Friday, 11 October 2019

Fish and Chip Special

I'd offered to drive at the Battlefield Line on either Saturday 3rd August or Sunday 4th August. I knew there was a Fish and Chip Special train on the Saturday evening and I was initially asked by the Roster Clerk to drive the five service trains during the day on Saturday (the evening train is often a separate shift). But it seemed that a number of our volunteers were going to be away that weekend so I was asked if I'd do the evening instead, in the hope that covering the day would be easier. But there was no Driving Experience Course booked for that morning so I offered to work through, covering the service trains and the 'Special' if no other driver came forward. That still left the problem of the Fireman's role, preferably with the long 'shift' split between two fireman. Initially, that was problematic, too, and operating the first two service trains with the Diesel Multiple Unit was considered. Finally, the whole day was to be steam, with one fireman during the day and a relief fireman for the Fish and Chip Special.

As I approached the Locomotive Shed on Saturday morning, I was musing whether to oil round the outside motion first or immediately tackle the oiling points accessible from the inspection pit. Then I saw that the bunker of our engine, light Prairie 5542, was only just inside the roller shutter door so the engine had been stabled a good engine length short of the pit. Forewarned by this, I was not altogether surprised to be met by a rather disgruntled fireman. He explained that he had decided to come to the shed on Friday evening with the intention of putting a 'warming fire' in the engine so that the boiler temperature would be gently raised overnight (the engine not having been used since the previous weekend) only to discover very little water in the boiler and a serious case of clinkering on the grate, foiling his planning.

The boiler water level must be visible in the gauge glasses before lighting-up. On disposal, it's normal to use an injector to ensure a reasonable level of water is showing in the gauge glass, remembering that, as the engine cools, the water will contract, lowering the indicated water level. How major this effect is depends upon the boiler pressure on disposal (it's good practice to leave no more than 50 p.s.i. on a stabled engine), the outside temperature (which depends on the season, of course) and how much steam or water may leak via gauge glasses, injector non-return clacks or otherwise. It's not unusual to lose 'half a glass' or more on a stabled engine, so it's vital a reasonable level of water is observed on disposal.

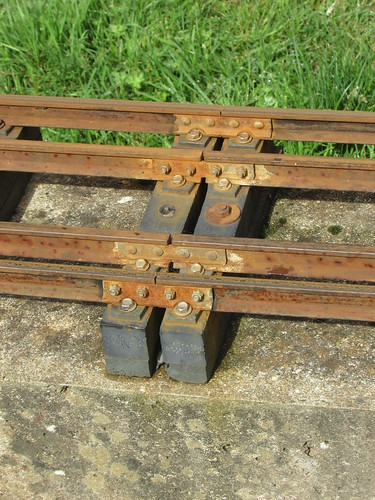
There are various methods of getting water into the boiler without steam. The most common is to connect a water hose to an injector overflow pipe and open the steam cock on that injector, allowing the water pressure to force water backwards through the injector into the boiler. In common with many preserved engines, one of the copper injector overflow pipes on 5224 has been modified to terminate in a 'fire hose connector', allowing rapid connection of a hose terminated in what I believe was originally known as a 'John Morris Coupling' but is now usually called a British Instantaneous Coupling.


5542: Detail of British Instantaneous Coupling fitted to injector overflow pipe on driver's side to facilitate filling boiler.

At Shackerstone, there's a home-made adaptor to connect the British Instantaneous Coupling to the smaller-diameter water hose available in the shed.

Having sorted the low boiler water problem, it was necessary to deal with the clinkered firegrate left by the previous crew before a new fire could be lit. When coming towards the end of a shift, one of the skills a fireman must master is "running the fire down" - reducing the mass of burning fuel in the firebox so as to be able to complete the 'turn' with adequate boiler pressure and fill the boiler but not leave too much fire when stabling the engine. On disposal, the minimum requirement is to use a fire iron to break up any lumps of clinker found and run a fire iron across the grate to ensure that no clinker is adhering to the firebars (the 'pricker' turned flat is suitable for this). If there's not much left in the firebox, many railways are happy to leave it overnight to cool slowly but if there's a fair bit of clinker, it's normal to remove the excess with the Clinker Shovel ('paddle') on disposal so that the following fireman lighting-up only has a moderate amount of clinker and ash to remove.

The fireman reported that he'd spent all Friday evening trying to remove a large amount of clinker left on the grate which, as it had cooled, had turned to an unyielding concrete which welded itself intimately to the cast iron firebars. Removal of this clinker had involved climbing inside the firebox for a long, unpleasant time and the job was only completed after an early start on the following morning, producing a large heap of broken-up clinker just outside the shed. When I arrived, he'd just lit the new fire on the now-clean grate but, since the locomotive's coal bunker had not been refilled, he was having to search for the few remaining lumps of coal amongst the mounds of slack liberally covering the footplate.

Both oil bottles on the engine (actually 1 gallon metal containers, rather than traditional railway pattern) required replenishing so I filled one with SAE220 Motion Oil and the other with SAE680 Compound Steam Oil, then I started my preparation by draining and refilling the Sight Feed Lubricator on the footplate.

The fireman offered to walk to the North End, start the Class 04 diesel shunter and drive it to the shed so that we could then drag 5224 to the North End where the 'Loadall' telescopic loading shovel could be used to coal our engine. Having agreed on this plan, I carried on with oiling-round the outside motion and the oiling points accessed from the front framing, occasionally checking on the fire. By the time the '04' appeared, 5224 had started to steam and I'd just 'cracked' the blower valve open but we'd only slack left in the bunker. With 5224 'hooked-on' we drove down to the coal stillage, screwed down 5224's handbrake and uncoupled the diesel which moved out of the way so that the 'Loadall' had room to operate, transferring Ffos-y-fran opencast coal from the stillage to our bunker. The diesel shunter then propelled 5224 back to the shed, going right inside to position the locomotive over the inspection pit.

Having first added a 'charge' of coal to the firebox, the fireman took the diesel shunter back to the North End for stabling. I clambered into the pit with oil feeder, oil bottle and rag to attend to the numerous oiling points and by the time I'd finished, boiler pressure had risen nicely. However, the interlude going for coal had meant that we'd had to interrupt filling the side tanks from the shed hose. We'd an indicated 600 gallons in the two side tanks - in theory sufficient for one round trip to Shenton but without margin so we agreed to take water from the column at the south end of platform 2 before we left.

Now the next problem presented itself. When running with the normal 4-coach train, it's possible to arrive back in platform 2 at Shackerstone with the locomotive just clear of the barrow crossing at the north end of the platform, allowing arriving passengers to make their way across the lines to platform 1 before the engine runs round its train prior to the next trip. If the train stops correctly, the locomotive, having run round, can take water prior to being attached to the train. The stock in platform 2, from the north end, was the Guard's Full Brake, Passenger coach, the Buffet coach (called 'Jesse', after the donor) and another Passenger Coach, all in maroon. But another passenger coach, this one in 'blood and custard' livery, was coupled onto the south end of the train, making the water column inaccessible without first coupling onto the stock and setting the whole train back. With the signalman and guard aware of our need for water, we came 'off-shed' and moved onto the south end of the stock. The fireman coupled-up whilst the guard, Stephen W., made sure the barrow crossing was free of crossing passengers. The guard then gave us the 'come towards' handsignal and I set the train back until we were in the optimum position for taking water. The fireman jumped up on the side tank, opened the filler and positioned the flexible hose (always referred to as the 'bag') then I operated the large handwheel to turn on the water supply. On the cry of "That'll do!" I wound the handwheel closed, returned to the footplate and created the vacuum brake. Our rear coach was blocking the north end barrow crossing and there were passengers on platform 1 waiting to join the train so the guard gave the 'move away' handsignal, rather than the usual 'Right away' with whistle and green flag, as a reminder that we were only easing off the barrow crossing to let passengers join the train. Once everyone was aboard, the guard gave the 'Right away' and we set off for Shenton, somewhat late because of the various difficulties.


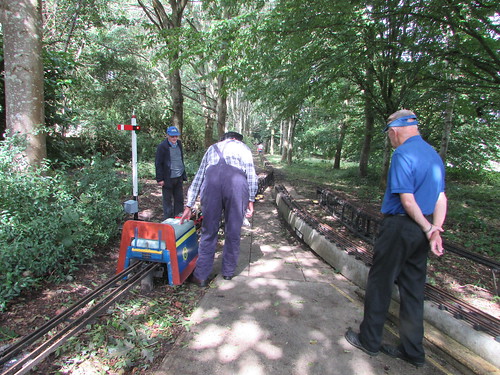
The fireman 'bends his back' (Battlefield Line: 3-Aug-2019)

The fireman and I agreed that 5542 wasn't steaming right but we had no trouble during the trip. The guard and signalman decide that we should reduce the load to four coaches during the day to avoid problems of running round and watering, so we had a bit of a shunt to do before setting off.


Passengers leaving the train after our arrival back in platform 2 at Shackerstone during the afternoon (Battlefield Line: 3-Aug-2019)

Our last scheduled arrival back at Shackerstone was routed into platform 1, ready for the fish and chip diners. The evening catering staff were arriving and they were anxious that we re-attach the coach we'd removed as they needed to 'lay-up' two coaches for the fish and chip diners. The 'day' fireman was 'booking-off' before the evening train but he had time to perform the shunt re-attaching the coach and watering before I was left to 'mind the shop' until the evening fireman arrived. By that time, I was fairly dirty and tired.


Battlefield Line: 3-Aug-2019: Jan on 5542 at Shackerstone, rather dirty.

The 'evening' fireman turned out to be the 'day' guard, Stephen W., having changed to footplate apparel. He had been relieved by Dave N. as guard for the fish and chip service.


Early arrivals for the Fish and Chip service are greeted by railway staff on platform 1 at Shackerstone.

The guard told us we'd be doing two round trips to Shenton at a fairly gentle pace, once the food, which was being prepared off-site, arrived. To my surprise, all the food was loaded at Shackerstone in time for a departure around 7.00 p.m. It was a warm evening and the journeys were very pleasant, punctuated by the bursts of activities each end of the line as we ran round the train. By the time we arrived at Shenton on the second trip, most people had finished eating and the platform filled up with passengers watching the business of uncoupling and coupling-up the engine. It took the guard a few minutes to shepherd all the passengers back on to the train and he gave us permission for our final trip to be be at 'Line Speed'. That's 25 m.p.h. maximum but there are numerous areas where a lower speed limit is applied. I can confirm that the fish and chips were excellent, because the train crew were issued with servings.

Back at Shackerstone, Steve and I wasted no time in uncoupling and shunting light engine to the shed. Having 'cleaned' the fire, the remains were left on the grate, allowing the firebox to gently cool overnight. The locomotive was positioned over the inspection pit in the Shed and the remaining steam used to fill the boiler with water. Handbrake applied, scotch set under the driving wheel as an extra precaution, gauge glass isolated and the chimney cap (a bit like a dustbin lid) fitted to retain warmth in the boiler, it only remained to complete the daily inspection and defect report before signing off after a long shift.

Related posts on this website

Preparing 5542 (part 1).
Preparing 5542 (part 2)

There are also a number of other posts with technical content about working on 5542:-
GWR 'Light Prairie' 5542 (22-Aug-2010)
On the Footplate (5-Dec-2017)
Santa Specials at the Battlefield Line 2017 (19-Dec-2017)
5542 at the Battlefield Line (28-Aug-2018)
Battlefield Line 'Family Fun Weekend' (3-Sep-2018)
5542 at the Battlefield Line in 2019 (30-Jul-2019)


To see all my posts about the Battlefield Line, select Label 'Battlefield Line' or click here.
To see all posts with Mutual Improvement Class content, select label 'MIC'or click here or look at the index at Mutual Improvement Classes (2).

My photograph albums

Where necessary, clicking on an image above will display an 'uncropped' view or, alternately, pictures may be selected, viewed or downloaded, in various sizes, from the album listed:-

5542 GWR Locomotive
Battlefield Line 2019.

Monday, 23 September 2019

Bath by Train

On Tuesday, 21st August 2019, I made a journey by train to Bath for a meeting. The timings of the trains I used were:-

Wolverhampton-Bath Arrive Depart
Wolverhampton 06:04
Sandwell and Dudley 06:14 06:14
Birmingham 06:24 06:42
Cheltenham 07:20 07:23
Bristol Parkway 07:53½ 07:55
Bristol Temple Meads 08:05 08:23
Bath Spa 08:35

After a taxi from my home to Wolverhampton station, a Virgin Trains 'Pendolino' whisked me to Birmingham in reasonable comfort. But, using the escalators at the south end of the platform which are signed as giving access to other platforms, I knew that finding my departure platform would actually be confusing. I had to exit through the gate line near the main exit, walk through the dreadful 'Grand Central' shopping centre and re-enter the station through a different gate line before I could hunt for my train. When I reached platform 11B my train, a Cross Country 'Voyager' was present but shut-down, so all the passengers were glumly waiting on the platform. A few minutes before departure, the driver must have arrived because the train's diesel engines burst into life and after a short wait the doors were enabled, finally allowing the waiting passengers to board. My train, the 06:42 from Birmingham New Street to Painton, reporting number 1V41, set off on time on the former Midland Railway route via Five Ways.

When I was younger and carriage windows could be opened I would often follow progress by sighting each signal as we approached and often making copious (if illegible) notes on the track and signalling layout. A modern equivalent is to follow the route using a 'Smartphone' and the remarkable facilities of Railcam.UK which I outlined in the post Watching The Trains Go By. In the New Street display on Railcam UK, train describer 'berths' showed the position and reporting numbers of all trains but, once we passed Five Ways, signal aspects appeared on the diagram as well. As displayed in signalling centres, these are simply shown as 'red' or 'green' whereas the driver will also be presented with 'yellow', 'double yellow' or, sometimes, flashing aspects by the actual signals themselves. Older signalling systems, like New Street, only provide train describer information to Network Rail's external database but more modern systems supply signal data as well. The Network Rail database is interrogated by Railcam UK to provide the remarkable ability to track progress from within the train itself.

We made good progress 'under the wires' through the extended Bromsgrove station where electrification finishes and I noticed on the Railcam UK diagram train 2O70 ahead of us. Railcam UK confirmed that this was a Worcester to Bristol diesel multiple unit so it had joined our route at Abbotswood Junction. I wondered whether we would be 'baulked' by this slower train but, in fact, we arrived at Cheltenham about one minute early. This was just as well as the train filled right up with commuters heading to Bristol, using up all our station allowance. We left Cheltenham as booked, by which time I'd realised that, after its departure from Cheltenham, the DMU would leave our route at Barnwood Junction to call at Gloucester, where it would reverse and only rejoin our route well after my train had passed.

At Standish Junction the line to Swindon peeled off to our left then I noted Wickwar Tunnel, Yate station and soon we were slowing for the long right hand curve as we joined the Great Western Main Line at Westerleigh Junction, now 'under the wires'. We arrived three minutes early for our booked stop at Bristol Parkway. Despite at the improvements and extensions to the facilities here, the place still strikes me as having a rather 'temporary' appearance.

I believe electric trains now operate as far as Bristol Parkway on the Great Western Main Line. Although the line towards Wales Has been equipped with Overhead Line Equipment at least as far as Severn Tunnel Junction, services are no yet electric. There's no obvious work been carried out on the line from Bristol Parkway to Bristol Temple Meads and the route through Filton Abbey Wood, Stapleton Road and Lawrence Hill is still unsullied by 'knitting'. However, the Relief lines which were removed some years ago have been reinstated.

We arrived at Bristol Temple Meads on time, stopping in platform 3/4 under the airy, curved trainshed. Brunel's original terminal station featured a straight trainshed which is no longer part of the operational railway. The Bristol and Exeter Railway trains reached Brunel's terminal by an inconvenient, curved approach with its own platform. In the 1870s this area was developed with the impressive curved trainshed which survives and further platforms were added in the 1930s, more modestly provided with umbrella roofing.


Trainshed over the through lines at Bristol Temple Meads viewed from platform 3/4, looking west.

I'd not expected to see a Class 43 HST at Bristol Temple Meads since the advent of the Class 800 bi-mode trainsets had replaced them on the Paddington route, but there was an HST, in First Great Western livery, in platform 5/6. Railcam UK informed me that it was an empty stock working from Bristol St. Philips Marsh Depot to Hull by the Rail Operations Group, reporting number 5E23. I made my way through the wide underground passage linking the various platforms to wait for my service to Bath from platform 9. Whilst waiting, I took a few pictures.


Bristol Temple Meads, View from east end platform 9: Empty stock HST on far left and Colas Rail Test Train in High Level Siding.


Bristol Temple Meads Station: View looking west from platform 11.


Bristol Temple Meads Station: View looking east from platform 11, with Class 800 arriving in platform 13.

The Great Western Railway Railway Diesel Multiple Unit heading for Salisbury arrived on time and quite a crowd boarded. It took just twelve minutes to reach Bath Spa station, where many of the passengers alighted.


Bath Spa: View from Platform 2 looking towards London.

I made my way through the pedestrian passage to the south side where I was met at the small pick up/drop off area.


Bath Spa: Station buildings on Down side, viewed from passenger Drop-off Point, showing restored canopy.

After my meeting, I was pretty tired. I purchased a e-ticket for my journey back to Wolverhampton using an 'app' on my mobile phone during the car trip to Bath Spa station. This stored two versions of the ticket on my phone - a human-readable version and a machine-readable 'QR' code there's a useful article of 'QR' codes in Wikipedia here). Ticket inspectors on trains either check the details on the human-readable version or, sometimes, have a portable scanner which 'reads' the 'QR' code. But most of the ticket gates that have proliferated can't read e-tickets so a member of staff has to peer at the screen on your mobile and then let you through. But, to my surprise, the modern barrier at Bath was equipped with a small horizontal glass screen (like a miniature supermarket product scanner) so the computer in my smartphone talked to the computer in the ticket gate and I was admitted to the platform.

The return timings were:-

Bath-Wolverhampton Arrive Depart
Bath Spa 16:28
Bristol Temple Meads 16:40 17:30
Bristol Parkway 17:38 17:40
Cheltenham 18:08½ 18:16
Birmingham 18:56
Wolverhampton

The first 'leg' was on the three o'clock Down from Paddington, reporting number 1C19. This was my first trip on a Class 800 'Bi-Mode' (here running on diesel-power since electrification of the line through Bath to Bristol is yet to happen). The train was, as expected, busy but I found a seat. I rated the experience as 'OK' but not particularly impressive. But it was only a short journey and I was tired - perhaps I'll enjoy my next trip on the Hitachi-built trains more.

Of course, Bristol Temple Meads was packed so I made my way across to platform 3 to await the arrival of the 15:25 from Plymouth (with a lot of other passengers). The train was due in at 17:22½, leaving at 17:30. To my delight, a refubished Cross-Country 'HS125' was working the service. From Railcam UK I confirmed that the train was scheduled into Birmingham at 18:56, leaving at 19:03 for Leeds where it was due to arrive at 21:02. The reporting number was 1E63. The train was heavily loaded but I managed to get a seat at Bristol and we were soon making our first stop at Bristol Parkway.


Bristol Parkway station.

Just over five miles beyond Bristol Parkway, at Westerleigh Junction, we passed over the single line branch which I believes serves Westerleigh Oil Terminal then the line to Cheltenham curves sharply away from the Great Western route to Paddington, with an overlap 'under the wires' on the Cheltenham line.


Bristol area rail: The line to Cheltenham curves away from the Great Western Main Line at Westerleigh Junction, with an overlap 'under the wires'.

Just before Yate station, the single line we'd crossed over converged with the Cheltenham line on our left. Railcam UK showed a DB Freight from Westerleigh Oil Terminal to Robeston (near Milford Haven), reporting number 6B47, on the branch.

At Cheltenham Spa, a lot of passengers left the train, but quite a few also joined. We then continued, without incident, to Birmingham New Street where many passengers, including me, disembarked but the platform was crowded with passengers waiting to join the train.

I quickly located the platform for the next Wolverhampton departure (a West Midland Trains service to Shrewsbury, I think) and I found a seat just before it left

Related Posts on other Websites

Bristol Temple Meads railway station (Wikipedia).

Book References

[1] 'Regional History of the Railways of Great Britain: Vol. 11, Thames and Severn' by Rex Christiansen (ISBN: 0715380044)

My pictures

Where necessary, clicking on an image above will display an 'uncropped' view or, alternately, pictures may be selected, viewed or downloaded, in various sizes, from the album below. Apologies for the poor quality of pictures taken from trains.

Bristol area railways.

East Croydon to London Bridge

Journey on Thursday, 28th March 2019

I've been a reasonably frequent traveller between East Croydon and London on various visits. Normally, the service from East Croydon to Victoria with a single stop at Clapham Junction is the most convenient, using the line originally built by the London Brighton and South Coast Railway (LBSCR). But Victoria was not the first LBSCR terminus in London - that was Tooley Street, later called London Bridge. So I sometimes use the fast service from East Croydon to London Bridge along the 4-track route through Norwood Junction.

Travelling up to London from Croydon on 28th March for a meeting near London Bridge, I arrived at East Croydon in time to watch a fast train to London Bridge departing. I decided I'd still plenty of time to get to my meeting so when the next train to London Bridge, a stopping train via North Dulwich, arrived I decided to board it. The map below shows the normal route to London Bridge and the route my stopping train took. The development of the railway network in south London is quite hard to follow. To see the whole of this pre-grouping map and extracts of some areas, follow the links from my post Pre-grouping Railway Map.


Detail from pre-grouping railway map showing LBSCR main line via Norwood Junction (thin green) and route via North Dulwich (thick green). The original map was published by W & A K Johnston under the title 'Railway Map of England and Wales 11th Edition'.

I'd only previously travelled on parts of the route the train would take. The whole route belonged to the London, Brighton and South Coast Railway in pre-grouping days, but the South Eastern and Chatham Railway was 'implicated' around Tulse Hill, Peckham Rye and, of course, on the last 1.5 miles to London Bridge.

We left East Croydon on the Slow line and at Windmill Bridge Junction took the flyover which took us over the Brighton Fast lines to our first stop at Selhurst. From here the route is 4-track, paired by use, to Victoria. Travelling on the Up Slow my train made station stops at Selhurst, Thornton Heath and Norbury.


Norbury: View from train on Up Slow showing Banner Repeater TVC672 on platform (South Croydon to Wolverhampton by rail)

After the Streatham Common stop, my train diverged to the right from the Victoria Lines onto the Streatham Spur, then joining the line from Mitcham Junction.


Streatham Common Spur: View from train heading for Streatham showing Victoria lines and, in background, bridge carrying Mitcham Line over the Victoria Lines (South Croydon to Wolverhampton by rail)

We stopped at Streatham, passed through Streatham Tunnel and Leigham Tunnel and then, approaching Tulse Hill, were joined on our left by the line from Streatham Common and on our right by the line from Wandsworth Common before stopping at platform 3 of the four-platform Tulse Hill station.


Tulse Hill: View from train in platform 3 showing signals VC760 and VC762. Note expansion joint in running rail and traction current bonding (South Croydon to Wolverhampton by rail)

Leaving Tulse Hill, the route to Herne Hill (used by some 'Thameslink' services) diverged to our left before we entered the 331 yard long Knight's Hill Tunnel, then making stops at North Dulwich and East Dulwich.


North Dulwich: View from train showing platform 1 (South Croydon to Wolverhampton by rail)

At Peckham Rye Junction, we merged with the line from Victoria via Clapham High Street and continued over the arches to platform 2 at Peckham Rye on the South London Line.


Peckham Rye: View from train approaching station 'over the arches' showing 4-aspect automatic signal VS443 (South Croydon to Wolverhampton by rail)


Peckham Rye: View of platforms 3 and 4 and rear of signal VS444 (South Croydon to Wolverhampton by rail)

After our stop at Queens Road Peckham, Old Kent Road Junction allows London Overground services to diverge right and join the East London Line at Silwood Junction but my train continued to a brief stop at South Bermondsey before joining the remarkable expanse of lines for the final mile and a half to London Bridge. Still following the original alignment of the London and Greenwich Railway across a series of viaducts but now expanded in width to carry no less than eleven running lines, the area received major modernisation during the Thameslink Project which also completely rebuilt London Bridge station.


Approaching London Bridge on Up showing signal TL4204 on 11 Reversible at Brunswick Court Junction (South Croydon to Wolverhampton by rail)


Approaching London Bridge on Up showing former Area Signalling Centre (South Croydon to Wolverhampton by rail)

There's a brief mention of the pioneer London and Greenwich Railway here and the later period on the L.B.S.C.R. at London Bridge is outlined in Origins of the Southern Railway: Part 2: L.B.S.C.R..


London Bridge Station: View from Platform 12 looking South-East after my arrival. Route set for departure from platform 13 to track 9.


London Bridge Station: Concourse near entrance to Platform 12 showing departure display.

After my London meeting, I returned to Wolverhampton from London Euston. There are a number of pictures in the collection South Croydon to Wolverhampton by rail taken on that journey.

Related articles on this web site

Notes on Some Early Railways in England.
Origins of the Southern Railway: Part 2: L.B.S.C.R.

My pictures

Where necessary, clicking on an image above will display an 'uncropped' view or, alternately, pictures may be selected, viewed or downloaded, in various sizes, from the albums below. Apologies for the poor quality of pictures taken from trains.

South Croydon to Wolverhampton by rail
East Croydon Area Rail.
South London Railways.
London Bridge Station.

Saturday, 7 September 2019

Bournemouth by Train

On Saturday, 17th August 2019, I travelled by train from Wolverhampton to Bournemouth to attend the 'Lionsmeet 2019' event. The timings of the outward trains I used were:-

Wolverhampton-Bournemouth Arrive Depart
Wolverhampton 06:02
Birmingham New Street 06:19 06:33
Winchester 08:58 09:05
Bournemouth 10:00

The first 'leg' to Birmingham was by a 2-coach Diesel Multiple Unit operated by Transport for Wales, reporting number 1G28. At Birmingham New Street, the train stopped at the south end of the platform (before continuing to Birmingham International) so I had a fair walk to the escalators towards the north end of the platform which allowed me to cross to platform 9 (without the 'faff' of using the ticket barriers).

There was a Cross Country 'Voyager' displaying the destination as 'Manchester' in the north end of platform 9. As I watched, another 'Voyager', comprising two 'sets', slowly arrived in platform 9 from the south - clearly an empty stock working from the Bombardier Depot at Central Rivers (near Burton-upon-Trent). The new arrival stopped a few yards short of the Manchester train, following handsignals from a driver waiting on the platform who was presumably about to take over one of the trains. After a short delay, the new arrival eased forward a few feet and I realised that it had been uncoupled from the rearmost set. So there were now three departures in platform 9, one behind the other, bound for Manchester, Painton and Southampton.

I boarded the Southampton service, reporting number 1O80, and we left on time, turning right at Proof House Junction to reach St. Andrews Junction where we first joined the former Midland Railway Camp Hill line before diverging left at Bordesley Junction to next join the former Great Western route to London Paddington.

Our first calling point was Leamington Spa, where the original layout of two main lines flanked by platform loops remains although the station is much changed from steam days. Immediately south of the station, only parts of the viaduct remain which formerly brought the L&NWR line to a second station Leamington (Milverton). The comprehensive WarwickshireRailways.com site has more information about the history of both stations - the GWR station is described here, the L&NWR station here.

Further south, Fenny Compton is the junction for the MOD Depot at Kineton. There's an excellent history of Kineton MOD and its railways in Roger Farnworth's blog here. At Fenny Compton, there are goods loops in both directions and a Freightliner train was waiting in the Down Loop. During the journey, I was using Railcam.UK intermittently on my mobile phone, so I quickly identified the freight as 4M62 from Southampton to Lawley Street. There's an introduction to using Railcam.UK in my post here.

My train was 'right time' for its next stop at Banbury, then we passed under the flyover at Aynho Junction where the Princes Risborough Line diverges. The 'cut-off' through Princes Risborough gave the Great Western a faster route from Birmingham to London Paddington than the original route through Oxford and Didcot but, following British Rail's decision to electrify the former L&NWR, the route became less important. The line from Aynho Junction to Princes Risborough was singled and a number of intermediate stations lost their through main lines, retaining what had been platform loops. This, of course, was in the name of reducing ongoing maintenance costs but, with passenger traffic increases generated by the innovative Train Operating Company Chiltern Trains and their services between Birmingham and London Marylebone, the line from Aynho to Princes Risborough has been restored to double track.

Oxford station appeared completely modernised with comprehensive signalling and track improvements including high-speed turnouts. We arrived at 07:40 and left, on time, at 07:42. Railcam.UK showed me that we were being followed by 4O18, a Lawley Street to Southampton Freightliner train. At Didcot we used the Didcot avoiding line, catching brief views of the Great Western Society's facilities and numerous steam locomotives before joining the now-electrified Up Relief line of the Great Western Main Line which took us to our next stop at Reading.

The modernisation in the Reading area was even more spectacular that at Oxford (but I believe did cost around 400 million pounds!). We ducked under the 'new' flyover carrying the Up and Down Main lines which was opened, I think, in 2015 and stopped in the west end of platform 7. My train would reverse here, so as to reach the line to Basingstoke. The container train following us would have no need to enter the station at all. Passing under the flyover to gain the Reading West Curve, it would join the Basingstoke line at Oxford Road Junction without hampering traffic on the Main lines at all. We arrived at 08:05 and were not due out until 08:22, giving me time to tale a few pictures of the station. It's impressive from an engineering point of view but, for me, bereft of any aesthetic appeal. There's more information about the station on Wikipedia here.


Bournemouth by Train: Reading, view from overbridge looking west showing the amazing tangle of Overhead Line Equipment and a Class 800 approaching.


Bournemouth by Train: Reading, view of platform 7 looking west, showing my 'Voyager' waiting to leave with the Southampton service.

Departure was on time and my train headed south for about fifteen miles so as to join the main line from Waterloo just east of Basingstoke station.

The line we had joined opened in 1840 as the London and Southampton Railway, only ten years after the opening of the pioneering Liverpool and Manchester Railway. When the London and Southampton Railway opened a branch from Eastleigh to Gosport, creating the first railway to serve Portsmouth via a ferry across Portsmouth Harbour, it tactfully changed its name to the London and South Western Railway, since Portsmouth regarded Southampton as rather an 'upstart'.

The main line through Basingstoke has four tracks, paired by direction (Down Slow, Down Fast, Up Fast, Up Slow). This arrangement had applied from Wimbledon, with intermediate stations provided only with flanking platforms on the slow lines but Basingstoke has platforms on all four lines. The station buildings are elderly but attractive of red brick construction with extensive canopies over the platforms.


Bournemouth by Train: Basingstoke Station Buildings.

We arrived at Basingstoke at 08:39 (1 minute early), leaving at 08:44 and accelerating towards Worting Junction where the direct line to Salisbury diverged to our right. This line had opened in the 1850s and ultimately led to Exeter and Plymouth, inciting fierce rivalry with the Great Western Railway for traffic, best known for the competition for the 'Ocean Mails' traffic from Plymouth. At Worting Junction, crossovers allow the traffic to 'sort itself out' and then what were the Fast Lines become the Up and Down Exeter and what had been the Slow Lines become the Up and Down Southampton. Battledown Flyover, opened in 1897, allows Up Southampton trains to avoid conflicts with trains on the Exeter line, as clarified in the Wikipedia article here.


Bournemouth by Train: Battledown Flyover, viewed from down Southampton train.

When booking my ticket on the internet, the recommendation was to change at Winchester so I had a few minutes to take pictures of the simple layout: just two platforms flanking the main lines.


Bournemouth by Train: Winchester platform 2, looking towards Eastleigh, with 'Voyager' departing for Southampton.

On the Down side to the north of the station, there is a single refuge siding, called the Baltic Siding, apparently usable by trains in either direction.


Bournemouth by Train: View from Winchester platform 2, looking towards London, showing overbridge and signals EH144 and EH252 for Up direction movements. The turnout to the right is for the Baltic Siding.

Whilst I waited, an Up container train rattled through from Southampton but I didn't identify the destination. My connection arrived on time; a Class 444 EMU formed from two 5-car units, reporting number 1W57, which had left London Waterloo at 08:05 and taken just one hour for the 66 miles. We reeled off the seven miles to Eastleigh, passing the extensive yards at speed on the Down Fast before braking for our stop at Southampton Airport. Soon on our way again, we passed the 4-platform junction at St. Denys, where the line from Fareham converges and had views on the left of the River Itchen which sinuously makes its way to the sea.


Bournemouth by Train: View of River Itchen approaching Southampton.

From St. Denys there are four running lines, paired by direction past the modern Northam Traincare Depot on our left. At Northam Junction the line to Southampton Eastern Docks, now single, continues ahead. The branch is just over a mile long so there were no views of the 'Old Dock', although St. Mary's Stadium, home of Southampton's Premier League Football Club - the "Saints" was very apparent.

Beyond Northam Junction, the double track main line executes an almost 90-degree turn to the right before entering Southampton Central station via a tunnel 528 yards long. I found the present reinforced concrete 4-platform station dating from the 1930s and refurbished in 2011 unappealing, I'm afraid. There were aspirations to build a completely new 10-platform station but I don't know how that's progressing.

West of the station there are four running lines flanked by two loops. The six lines are 'grouped by direction' but, unusually, in the order Down Loop, Down Fast, Down Slow, Up Slow, Up Fast, Up Loop. This seems to be because the next station, Millbrook, just under a mile from Southampton Central has only one island platform placed between what have become the present Slow lines. Re-signalling has transformed the area since my early visits, during which the four Loop and Fast sines have been arranged for reversible working. As I passed, I could see that signalling alterations were continuing in the area - there were a number of uncommissioned new colour light signals with the signal heads shrouded in a custom-made bag carrying the white cross symbol indicating uncommissioned equipment. Speed was quite low through this area.

I didn't really see Millbrook Freightliner Terminal on the north side of the line, because my attention was focused on the tantalising views across the fence on the south side as we passed first the Western Docks and then the more modern container berths operated by DP World.

I knew that Southampton had a berth large enough to handle the super-size 'Post-Panamax' container ships and I took the picture below not sure whether the vessel was a 'Post Panamax' design - from a few hundred yards away on the train, it was hard to determine the size. A little research back home confirmed the vessel was the 'Post-Panamax' vessel 'MOL TRIUMPH' with a capacity of over 20,000 twenty-foot containers or equivalent!


Bournemouth by Train: View of DP World berth DP5 at Southampton after passing Millbrook station. The ship is MOL TRIUMPH.

We passed Maritime Freightliner Terminal, next to container berths DP1 to DP4 and then under the long concrete bridge carrying road traffic to the container berths. A couple of 'Freightliner' locomotives stood in the sidings near the repair shop where freightliner wagons are serviced.


Bournemouth by Train: View of DP World container cranes at berths DP1 to 4 at Southampton with Freightliner container crane in foreground.


Bournemouth by Train: View of DP World container cranes at berths DP1 to 4 at Southampton, Freightliner locomotives and bridge carrying First Avenue to Dock Gate 20 on left, Freightliner repair shop on right.

As we crossed the River Test on the Totton Causeway, there were final views of Southampton docks before we headed towards the New Forest and our next stop at Brockenhurst.


Bournemouth by Train: River Test with DP World container terminals in the distance.

At Brockenhurst, a Class 450 EMU forming the shuttle service to Lymington was waiting on the opposite face of the Down island platform. Railcam.UK informed me that the reporting number of the Lymington train was 1J15. Some years ago I used the Brockenhurst - Lymington Pier service when slam-door stock was still in use. I think the 'diagram' then involved seven round trips on the line. There's an article about the branch on Wikipedia here.

The final 15 miles to Bournemouth took us just 21 minutes, including three brief stops - at New Milton, Christchurch and Pokesdown, giving us a 'right time' arrival. The leading driving cab of my train had stopped near a pillar supporting the umbrella roof and I'd noticed the bucket of water with two mops leaning on the pillar. But I'd not realised the intention until the driver left the cab and used one of the mops to liberally douse the front cab window with water. The wet patch on the platform testified to the technique being common practice. I concluded that the built-in window washing feature on these EMU is not as effective as it might be.


Bournemouth: Class 444 which I'd caught at Winchester about to head to Weymouth.

Platform announcements indicated that the two sets divided at Bournemouth, the front set continuing to Weymouth, the rear set terminating, I think. Although the two cental roads between the Up and Down platforms have been elimited, Bournemouth is still laid out to facilitate trains being divided or joined. There are two middle sidings between the Down and Up lines just west of the train shed, provided with a servicing platform and lighting and these see regular use. The Down platform (number 3) extends west outside the train shed for some distance, forming the now-disused platform 4.


Bournemouth: View from footbridge looking west with platform 3 and disused platform 4 beyond. The concrete road bridge carries dual-carriageway Wessex Way.

The real joy for me was the train shed itself which had become very shabby but, following extensive refurbishment in 2000 with brickwork and stonework cleaned, roof trusses repainted, roof reglazed and replacement of the glazed end screens, natural light floods onto the platforms. Wikipedia has an article on Bournemouth station here.


Bournemouth: View looking towards London from footbridge showing station buildings on platform 2 and Train Shed roof.


Bournemouth: View looking towards London on platform 3 showing station buildings and Train Shed roof.


Bournemouth Station: View from approach road on south side.

However, I only spared a few minutes taking pictures before boarding a taxi to Littledown Park to attend the 2019 'Lionsmeet' (described here).

Book References

[1] 'Regional History of the Railways of Great Britain: Vol. 11, Thames and Severn' by Rex Christiansen (ISBN: 0715380044).
[2] 'The London & South Western Railway' O.S. Nock, published by Ian Allen.
[3] 'The South Western Railway' by Hamilton Ellis, published 1956 by George Allen and Unwin.
[4] 'History of the Southern Railway' by C. F. Dendy Marshall, revised by R. W. Kidner reprinted 1982 by Ian Allen (ISBN 0 7110 0059 X).
[5] 'Southampton's Railways' by Bert Moody, Waterfront Publications (ISBN 0 946184 63 1).


Related articles on other sites

London and South Western Railway (Wikipedia).
Lymington branch line (Wikipedia).
Bournemouth railway station (Wikipedia).

Related articles on this site

Origins of the Southern Railway: Part 1 - L.S.W.R. 17-Nov-2015
Lionsmeet 2019.
Watching The Trains Go By.

My pictures

Where necessary, clicking on an image above will display an 'uncropped' view or, alternately, pictures may be selected, viewed or downloaded, in various sizes, from the albums below:-
West Midland Railways (pictures on earlier journeys).
Bournemouth by Train.


Apologies for the poor quality of pictures taken on board modern trains.

Sunday, 25 August 2019

Lionsmeet 2019

Each year, The Old Locomotive Committee (OLCO) has an event, called 'Lionsmeet', for live steam models of the 'Lion' locomotive and similar models of designs up to around 1850. In 2019, the event was held on Saturday, 17th August at the Littledown Park track of the Bournemouth & District Society of Model Engineers (B&DSME).

B&DSME has a long history during which it has operated on a number of sites as outlined on their website here. The Society was founded in 1924, as shown below.


Letter published in the Model Engineer & Electrician magazine on the 13th March 1924 announcing the inauguration of the Bournemouth society(Photo: B&DSME).

The present Littledown Park track was opened in 2004 in a popular Bournemouth park which incorporates a leisure centre. The part is described on Bournemouth Council's website here. The park features an attractive lake area, home to numerous ducks and a rather tame heron.


Lionsmeet 2019: Littledown Park features an attractive lake area with ducks and a rather tame heron.

The weather during the previous few days had been very wet in most of England but improved on the day of 'Lionsmeet', which proved dry and warm. On my arrival at the B&DSME Clubhouse, I was welcomed by host club members and my friends from OLCO. I was rapidly furnished with a cup of tea and, throughout the day, the host club were very solicitous regarding the welfare of their visitors.

Initially, the activity was centred around the multiple, elevated steaming bays outside the clubhouse as various 'Lion' models were steamed.


Lionsmeet 2019 Bournemouth: Andrew Neish and Adrian Banks chat as 'Thunderbolt' "brews up".


Lionsmeet 2019 Bournemouth: View of the Steaming Bays and traverser tracks.

An elevated traverser transfers locomotives between the steaming bays and a spur line leading to the running line. There is also a siding alongside the clubhouse to facilitate moving larger locomotives between road vehicles and the steaming bays. The traverser also serves two single road, covered carriage sheds which are almost invisible, situated close to the park boundary and hidden by bushes.


Lionsmeet 2019 Bournemouth: View of traverser and entrance to second carriage shed.

The traverser also gives access to a turntable. Although running on the main line is normally in a clockwise direction, I was told that periodically anti-clockwise running is adopted, to even out flange wear.


Lionsmeet 2019 Bournemouth: View of the Turntable. The carriages are standing on the spur line from the traverser to the running line.

The 1760 feet long continuous running line is situated in a pleasant wooded area close to the park boundary, and has a conventional 'dog bone' shape with two long, parallel sections joined at each end by 57 feet radius return loops. A station, named Bankside, is provided on the return loop near the clubhouse for loading and unloading passengers.


Lionsmeet 2019: View showing part of return loop at clubhouse end of line, the two parallel straight sections through the trees and the park boundary in the background.

The running line is supported on pre-cast concrete beams each 4 metres long, using just four different types (straight, curved with cant, left-hand transition, right-hand transition). The 4-rail multi-gauge track caters for 3½", 5" and 7¼" gauges. The track was pre-assembled into 3 metre long panels using 1kg/m steel flat-bottom rail profile, mounted on jig-drilled sleepers sawn from recycled plastic plank. The 'About' tab of the B&DSME website here has a lot more information about the track and its construction.


Lionsmeet 2019 Bournemouth: View of rail joints on the multi-gauge track.

A J Reynolds' 'Lion' was the first locomotive ready for running but John Dalton with his 7¼" gauge model and Adrian Banks with 'Thunderbolt' followed. Later, Nigel Way from the host club joined them, driving the 'Lion' owned by John Biss.

Once the traverser has transferred locomotives from the steaming bays to the spur line leading to the running line, a combination of hinging section on the spur and 'Bendy Beam' on the running line allow locomotives onto the main line. The 'Bendy Beam' is described on the B&DSME website here.

When electrical detection proves that the hinging sections and 'Bendy Beam' are correctly set for movements on the running line, the solenoid-operated lower-quadrant semaphore 'stop' signal facing Bankside station platform is automatically placed 'off'. Trains approaching Bankside station in a clockwise direction receive an advance warning from a distant signal. When the railway is not running, the signals are unplugged and stored in the wooden station building at Bankside. I was told that the signals can be installed in alternative locations when anti-clockwise running is adopted.


Lionsmeet 2019, Bournemouth: View looking north from station showing (L-R) spur line from steaming bay traverser, running line, holding siding.

The picture below shows Adrian Banks moving 'Thunderbolt' onto the running line.


Lionsmeet 2019 Bournemouth: Adrian Banks with 'Thunderbolt' moving from the spur line to the main line.

Once 'Thunderbolt' was on the running line, a member of the host club restored the hinged section and 'Bendy Beam' to allow continuous running to resume.


Lionsmeet 2019 Bournemouth: With Adrian Banks and 'Thunderbolt' on the main line, the 'Bendy Beam' is restored for main line running.

There was no competition running, so participants could exercise their steeds or chat with the members of the host club or OLCO during a relaxed day.


Lionsmeet 2019 Bournemouth: A J Reynolds was early onto the track with his 'Lion'.


Lionsmeet 2019 Bournemouth: John Dalton approaches the station with his 7¼" 'Lion'. Note the 'clear' distant signal.


Lionsmeet 2019, Bournemouth: Nigel Way, A J Reynolds and John Dalton lined-up at Bankside station with their models. Mains water with a portable bowser and buckets of coal are available here.

A splendid buffet luncheon was unveiled in the clubroom - a rather magnificent affair equipped with First Class seating obtained during the re-fit of railway coaches. Appropriately, the large colour display screen on the end wall was showing 'The Titfield Thunderbolt' on repeat.


Lionsmeet 2019: The clubroom, with ex-railway First Class seating.

The afternoon was particularly relaxing as the weather remained warm, presenting a good opportunity to study the interesting range of static exhibits on display.


Lionsmeet 2019: Bankside station on a warm afternoon.


Lionsmeet 2019, Bournemouth: (L-R) John Dalton, Andrew Neish and Peter Burton, B&DSME Chairman.


Lionsmeet 2019 Bournemouth: Harrye Frowen's 7¼"'Lion' was displayed by John Hawley.


Lionsmeet 2019 Bournemouth: Two 'Lions' under construction.


Lionsmeet 2019 Bournemouth: John Biss's 'Lion' and train.

Other models by John Biss were also on show, including a rail-mounted hand-operated crane and an intriguing Pump-type Maintenance Trolley which is battery powerd and radio controlled!

Also on display was a completed model of 'Canterbury Lamb' and a rolling chassis I didn't identify for either a 2-2-0 or 0-2-2, together with a partial kit of parts for a 'Lion' offered for sale.

On an elevated storage siding in the clubhouse, I found another battery powered model called 'Sheddon Wheals' with a steam-outline superstructure painted blue and strangely reminiscent of a famous steam locomotive. There was also a nicely-executed six-coupled diesel outline locomotive named 'Littledown Castle' which I understand is petrol-engined. These last two locomotives exit the clubhouse via an opening hatch in the wall. When a bridging piece of track is correctly in place connecting the elevated storage siding to a nearby steaming bay outside, a 'moveable scotch' is automatically lowered to allow the locomotives to safely leave the storage siding.

There's also an out-and-back 16mm narrow-gauge garden railway on elevated baseboards, but it was not in use during 'Lionsmeet' and was protected by locked security covers.

All the above are illustrated in my album of pictures of Lionsmeet 2019 here.

It had been a most enjoyable day and John Brandrick, the OLCO Chairman, made a short address thanking the host club for their hospitality, enthusiastically endorsed by the OLCO members.


Lionsmeet 2019: Bournemouth: John Brandrick, OLCO Chairman, (with Dan) thanks B&DSME for hosting 'Lionsmeet' 2019.

Related posts on this website

All my posts about the Old Locomotive Committee can be found here. Most posts include links to my related pictures.

My pictures

Where necessary, clicking on an image above will display an 'uncropped' view or, alternately, pictures from may be selected, viewed or downloaded, in various sizes, from the albums listed:-

Lionsmeet 2019.
All my 'OLCO' picture albums.