skip to main |
skip to sidebar
On 29th December 2016, I repeated a trip I'd made to Liverpool just one year earlier. The earlier trip is described in the post Merseyside in December.
Christmas 2016 had been quite mild but was followed by much lower temperatures, hard frosts and winds, resulting in Government warnings about possible travel problems and advising the elderly to stay at home and keep warm. So Thursday, 29th December didn't seem an ideal date for a trip, particularly with restricted bus service which was supposed to operate from my village. The first bus was advertised at 8.15 a.m. as far as Penkridge, where there's a small railway station, from where I hoped to catch a Liverpool train operated by London Midland to Liverpool.
Standing at the bus stop in the cold, I began to have second thoughts but the bus arrived and we set off for Penkridge (with me as the only passenger). It's a twisting route over country lanes through the villages of Bishop's Wood, Wheaton Aston and Lapley. The dark red sun hanging low on the horizon in the east was having little impact on the hard frost so road conditions were not ideal but, to keep to time, the bus was driven quite hard. We picked up one young woman at Wheaton Aston and arrived at Penkridge on time. I walked to the station, choosing a route through the churchyard of St. Michael and All Angels Parish Church (which has a very comprehensive website of its own here).
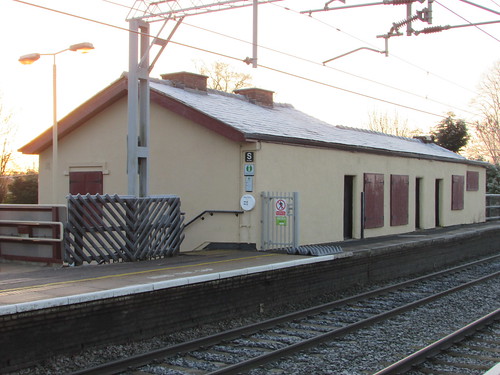
Penkridge Station - the boarded-up station building on the Up platform.
I was quite surprised when the automatic ticket machine, in an exposed location outside the unmanned station, correctly sold me a return ticket to Liverpool but, waiting on the platform with chilling feet my doubts about the wisdom of the trip returned. The passenger information displays did not appear to be working but the long-line public address delivered a couple of pre-recorded general safety messages before announcing my train, which arrived only a minute late. Eight waiting passengers boarded with me and I readily found a seat. The Class 350 Electric Multiple Unit was quite warm and we made good time to Stafford, where a large crowd of passengers joined the train.
We left Stafford on the Down Fast and we sped past the Norton Bridge Flyover (opened earlier in the year and described in my earlier post Return to Manchester) where I was just able to spot the old Down Slow, now out of use and partly lifted, which is now replaced by a new line which loops away to the west before rejoining the original alignment to the north of the flyover.

Norton Bridge: (top to bottom) new Down Slow rejoining original route, old Down Slow lifted, Up Slow.
The train made a long, slow approach to Crewe (without actually stopping at South Junction, as is often the case) but whether this was signals, weather conditions or otherwise I couldn't tell. Some passengers got off but many more joined the train. We left Crewe on the Down Fast but we seemed to be at reduced speed so we were falling behind the schedule. Stops at Winsford, Hartford, Runcorn and Liverpool South Parkway all added more passengers so on arrival at Liverpool Lime Street I doubt that there was a spare seat in the four coach train. Arrival was around 20 minutes 'down'. I purchased an All Areas 1-day 'Saveaway' ticket (valid on buses, Merseyrail trains, local trains and the ferry) from the friendly booking clerk at the booking office and made my way underground to the platform on the Wirral Line of Merseyrail.
The Class 507 and 508 Electric Multiple Units operated by Merseyrail are some of the oldest rolling stock in use on the national network but they still manage to provide an intensive well-used service. After James Street station, the single-line Liverpool Loop opened by British Rail in 1977 allows city-bound trains to serve Moorfields, Lime Street (Low Level) and Central before stopping again at James Street, now leaving the city. At Lime Street (Low Level), I passed through the new, automatic ticket barriers and caught the first train, bound for Chester, for the two stops to James Street.
A flight of steps and a lift returned me to street level where I was relieved to find it not too cold with a cheerful sun although the frost was still apparent. I walked towards Pierhead and considered my options. I've developed the habit of making a visit to the locomotive 'Lion' in the Museum of Liverpool before crossing the river on that icon of Liverpool, the Mersey Ferry. Incidentally, there are various links about 'Lion' and my involvement in the section The Museum of Liverpool, 'Lion' and the Old Locomotive Committee of the post here.
I knew that the first ferry was at eleven o'clock and hourly thereafter. With our late arrival in Liverpool, I wondered whether I'd need to revise the plan but, by walking faster and making my visit to the museum brief, I arrived at the ferry booking office in time to obtain a boarding pass for the 11:00 sailing, even snatching a quick 'shot' of Liverpool's 'Three Graces' on the way.
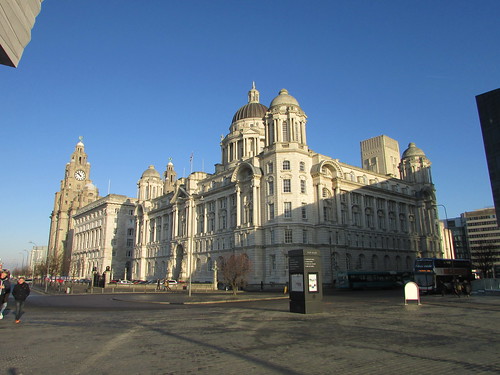
Return to Merseyside: Liverpool's 'Three Graces'.
'Snowdrop' was a few minutes late arriving at Pierhead but, once the gangway was in place, the long queue of passengers quickly boarded.
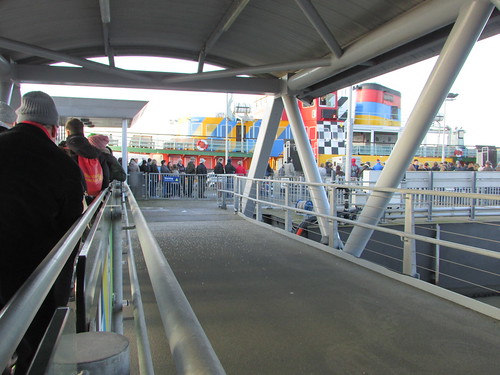
Boarding the 11:00 ferry.
As we boarded, I spotted 'Stolt Pelican' making its way upstream on the Birkenhead side of the river. Through the magic of marine Automatic identification system data, made available by a number of specialist shipping companies via the internet, on my return home I was able to determine that the ship, a chemical/oil products tanker of 5,797 tonnes deadweight had left Delfzijl (Netherlands) on December 25th for Ellesmere Port. By the time I made my checks at home, the ship had already left Ellesmere Port and was in the Irish Sea, destination Thamesport. There's a little about the Stolt fleet in the section By Ferry to Pierhead of the post here.
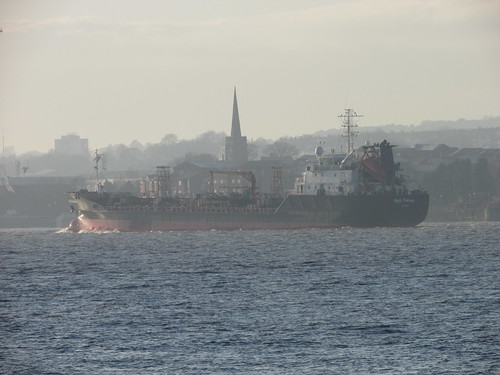
'Stolt Pelican', heading for Ellesmere Port.
'Snowdrop' was still in the 'DAZZLE' livery I complained about in the section The River Mersey of the post here. The ferry had docked at Pierhead heading upstream but, as soon as it cast-off, it turned seawards and gave us views of the dockland to the north of Pierhead. Before long, the Captain had turned upstream again to head diagonally for the floating landing stage at Seacombe. Mid-channel, the river was more troubled and a wind had picked up, discouraging me from disembarking at Seacombe (which I'd done a year previously).
Seacombe Landing Stage.
As we approached the floating pontoon, the Captain turned the ship again so that we moored with the bow pointing downstream. Looking across the river to the new 'Liverpool2' dock at Seaforth, I recorded the massive Chinese-built container cranes waiting for business, attended by a host of smaller gantry cranes, all looking very smart in their red and white livery. The Peel Ports site here has information about progress of the 'sea trials' at 'Liverpool2'.

The new 'Liverpool2' facility at Seaforth, viewed from Seacombe.
Within a few minutes, passengers had disembarked, more had joined and we were on our way upstream again for Birkenhead Woodside, this time with a very sharp wind which threatened to remove my cap. The Offshore Windfarm Support Vessel 'Seacat Defender', also heading upstream, almost matched our speed for a few moments as I took a picture. Liverpool is one of the shore locations supporting the extensive Irish Sea wind farm installations. My earlier post Llandudno includes a section on Offshore Wind Turbines.
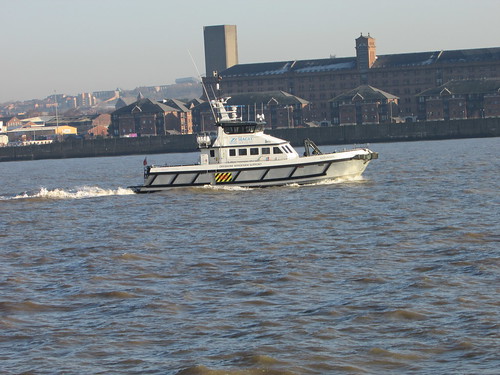
Seacat Services Offshore Windfarm Support vessel 'Seacat Defender'.
As we passed the remaining entrance to the Great Float of Birkenhead Docks, I managed a picture of the rolling lift bridge which takes Tower Road across the 100 foot channel. I described visiting this bridge on foot in the section Tower Road Bridge of the post Birkenhead and New Brighton by train (Part 2).
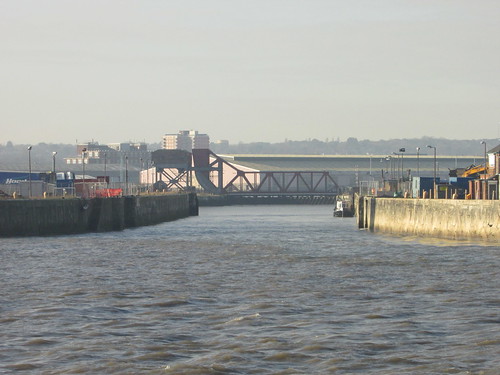
Tower Road Rolling Lift Bridge.
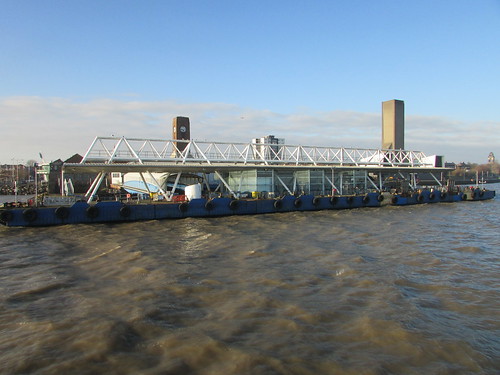
There was no ferry at the 12 Quays Terminal as we passed but I took a picture of the 3-lane vehicle bridge which connects the quay to the floating pontoon.
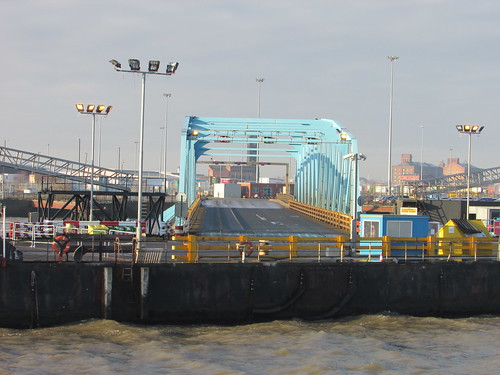
3-lane vehicle bridge connecting dock to pontoon at 12 Quays Terminal.
As we approached Birkenhead Woodside landing stage, the thin 'messenger line' thrown by the deckhand on 'Snowdrop' was caught by the man on the landing stage across his extended arm and he hauled in the slack, followed by the heavy mooring lines to which the thin line was attached.
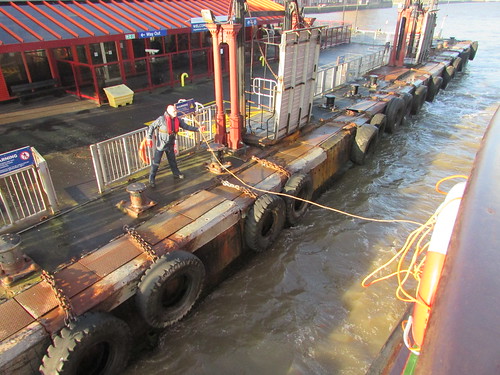
Birkenhead Woodside, catching the 'messenger line'.
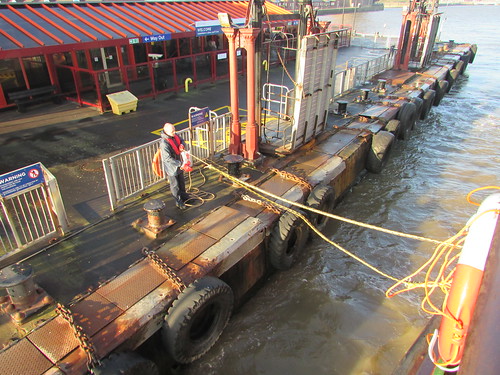
Birkenhead Woodside, receiving the mooring lines.
With the loop in the mooring cable slipped over a bollard, the slack was adjusted by the deckhand on 'Snowdrop' as the Captain used the engines to bring the ship alongside - a task requiring great skill in the difficult currents of the Mersey. Watching the 'messenger lines' being thrown always reminds me of the 'practice courts' for the Line Handlers which I saw during my Partial Transit of the Panama Canal in 2008, described in the post here.
I disembarked, with other passengers, at the end of the always-enjoyable 'nautical' phase of my visit. More passengers boarded, whilst some remained on board for the last leg of the triangular journey back to Liverpool Pierhead which operates every hour.
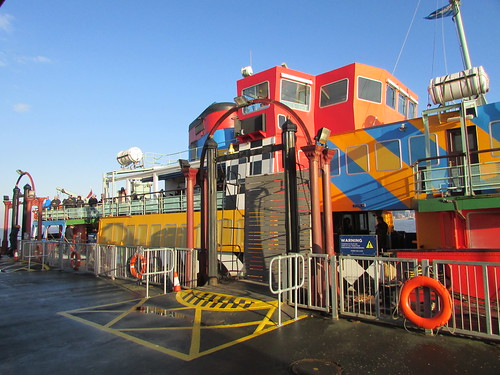
'Snowdrop' at Birkenhead Woodside.
Once on shore, the wind abated and in bright sun I walked to Hamilton Square station to continue my explorations by train.
Go to Part 2 ...
Related posts on this site
I've written about Liverpool a number of times. Most are referenced in the post Liverpool (again).
My Pictures
Where necessary, clicking on an image above will display an 'uncropped' view or, alternately, all the pictures from this and earlier trips may be selected, viewed or downloaded, in various sizes, from the albums listed:-
Return to Merseyside (This trip).
Merseyrail (Earlier trips).
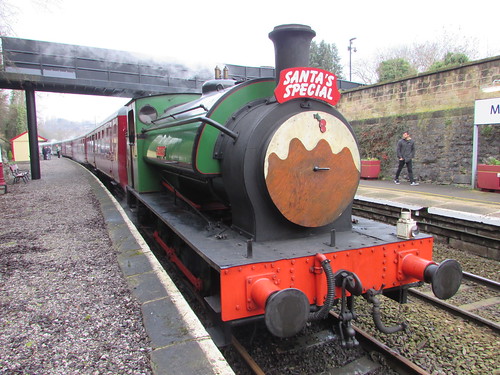
The Battlefield Line 'Santa Special' trains between Shackerstone and Shenton are now of two types, which run alternately. One type, with vestibule stock, is dubbed the 'Classic' train. In this train, Santa's Helpers take groups of passengers, in turn, to see Santa Claus in his Grotto, where the children receive a Christmas present. The second train has corridor compartment stock and forms the 'De Luxe' train. On the 'De Luxe' service, families or groups can book a private compartment provided with a Christmas Hamper containing food, drink and Christmas Crackers. On the 'De Luxe' service, Santa visits each compartment in turn distributing presents.
In December 2016, visiting locomotive 30120 (the preserved Drummond 'T9') worked the 'Classic' train and 'Cumbria' (Hunslet 3794 'Austerity Tank'), hauled the 4-coach 'De Luxe' train. Jan was rostered as the driver of 'Cumbria' on Sunday 11th December and Sunday 18th December.
 Shackerstone Station had festive decorations.
Events of Sunday 11th December 2016
It was still dark when I arrived at Shackerstone shed but Steve, who was firing 'Cumbria', had just started work and Dave and Carl on the 'T9' had matters well in hand for their earlier departure with the first 'Classic' train of the day. Whilst Steve cleaned the grate and laid the fire, I started oiling-round. By the time I'd finished, 'Cumbria', still warm from the previous day, was just starting to make steam. Once the 'T9' had left the shed, the inspection pit in the shed became available and in due course we moved 'Cumbria' onto the pit so that Steve could clear the ash from the ashpan. I noticed that the rear damper door was reluctant to latch in the 'open' position and Steve had to wedge the damper door open using a spare ashpan rake. Whilst we were over the pit, I completed my examination of the underside of the locomotive. This included checking the six underhung springs, spring hangers and associated fixings, the cylinder drain cocks and operating levers, the brake rigging, steam brake cylinder, handbrake screw and associated linkages, the base of the firebox, the firegrate and foundation ring, the ashpan, in fact generally looking for trouble or what might develop into trouble. Meanwhile, a hose pipe attached to the mains water supply was slowly filling the saddle tank.
As the boiler pressure increased, we moved the locomotive outside the shed and did as much cleaning as time permitted before coming 'off shed' via the ground frame and coupling up to our 4-coach train waiting in platform 1 so that we could start steam heating the train.
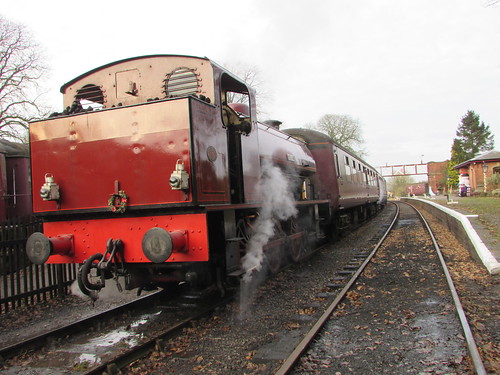
Shackerstone Santa Specials: 'Cumbria' steam heating the stock for the 'De-Luxe' train.
Our first departure was a little delayed (Santa cannot be hurried so the 'Classic' train, hauled by the 'T9', was a little late arriving back at Shackerstone). Once we did set off, it was at a rather pedestrian pace as Santa slowly worked his way from compartment to compartment greeting our young visitors. We stopped at Market Bosworth for a while to let Santa get a little further along the train and then continued, at a similar slow speed, to our terminus at Shenton. Steve and I then ran 'Cumbria' round the train and re-coupled, ready for our return to Shackerstone, this time chimney leading. Santa was still distributing presents so we trundled back to Market Bosworth at the usual slow speed, making us lose more time. However, after waiting at Market Bosworth for a few minutes, Santa had finished seeing all the children and so we were told that we could make our return to Shackerstone at 'Line Speed' (a fairly modest 25 m.p.h. with certain sections at lower speed).
Once we'd brought our train back into platform 1 at Shackerstone, the 'T9' was able to depart with the delayed second 'Classic' train of the day. This left platform 2 free for us the run round our train, stopping to water at the water column. That was when the plan unravelled. Steve man-handled the water 'bag' into the tank filler and I opened the water valve (a big, horizontal wheel which for some reason is turned clockwise to allow water to flow, unlike most water taps). At first, water started to flow but Steve quickly realised that the volume was reducing to a trickle. He climbed down to the ground and went to investigate the problem.
Locomotive Water Supplies
In addition to needing fuel to generate heat, steam locomotives require copious supplies of water which is boiled, used to push a piston down a cylinder to produce motion and then (unless we're talking about compound or condensing designs) immediately discharged as exhaust steam. I discussed carrying water on locomotives in the post Water, water, everywhere. So the first thing locomotives run out of is usually water (followed by either fuel or a sufficiently energetic fireman to continue working). A hose connected to a mains water supply may suffice on shed whilst an engine is being brought into steam but, once on the road, the locomotive needs to be replenished in a matter of minutes so normally large, elevated tanks are required at strategic locations along the railway which can be refilled from a more modest water main over a period of time and rapidly discharged by gravity through a large capacity pipe into the locomotive's water tank. Various sizes and arrangements for the elevated tanks could be found in the steam era.
A common British arrangement was to mount the tank on a brick structure. The picture below shows a fairly grand preserved example adjacent to Huddersfield Station (for a little more about this splendid survivor, see the post Day Trip to Shipley).
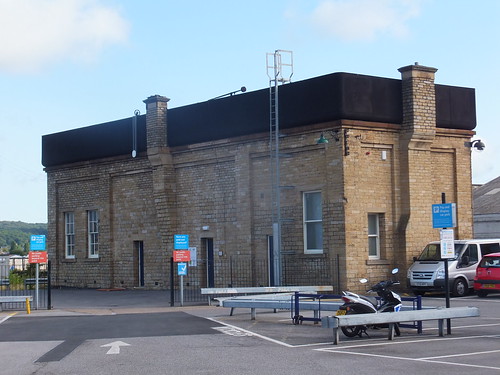
Railway water tower at Huddersfield Station.
Alternately, the tank could be supported on a metal framework.
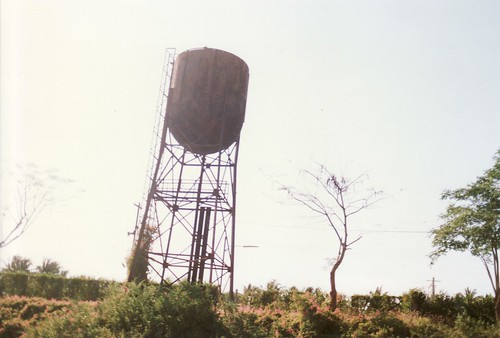
A large railway water tower in Thailand.
In the Parachute Tank design, a round metal tank was balanced on top of a cast column at the point of use but, more commonly, the water column (or water crane) at the trackside would be fed by a high-capacity pipe from a remote tank. When I was young, I used to watch locomotives taking water at Wolverhampton High Level Station and the LNWR pattern water column in use there is described in the section 'Water Column' in post Wolverhampton High Level Remembered.
Arrangements at Shackerstone
There are two, interconnected tanks, elevated by being positioned at the top of the bank adjacent to the railway. These are normally filled under the control of a float valve from the available public water supply and a high capacity pipe feeds water to the water crane at the end of platform 2.
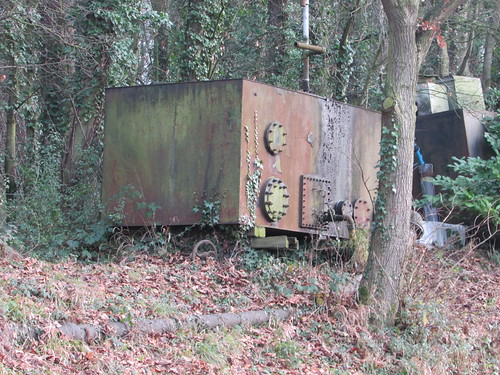 Shackerstone: The tanks for the locomotive water supply on the bank adjacent to platform 2.

Shackerstone: The Water Crane at the end of platform 2.
The Problem
Steve quickly diagnosed the problem. Because of a fault on the float valve, the stop valve in the incoming water supply had been shut to prevent possible overflow but had not been re-opened, allowing the tank to empty itself. Opening the stop valve allowed water to start flowing into the tank but it would be some hours before a proper supply was available. The platform tracks at Shackerstone are provided with hoses connected to the mains for refilling the lavatory tanks on the passenger coaches and we experimented with taking water from here, but it was clear that we would not have taken sufficient water in time to work our next booked 'De-Luxe' service ('Cumbria' uses rather a lot of water, especially when carriage warming is required).
The Solution
The 'T9', on its way back from Shenton after its second trip with the 'Classic' train, had sufficient water for another trip (it's paired with an 8-wheel 'Watercart' tender) so it was decided to 'swop' the engines, with the 'T9' taking the second 'De-Luxe' train, giving 'Cumbria' another hour or so to finish watering from the mains supply before taking the last 'Classic' train.
The returning 'Classic' train was stopped just short of the signal box and the 'T9' uncoupled and moved forward, light engine, to couple onto the 'De-Luxe' train in platform 1. As soon as the 'T9' had cleared the crossover, we moved towards the coaches of the 'Classic' service, coupled on, and brought the train into platform 2 so that the passengers could disembark. If any of the passengers noticed that they'd left Shenton with one engine and arrived at Shackerstone with a different engine, they made no comment!
Once the 'T9' had departed with the 'De-Luxe' train, we were able to run round the coaches of the 'Classic' train and provide steam heat whilst we continued to slowly replenish our saddle tank. By the time the 'T9' returned, it was becoming dark so Steve had lit our engine lamps. We also had a full tank of water. Once we had the 'Right Away' from the Guard, we set off in the gathering gloom at the accustomed gentle pace for 'Santa' trains. On arrival at Shenton, we cautiously ran round the train - everything becomes harder in the dark - and waited for the 'tip' from the Guard.
We were told that Santa had completed his present distribution, so we could return at 'Line Speed', although a stop at Market Bosworth was required to allow some people off the train, so we had an enjoyable trip back to Shackerstone and, approaching the signal box found the 'Bottom Dolly' disc signal 'off' for platform 2, as expected. The 'T9' had run round the 'De-Luxe' stock to the Shenton end of the train. We uncoupled from the 'Classic' train and, by the time we'd moved the engine down to the 'North End', the 'T9' had drawn the 'De-Luxe' stock 'Up the Cutting', leaving platform 1 clear for us to pass through the platform to the Ground Frame and go 'on shed'. We 'tied-down' 'Cumbria' well inside the shed and completed our disposal. Meanwhile, the 'T9' pushed the 'De-Luxe' stock back into platform 1, uncoupled and followed us onto shed. Well, we were about 30 minutes late finishing the 'Santa' trains but, considering the difficulties, we thought that not a bad result. There were certainly lots of pleased passengers during the day.
Events of Sunday 18th December 2016
It was still dark when I arrived, a little before 7.00 a.m. John B. and Sam B. had arrived and were preparing the 'T9'. The good news was that, during the previous week Steve had repaired the faulty float valve on the locomotive water supply which had caused problems during my previous 'turn'. The bad news was that there was no fireman for 'Cumbria' and that I was on my own. It appeared that, unless I set to and tackled both fireman's and driver's duties (at least temporarily), a number of disappointed visitors were guaranteed. I couldn't find a firing shovel (not a good start) but I borrowed the 'spare' shovel off the 'T9'. I couldn't find wood for lighting-up. Sam said he'd had a similar problem but showed me a rather damp wooden panel which he'd been breaking up to use on the 'T9' and he helped me break up a bit more of the panel.
Lighting-up
Before lighting-up, the safety of the boiler must be assessed. The two gauge glasses had been, correctly, left isolated overnight so I 'opened' them, 'blew-down' (actually 'drained-down' since there was no pressure left in the boiler) and satisfied myself, by comparison of the levels in the glasses, that there was adequate water in the boiler. Then, I checked around the boiler for leaks. Mudholes, washout plugs, stays, rivets, foundation ring, boiler tubes and fusible plug should all be examined. The firegrate still had the now-cold ash and clinker from the previous day's fire so, armed with a suitable fireiron (a substantial 'straight dart' about five feet in length), I slid the end of the dart forwards and backwards along the firebars to encourage the remains to drop through the air spaces into the ashpan. This is a fairly energetic process which, of course, produces clouds of dust. Any large clinker has to be extracted with the clinker shovel ('paddle') through the firehole door but, being short of time, I managed to avoid this by 'bashing' larger pieces with the dart to break them up. The cleaner the firegrate before setting a new fire, the less likely are subsequent steaming problems but, in the circumstances, I settled for a result a little short of the proverbial "clean enough to eat your dinner off".
There are nearly as many methods of steam-raising as there are fireman. I adopted a method that's worked well on a wide range of locomotives. First, I shovelled a thin bed of coal across most of the firegate. I selected a fairly thin stick of wood from my meagre supply, wrapped it in a oil-soaked rag and lit the rag from a match. I carefully dropped the burning stick onto the grate and added more wood, attempting to form a "Scout's Campfire" shape so that each piece of wood could be exposed to the heat but also have plenty of air around it. I added a little oil to encourage the damp wood to burn and was gratified to see a reasonable wood fire result. Next, I tossed some small pieces of coal onto the wood so that the coal would be warmed. Worried that the wood would expire before the coal caught alight, I returned to the remains of the damp wooden panel and broke up a little more wood which I added to the fire with more selected pieces of coal. I then applied the "Ten Minute Rule" - open the dampers, close the firedoors and do something else for ten minutes. Well, I'd plenty of other things to do with an engine to examine and oil. After ten minutes, the fire had 'caught' better than I dared hope, so I applied a light firing of coal, making sure that there was coal around the edges of the burning mass to encourage the fire to spread across the firegrate and then left it for another ten minutes. Some fireman tend to 'black-out' the fire and leave it for half-an-hour or more, later spreading the fire around the grate with a fireiron but I've found that following the "Ten Minute Rule" will warm an engine faster but gently and (except on very large firegrates) avoids the need to use a fireiron to spread the fire altogether. An engine is immobile until it's producing steam and, with around half a ton of water in the boiler of an 'Austerity', it takes time and a decent fire to bring it to the boil, even when the water is warm from the previous day.
Of course, being on my own there was a lot of climbing up and down involved - hose into the tank to take water, work progressively around the engine applying oil, return periodically to the footplate to fire. By the time the 'T9' moved off shed, 'Cumbria' was starting to make steam so I could consider moving onto the pit to empty the ashpan. Getting an engine to move is always the lesser problem - getting it to stop is the main safety consideration and when single-manning the risks are increased. With around 30 p.s.i. on the clock, I gingerly moved the engine onto the pit without incident. I clambered underneath 'Cumbria' with two ashpan rakes - one to rake out the ash, one to wedge the front ashpan door open. Perhaps unwisely, I decided to leave the hose feeding the locomotive's water tank, as I was anxious to start out with a full tank, and so I raked out the ashpan 'dry'. I eventually emerged from the pit, after shifting a fair amount of ash from the two ashpans, spluttering from the dust and white like a snowman. Simon P. chose this moment to appear and comment "You should be coming off shed now to steam heat the train". My rather terse response encouraged him to assist by checking the saddle tank water level (I decided we'd enough), operate the Ground Frame and, after I'd moved the engine onto the four coach 'De-Luxe' train, couple up.
In the section Related posts on this site below, various posts on steam-raising and preparation are linked.
The First 'De-Luxe' service

Shackerstone Santa Specials: 'Cumbria' (shrouded in steam) waiting to take the 'De-Luxe' train.
After my unexpected exertions getting 'Cumbria' ready, I was content to look after the engine whilst warming the train, maintaining the fire and keeping the boiler topped-up. But we would need a fireman if we were to take the 'De-Luxe' train down the line. Management decided that, when the 'T9' returned, Sam (who was firing the 'T9') would have to immediately swop onto 'Cumbria' and fire that trip. So that's what happened. We made a leisurely progress to Shenton, pausing a Market Bosworth, as 'Santa' made his way through the train. Sam and I ran round the train and were told that the return to Shackerstone could be made at normal speed, so we enjoyed a slightly more spirited run back. Sam then swopped back onto the 'T9' for another run to Shenton with the 'Classic' train.
The Second 'De-Luxe' service
Again, I was happy to 'baby-sit' the engine before our second journey to Shenton, expecting that Sam would have to swop engines again. But, having completed other duties, Martin S. appeared, saying the he would fire the second trip. As Santa dealt with his excited young visitors, we made our sedate way from Shackerstone to Shenton and ran round, ready for the return.

Shackerstone Santa Specials: View from footplate of 'Cumbria' looking back along the train between Market Bosworth and Shenton.
As it became dark, we were able to return to Shackerstone at normal speed because Santa had completed his rounds. As usual, we ran into platform 1, uncoupled and waited for the 'T9' to leave with the last train of the day. Whilst we waited, our passengers streamed past on their way to the car park - everybody seemed in good spirits.
Shackerstone Santa Specials: Platform 1 North End. A group of happy passengers photographed with 'Cumbria' in the background.
After the 'T9' had left we were able to run round the train. Martin said that I could propel the empty stock to the North End, to stable overnight, and that he would act as Shunter. He released the Guard's handbrake and gave me handsignals with a 'Bardic' battery handlamp from the far end of the train. I eased the train forward very gently. In the dark, the driver is reliant on the Shunter's signals (although, noting the position of the locomotive, I could work out roughly where the other end of the stock would be). When the white "come towards" handsignal changed to steady red, I stopped the movement and waited for Martin to re-apply the Guard's Handbrake and walk back to uncouple 'Cumbria' from the coaches.
Then we were able to return, via Platform 1 and the Ground Frame, to the shed where we stabled well inside so that the 'T9' could come in after us and we completed our disposal.
Related posts on this site
Driving Turn at Peak Rail - Part One: Preparation
Preparation of Locomotive 'Sapper'
(Both of the above describe the preparation of locomotives similar to 'Cumbria' at another railway).
MIC - Firing Steam Locomotives (1).
The 'Austerity' 0-6-0ST locomotive.
There are a number of other posts about footplate work on 'Cumbria' on the Battlefield Line:-
'Santa Specials' at The Battlefield Line - Christmas 2015.
The Battlefield Line Steam Gala.
Sunday at Shackerstone.
'Operation: Market Bosworth' - On the Footplate.
Related posts on other sites
Sam Brandist has his own blog and has posted an interesting account of his day on the 'T9' (and helping me with 'Cumbria') on Sunday, 11th December. You can find his report here.
My Pictures
Shackerstone Santa Specials.
Peak Rail Santa Specials operate from Rowsley, where all passengers board and alight, to Matlock Town. 'Technical' stops are made at Darley Dale in both directions. In 2016 trains were operated 'top-and-tail' by visiting locomotive 'Ring Haw' (0-6-0ST Hunslet 1982 of 1940) at the south end of the train and either resident Class 31 or Class 44 diesel-electric at the north end. Jan was rostered as the driver of 'Ring Haw' on Tuesday 20th December and Thursday 22nd December.
Events of Tuesday 20th December 2016
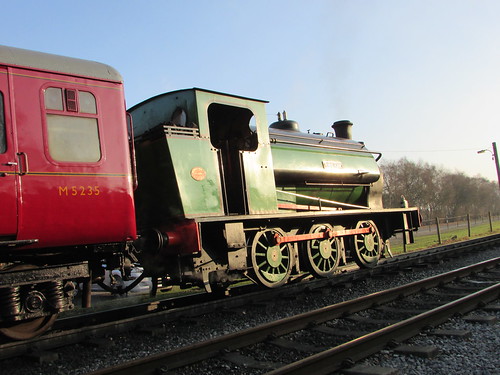
'Ring Haw', highlighted by the afternoon sun, ready to start the last train of the day from Rowsley on 20th December 2016.
I was rostered with Keiron R. as fireman, working with 'Penyghent' at the north end. The load was six passenger coaches plus a 'BG' luggage van to store the presents which Santa Claus would distribute to the visiting children. 'Ring Haw' rather appealed to me. It is a '14-inch Hunslet', less powerful than the 'Austerity' 0-6-0ST locomotives (which were based on the '16-inch Hunslet'). It served at the Nassington Iron Ore Mine near Peterborough until withdrawal in 1970. It is now based at the North Norfolk Railway and the owners limit its use to the equivalent of a 4-coach load so 'diesel banking' was specified on parts of the Peak Rail route. Following clearance by the Railway Inspectorate, it was also specified that the diesel locomotive would create the vacuum brake even when 'Ring Haw' was working the train, so the vacuum ejector in the cab of 'Ring Haw' was simply used the driver's brake application valve.
Whilst 'oiling round' I had plenty of time to notice the similarities with the 'Austerity' tank locomotives - two inside cylinders with slide valves operated by 'Stephenson' Link Motion.
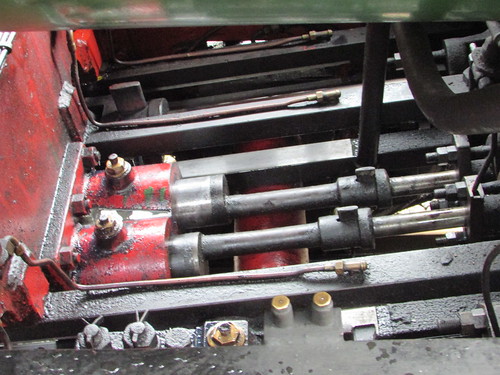
'Ring Haw' at Peak Rail: View from right-hand foot framing, showing slide bars and valve rods.
As far as lubrication is concerned, a number of conventional oil cups with trimmings and oil holes have been retained but a large mechanical lubricator is now fitted to 'Ring Haw' serving not only the cylinders and the regulator in the dome but also the axleboxes, slide bars, piston and valve glands via copper pipes fitted with the appropriate non-return valves. Oil with an SAE of 680 is used in the mechanical lubricator.

'Ring Haw' at Peak Rail: Mechanical lubricator mounted on the left-hand foot-framing.
Unusually, the axlebox hornguides are grease lubricated from a separate system fed from grease nipples mounted along the top of the main frames.
The saddle tank is pierced by the dome which accommodates the regulator. Externally, the dome mounts two Ross 'Pop' safety valves side-by-side together with a high-toned whistle. The saddle tank does not extend over the smoke box.
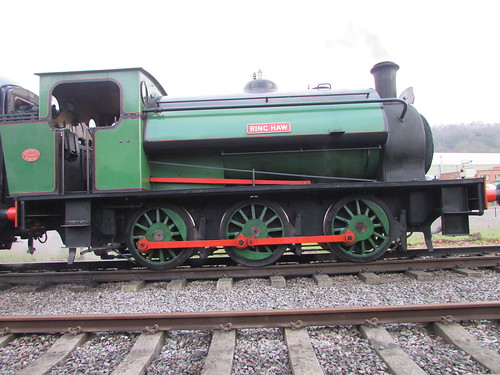 'Ring Haw' at Peak Rail
The cab layout is typical of industrial locomotives - right hand drive with a two-handled regulator, steam brake valve capable of being operated from linked handles on either side of the cab, two gauge glasses and two Davies and Metcalfe backhead injectors. The Davies and Metcalfe vacuum ejector and the steam heating shut-off cock with automatic pressure regulator are, of course, features added in preservation.
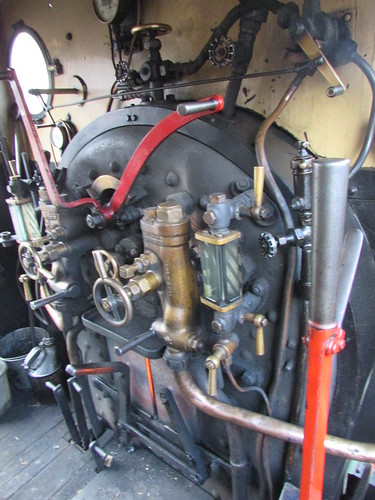
'Ring Haw' at Peak Rail: View of boiler backhead viewed from driver's side of cab.
'Ring Haw' steamed well and was economical on coal and water. Keiron and I had an enjoyable day carrying out four round trips to Matlock Town as we helped to provide the proper 'Santa Special' experience which relies on the work of a large number of volunteers.
Events of Thursday 22nd December 2016
Once again I was rostered with Keiron R. as fireman, working with 'Penyghent' at the north end and the same 7-coach load as on the Tuesday, carrying out four round trips to Matlock Town. 'Ring Haw' gave us no concerns during the day.
 'Ring Haw' at Matlock Town, with 'Christmas Pudding' headboard, ready to be pulled back to Rowsley.
As on the previous Tuesday, we lit the engine lamps for the last round trip as it was already becoming dark (the Winter Solstice had been on Wednesday, 21st December, giving less than 8 hours of daylight). At the end of traffic, 'Penyghent' uncoupled from the train and headed smartly up the loop until clear of the crossover to the Headshunt (which I prefer to call the 'Third Line'). Meanwhile, Keiron uncoupled 'Ring Haw' from the train and, in possession of the Single Line Token, we headed towards Matlock until clear of the South Ground Frame so that Keiron could turn me into the loop. Once clear of the points, I gave three short whistles to Keiron (the old British Railways whistle code for "Clear of All Running Lines") and, once Keiron had rejoined the engine, we followed 'Penyghent' to the North End.
I stopped clear of the road crossing until 'Penyghent' passed us, heading for Shed Road 2 then I followed suit and we also stabled on Road 2. Whilst we went about disposal duties, Harvey C. used the Bucket Loader to refill the bunker ready for the following days service. Then it was complete the paperwork, sign off and return home.
My Pictures
'Ring Haw' at Peak Rail.
I'd kept up to date fairly well until our second encounter with the "Drake", then contemporary posts stopped briefly until the sea (and my digestion) had settled. Once we arrived at Ushuaia, there was too much travelling to do other than produce a short version of my exploits. (Do I hear you say "For this relief, much thanks"?). However, now I am safely back home, I intend to expand the reports on the last, hectic days of my marathon trip.
Events of Thursday, 1st December
I woke at 2.30 in the morning, aware that something had changed, although it took my addled brain a few moments to work it out: The erratic lurches of the ship had been replaced by a regular rocking, still quite strong but far less unsettling. By morning, the situation was quite tolerable and the dining room filled up for breakfast. Matters continued like this throughout Thursday.
Events of Friday, 2nd December
We docked peacefully at Ushuaia but guests were required to leave the ship shortly after 8.39 a.m. because the crew had to prepare for another shipful of guests arriving later that day. I took the Silversea option of a tour bus all of 200 yards to the town where we had about 90 minutes to explore. I managed to visit two interesting, small museums on the foreshore then it was back on the bus for transfer to the small, modern airport. Having checked in, I waited outside the terminal with some of my new friends. The flight to Buenos Aires was very full and very tedious but, on arrival, I was greeted by a charming young girl and promptly transferred to my hotel, the Plaza. I'd hoped to travel on the city's Metro, also called 'Subte', as it had been some years since I tried it. I discovered it's all been modernised and ticketing is now by a 'credit card' which you 'charge' at any station. After some problems, I travelled on, I think, four of the city's lines. My interest is not purely technical. If you dress inconspicuously, you can 'people watch' and learn about the way of life by observation. By the time I returned to my hotel, I was very tired but pleased.
Events of Saturday, 3rd December
I was collected earlier than I would have wished for my internal flight to the Argentine airport serving Iguassu. The flight was less than two hours and my baggage arrived fairly quickly so I was quite optimistic until I discovered there was no guide. I made enquiries (sometimes another guide can locate the missing person) but, having drawn a blank, I decided after half an hour to make my own way to the hotel. My ignorance of the geography around Iguassu was such that I didn't realise my hotel was on 'Brazilian Side' and we would have to cross the border. Having pre-paid a taxi firm, we set off, went through Argentine Immigration, crossed the River Bridge which forms the actual border and were just conducting formalities at Brazilian Immigration when my missing guide arrived. Luggage was transferred to the new car and we continued to my hotel.
We passed the Helisul helicopter pad and, as the weather was rather overcast, my guide suggested I take my 10-minute flight over the Falls first and I enjoyed that.
The hotel is within Iguassu National Park so we had to stop and pay the park admission fee. We were still not finished. The hotel have their own entrance gate beyond which only certain vehicles can proceed. Oddly, the big buses providing public transport can go but my car couldn't so we had to transfer my luggage again to the hotel Shuttle Bus and I arranged a meeting time (at the gate) of 8.00 a.m. Sunday. At the hotel, I was expected and I was informed that I'd been upgraded to a splendid suite, with small balconies accessed by double=doors, one of which had excellent views of part of the falls. I went outside to watch the sunset but otherwise remained in my room with the balcony doors open, lulled to sleep by the continuous roar of rushing water.
Events of Sunday, 4th December
I quickly discovered why my guide has suggested an early start. We sailed through the border crossing back into Argentina which can involve long queues.
We paid to go into the Argentine National Park and started a walking tour around the top of the Falls.
To be continued ...
Related Posts
Just posts on the Antarctic segment: Antarctic Peninsula.
All posts describing this trip (Chilean, Antarctic, Argentinian and Brazilian sectors): Chilean Fjords.
My pictures
All my pictures taken in Antarctica on both this visit and my earlier visit in 2008 are in the collection here.
I've also made some additions to the 2006 collection on Brazil to show Iguazzu here.
Events of Wednesday, 30th November
We’d spent the previous night at anchor in calm seas just off Deception Island with the intention of letting the unfavourable weather system pass before we entered the unprotected waters of the South Atlantic and the uncertainties of the Drake Passage to reach our destination at Ushuaia.
We raised the anchor at around 6.30 a.m. and initially sailed north with Deception Island on our port side (left), turning west to pass to the north of Deception Island with the main South Shetland Island chain to starboard.
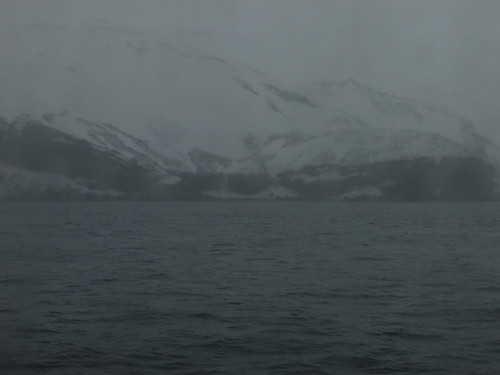
Into the South Atlantic: "the main South Shetland Island chain to starboard".
The wave action was noticeably increased after our turn but conditions were still quite comfortable and I took breakfast as normal, although the restaurant seemed quieter than normal.
I attended the first lecture of the day by Hans Peter talking about Water but, once we were clear of Snow Island, the ship turned northwards to head for Ushuaia, passing through the Boyd Strait between Smith Island (to port) and Snow Island (to starboard). The wave action became significantly greater, with occasional waves much larger than the average. With some difficulty, I made my way through the ship to the restaurant for lunch. There were definitely far fewer people taking a meal and the buffet selection on offer was less than normal. The expedition team estimated the waves at 4 to 5 metres.
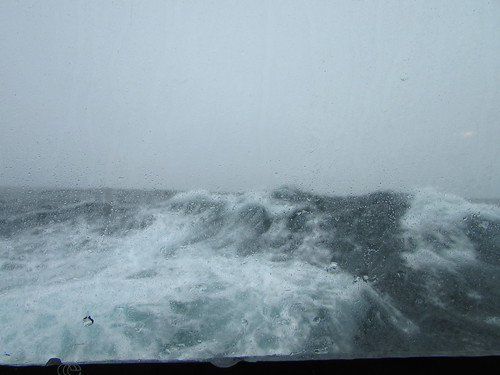
Passing through the Boyd Strait.
The meal was punctuated by the occasional crashing noises as tableware was deposited on the floor in different parts of the restaurant in response to a lurch from the ship. Although I took only a carefully-selected light lunch, a little later I started to feel rather queasy and decided to rest in my cabin, in the hope of attending another lecture later in the afternoon.
The amplitude of the larger waves must have increased further because loose items started to move around in the cabin. All my papers with notes on the trip were swept from the desk and fanned across the floor. Dozing off, I was rudely awakened as an unused wine cooler and cake stand (provided as standard cabin equipment) became dislodged and loudly rattled across the floor. On a few occasions, daylight was suddenly excluded from the cabin for a couple of seconds as a larger-than-normal wave completely obscured the rectangular window. Once, the sea water was thrown against the window with such a loud ‘bang’ that I half-expected the very-thick, toughened glass panel to shatter.
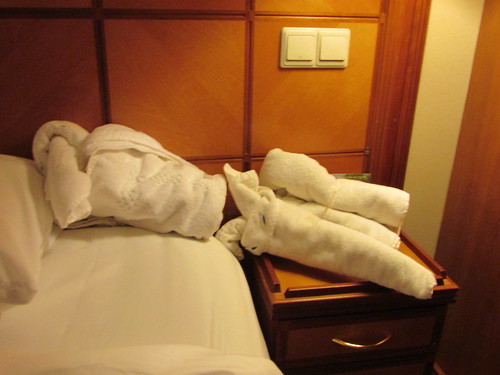
Into the South Atlantic: My elephant 'went to pieces' during the heavy weather.
I didn’t attend the lectures in the theatre, although I did switch the television to channel 9 which gave the sound-track of the lecturer plus the associated slides being displayed in the theatre. The rest of the time, I would normally leave the television on channel 1 which gave a moving-map display of position, speed, heading and wind.

Into the South Atlantic: Television Channel 1 gave a moving-map display of position, speed, heading and wind.
The Drake Passage had been kind to us on our way south but seemed to be living up to its fearsome reputation as we returned north. However, I think my first passage south through the Drake Passage back in 2008 was probably worse.
I decided to remain in my cabin for the evening and take only a very light snack, eventually taking one of the little blue Meclizine tablets supplied by reception for motion sickness. Within 30 minutes or so I felt incredibly drowsy and the erratic lurches of my world seemed less important. I lay on top of the bed and succumbed to sleep.
Related Posts
Next post describing this trip: Returning across the Drake Passage.
All posts describing this trip: Chilean Fjords.
Just posts on the Antarctic segment: Antarctic Peninsula.
My pictures
Where necessary, clicking on an image above will display an 'uncropped' view or, alternately, my pictures from this (and earlier) trips may be selected, viewed or downloaded, in various sizes, from the albums listed:-
Into the South Atlantic.
'Silver Explorer'.
All my pictures taken in Antarctica on both this visit and my earlier visit in 2008 are in the collection here.
[Links to pictures and pictures added 10-Feb-2017]
Events of Tuesday, 29th November
Overnight we had headed away from the Antarctic Peninsula to intercept a unique island, Deception Island, which lies south of the main South Shetland Group. Early explorers considered the island ‘normal’. It was only later that a narrow passage (‘Neptune’s Bellows’, around 230m wide) was identified establishing that the island was, in fact, horse-shoe shaped, offering a protected anchorage around 9 km by 6 km within the horse-shoe. The misleading appearance of the island gave rise to the name ‘Deception Island’.
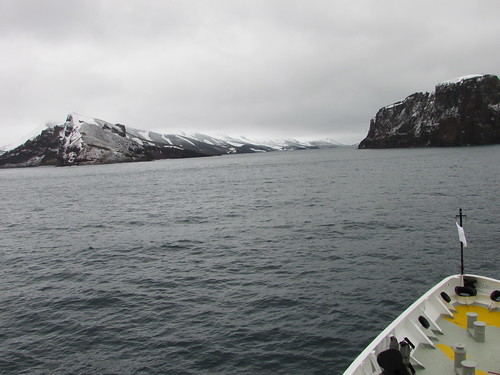
Deception Island: Approaching Neptune's Bellows.
The whole island is an ‘active’ volcano, where an earlier eruption had caused the side of the cone to collapse, allowing the sea to flood the caldera, producing the present arrangement. The island provided a useful refuge to the early sealers and whalers then, in 1906, a base was constructed in Whalers’ Bay, which supported 13 whaling factory ships by 1914. The role of the onshore plant was to boil whale carcasses to extract whale oil but, following the price collapse during the Great Depression, the base was abandoned in 1931, to be later used by the British for a time as a research station.
Whalers’ Bay
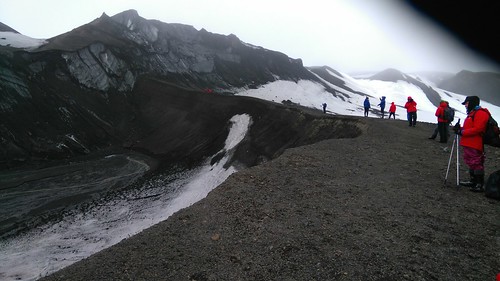
We were encouraged to be on deck for around 8.00 a.m. to observe the passage through Neptune’s Bellows. Starting at 9.00 a.m., a wet landing by Zodiac was offered, allowing walking around the extensive, flat area of black 'sand' leading back from the sea. The buildings and equipment in Whalers’ Bay are in derelict condition and a decision has been made not to attempt restoration.

Deception Island: Derelict buildings and equipment in Whalers’ Bay.
I spent my time walking from the landing point to the abandoned aircraft hanger and back, making a photographic survey of the buildings, equipment and wildlife.
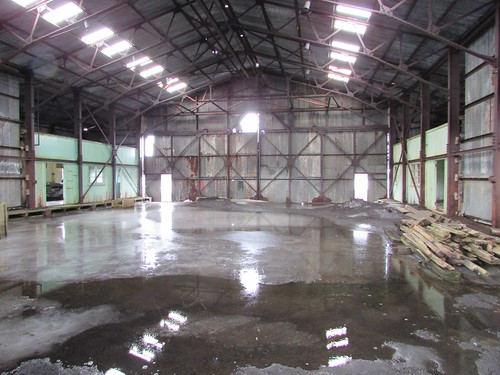
Deception Island: The abandoned aircraft hanger, Whalers' Bay.
I didn’t take the guided walk to a viewpoint called Neptune’s Window as I’d done that on my earlier visit to Deception Island in 2008 (described here).
Near the Zodiac landing, steam could be seen rising and, in places, the water and black 'sand' were pleasantly warm, attesting to the ‘active’ nature of the volcanic site (the last eruption was in 1970). However, I declined to take the ‘Polar Plunge’ by swimming in the (hopefully) warm water as I’d done that in 2008, although a number of my fellow guests did accept the challenge.
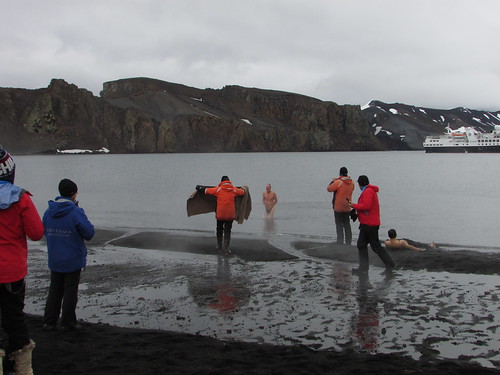
Deception Island: One guest makes use of his hat when emerging from a 'skinny dip' whilst another takes the 'warm sand treatment'.
After a very enjoyable shore visit, it was back to the ship by Zodiac, in time for lunch in the restaurant. Whilst we enjoyed lunch, the ship re-positioned to Telefon Bay, also within the caldera of Deception Island where we had a final opportunity to go ashore.
Telefon Bay
It was quite cold when we made our landing on a windswept beach of black ‘sand’. A 1 km walk was offered to inspect the crater formed during the 1970 eruption. Most of the route was covered in soft snow which made walking very tiring. I was on the point of turning back when Steffan from the Expedition Team pointed out how close the crater rim was so, after a breather, I persevered and was rewarded with an impressive, if bleak, sight.
Deception Island - View of the crater, Telefon Bay.
Quite a few guests continued on a further 2 km hike which they concluded with a slide down a snow-covered hillside on their way back to the landing point. I decide to retrace my outwards route back to the Zodiac, in the company of quite a few guests.

Deception Island - View of our ship, Telefon Bay.
The wet landing at Telefon Bay was the last trip ashore before we left the South Shetland Islands to cross the Drake Passage to our final destination, Ushuaia in Argentina. However, the weather forecast for the area was not promising, so the Captain decided to move the ship outside the caldera of Deception Island and anchor overnight, hopefully allowing the unfavourable weather system to pass before we attempted our passage.
In the evening I attended the Captain's Farewell Cocktail Party in the theatre followed by the Captain's Farewell Dinner in the restaurant.
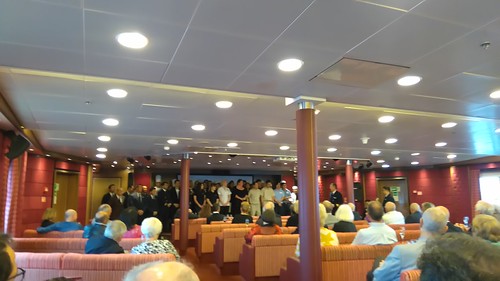
'Silver Explorer': Most of the crew, housekeeping and catering staff on stage in the theatre at the Captain's Farewell Cocktail Party held on Tuesday evening.
Related Posts
Next post describing this trip: Into the South Atlantic.
All posts describing this trip: Chilean Fjords.
Just posts on the Antarctic segment: Antarctic Peninsula.
My pictures
Where necessary, clicking on an image above will display an 'uncropped' view or, alternately, my pictures from this (and earlier) trips may be selected, viewed or downloaded, in various sizes, from the albums listed:-
Deception Island - 2016.
'Silver Explorer'.
All my pictures taken in Antarctica on both this visit and my earlier visit in 2008 are in the collection here.
[Links to pictures added 6-Feb-2017: Pictures added 8-Feb-2017]
Events of Monday, 28th November
Brown Bluff
Brown Bluff is located on the Antarctic Peninsula, facing the Antarctic Sound. A rust-coloured, steep-sided, flat-topped mountain towers above a shingle beach which is home to Gentoo and Adelie penguin rookeries.
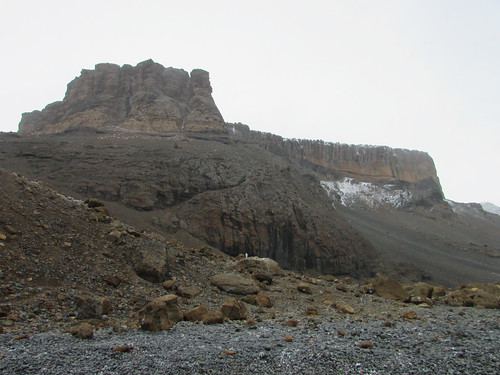
Brown Bluff
The Zodiac ride led us through numerous large pieces of ice to a wet landing on the beach. The wind was quite sharp and it was snowing, so I was well wrapped-up.
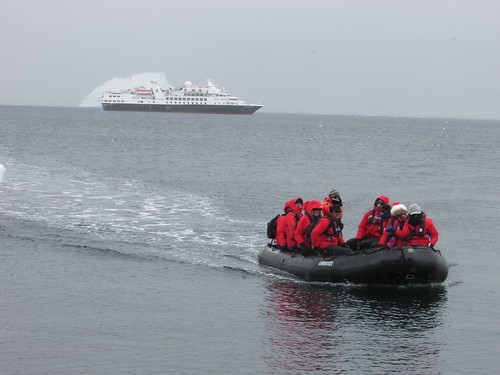
Brown Bluff: A Zodiac lands another group of guests.
Although some of the penguins were nesting around the large rocks at the foot of the cliff, most were congregated near the shore so we were asked to take a path higher up the beach. We passed colonies of both Gentoo (readily recognised by their white ‘ear muffs’) and Adelie (no head marking but with piercing eyes) commencing nesting.
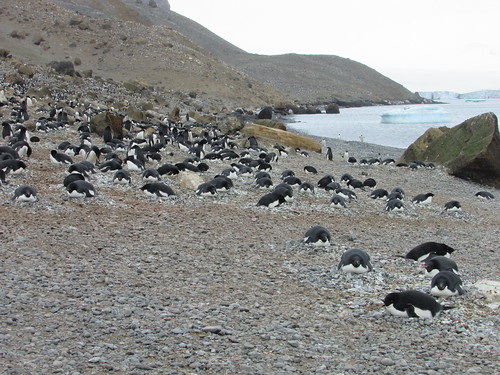
Brown Bluff: Adelie penguins nesting on the beach.
Both species on the beach were either standing, perambulating or, in a few cases, lying on their front. The Adelie has a very urgent way of walking (“I’m late, I’m late, for a very important date”) and they seem very sheep-like, walking one after another, single-file. One of my new friends suggested their behaviour was “lemming-like”.

Brown Bluff: A group of Adelie penguins march, single-file, across the shingle.
Puzzling is the way there can be a sudden change of plan, where the direction of travel is suddenly reversed. At times, a column of Adelies would end at the water’s edge and, one after another would dive in, apparently in pursuit of fish. But, on at least one occasion, we saw a version of the ‘change of plan’ behaviour where, almost as soon as the penguins had entered the water, they were hastening out again.
We had been offered a guided walk by Hans Peter to the moraine area of the adjacent glacier. I started on this walk which started by climbing a rather steep diagonal pitch up a hill from the beach over loose ‘scree’. There were good views from the top of this climb.

Brown Bluff: View from the top of the 'scree' showing the beach and numerous large pieces of ice.
Looking ahead, as the path crossed the moraine and continued up the ice at the edge of the glacier, I decided that it would be more prudent to return to the beach, particularly as the snow flakes were getting larger.
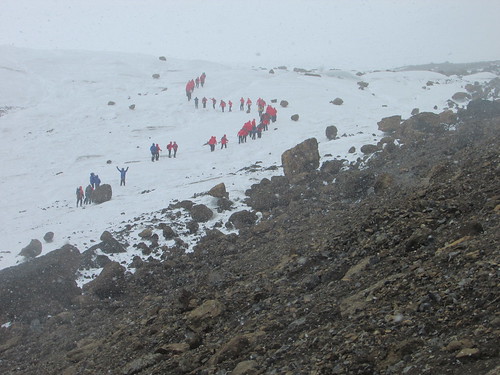
Brown Bluff: Guests crossing the moraine and continuing up the edge of the glacier.
So, having agreed my return with the Expedition Team, I very cautiously made my way back over the loose rock to the Zodiac Landing point. Back on the beach and finding partial shelter behind large rocks, I was happy to remain on the beach taking in the scene for some time before joining other returning passengers on the ‘Zodiac Shuttle’ service back to the ship. Once again, the morning’s activities had given me a good appetite for lunch. Whilst we enjoyed our meal, the ship moved along the coast to Hope Bay, where Argentina’s Esperanza Station is located.
Esperanza Station
Esperanza Station is a civilian settlement and research station built in 1953. In winter, there are 55 inhabitants, including a number of children.
At the kind invitation of the Station Commander, we made a wet Zodiac landing on a pebble slipway adjacent to a small jetty.

Esperanza Station: Guests coming ashore. The cemetery is visible in the background.
We were welcomed by the Assistant Station Commander and divided into two groups for a conducted tour around some of the station’s 43 buildings. Although some areas were roped off and reserved for the penguins on the island, the penguins, used to the presence of humans, wander unconcernedly across the whole Station.

Esperanza Station: A Gentoo penguin studies a large, abandoned satellite antenna in a 'Penguins Only' area.
We viewed the remains of the stone hut in which Andersson, Duse and Grunden were forced to over-winter in 1903 after the sinking of the 'Antarctic'. There's more information about this expedition here.

Esperanza Station: The remains of the stone hut in which Andersson, Duse and Grunden over-wintered in 1903.
Some large artefacts from the early days of the Station, such as a ‘Snowcat’, sledge and a section of railway track have been preserved outside.
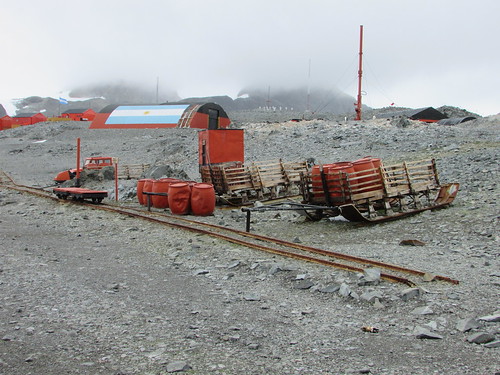
Esperanza Station: Large artefacts preserved outside.
Smaller objects were indoors in a nicely laid out museum building, including an incubator for human infants as used in the early period when there were at least eight births at the Station. Outside the museum, a series of cast brass plates listed the residents of the Station year by year.
We were invited into the school building (not in use when we visited although I saw some young children by the jetty). The well-equipped building was kept heated so is also used for other functions. I was intrigued that the main room of the school was decorated with balloons but the schoolmaster explained that it had recently been used for his wedding to the lady teacher carried out by the Station Commander. The school provides pre-school, kindergarden, primary and (using distance learning) secondary education. The distance learning, of course, requires internet and a number of satellite dishes could be seen around the station providing voice, data and television services.
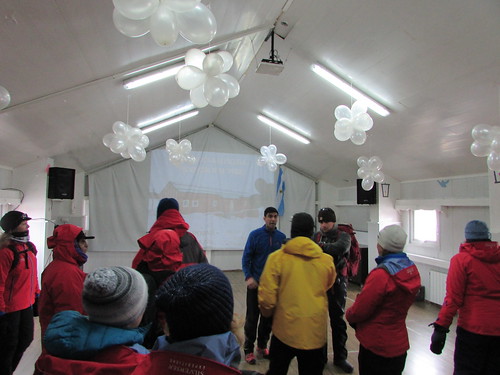
Esperanza Station: The Schoolmaster welcomes his visitors.
After we’d visited a small, nicely decorated Roman Catholic church, we were invited into the main meeting room provided with table tennis and pool tables, a seating area and bar. Trestle tables had been set along one wall with light refreshments for the visitors. Tables near the opposite wall were selling souvenirs relating to the Station.

The visitors enjoy refreshments and purchase souvenirs.
Everybody was most friendly and I was quite sad when we made our way back to the Zodiac landing point after a fascinating visit.
Tabular Icebergs
The day's excitement was not over because our course leaving Esperanza would take us through 'Iceberg Alley' where we were able to see a number of icebergs, including an impressive Tabular Iceberg, a huge flat-topped mass of drifting ice, rising at least 50 metres above the sea.
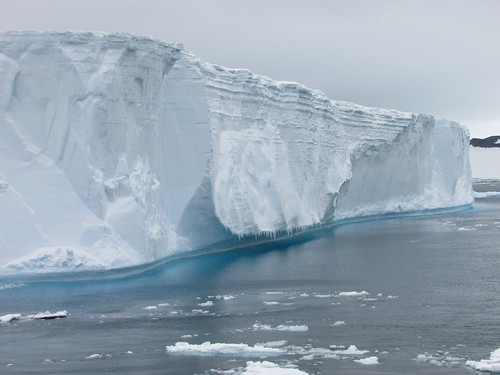
Tabular Iceberg.
For many of the guests, it was their first sighting of a Tabular Iceberg although, on an previous voyage, I'd seen a very large tabular iceberg or 'Mega Berg' which I described in the post South Georgia (day 4). The day ended with the ‘Recap and Briefing’ followed by a specially-themed buffet meal.
Related Posts
Next post describing this trip: Visiting Deception Island.
All posts describing this trip: Chilean Fjords.
Just posts on the Antarctic segment: Antarctic Peninsula.
My pictures
Where necessary, clicking on an image above will display an 'uncropped' view or, alternately, my pictures from this (and earlier) trips may be selected, viewed or downloaded, in various sizes, from the albums listed:-
Brown Bluff - 2016.
Esperanza Station, Hope Bay - 2016.
Tabular Icebergs.
All my pictures taken in Antarctica on both this visit and my earlier visit in 2008 are in the collection here.
[Links to pictures added, pictures added: 3-Feb-2017. Tabular icebergs added: 6-Feb-2017]


