On 11th and 12th April 2013, I re-visited some of the lines around Clapham Junction, London, which has the distinction of being "Britain's Busiest Railway Station" (in terms of number of trains). Trains today are principally Electric Multiple Units of various classes.
Then and Now
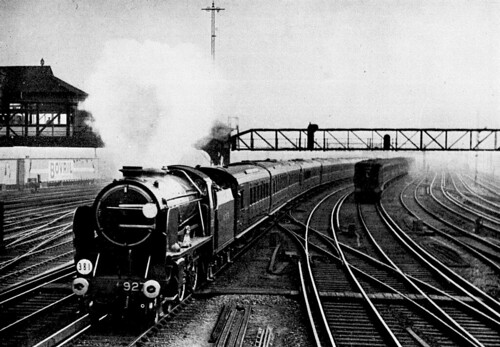 In the 'Southern' era, 'Schools' 4-4-0 No. 927 hustles the Down 'Bournemouth Limited' express through Clapham Junction, passing a Down electric train. Clapham Junction 'A' signal box, built over the tracks, is visible on the left (Photo: British Railways).
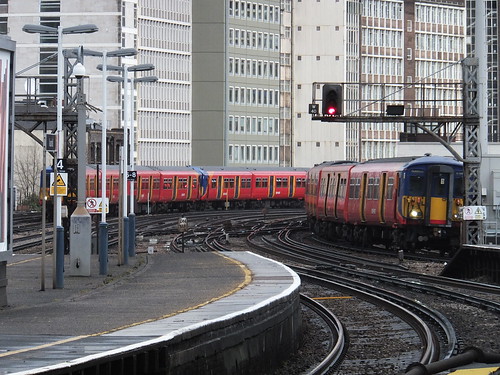
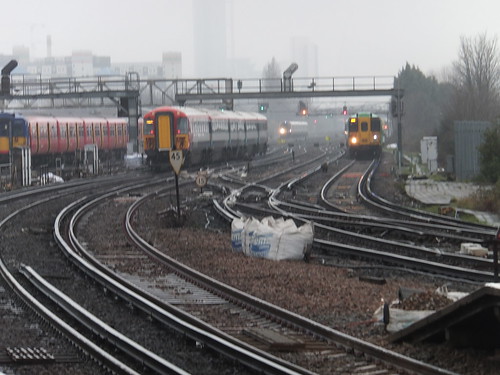 A modern view taken from (more or less) the same location, looking towards the centre of London. Two multiple units are approaching and two heading away. Clapham Junction 'A' signal box has gone and the area is controlled from Victoria Area Signalling Control (which is actually situated at Clapham Junction).
Pre-Grouping History
Clapham Junction would be impressive if only for the number of trains using the station but looking the historical reasons for the tangle of lines in the area makes the location even more interesting. The London and South Western Railway were first on the scene, with their initial line from Nine Elms to Southampton. A branch to Richmond was opened next. As traffic grew, an extension from Nine Elms to Waterloo Station was brought into use.
Both the London Brighton and South Coast Railway and the London and Chatham Railway (which later became the South Eastern and Chatham Railway) had their initial terminal stations at London Bridge, which was fairly convenient for businessmen travelling to the City. But these railways had aspirations to create a new terminus in the West End, north of the Thames. A number of new lines fulfilled these ambitions.
The London Brighton and South Coast Railway constructed a new line from East Croydon to Clapham Junction which then ran parallel to the South Western lines before crossing under them to head north to the River Thames. The South Eastern and Chatham Railway extended its lines to similarly cross under the London and South Western route to Waterloo. The new route for the two railways crossed over the Thames on Grosvenor Bridge, to reach the two side-by-side stations at Victoria.
The success of Victoria brought congestion, neccessitating the widening of Grosvenor Bridge. The South Eastern and Chatham Railway paralleled their original line to Victoria with a new route between Battersea Pier Junction and Wandsworth Road which, in addition to crossing over the South Western lines to Waterloo, crossed the original route twice! The London Brighton and South Coast Railway built its own high-level parallel routes between Battersea Pier Junction and Clapham Junction with a new branch at Battersea Park to Wandsworth Road.
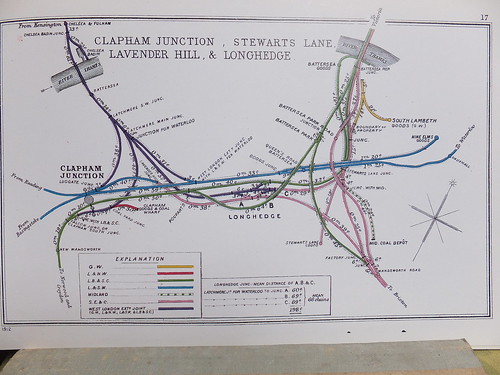
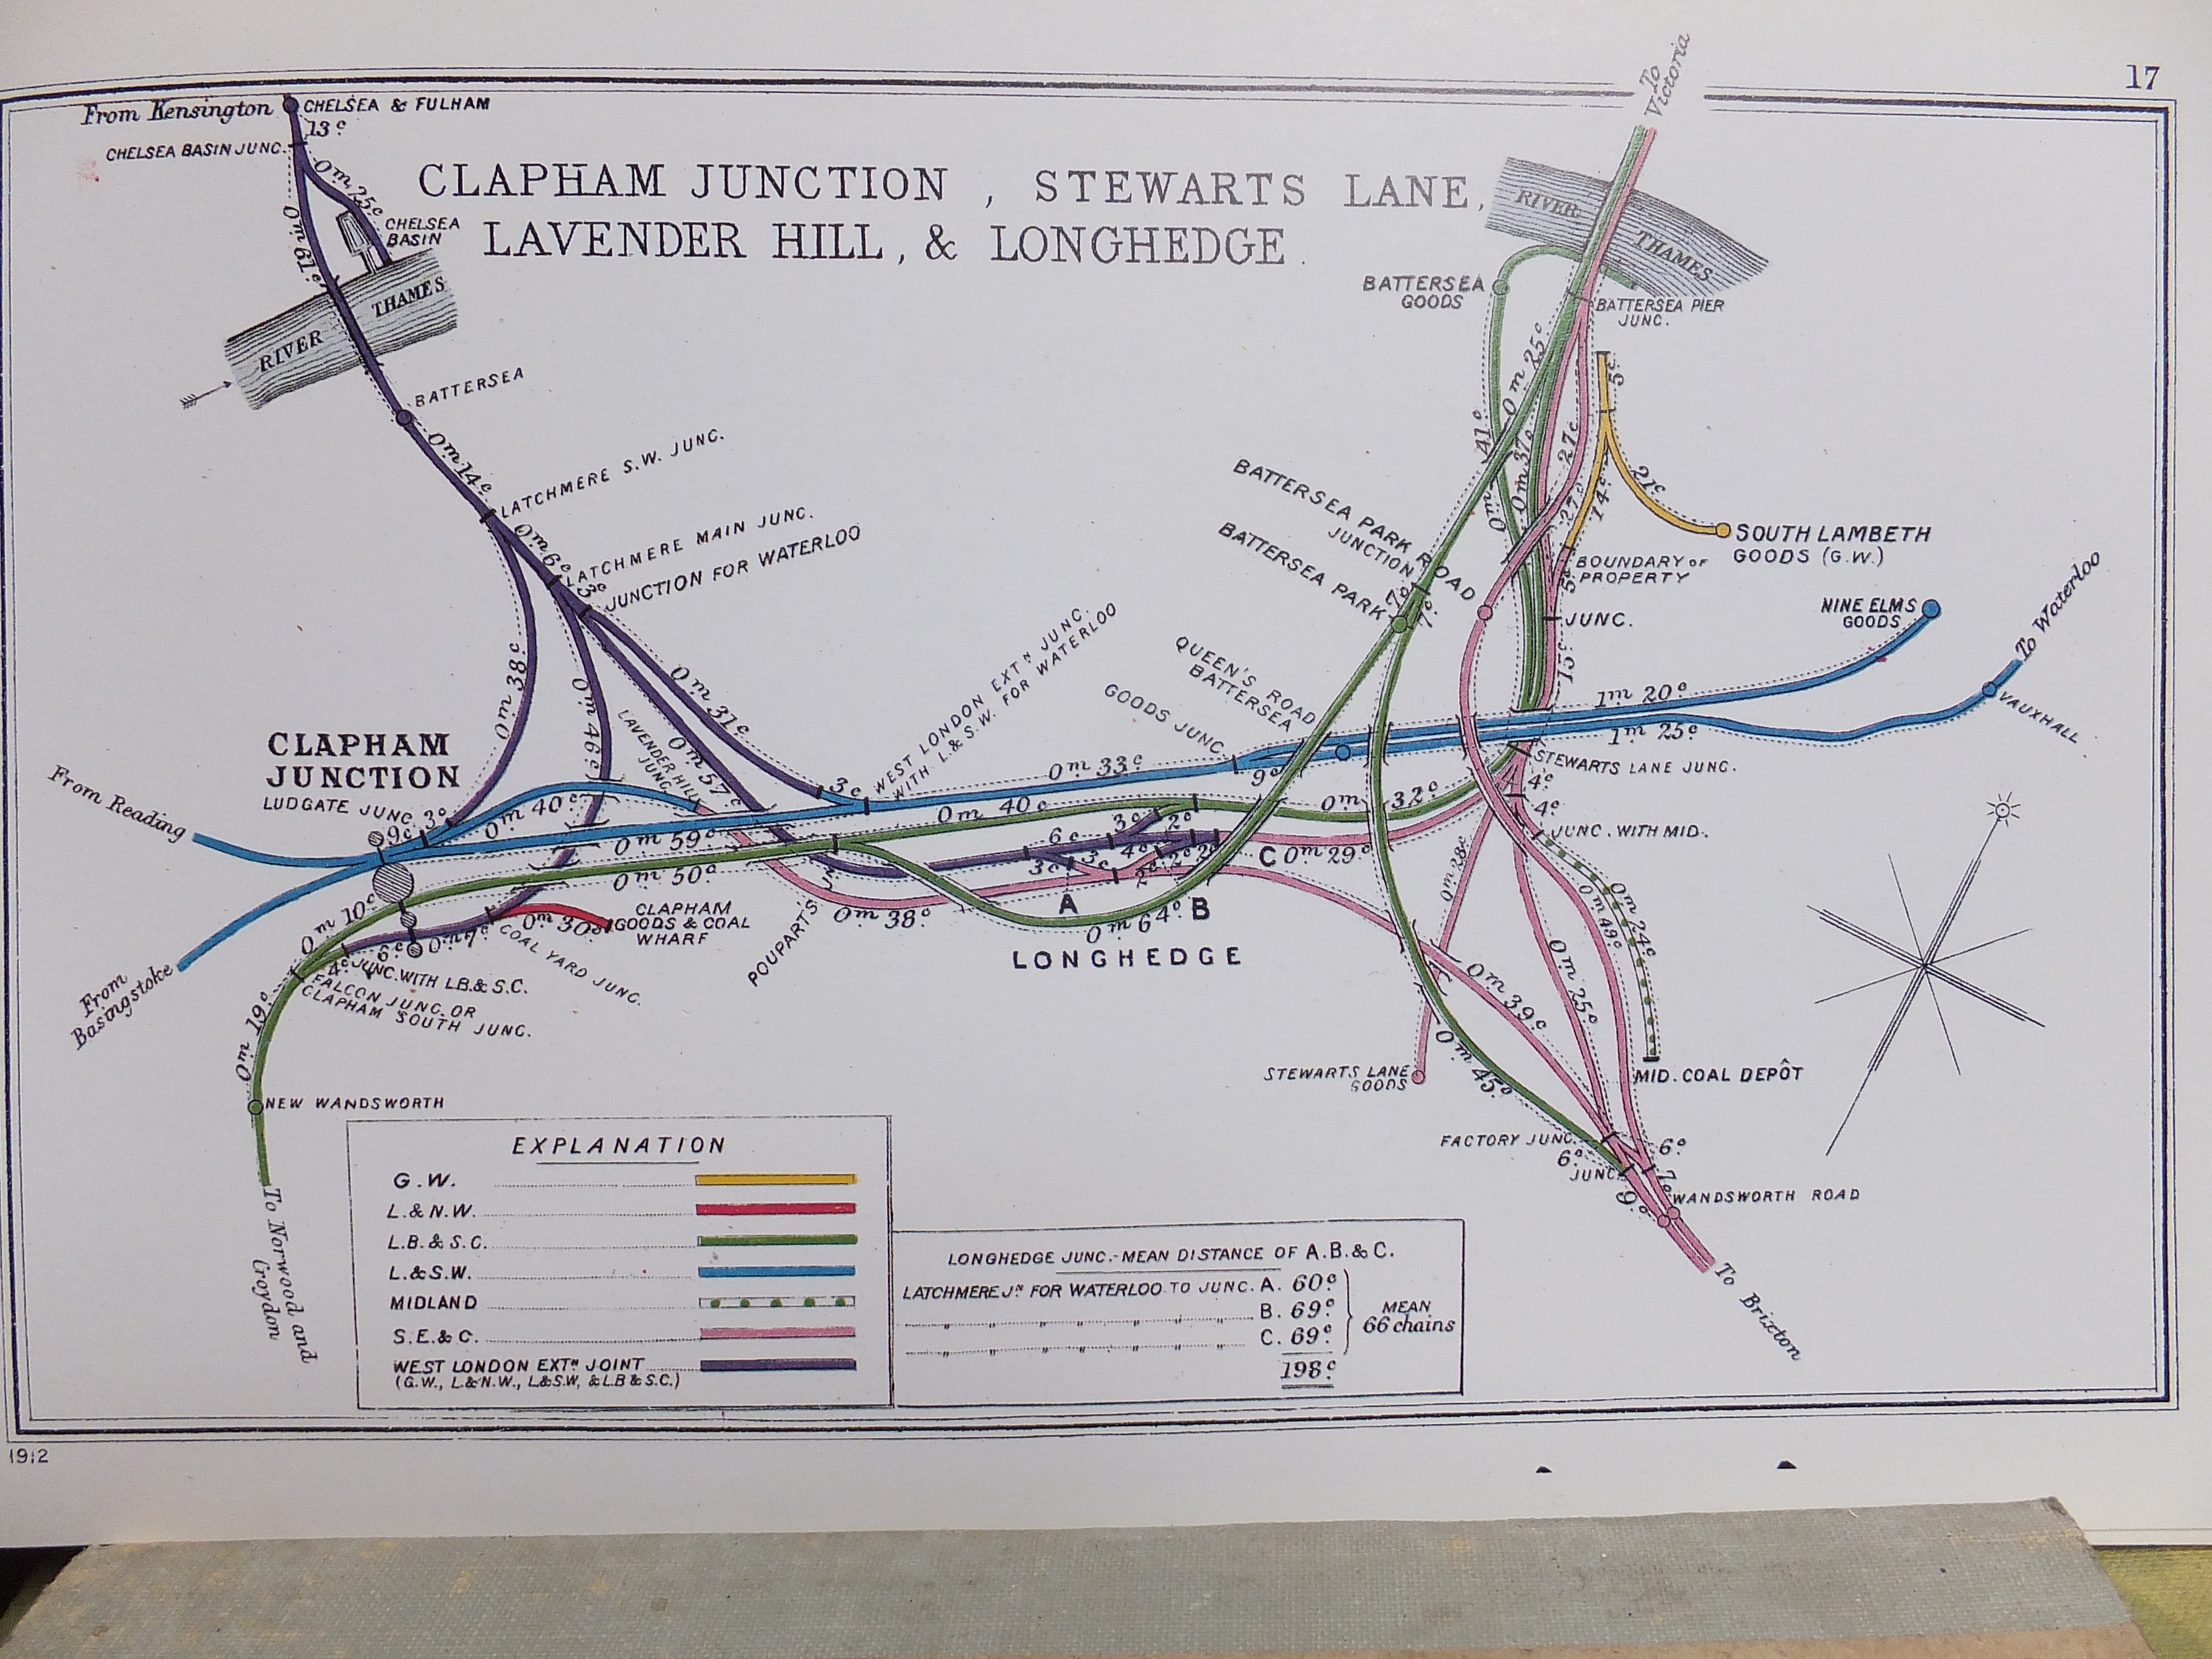
All the major stations in central London were termini, set in a 'ring' within which railways were prohibited until the advent of underground railways. This was inconvenient for those passengers whose destinations lay on the far side of London and railways desired the possibility of through working. The West London Railway connected major railways like the London and North Western Railway and the Great Western Railway with destinations on the north bank of the Thames in the west of London. The West London Extension Joint Railway (jointly owned by the London and North Western Railway, the Great Western Railway, the London and South Western Railway and the London Brighton and South Coast Railway) extended the West London Railway south across the Thames and then split into four branches which joined the London and South Western Railway (both eastbound and westbound) and the London Brighton and South Coast Railway (both eastbound and westbound). The diagram below shows the layout of the various lines at the time of the First World War.
 Click for larger image.
Details of the junctions between various railways in the vicinity of Clapham Junction. This diagram is one of a series prepared by the Railway Clearing House in 1914 which appear in the reprint 'Pre-Grouping Railway Junction Diagrams 1914', published by Ian Allen (ISBN 0 7110 1256 3).
The following railways appear on the diagram:-
Great Western Railway.Three goods yards, whilst owned by one railway, were only rail-accessible by using "Running Powers" over another railway, making the situation even more complicated:-
London & North Western Railway.
London Brighton and South Coast Railway.
London and South Western Railway.
Midland Railway.
South Eastern and Chatham Railway.
West London Extension Joint Railway.
Clapham Goods and Coal Wharf (London and North Western Railway).Years ago, I remember being puzzled, looking down on South Lambeth Goods from an electric multiple unit, seeing a 'Pannier' tank locomotive and a Great Western 'Parachute' water tank in the shadow of the huge warehouse building. I didn't know then that the Great Western had once been part owners of the Eastern Section of Victoria (which was originally dual gauge!) and that the secret behind these incursions of other railways was the West London Extension Joint Railway.
Midland Coal Depot (Midland Railway).
South Lambeth Goods (Great Western Railway).
Signalling
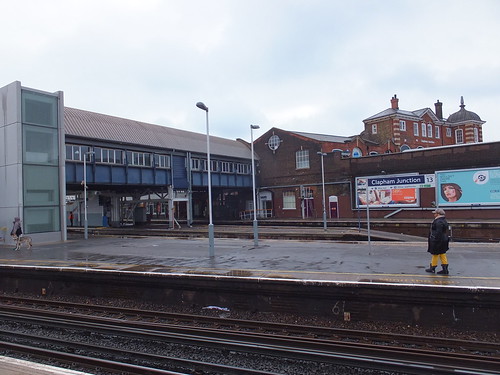
Clapham Junction is now controlled from a rather grim-looking building on the south side of the lines, just to the east of Clapham Junction Station.
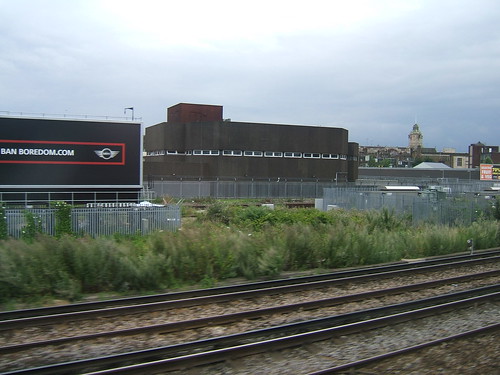 The sombre building in the background is the present Victoria Area Signalling Centre.
Victoria Area Signalling Centre replaced a number of signalboxes. I remember West London Junction, an elderly structure on a bridge spanning the London and South Western lines and Clapham Junction 'A', a similar structure nearer the station. These boxes controlled the former London and South Western Railway lines to Waterloo. I remember Clapham Junction 'B', a brick and concrete structure in the 'modernist' style beloved by the Southern Railway. The structure still overlooks the Brighton Lines to the east of the station. I'm afraid I don't remember Clapham Junction 'C', which stood at the west end of the station on the Richmond Lines. This originally had a pneumatic frame from the British Pneumatic Railway Signal Company (briefly mentioned in my post on A. F. Bound), although this was later modified for all-electric operation.
The Southern Railway had successfully used Westinghouse Style 'K' power frames (with mechanical interlocking between the miniature levers) at various locations. When the Style 'L' (with electrical interlocking between the miniature levers) was introduced, the Southern Railway adopted this design.
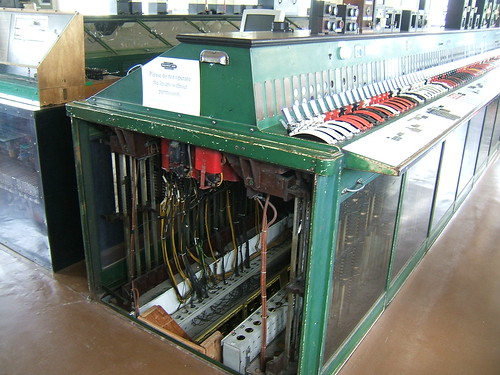
For more information about the Style 'L' frame, refer to Book Reference [8] 'The Style L Power Frame'.
In 1935, an order was placed for a 59-lever frame for West London Junction with 16 point levers, 32 signal levers and 11 spare levers. A larger 103-lever frame was ordered at the same time for Clapham Junction 'A' with 29 point levers, 66 signal levers and 8 spare levers. The 103-lever frame for Clapham Junction 'B' was not ordered until October 1949 with 25 point levers, 65 signal levers, 2 special levers and 11 spare levers.
More details of these boxes can be found on pages of the excellent 'Westinghouse Brake and Saxby Signal Co. Ltd miniature power lever frames' site, as below:-
West London Junction
Clapham Junction 'A'
Clapham Junction 'B'
Clapham Junction 'C'
An idea of the problems of working the area in the days of mechanical signalling with semaphore signals, see Book Reference [7] 'London Brighton & South Coast Railway: Signal Boxes in 1920-1922'.
Clapham Junction Station Architecture
A long, wide footbridge spans the station. The width of the bridge has allowed a long string of retail outlets (mainly food) to be set up. The earliest section of the bridge covering the original platforms on the London and South Western Railway side has a bit of 'ornamentation' but the additional footbridges covering the newer platform are of plainer design.
 Clapham Junction: View from west end of the 'South Western' side looking east, showing the largely un-modernised covered footbridge with a new lift-tower on the left.
The 'Brighton' side footbridge is of plainer design and this connects with the main station building which offers vehicle access from St. John's Hill.
 Clapham Junction: View from west end looking south, showing the less-ornate newer covered footbridge on the 'Brighton' side, with a new lift-tower. The main station building is in the background.
On the 'Brighton' side new stairs to access the platforms from the footbridge incorporating modernised accommodation have recently been provided. These are in the 'all steel and glass' style that modern architects seem to favour and visually jar with the rest of the station.
 Modernised platform access on the 'Brighton' side, with lots of glass.
There is also pedestrian access further along St. John's Hill which leads, via an arcade of shops, to a subway spanning the station.
Passenger Information
There are now modern passenger information displays everywhere which are helpful (if a bit overwhelming). There appear to be two automated public address systems. As far as I could work out, a female voice announces trains on the 'Brighton' side and a male voice deals with 'South Western' trains. In many parts of the station, both systems are audible, often talking at once. I was reminded of the opening scene from the film 'Airplane' (where male and female voices describe the parking arrangements at the airport before descending into an argument).
London Overground
Clapham Junction is now a station on the London Overground network. Platforms 1 and 2 are now used by Class 378 electric multiple units which provide a regular service via the West London Extension line to Willesden Junction and beyond.
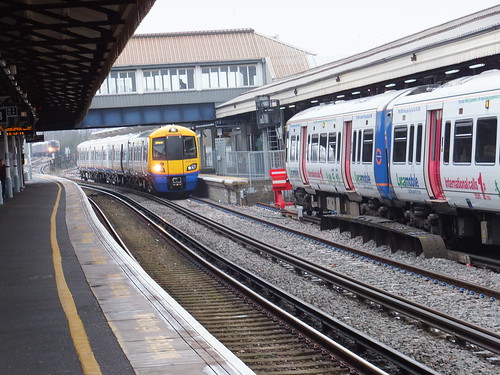 Clapham Junction: View from east end of platform 3 looking west with Overground train in platform 2 and Overground train (covered in 'official graffiti') in platform 1.
Environs of Clapham Junction
In between Clapham Junction and Waterloo, there are two stations - Queenstown Road and Vauxhall. Queenstown Road (originally called Queen's Road) is a typical, fairly modest L.S.W.R. affair.

Queenstown Road station showing the relatively undamaged road frontage. The original name (Queen's Road Station) and owner (L.S.W.R.) still appears.
On my recent brief visit to Vauxhall, its 8 platforms received a bewildering succession of stopping and through trains.
 Vauxhall Station, looking towards Waterloo.
 Click for larger image
Aerial view of Vauxhall. Vauxhall Bridge over the Thames is in the top left corner, with Vauxhall station nearby. The lines to Waterloo Station are top right and the lines to Clapham Junction left middle. The Oval (which we are now supposed to call 'The Brit Insurance Oval), is bottom right.
In between Clapham Junction and Victoria, there is one station - Battersea Park.
 Battersea Park station, seen from a train on the Down Brighton Fast (platform 5).
Book References
[1] 'The London & South Western Railway' O.S. Nock, published by Ian Allen.
[2] 'Locomotives of the London and South Western Railway Part 1' by D.L. Bradley, published 1965 by RCTS.
[3] 'The South Western Railway' by Hamilton Ellis, published 1956 by George Allen and Unwin.
[4] 'History of the Southern Railway' by C. F. Dendy Marshall, revised by R. W. Kidner reprinted 1982 by Ian Allen (ISBN 0 7110 0059 X).
[5] 'Great Locomotives of the Southern Railway' by O. S. Nock, Guild Publishing, 1987 edition by Book Club Associates.
[6] 'Southern Steam' by O. S. Nock, published by David & Charles (ISBN 0 7153 5235 0).
[7] 'London Brighton & South Coast Railway: Signal Boxes in 1920-1922' from the J.M.Wagstaff Collection Part 1 - London to Brighton', published by the Signalling Record Society (ISBN No. 1 873228 08 2).
[8] 'The Style L Power Frame' written and published by J. D. Francis 1989 (ISBN 0 9514636 0 8).
Maps
'Pre-Grouping Railway Junction Diagrams 1914', published by Ian Allen (ISBN 0 7110 1256 3).
Details of the modern railways around Clapham Junction are shown in one of the 'Quail Track Diagrams' books:-
'Railway Track Diagrams Book 5: Southern and TfL' Third Edition, published by TRACKmaps (ISBN 978-0-9549866-4-3).
External Links
London and South Western Railway (Wikipedia).
South Eastern and Chatham Railway (Wikipedia).
London, Brighton and South Coast Railway (Wikipedia).
Related articles in this Blog
Waterloo Station, London
Waterloo Station, London (Part 2).
Victoria Station, London.
The West London Line.
My Pictures
Clapham Junction.
London: former 'Southern' lines (includes Queenstown Road and Vauxhall).
London's Railways.
[Links to Waterloo pt 2 and WLE added 25-Mar-2020]
