I've been a reasonably frequent traveller between East Croydon and London on various visits. Normally, the service from East Croydon to Victoria with a single stop at Clapham Junction is the most convenient, using the line originally built by the London Brighton and South Coast Railway (LBSCR). But Victoria was not the first LBSCR terminus in London - that was Tooley Street, later called London Bridge. So I sometimes use the fast service from East Croydon to London Bridge along the 4-track route through Norwood Junction.
Travelling up to London from Croydon on 28th March for a meeting near London Bridge, I arrived at East Croydon in time to watch a fast train to London Bridge departing. I decided I'd still plenty of time to get to my meeting so when the next train to London Bridge, a stopping train via North Dulwich, arrived I decided to board it. The map below shows the normal route to London Bridge and the route my stopping train took. The development of the railway network in south London is quite hard to follow. To see the whole of this pre-grouping map and extracts of some areas, follow the links from my post Pre-grouping Railway Map.

Detail from pre-grouping railway map showing LBSCR main line via Norwood Junction (thin green) and route via North Dulwich (thick green). The original map was published by W & A K Johnston under the title 'Railway Map of England and Wales 11th Edition'.
I'd only previously travelled on parts of the route the train would take. The whole route belonged to the London, Brighton and South Coast Railway in pre-grouping days, but the South Eastern and Chatham Railway was 'implicated' around Tulse Hill, Peckham Rye and, of course, on the last 1.5 miles to London Bridge.
We left East Croydon on the Slow line and at Windmill Bridge Junction took the flyover which took us over the Brighton Fast lines to our first stop at Selhurst. From here the route is 4-track, paired by use, to Victoria. Travelling on the Up Slow my train made station stops at Selhurst, Thornton Heath and Norbury.

Norbury: View from train on Up Slow showing Banner Repeater TVC672 on platform (South Croydon to Wolverhampton by rail)
After the Streatham Common stop, my train diverged to the right from the Victoria Lines onto the Streatham Spur, then joining the line from Mitcham Junction.

Streatham Common Spur: View from train heading for Streatham showing Victoria lines and, in background, bridge carrying Mitcham Line over the Victoria Lines (South Croydon to Wolverhampton by rail)
We stopped at Streatham, passed through Streatham Tunnel and Leigham Tunnel and then, approaching Tulse Hill, were joined on our left by the line from Streatham Common and on our right by the line from Wandsworth Common before stopping at platform 3 of the four-platform Tulse Hill station.
Tulse Hill: View from train in platform 3 showing signals VC760 and VC762. Note expansion joint in running rail and traction current bonding (South Croydon to Wolverhampton by rail)
Leaving Tulse Hill, the route to Herne Hill (used by some 'Thameslink' services) diverged to our left before we entered the 331 yard long Knight's Hill Tunnel, then making stops at North Dulwich and East Dulwich.

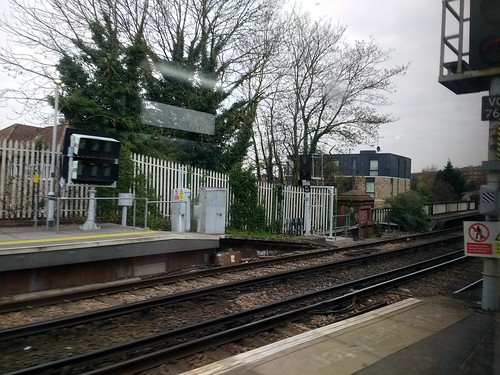
North Dulwich: View from train showing platform 1 (South Croydon to Wolverhampton by rail)
At Peckham Rye Junction, we merged with the line from Victoria via Clapham High Street and continued over the arches to platform 2 at Peckham Rye on the South London Line.

Peckham Rye: View from train approaching station 'over the arches' showing 4-aspect automatic signal VS443 (South Croydon to Wolverhampton by rail)

Peckham Rye: View of platforms 3 and 4 and rear of signal VS444 (South Croydon to Wolverhampton by rail)
After our stop at Queens Road Peckham, Old Kent Road Junction allows London Overground services to diverge right and join the East London Line at Silwood Junction but my train continued to a brief stop at South Bermondsey before joining the remarkable expanse of lines for the final mile and a half to London Bridge. Still following the original alignment of the London and Greenwich Railway across a series of viaducts but now expanded in width to carry no less than eleven running lines, the area received major modernisation during the Thameslink Project which also completely rebuilt London Bridge station.
Approaching London Bridge on Up showing signal TL4204 on 11 Reversible at Brunswick Court Junction (South Croydon to Wolverhampton by rail)

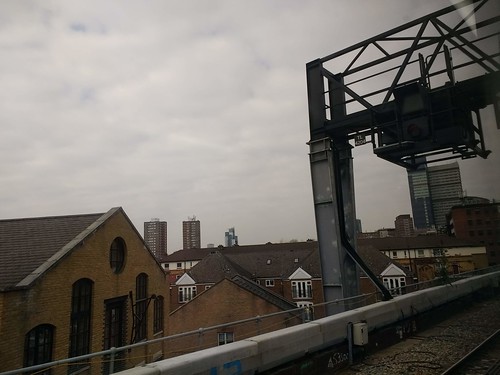
Approaching London Bridge on Up showing former Area Signalling Centre (South Croydon to Wolverhampton by rail)
There's a brief mention of the pioneer London and Greenwich Railway here and the later period on the L.B.S.C.R. at London Bridge is outlined in Origins of the Southern Railway: Part 2: L.B.S.C.R..

London Bridge Station: View from Platform 12 looking South-East after my arrival. Route set for departure from platform 13 to track 9.

London Bridge Station: Concourse near entrance to Platform 12 showing departure display.
After my London meeting, I returned to Wolverhampton from London Euston. There are a number of pictures in the collection South Croydon to Wolverhampton by rail taken on that journey.
Related articles on this web site
Notes on Some Early Railways in England.
Origins of the Southern Railway: Part 2: L.B.S.C.R.
My pictures
Where necessary, clicking on an image above will display an 'uncropped' view or, alternately, pictures may be selected, viewed or downloaded, in various sizes, from the albums below. Apologies for the poor quality of pictures taken from trains.
South Croydon to Wolverhampton by rail
East Croydon Area Rail.
South London Railways.
London Bridge Station.
