This is the first of a group of posts describing an 'Expedition Cruise' with Noble Caledonia in 2020 under the title 'Across the Tropic of Capricorn'. The ship 'Caledonian Sky' embarked her passengers in Auckland, New Zealand on Tuesday, 11th February 2020 so the first logistical problem was to travel to Auckland.
Events of 8th, 9th, 10th February 2020
Although travel from Heathrow with an overnight in Singapore was offered by Noble Caledonia, I decided to make my own arrangements through my agents Wexas, so I ended up leaving Birmingham Airport at 20:50 on Saturday 8th February 2020 from my local airport at Birmingham, UK, on Emirates flight EK038 to Dubai, operated by a huge Airbus A380. I was able to take a 'screenshot' to show my aircraft on the ground, viewed from the camera mounted on top of the aircrat tail.
Live view of my aircraft at Birmingham as on TV screen on 8-Feb-2020 in connection with 'Tropic of Capricorn' trip.
This flight was due in Dubai at 07:50 (local time) on Sunday and, after a transit stop of two and a quarter hours, I was then booked on Emirates EK448 to Auckland, due in Auckland at 11:05 (local time) on Monday. This is a long journey by any standards and, flying eastwards, I 'lost' eleven hours, which I would recover during my journey home. To call it a journey of endurance is rather ungracious compared with the exploits of the original explorers by sea like Cook, who suffered months of hardship to reach what is now New Zealand. But it is nonetheless rather taxing for people of my age so Business Class with Emirates is about the best way of lessening the 'ordeal'.
I was very well looked after by the airline and arrived in sunny Auckland full of optimism for the ocean trip ahead. An Emirates car took me to the Crowne Plaza hotel in Albert Street, right in downtown, where I was to join-up with travellers who had travelled from London with a stopover in Singapore.
Office block and Crowne Plaza Hotel, Albert Street, Auckland (Tropic of Capricorn).
Although I was quite tired from the flights, with a few hours to spare before the Welcome Dinner in the evening, I decided to take a walk in the city.
My first visit to Auckland was during my 'Round the World 1' trip at the end of 2001 - I was in Auckland for the New Year. There's a very brief post for that trip here. Visit 2 was only a quick trip into the city by 'bus whilst changing 'planes on 'Round the World 2' (I arrived from Hawaii and then took a domestic flight to Christchurch, on New Zealand's South Island). I visited Auckland again in February 2007 as part of 'Round the World 4' (Auckland is discussed in the post here) with pictures here.
So, I was interested to see what changes the city had experienced since my last visit. I made my way to the ferry terminal where significant development was taking place and some of the ferries had been relocated during this work.
New construction work near the Ferry Building, Auckland, 2020 (Tropic of Capricorn).
A cruise ship terminal, apparently a rebuilt former transit shed at a now-unused wharf in the commercial docks was still called 'Shed 10'.
The commercial traffic previously handled at this wharf is now dealt with at the berths to the east and at Fergusson Wharf which is equipped with huge container cranes. The ferry routes are always an attraction but, with limited time, I decided not to make a trip by ferry but to see what changes had occurred at the city's suburban station, Britomart.
The original Railway station closed many years ago and a new tunnelled line was built to a terminus for commuter trains in the heart of the city on Queen Street called Britomart. The commuter railway system is now electrified and the City Rail Link project (project web site is working on a tunnelled link to improve connectivity, currently causing chaos at street level with the associated construction work closing many streets.
Queen Street, Auckland in 2020 (Tropic of Capricorn).
Regular readers may not be surprised to read that I decided that a short journey from Britomart to the next but one station of Newmarket and back was essential. Because of what was described as 'a signal issue' the service was rather dislocated with trains to the south having to reverse at Newmarket, causing the passengers some confusion.
Britomart Station. Note the line of automatic ticket gates (Auckland's Commuter Railways in 2020).
After an interesting trip, I walked back to my hotel (uphill as I was moving away from the waterfront), arriving thoroughly shattered and, at last, able to shower after my marathon trip from England.
Related posts on this website
Clicking on the 'Next report' link (where shown) will display the post describing the next events. In this way, you may read about the trip in sequence.
Next report
Alternately, clicking on the 'All my Tropic of Capricorn reports' link displays all the posts on this trip in reverse date-of-posting order.
All my Tropic of Capricorn reports
My pictures
This blog post was first published on the ship via a satellite link with limited capacity so picture links were added later.
Until 2018, Yangon Central Station in Myanmar had been controlled by an elderly Westinghouse 'Style L' miniature lever frame. Back in 2014, through the kind offices of my friend Doctor Hla Tun, I visited the installation and that visit is described here.
In 2014, ambitious plans were emerging for the modernisation of the main line from Yangon to Mandalay and the important Circle Line around Yangon in a major scheme with the Japanese Government through the Japan International Cooperation Agency.
During my visit to Myanmar in October 2017, signs of the modernisation work were apparent. Some point installations had been equipped with new Kyosan a.c. electric point machines but the earlier colour light signals and
the Westinghouse miniature lever frame remained in use. Examples of the work in progress are shown in the pictures below.
Reinstated surface after installing new cables and signal post on platform 9 at Yangon (Yangon - Mahlwagon c/w)
New track circuit installation at Yangon Central Station (Yangon - Mahlwagon c/w)
New Kyosan point machine at Yangon. Note elevated mounting (Mahlwagon - Yangon Central Station c/w)
New Location Case Y10C (Yangon Central Station Movements 1-Oct-2017)
New Kyosan a.c. point machine at Yangon. Note cable termination box right foreground, still wrapped in green plastic (Yangon Central Station Movements 1-Oct-2017)
In May 2018, following a visit to Bago by car, I returned by train to Yangon. Near my destination, I could see the progress of the modernisation work. More point installations had been equipped with Kyosan a.c. electric point machines and the new signal posts had been fitted with colour light signal heads, although not yet brought into use, as shown in the pictures below.
Bago - Yangon by train 9th May 2018: Approaching Yangon Central on Down Main showing L: Replacement signal P7, not yet commissioned (3-aspect colour light with 'box' of 3x3 lights above), R: Existing signal P7 (Siemens).
Bago - Yangon by train 9th May 2018: Approaching Yangon Central on Down Main showing Down Local signals L: R141/R139, R: Replacement R141/R139 colour light with both theatre-type and 'box' of 3x3 lights above, subsidiary aspect below, not yet commissioned.
Bago - Yangon by train 9th May 2018: Approaching Yangon Central on Down Main showing L: Existing signal R140, R: Replacement signal R140 not yet commissioned (colour light with 'box' of 3x3 lights above)
Since all the new signal posts seemed to be near the old signals and carried the same numbers, it appeared that most of the modernisation work involved a renewal of equipment, rather than a fundamental re-think.
Before my next trip to Myanmar in May 2019, I had learnt that the replacement signalling equipment at Yangon Central Station had been commissioned, controlled from a new 'Operation Control Center' (yes, 'American' spelling) in another part of the station buildings. Doctor Hla Tun arranged an official visit on the day I arrived in Yangon, Sunday 5th May 2019. We first met the Yangon Station Master in his offices on platform 1, then one of his staff conducted us to the road approach side of the station buildings and an existing entrance to offices on the upper floors. The white-painted stucco of the post-war station building had become rather stained as is common in the humid climate but the walls in the immediate area of the Operation Control Center entrance had been nicely repainted.
The entrance to the Operation Control Center in Yangon (Myanma Railways 2019)
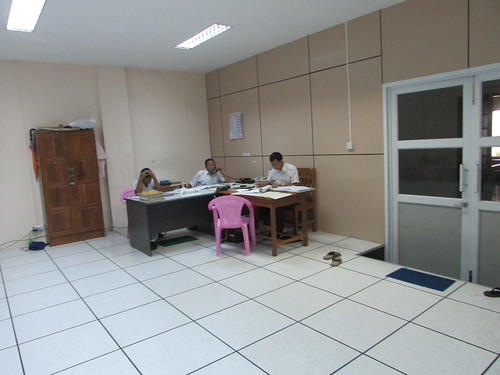
We climbed the steep stairs to the first floor and it was clear that part of the area had been recently partitioned off to form the Operation Control Center. Access was through double-doors with glazed panels and a security lock. Immediately inside the doors there was a deep step up onto computer sub-flooring. The Operation Control Center was windowless, artificially-lit and air-conditioned. In one corner, three men were working at a group of desks.
Operation Control Center, Yangon: Administrative section. Double access doors on right. Note deep step up to computer flooring (Myanma Railways 2019)
The actual control was being carried out in an adjacent corner of the room by two men seated at a row of desks with two computer monitors, each provided with a computer 'mouse', together with numerous telephones and two V.H.F. radio-telephones.
Yangon Operation Control Center (Myanma Railways 2019)
The signalman actually controlling trains that day on the the large computer monitor remembered my visit to the 'old' installation in 2014. A second signalman, with a smaller 'mimic' monitor, managed the frequent radio traffic. Studying the large colour computer monitor confirmed that the whole of Yangon Central Station had been transferred to the new control system, retaining the original signal numbers (prefixed 'R', presumably from a time when Yangon was known as 'Rangoon'. However, to the east, the vital junctions at Pazundaung, formerly a separate scheme provided by Siemens, were now controlled from Yangon with signals retaining their original numbers (prefixed 'P').
Operation Control Center, Yangon: Main signalling display at 09:53 (Myanma Railways 2019)
Yangon is a busy station and the position had changed after 8 minutes when I took the picture below.
Computer Monitor Display at 10:01, Operation Control Center, Yangon (Myanma Railways 2019) Click for larger view.
Studying the above picture 'Computer Monitor Display at 10:01' allows a fair understanding of the design:-
Tracks: Tracks are represented on the screen by a thick line: white if the track is unoccupied, red if a train is present, yellow if a route has been set. Perpendicular lines indicate the ends of the track circuit and the track circuit number appears in the form 'R[number]T' (Yangon area), 'P[number]T' (Pazundaung area) or 'A[number]T' (Automatic area), plus some 'funnies' like 'ART', 'RT', suffix 'AT' (for approach track) and 'R65T' divided into two sections. In many cases, the same references as the earlier Westinghouse system are retained.
Points(turnouts): The current position of points is indicated by a continuous thick track line. A break in the track line shows the route is not set. A set of three inclined thin lines indicates the 'NORMAL' position and the adjacent reference in the form '108' is the reference number. For crossover points, a suffix letter 'A' or 'B' identifies the two ends. The same references as the earlier system are retained.
Running (main) Signals: Graphical symbols represent different signal types, including 2-aspect, 3-aspect and searchlight (R65,R66,R73,R74 shown as 1-aspect) running signals. Where a subsidiary aspect is provided, this is represented by adding to the symbol an empty 'right-angled triangle with one curved side'. When the subsidiary is 'off', a diagonal line is added to the symbol. If the signal leads to more than one route, a route indicator is normally provided, represented by adding a separate square to the symbol. The running signal number appears in the form 'R[number]' (Yangon area), 'P[number]' (Pazundaung area) or 'A[number]' (Automatic area). The same references as the earlier system are retained.
Ground (shunting) Signals: Represented by a 'right-angled triangle with one curved side' symbol, with an additional horizontal line which is replaced by a diagonal line when the signal is 'off'. The ground signal number appears in the form 'R[number]' (Yangon area). The same references as the earlier system are retained.
Limit of Shunt: This symbol, representing a physical Limit of Shunt board, is a square enclosing a disc and appears, unnumbered and inactive, on the Up Main and Up Local, in the rear of signals P3 and P5. Because of the long-distance trains starting and finishing at Yangon, a station pilot locomotive is kept quite busy transferring coaching stock between the carriage sidings and various platforms. I presume this type of shunting movement, authorised by a subsidiary signal, must not continue beyond the Limit of Shunt board.
'NX' pushbuttons: In traditional, mechanical lever frames, each lever is generally associated with a single set of points or a single signal. Earlier power frames retained this approach, but later approaches adopted 'route-setting' where a simple action by the signalman automatically set the whole route from one signal to the next (if safe to do so) before clearing the signal. One method introduced by Westinghouse was 'One Control Switch' (OCS) where each signal was associated with a panel of turn switches, with one switch for each route beyond the signal (there's a very brief description of 'OCS' in the section 'Sandbach' of the post here). An alternative development, called 'NX' ('eNtrance-eXit') placed push buttons or turn switches on a track diagram of the controlled area. To set a route from one signal to the next, the signalman simply activated the switch at the first signal (the entrance) and a similar switch at the desired next signal (the exit). Because of the operational simplicity, 'NX' became widespread. The picture below shows the arrangement of a typical conventional 'NX' panel at Insein signal cabin.
Insein Signal Cabin showing 'NX' control Panel
In modern systems controlled from computer monitors, there's no physical control panel required. The track layout, with 'virtual switches', is digitally generated on the monitor screen, as shown in the picture 'Computer Monitor Display at 10:01' above. The 'virtual switches' are the white circles with an alphanumeric reference centred on the thick lines representing tracks. I assume the desired button is operated by 'point and click' with the computer 'mouse'. Normally, a button would serve as the exit button for the route in the rear and the entrance button for the route in advance but there are a few routes without an obvious entrance button so I'm not certain.
Crank Handles, Yangon: Top left of the monitor are three crank handle releases. During failures or maintenance motor points can be operated locally by inserting a large special key, called a 'Crank Handle' and 'cranking' the mechanism by hand. The key is normally released electrically from the supervising signalling control when required and, until the key is returned, the signalling control will be unable to set routes remotely. At a station like Yangon, it's possible to divide the system into 'East' and 'West', so that releasing a crank handle for one end of the station does not prevent normal route setting from continuing at the other end. Under normal operation, the crank handle 'IN' virtual indication is displayed. When remote release of the key is authorised, the virtual indication crank handle 'PERMIT' is displayed. Once the key is removed crank handle 'OUT' is shown until the crank handle has been replaced. I'm afraid I didn't discover the scope of the 'Yangon Maintenance' crank handle.
Crank Handles, Pazundaung: Top right of the monitor are two more crank handle releases. I presume the 'Pazundaung' release allows points in the area to be locally operated by cranking but I'm not sure about the 'Pazundaung Maintenance' release. Since the screen display still shows a signal box symbol at Pazundaung (a rectangle enclosing a line representing a traditional lever frame with a 'dot' representing the signalman), it's possible there's some form of local control panel at Pazundaung for use under abnormal conditions.
KYI APPROACH ACK: Bottom left of the monitor is a 'virtual switch and lamp' which also generates an audible alarm when a train approaches on the Automatic Section from Khyee Myin Daing direction under Track Circuit Block rules.
KCR & KM APPROACH ACK: Bottom right of the monitor are two 'virtual switch and lamp' activated when a train approaches on the Automatic Section from Mahlwagon direction under Track Circuit Block rules on either the Circle Line or the Main Line from Mandalay.
Communication area: Across the bottom of the screen are reserved areas for messages issued by the system, plus a group of 'soft keys'.
Interpreting the 'Computer Monitor Display' picture above
From left to right and top to bottom:-
1. A westbound train from platform 6 West is occupying track circuit R1T, placing automatic signal A1 at 'danger'.
2. Track circuit R23T (platform 1) is occupied by a train.
3. Track circuit R24T (platform 2) is occupied by a train.
4. Track circuit R40T (track 9) is occupied by a train.
5. Track circuit R42T (track 10) is occupied by a train.
6. Track circuit R54T (track 8) is occupied by a train but adjacent track circuits R60T and R61T are indicating 'route set', suggesting a shunting move in progress.
7. Points 95A, 95B and 96 are shown 'REVERSE' in yellow, suggesting that they've been 'called' to that position.
8. Track circuit R68T2 (down local) is occupied by a train.
9. Track circuit P2AT (down goods Pazundaung) is occupied by a train.
We watched movements for a while as I took more pictures showing the whole computer monitor or an area of the screen. Some of the pictures aren't very good I'm afraid but you can find them here. I was only able to look at the new equipment room through the glazed panel of the door to the room so I couldn't learn much.
New Signalling Equipment Room at Yangon's Railway Operation Control Center (MyanmaRailways 2019)
At the invitation of the Station Master's staff, the Doctor and I had a closer look at some of the 'outside equipment' (signals, point machines, location equipment cabinets) to complete our fascinating visit.
New outside signalling equipment, Yangon Central Station (Myanma Railways 2019)
3-aspect colour light R87 with subsidiary aspect R103 at Yangon Central Station (MyanmaRailways 2019)
Two Kyosan a.c. electric point machines type NS-CM at Yangon Central Station, with a third machine and position light shunting signal in background (MyanmaRailways 2019)
Location Case Y12C at Yangon Central Station, described as a 'Signalling Box' and made by Daido Signal Co, Ltd. Appears to mount the Track Feeds and Track Relays for local track circuits (MyanmaRailways 2019)
In January, 2019 the Battlefield Line inaugurated a 'Winter Steam Gala', in the form of a 'Last Train Monmouth-Chepstow Re-enactment', using two 'Pannier' tanks, as described here. The success of that event encouraged the railway to organise another Gala in January 2020, this time using two 'Light Prairies' plus 'Wightwick Hall' and the resident Diesel Multiple Unit.
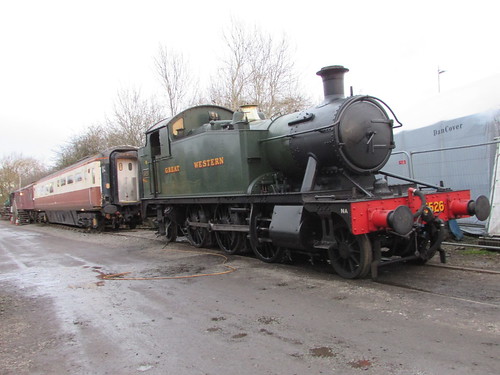
At the end of 2019, the two locomotives which had handled the Battlefield Line 'Santa Specials' ('Modified Hall' 6989 and 'Light Prairie' 5542) were already available. But discovering that 'Light Prairie' 5526 was being transported by road from the Chinnor and Princes Risborough Railway back to the South Devon Railway, it was agreed that 5526 would divert en route to Shackerstone to allow it to join what was initially called the 'Winter Warmer Gala' but, later, the 'Cold Turkey Gala'.
The timetable for the event was fairly similar to the intensive timetable used for the Shackerstone Railway Society 50th Anniversary Steam Gala which had been held in October 2019. During the Anniversary Steam Gala, Staff and Ticket working had been used to allow a Steam/DMU shuttle from Shackerstone to Market Bosworth to be 'interleaved' with regular service trains between Shackerstone and Shenton, using the 'Turnback Siding' at Market Bosworth to 'recess' the Steam/DMU service. There's a description of Staff and Ticket working in my post on the 2018 Steam Gala here. In 2018, the 'Turnback Siding' was still being constructed and so, on arrival at Market Bosworth, the Shuttle (on that occasion a steam locomotive coupled to a Great Western 'Auto' Trailer) had to immediately return to Shackerstone. For both the Anniversary Steam Gala and the 'Cold Turkey Gala', the Shuttle was formed by a 'Light Prairie' coupled to a 2-car DMU in a 'top and tail' arrangement. This rather unusual method of working is described in the post Operation of Steam/Diesel Multiple Unit Services at the Battlefield Line.
Events of Saturday 4th January 2020
I was booked to drive 'Light Prairie' 5526 on Saturday, which was scheduled to be the last of the three steam locomotives to enter traffic that day but I nevertheless arrived nice and early when it was still dark. As I sometimes do, I walked up Station Road to reach the station, rather than use the public access road to the car park. I signed-on in the Staff Room at the station, noting that the fireman Ritchie M. had signed on a few minutes earlier and I walked confidently to the Loco Shed. I greeted Dave H. and Jamie W. who were preparing 6989 (first engine due in traffic), Adrian A. and Paul on 5542 (second engine due in traffic) and arrived at - a large gap where I'd expected 5526! 'Perhaps they left 5526 on the DMU siding alongside the shed?' I mused, exiting through the back door of the Shed. The DMU was there, but no steam locomotive.
With an increasing sense of unease, I set off to walk the length of the station to the North End, reasoning that if the road transport had arrived late, there might not have been time to shunt the visiting locomotive from the north end, where it would have been unloaded from the trailer, to the Shed. It was with some relief that I finally spotted the familiar outline of a 'Light Prairie', standing in the open, attended by Ritchie and Adrian L. Of course, had I arrived at the railway using the Public Access road, I would have seen 5526 immediately!
5526 was built at Swindon in 1928, serving at a number of Motive Power Depots in the West Country before being withdrawn in 1962 (having covered 968,577 miles by which time she was on her seventh boiler) and sold for scrap. She languished, incomplete, at Woodham Brothers Scrapyard in Barry until purchased for restoration and preservation in 1985, finally being steamed again in 2002.
5526 awaiting preparation in an unusual spot at the north end of Shackerstone Yard on Saturday ('Cold Turkey Gala')
Adrian apologised for the inconvenient remote location of the engine and set off to find a firing shovel, oil feeder and a supply of oil. Ritchie's lighting-up wood was not very dry but, aided by some used diesel, he soon had a cheerful fire established. The locomotive had been used at Chinnor a few days before so still had a little warmth left in the boiler.
I set about my own preparation duties, anticipating finding minor differences as compared with 5542. Even in British Rail days, different examples of the same class could have detail variations and this is even more likely on today's restored steam locomotives where different preservation groups sometimes adopt different engineering solutions. I've described the Daily Exam and Oiling Round of sister engine 5542 in a couple of articles:-
5526 was very similar but, yes, I found some differences: for instance, in the siting of the oilboxes feeding the leading and driving coupled axles.
Normally, preparing in the shed, crews are unaware of the arrival of the public. But the exposed location of 5526 at the north end meant that every visitor walked right past us on their way from the car park to the station. I was amazed that, by eight o'clock, a steady stream of enthusiasts was arriving.
The first departure was the 09:00 to Shenton, hauled by 6989. Once this train had cleared Market Bosworth, 5542 hauling the DMU would follow with the 09:15 'Shuttle' to Market Bosworth. The 'Shuttle' would 'recess' in the 'Turnback Siding', allowing 6989 to return to Shackerstone, where it was due back at 10:00.
In the meantime, we were to move forward and, after coaling, move into the now-empty Loco Shed so that we could use the pit to complete our preparation and be ready to couple onto the south end of 6989's train for our 10:20 departure to Shenton. However, there was a slight problem as a 3-axle power bogie off a main line diesel was standing on a converging siding, with no clearance for us to pass. Adrian 'fired-up' the 04 shunter and propelled the attached Hiab Wagon up to the bogie, allowing the bogie to be attached to the drawgear of the Hiab Wagon with chains (of course, the bogie had no drawgear).
'04' shunter propelling the Hiab Wagon prior to moving the power bogie on left ('Cold Turkey Gala')
Adrian attaches the Hiab Wagon to the power bogie on left with chains ('Cold Turkey Gala')
Adrian then gently moved the odd-looking train away, storing it out of the way in the DMU siding at the south end. Ritchie accompanied on foot, prepared to scotch the power bogie should it become detached (the bogie has no operative brake either).
'04' shunter draws Hiab Wagon and bogie to stable them in DMU siding at the south end. Ritchie walks alongside prepared to scotch the bogie if it becomes detached ('Cold Turkey Gala')
Once the power bogie was clear of the hand points, I 'threw' them towards 5526 and eased the locomotive forward to a position where the 'LOADALL' bucket loader could move behind us to fill up our bunker. Once coaled, we made our way south through platform 1, Ritchie operated the Ground Frame and we moved onto the pit in the Loco Shed. Ritchie offered to complete the oiling underneath and we were soon ready to take our first train. My friend and Shackerstone member Mike S. (who drives at Peak Rail) appeared and we agreed that he'd ride with us.
6989 had been late departing on the 09:00 train and the arrival back was also a little late. The signalman then 'set the road' for us to move across to platform 2, ready to attach to the south end of the 5-coach train as soon as 6989 had uncoupled at the north end and moved forward, allowing passengers to use the barrow crossing. Once 6989 had cleared the single line from Market Bosworth to Shackerstone, the steam/DMU shuttle was then allowed to return, with the DMU doing the work in this direction. The shuttle back was routed into platform 1 and the signals came off for our late-running 10:20 departure. Our Guard gave the 'right away' and we moved away, passing an impressive row of photographers lined along the fence on the Down side. The Shackerstone signalman showed us the Train Staff and gave us a numbered Ticket, bearing details of our authority and our train's reporting number '2S01'. Travelling with a Ticket meant that, once we had cleared Market Bosworth, the shuttle could be allowed to follow us to Market Bosworth carrying the Train Staff.
Ritchie kept the boiler pressure 'up to the mark'and, once clear of the speed restrictions leaving Shackerstone, 5526 seemed to enjoy her new surroundings. We romped along in fine style, whistling and keeping a good lookout at Headley's Accommodation Crossing and, further on, at the public footpath crossing. There were men with cameras at both crossings (and a few elsewhere). We slowed for the two temporary speed restrictions on the way to Market Bosworth, first the Water Works and then passing through the wood on the approach to Market Bosworth.
With Market Bosworth acting as a Block Post, there was a Stop Board at the approach to the station, where we had to be prepared to stop, unless we received a yellow hand signal from the platform given by Johnathon W., the Person In Charge. The flag duly appeared, noted by both Ritchie and I shouting "Yellow Flag" so I was able to keep the train moving and draw into the platform. We surrendered the Single Line Ticket and, in return, were issued with the Train Staff for the Market Bosworth to Shenton Block Section, together with permission to pass the Stop Board as we left Market Bosworth.
There was quite a lot of activity on the platform at Market Bosworth with passengers boarding and alighting but, after a while, this sorted itself out, the platform staff gave the 'tip' to the Guard and the Guard gave us the 'Right Away'. Once clear of the speed restriction over the Cattle Creep near Deer Park Siding, we accelerated up the bank with full 'first valve' on the regulator and the reverser set to about 35% cut-off. This produced the expected willing response so, after passing under the three brick overbridges on this section, I set the engine to 'drifting'. On a Great Western locomotive, this means close the regulator fully, then just 'cock' the handle so as to open the Combining Valve (sometimes called the 'jockey valve' or 'W' valve) so as to continue the oil supply to the valves and cylinders. Swindon's Improved Sight Feed Lubricators are particularly effective and there's a fuller description of the arrangements in the post here (or you can read or download a copy of Collett's 1937 circular here).
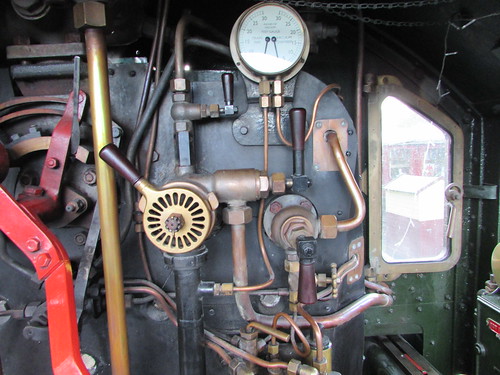
5526 detail of boiler backhead showing standardised layout of controls and small sight feed lubricator with 3 feeds ('Cold Turkey Gala')
We came over Shenton Lane Bridge at line speed and I started the initial braking application as we descended Shenton Bank, a straight quarter of a mile ending in Ambion Lane Bridge which is immediately followed by a 5 m.p.h. 'slack' because of the condition of the embankment at this location. The ground disc signal protecting the facing points at the start of the run-round loop at Shenton was, as expected, 'off'. This confirmed that the points were correctly bolted and 'fitting-up' so I kept the train rolling, ran along the length of the platform and stopped with the first coach still on the platform but the engine blocking the gated foot crossing. This is supposed to discourage the public from attempting to cross in front of the engine before we uncouple and move away but it's amazing how determined some people are. Normally, a member of the train staff acts as a crossing keeper until we're clear of the crossing.
With the train vacuum brake destroyed and the locomotive vacuum reservoir 'dumped', I was able to 'ease up' on the train, slackening the screw coupling to make uncoupling easier for the fireman, then we ran round. The loco crew operated the hand points at the south end of the loop but the Guard worked the ground frame controlling the points at the north end of the loop, releasing the ground frame with the Annett's Key forming part of the Train Staff we'd received at Market Bosworth. The Guard also obtained permission for us to return to Market Bosworth (prepared to stop at the Stop Board approaching the station, unless we received a yellow handsignal from the Person In Charge) before he gave the Train Staff back to the Driver, to be carried back to Market Bosworth and surrendered to the Person In Charge.
There were plenty of people watching our progress back to Market Bosworth from the public roads near the two road underbridges and the one road overbridge. I spotted at least four cars parked along Shenton Lane where it runs roughly parallel to, but at least 200 yards from, Shenton Bank on the railway. Most of the watchers were sporting cameras of one sort or another. Mobile phones, I-Pads and serious-looking kit with large lenses were all in evidence. Even the two overbridges serving farm tracks had their watchers. I slowed for the speed restriction over the Cattle Creep and saw 5542 and the DMU safely in the 'Turnback Siding'. We received a Yellow Flag and continued into the platform, where we surrendered the Train Staff to Johnathon. He displayed the Train Staff for Market Bosworth to Shackerstone but issued us with a numbered ticket endorsed with our train's reporting number '2N02'. Retaining the Market Bosworth-Shackerstone staff would allow him to despatch the 5542/DMU Shuttle back to Shackerstone, once the Shackerstone signalman had confirmed our safe arrival clear of the single line section.
We made a lively return to Shackerstone, with plenty of cameramen awaiting us near bridges and foot crossings. We stopped in platform 2 with our locomotive fouling the barrow crossing but all five coaches in the platform. Then we quickly uncoupled, immediately moving forward to the north end so that the barrow crossing could be used. In the meantime, 6989 had moved from platform 1 to the south end of the train ready to leave at 11:40 with '1S02', once the DMU had returned to platform 1, dragging 5542.
We simmered at the north end until 6989 and train had departed, then we moved back along platform 2 to take water.
Mike and Ritchie, having just watered 5526 ('Cold Turkey Gala')
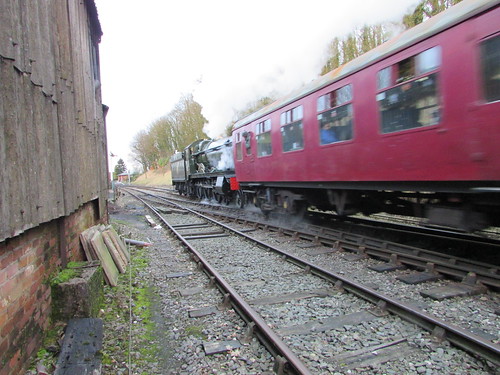
5542 on the 11:55 steam/DMU shuttle to Market Bosworth on Saturday, viewed from 5526 ('Cold Turkey Gala')
When 6989 and its train had cleared Market Bosworth, the signals came off for the 5542/DMU Shuttle to follow. Mike had agreed to fire our second round trip ('2S02', departing at 13:00) and this gave a good opportunity for Ritchie to drive.
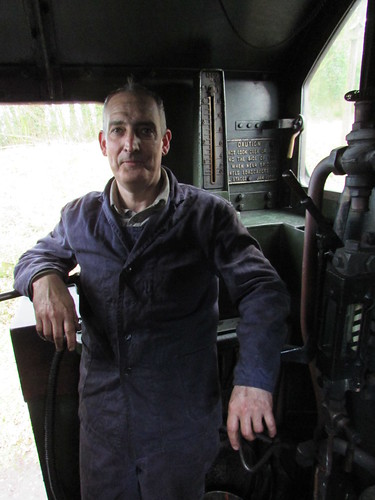
Ritchie M. on 5526 ('Cold Turkey Gala')
In readiness for 6989's return we had to move across to platform 1. Then we had the usual engine change, with 6989 temporarily standing at the north end while we coupled onto the south end of the train and waited for the DMU, dragging 5542, to return to platform 1.
Our second round trip passed off smoothly so that we found ourselves, once again, simmering at the north end waiting for 6989 and train to depart so that we could replenish our water tanks. Mike declined the invitation to stay for our last trip because of prior commitments.
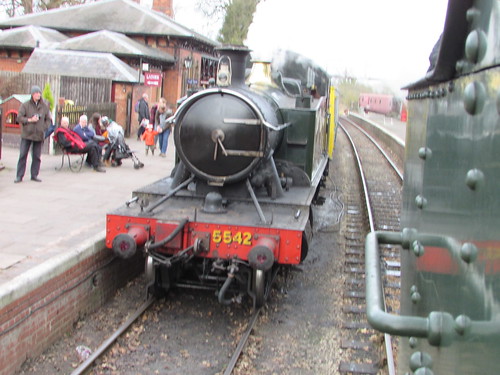
I took a couple of pictures of the 5542/DMU Shuttle before the fifth, and last, round trip of the day to Market Bosworth at 14:35.
5542 at Shackerstone with the 14:35 steam/DMU shuttle to Market Bosworth on Saturday ('Cold Turkey Gala')
5542 at Shackerstone with the 14:35 steam/DMU shuttle to Market Bosworth on Saturday. In the foreground 5526 ('Cold Turkey Gala')
The last train of the day was the 16:00 round trip to Shenton which had been planned to be double-headed by 5526 and 5542. However, during the day 5542 had been diagnosed with a leaking superheater element (a problem which had also occurred during 2019) so it had been decided that 5542 would retire to the shed after her fifth Steam/DMU Shuttle, leaving the last service to Shenton to be double-headed by 5526 and 6989 instead.
Accordingly, after the 14:35 steam/DMU Shuttle had departed from Shackerstone, we shunted 5526 across to the DMU Siding so as to leave both platforms clear - platform 2 ready to receive 6989 with the 5-coach service train and platform 1 ready to receive the Steam/DMU Shuttle.
5526 waiting in the DMU siding at Shackerstone as 6989 passes with the 15:20 arrival on Saturday ('Cold Turkey Gala') 6989 passing Shackerstone Loco Shed with the 15:20 arrival on Saturday ('Cold Turkey Gala')
We continued to wait as 6989 ran round, ready to work the 16:00 last train of the day. Then, the Steam/DMU Shuttle returned into platform 1. 5542 rapidly uncoupled and was allowed to go on shed. The repair staff removed the failed element and 'blanked' the header using the failed element from the previous year which had been previously cut down and welded-up for possible use as a 'blank'. Thanks to the work of the repair staff, 5542 was able to carry out its booked working the following day.
5542 retired to the shed early with a failed superheater element ('Cold Turkey Gala')
Finally, 5526 was 'turned out' by signalman Dave N. and we shunted across to couple in front of 6989 on the double-headed final service.
View from 5526, coupled ahead of 6989, ready to work the 16:00 train to Shenton ('Cold Turkey Gala'). Note the DMU, about to stable overnight in the DMU Siding.
On a double-headed service, the driver of the leading engine is responsible for 'making the brake' and controlling the train, although the driver of the other engine is expected to keep a good lookout, observe signals and provide power as necessary.
When the Guard gave the 'right away', I exchanged whistles with 6989 and carefully opened the regulator. 6989 matched my effort and, with the chimney of the 'Hall' just a few feet behind our cab the 'chuffs' were much louder than those of 5526. At the signal box, we received the Train Staff for the line to Market Bosworth. When I was growing-up, the rearmost-engine always carried the Train Staff but the 'Big Railway' and many preserved lines changed some years ago to the leading engine carrying the Staff. Once the train was clear of Barton Lane bridge and the 10 m.p.h. speed restriction, we accelerated the train. The most noticeable effect was caused by the difference in coupled wheel size of the two engines. Four 'chuffs' from 5526 with her 4 foot 7-1/2 inch diameter wheels took us forward about 14 and a half feet. But four 'chuffs' from 'Wightwick Hall' with 6 foot wheels took her forward 19 feet. So, to move ahead slip-free my engine was producing around 30% more 'chuffs', giving an odd syncopated exhaust effect which suggested, erroneously, that we were doing most of the work.
Once we were up to Line Speed, it was clear that 6989 was leaving us to 'run' the train, making control much easier. Double-heading is fine when the two drivers co-operate, but can be difficult if the engine next to the train decides to apply power at the wrong time. Although we were 'losing the light', there were still plenty of photographers along the line. After a fairly 'spirited run', we received a yellow hand signal approaching Market Bosworth and eased the train into the platform. We surrendered the Train Staff, received the one for Market Bosworth-Shenton and were soon on our way again.
After an all-too-brief but enjoyable run to Shenton, I destroyed the train vacuum and allowed 6989 to ease-up both engines onto the train. 6989 uncoupled from the train. As lead engine, I then moved both engines into the headshunt, creating vacuum to release the vacuum brakes of 6989. Then 6989 became lead engine as we ran long the run-round loop. Finally, I moved both engines onto the north end of the train and we coupled up.
6989 was lead engine going back, so all I had to do was keep a good lookout and provide a little help when the 'Hall' was under power. Each time the 'chuffs' from the chimney of 6989 ceased, I set 5526 to 'drifting'.
During the day, the initial late running was made up and we finished close to 'right time'. I was told that there was 'a bit of a shunt' to do later, so I was invited to leave 5526 in the station - an offer I happily accepted. Just as I was booking off, after an excellent if tiring day, I was asked if I could possibly drive the DMU on the second day of the Gala, the following day. I said 'Yes'.
Where necessary, clicking on an image above will display an 'uncropped' view or, alternately, pictures may be selected, viewed or downloaded, in various sizes, from the albums listed:-
The last Santa Specials at the Battlefield Line were run on 24th December 2019, Christmas Eve. But the railway only remained closed for three days until Saturday 28th December 2019 when 'Mince Pie Specials' were run for five days, using a mixture of DMU and steam.
Events of Saturday 28th December 2019
I was asked to drive on Saturday 28th December 2019, once again on 6989 'Wightwick Hall'. I discovered Stephen W. was my fireman and that he'd gone in on Friday evening to light a warming fire, returned home for a few hours sleep and arrived back at the shed shortly after me. Stephen was happy setting a new fire, so I turned to the oiling round.
Click for larger view
'Modified Hall' Class from British Locomotive Types 1946 (Railway Publishing Co. Ltd.)
The 2-cylinder 'Standard' designs of the Great Western with outside cylinders have Stephenson Link motion with four eccentrics mounted on the driving axle between the frames to provide the necessary valve events. Inside cylinder Great Western designs normally have valves between the frames which can be directly driven from the expansion links between the frames. But with outside cylinders and valves, as used on the 'Hall', rocking shafts are required to transmit the movement of the dieblocks between the frames (via the intermediate valve rod, rocking shaft, valve link and valve rod) to the piston valves outside the frames.
This is illustrated in the well-known diagram below, taken from the 'Handbook for Railway Steam Locomotive Enginemen', published by the British Transport Commission in 1957. Original copies are still available on the second-hand market and an Ian Allan reprint from 2014 is available new (ISBN: 9780711037946).
Click on the above diagram to enlarge.
Layout of valve gear.
I could get at most of the outside motion but the corks on both little ends were inaccessible.
Six portable, cylindrical oil pots each with a shut-off cock feeding a flexible, plastic hose are provided for the important job of topping up the coupled wheel axleboxes. The idea is that the oil pots clamp on the foot-framing with each hose fed to the filler on top of the axlebox. This involves reaching through the spokes of the coupled wheels to access the filler tubes but, again, the angle at which the engine had stopped meant that this oiling had to be deferred until we'd sufficient steam to move to a better position.
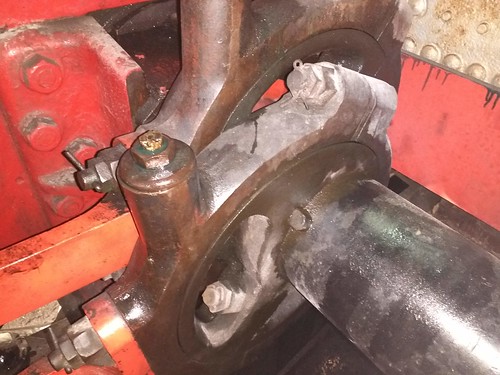
The engine was partly over the pit but not in a very good position. A bigger problem was the fact that after a number of days of intensive two-train 'Santa' services, one half of the length of the pit (the half I needed to work in, naturally) was fairly full of ash. This, combined with the fact that it's a rather shallow pit in any case, meant that scrambling around in the pit, ducking under the brake gear, was quite challenging. Having hauled myself up in the space between the dual brake shafts so as to stand on the brake rigging, facing the firebox, I was able to deal with the large-capacity oil reservoirs on the four eccentrics. The two pictures below show the driving axle with its eccentrics.
View of Driving axle showing (L-R) Right Fore Eccentric, Right Back Eccentric (6989 'Whitwick Hall')
View looking rearwards showing driving axle with left fore eccentric and front of outer firebox. The oil feeder and wiper gives an idea of the generous proportions of the axlebox (6989 'Whitwick Hall')
Still perched on the brake rigging, I turned round to face forwards, allowing me to attend to the oiling points associated with the expansion links and lifting links.
View looking forward showing left expansion link, arm on weighshaft to operate left lifting link and left dieblock which is connected to the fluted intermediate valve rod extending forward to the inner valve arm of the rocking shaft. Leading coupled axle in background (6989 'Whitwick Hall')
View looking forward with left lifting link just visible. The fluted intermediate valve rods lie almost horizontal either side, connected beyond the frame stretcher to the inner valve arms of the rocking shafts. Note the large vacuum brake cylinder between the frames ahead of the leading coupled axle. The red-painted pressed metal guards bolted to the axleboxes of the coupled wheels are provided to screen the journals from foreign matter (6989 'Whitwick Hall')
Having completed this part of the oiling, I gingerly lowered myself down into the pit between the twin horizontal brake shafts and completed oiling the leading bogie.
View looking forward and down while perched on brake rigging ahead of driving axle, showing the twin longitudinal brake shafts with bottlescrew adjusters (6989 'Whitwick Hall')
The 'Churchward era' 4-6-0s introduced bar-framed bogie trucks and I think these were used on the original 'Halls'. But Hawksworth's 'Modified Halls' substituted plate-framed bogies. More drastically, Hawksworth introduced plate main frames throughout on the 'Modified Halls'. Earlier locomotives based on Churchward's preferences had plate main frames as far forward as the cylinders which were manufactured using two castings bolted back-to back on the centre line of the locomotive incorporating steam exhaust passages and smokebox saddle. Adopting back-to-back cylinder construction required bar framing between the cylinders and the front buffer beam. The 'Modified Hall' had two separate cylinder castings conventionally bolted to the outside of plate frames running the length of the locomotive. I suspect (but haven't been able to confirm) that the motive for these changes was cost-saving.
With steam pressure in the boiler rising, we moved the locomotive so that the coupled wheel axleboxes and little ends could be dealt with. Stephen attended to the axleboxes whilst I clambered up on to the front framing to top-up the oil pots on the rocking shafts and the other oil pots. The vacuum pump oil pot on the driver's side is accessible through a cut-out in the foot framing. This uses a mix of cylinder oil and paraffin to preventing 'sticking valves' on the pump.
6989 'Wightwick Hall': Right leading splasher showing cut-out in foot framing giving access to the vacuum pump oil pot (Battlefield Line Santa Specials 2019)
6989 is fitted with a hopper ashpan operated by large lever or 'key' normally stowed in the cab on the fireman's side. To empty the ashpans, the 'key' is engaged with a square-section shaft accessible through a cut-out in the footplate steps on the fireman's side, and the locking pin (rather hidden behind the footplate steps) is removed. The key can then be operated back-and-forth through a wide arc, opening and closing the hopper doors until all the ash has been dislodged and dropped into the pit. Even using the ashpan spray connected to the fireman's side injector, this usually results in plenty of ash flying around. Finally, the hopper doors are closed, the securing pin is replaced and the heavy 'key' stowed back in the cab.
Stephen operating the hopper ashpan (6989 'Whitwick Hall')
6989 'Whitwick Hall' 'brewing up' in the shed at Shackerstone, prior to working 'Mince Pie Specials' (6989 'Whitwick Hall')
We'd raised sufficient pressure to move outside the shed and a quick test of the vacuum brake showed that we'd enough brake power to move safely across to our 5-coach train in platform 2 so that we could start steam heating the coaches.
Our diagram called for four round trips to Shenton during the day, leaving Shackerstone at 11:00, 12:30, 14:00 and 15:30
The view below shows the standardised layout of the driving controls on the right side of the cab.
6989 'Wightwick Hall': Driver's vacuum brake application valve with small ejector steam cock (above), large ejector steam cock (right) and blower valve (below right)
Of course, when in motion, most of the driver's attention is focussed ahead. The Christmas Fairy Lights were still in place on 6989, as a further distraction. The You Tube clip below shows how limited the view from inside the cab can be, which I why I tend to prefer to lean out over the cab side sheeting most of the time. Click 'Replay' to watch again.
Driver's view ahead on 6989 'Whitwick Hall' between Market Bosworth and Shenton on the Battlefield Line on a 'Mince Pie Special' service on 28th December 2019.
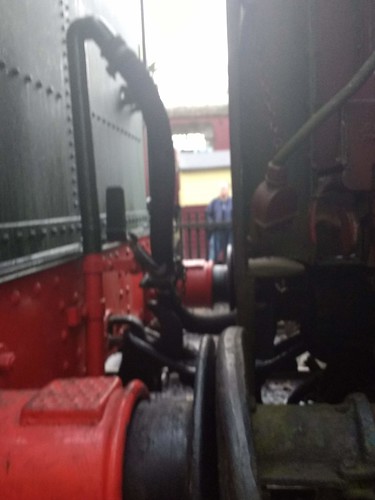
At each end of the line, we ran round the train and Stephen commented that there's not much room for the fireman to work in when coupling up once the locomotive had 'squeezed up'on its train.
There's not much room for the fireman to work in when coupling up once the locomotive has 'squeezed up'on its train (6989 'Whitwick Hall')
During the afternoon, we decided to 'top up' the tender tank from the column at Shackerstone. It was already getting dusk when I took this last view of 'Wightwick Hall' ready to leave Shackerstone with a 'Mince Pie Special'.
6989 'Whitwick Hall' ready to leave Shackerstone with a 'Mince Pie Special'.
Passenger numbers had been encouraging all day, Stephen had kept a good fire and we were both satisfied when we completed the last trip and disposed the locomotive after an enjoyable day.
Where necessary, clicking on an image above will display an 'uncropped' view or, alternately, pictures may be selected, viewed or downloaded, in various sizes, from the albums listed:-
Jan's blog will be maintained, both in her memory and also as a source of reference material in many areas of interest. New posts will be added, to continue to record the ongoing influence of Jan's work and life.
Jan:
I've been an electronics engineer for over 57 years and I'm interested in travel, history, architecture, the industrial revolution, science, railways and, well, lots of things. I believe in what one of my heroes, Richard Feynman, called "The Pleasure of Finding Things Out".
'Labels to select a blog topic' (below) will select the posts on a particular subject.
The Search Box (with the magnifying glass symbol) in the header will find posts including any particular word or phrase.
'Links to photographs' (below) will take you directly to my photographs on 'Flickr'.


