Following the success of the Steam Charter to Peak Rail operated by 'Oliver Cromwell' on the 27th May 2012, a similar tour visited Peak Rail on 14th April 2013.
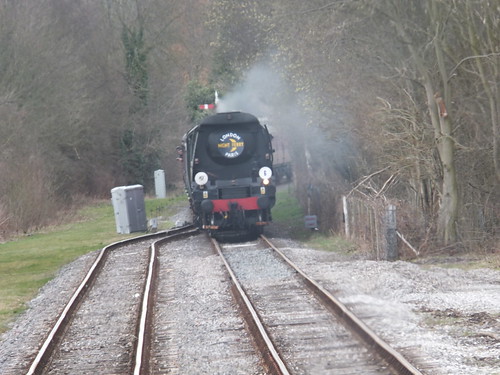
In 2013, the 'Peak Forester' was operated by unrebuilt 'Battle of Britain' Class 'Tangmere', named after RAF Tangmere. This famous RAF Station, near Chichester, played an important role during the Battle of Britain (see the Wikipedia article here).
On the day of the charter, Peak Rail ran a modified service between Rowsley and Matlock Town, with a 7-coach train top-and-tailed by a steam locomotive 'Lord Phil' at the north end and a Class 31 diesel electric locomotive at the south end. I was the driver on 'Lord Phil' and Phil was the fireman.
The passing loop at Darley Dale was used to allow the steam charter to pass the Peak Rail service. When the 'Peak Forester' arrived, the Peak Rail passenger train waited in the Up platform at Darley Dale. At Rowsley, 'Tangmere' was watered, coaled, turned and serviced. With the stock for the charter shunted to the loop, the Peak Rail service was able to use the single platform at Rowsley. To allow the 'Peak Forester' to return to Network Rail, the Peak Rail service ran Empty Coaching Stock (ECS) to Darley Dale, drew onto the single line to clear the loop points. A preserved Fire Tender with around 400 gallons of water then topped-up the saddle tank on 'Lord Phil'. The ECS was then signalled into the Down platform to await the passage of the charter. Once the charter has disappeared towards Matlock, the ECS was able to continue to Rowsley before forming the last passenger service of the day to Matlock Town and back.
My Pictures
'Peak Forester' 2013.
Friday, 19 April 2013
The 'Peak Forester'

Crewe South Junction (1940) Signal Box

Crewe South Junction Signal Box controlled movements at the south end of Crewe Station from 1940 to 1985. The structure of the signal box survives in a semi-derelict form. This 'ARP' box, with a Westinghouse Style 'L' Power Frame, is the last-but-one in a series of signal boxes which have controlled the important junctions at the south end of Crewe Station.
In 1938, with the threat of war and aerial attack looming, it was decided that certain strategic signal boxes should be replaced by an 'ARP' ('Air Raid Precautions') design, better able to withstand blast damage. Accordingly, Crewe North Junction and Crewe South Junction signal boxes were rebuilt, replacing the earlier 1907 signal boxes which used the 'Crewe' All Electric System. New point machines were provided and the electrically-operated semaphore signals were replaced by colour light signals.
Westinghouse Brake and Signal Company had been supplying the Style 'L' miniature lever frame since 1929 so it was a 'safe' choice. The L.M.S. order for Crewe South Junction (together with a second for Crewe North Junction and a third 'Standby' frame) was placed in March 1939.
The Crewe South Junction lever frame order called for 227 levers made up of 72 point levers, 127 signal levers, 8 'special' levers, 7 spare levers and 13 spare spaces. These levers were supplied as 19 off 12-way sections which were mounted in-line to form one large frame.
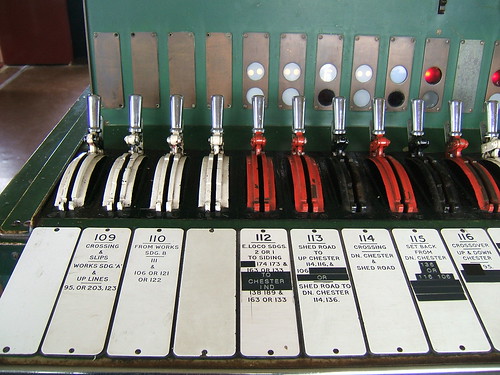
Movement of each lever drives a vertical shaft via bevel gears. The vertical shaft carries the electrical contacts used for control and interlocking.
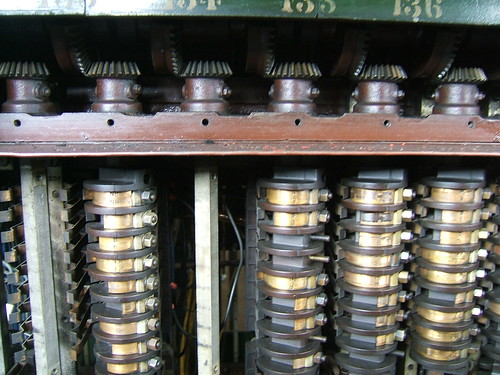
The associated relays which provided the electrical interlocking were mounted on steel shelves in a large Relay Room on the ground floor. 'Shelf' relays were used, interwired on site.
When I was young, I thought it a curious-looking box but, for me, it didn't quite have the air of mystery which Crewe North Junction possessed. I went inside Crewe South Junction once in the 1970s when my firm had started supplying telecommunication equipment to the railways but, sadly, I didn't take any pictures.
The Crewe North Junction (1940) Signal Box is briefly described here.
In 1985 control of the Crewe area was transferred to Crewe Signalling Centre, built on part of the site of the famous Crewe North Shed.
References
'The Style L Power Frame' written and published by J. D. Francis 1989 (ISBN 0 9514636 0 8).
External Links
Crewe South Junction by Mark Adlington.
My Pictures
Crewe Area.
Easter at Peak Rail

The 6-coach top-and-tailed train (Drawn by Charlie Baulkham.)
I was driver at Peak Rail on Easter Sunday, 31st March 2013. We ran the normal Sunday Service of five round trips between Rowsley and Matlock Town, top-and-tailed by a steam locomotive at the south end and a diesel electric locomotive at the north end.
Following the swan-song of 'Royal Pioneer' at the recent Blazing Saddles event, this locomotive has retired from traffic pending heavy repairs. 'Lord Phil' is now the regular steam locomotive. On Easter Sunday, Phil was Fireman and Dave was Cleaner. We had a good day, although it was rather cold.
I didn't take any photographs on the day but my young friend Charlie Baulkham produced a splendid panorama of our train, shown above.
Tuesday, 9 April 2013
Easter Week at the Museum of Science and Industry
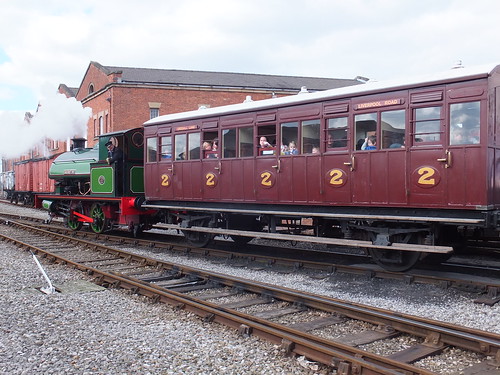
The Museum of Science and Industry in Manchester (MOSI) normally operates a steam train on Saturdays and Sundays. But, during school holidays, it attempts to run more frequently. Over Easter 2013, volunteers were arranged to work on 17 consecutive days.
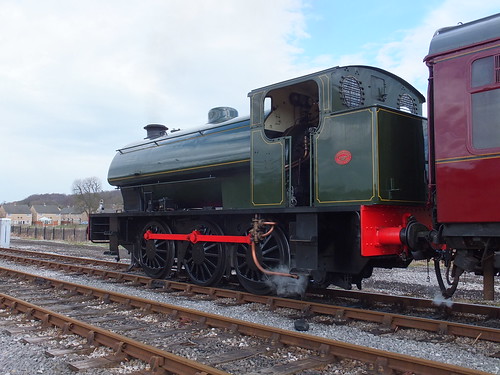
I was the driver on Friday, 5th April 2013. Earlier in the week, the service had been operated by the 'Planet' replica with the two blue coaches. However, on the Friday we used 'Agecroft Number 1' so that 'Planet' could be readied for its imminent visit to Beamish, The Living Museum of the North, as part of their 'Great North Steam Fair'.
The previous week, I'd been Operating Officer when we'd also used 'Agecroft Number 1', paired with a restored, elderly 4-wheel North London Railway 2nd Class Coach currently on loan from the Furness Railway Trust. On that occasion, we'd completed the train with a 20-ton Brake Van.
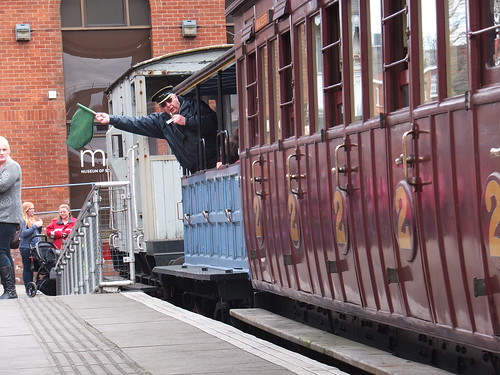
On the 5th April, we again used the North London Railway coach but, this time, with one of MOSI's 'semi-open' blue coaches which gave us extra seats for passengers. Vince was fireman, David was Guard and Peter carried out the Operating Officer duty. The weather was dry but cold. I was surprised at how many visitors were keen to ride the train, despite the cold, and we were kept busy all day.
My Pictures
Easter 2013 Trains at MOSI.
Easter at Shackerstone, 2013
Over the Easter holiday in 2013, the Battlefield Line operated both the visiting locomotives - the 'T9' on the main train alternating with the Beattie Well Tank 30585 on a 2-coach train with a 4-wheel van.
Events of Monday, 1st April 2013
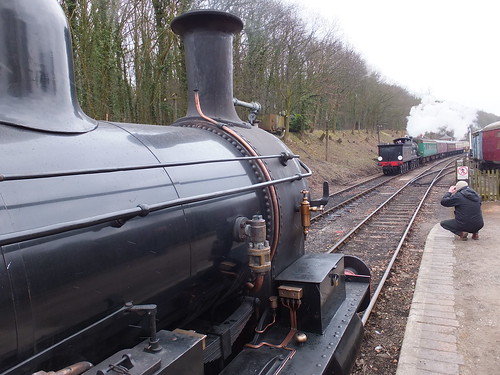
On Easter Monday, I was driver on the Beattie Well Tank and Carl was on the 'T9'. Both locomotives were lit-up in the shed. The 'T9', 30120, was nearest the door so, once in steam, Carl was able to move her outside. There was not going to be time for us to fill the coal bunker before we entered traffic, so we hand-coaled until Danny was happy we'd enough for the first trip. We had to wait inside the shed until the 'T9' came off shed, picked up our train (which had been stabled on the long siding next to the shed) and drew it into platform 1. We could then come onto the head of our train and couple up.
Although steam heating has been added to the locomotive in preservation, the box van at the head of our train had no steam heat connections so we were unable to warm the carriages (had we had a 'Banana' van, they were provided with steam heat to allow the bananas to be ripened in transit). Matters would be no better on our return trips from Shenton because, although we were then coupled next to our coaches, the locomotive had no steam heat connection on the front!
We were booked to leave with the first train of the day at 10.30 a.m. but I'm afraid we were late away. The locomotive was a willing performer although she tended to roll a bit (I think there's some sort of transverse compensating beam on the trailing coupled axle but I didn't have a chance to confirm).
Because of the engine's limited water capacity, our white milk tank had been positioned in the headshunt at Shenton, (with water, not milk) and we took a portable pump with us. So each time we arrived at Shenton, we uncoupled, drew forward onto the tank wagon and replenished the tank.
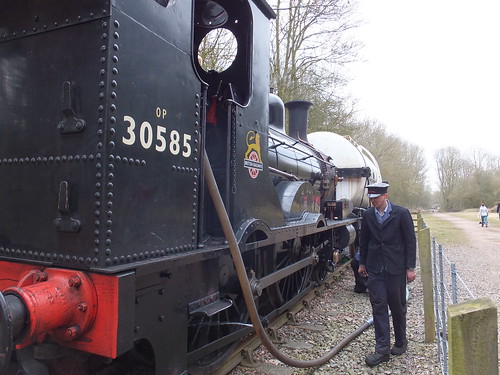
By the time we arrived back at Shackerstone in platform 1, the 'T9' was ready to leave with the (slightly delayed) 11.45 a.m. departure. Once he'd left, we trundled down to the coal bunker at the north end to be coaled by the bucket loader. We filled our water tank once again and had a breather in platform 1 until the 'T9' returned. We were a little late away on our 12.45 p.m. departure and made our second foray to Shenton. On our return, we watered but needed no more coal and, again, had a little time to ourselves before departing with the 3.00 p.m. train.
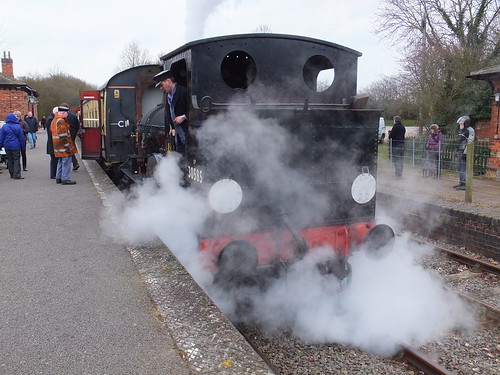
We were back a little after 4.00 p.m. but the last train, the 4.25 p.m. was supposed to be hauled by both engines so it was clear we'd probably be late away.
First, we had to get rid of our train. The signalman set the road for the long siding and, with someone riding in the front of the stock, we propelled our train into the siding, tied it down, uncoupled and shunted light engine to couple on ahead of the T9. We agreed it woud be prudent to take water but, coupled in front of the 'T9' and a 5-coach train, we were nowhere near the water column. Once preparations had been made, the Guard called us back and I gently reversed the whole train until we could get water. This was all done quite promptly and soon we had the 'rightaway' and happily bowled through the country to Shenton. We tried to fill our water tank one last time, but the portable pump seemed to be struggling. We assumed the tank wagon itself was nearing empty, so we gave up, finished the run round and took our place in front of the 'T9' for the return journey.
There wasn't too much fire left when we arrived back at Shackerstone and the instruction was to go light engine to the north end for immediate loading on the low loader. Sure enough, temporary rails had been laid and the lorry driver invited me to drive onto the low loader. Well, I made two attempts but didn't quite make it onto the trailer. The pressure was quite low and Danny was worried about the water level in the boiler but I suspect I was more worried about being able to stop once on the trailer since I'd found the engine brakes rather 'soft' during the day. The lorry driver attached a steel cable to the locomotive and the front of his tractor unit and towed us onto the low loader. There was enough steam (and water) to fill the boiler whilst the load was being secured then the low loader reversed along our drive before driving to Buckinghamshire Railway Centre. A very enjoyable day.
Events of Tuesday, 2st April 2013
I was back at Shackerstone on Tuesday to drive the diesel railcar. The low loader returned to take away the 'T9' but I was a bit pre-occupied with the diesel railcar and wasn't able to get any pictures of the 'T9' as I'd hoped.
We were running with the single unit 'Bubble Car' attached to half of the 2-car set. There had been a mechanical problem on one of the engines on the 'Bubble Car' so this had been isolated, leaving a more-than-adequate three engines. With the very cold weather, I had some problems getting the engines started but eventually had all three engines running. I started a heater in the 'Bubble Car', but failed to get either heater in the other coach to run. Only two starting attempts are allowed on each heater, after which I had no alternative but to write them up on the Defect List.
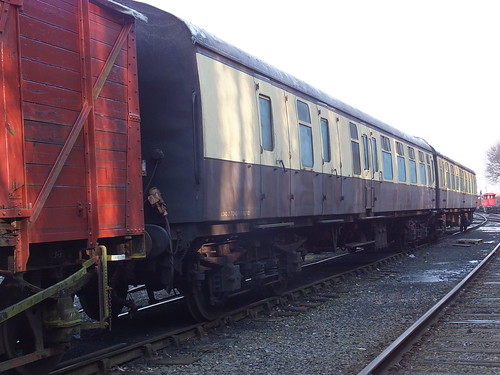
There was one remaining problem - the diesel railcar was 'boxed in' by the two 'blood and custard' coaches plus a van of the 'Local Set' which I'd shunted there myself the previous day. By this time, Martin the Guard had arrived, so we agreed on the shunt. I would bring the railcar up to the 'Local Set', couple on and, with Martin keeping a lookout from the end of the coaches, propel the stock to the north end of platform 1 and 'tie it down'. Once uncoupled, the railcar would use the south end of the platform for the rest of the day. I coupled the railcar to the stock and attempted to attach the vacuum hoses but the hoses on the railcar and boxvan were in very difficult positions so I decided to do the move without vacuum brakes on the 'Local Set'. We completed the move, I uncoupled the railcar and Martin placed a tail lamp on the end of the boxvan for protection.

The timetable called for four round trips to Shenton, stopping at Market Bosworth and we ran to time all day. It was another cold day but we attracted reasonable numbers of passengers. At the end of service, the Guard and I secured the doors and made sure all windows were closed, I drove the set to the Long Siding, shut down the engines, isolated the batteries and checked that all lamps were off. Finally, I walked around at ground level making sure there were no problems (overheating, leaks). Another pleasant day.
Brief History of the Beattie Well Tanks
By 1850, the L.S.W.R. were operating an intensive suburban passenger service around London. When additional motive power was required, a design for a small tank locomotive was started. Joseph Hamilton Beattie constructed a number of prototypes with different proportions before settling on a final design. The majority of the class was built by Beyer Peacock in Manchester with the first delivery in 1863. By the time the final order was delivered in 1875, the class numbered 85.
The Beattie Well tanks were great survivors. Amazingly, three of the class (admittedly fairly well rebuilt over the years) passed into British Railways stock. They carried the numbers 30585, 30586 and 30587 and were used on the Bodmin and Wenford branch until withdrawal in 1962. 30585, which we used over Easter, is from the 1874 batch and she can usually be seen at Buckinghamshire Railway Centre. I was reminded of another well tank I've driven - the 0-6-0WT 'Bellerophon', also built in 1874, but that's another story.
There's one other Beattie Well Tank preserved, 30587. It's owned by National Railway Museum and normally based on the Bodmin and Wenford Railway. Some years ago, I drove this locomotive on the Demonstration Line at N.R.M. but that, too, another story.

30587 (Photo: N.R.M.)
The remaining member of the Southern Railway Trio didn't make it into preservation.
Construction of the Beattie Well Tank 30585
The Beattie 2-4-0 Well Tank has 5'6" coupled wheels and two outside cylinders 15" x 20". There's a rectangular water tank mounted low between the frames which stops ahead of the driving axle and is supplemented by a second tank occupying the lower part of the rear bunker, giving a rather miserly total water capacity of 550 gallons. The upper part of the bunker holds around one ton of coal which is delivered at a fairly convenient height to the footplate through two sliding coal doors in the back sheet of the cab. The feed to the boiler was originally provided by crosshead pumps, but these were long ago replaced by injectors. Because the trailing coupled axle lies under the cab, the curved splashers for the associated wheels pass right across the cab floor on both driver's and fireman's side.
The vacuum ejector currently fitted was added at some point - it appears to be a modified version of a Gresham and Craven product. The locomotive itself is only fitted with co-acting steam and hand brakes but the steam brake valve is a 'combination' type which can be operated by vacuum. Inconveniently, the steam brake valve and latch is fitted on the fireman's side of the cab.
The leading carrying wheels are provided with both inside and outside axleboxes. Most of the weight is carried on the inside axleboxes via the overhung springs. Further control is provided by the brass outside axleboxes via the underhung springs which are suspended from the lower slide bars. The driving wheels have inside axleboxes with underhung springs.
The rear coupled wheels have inside axleboxes and there are two pairs of fairly small coil springs visible in the cab. I think there's some sort of transverse compensating beam but I haven't yet been able to confirm this.
The 'Wikipedia' reference below and the listed books all have additional information on the Beattie Well Tanks. My set of pictures 'Easter at Shackerstone' linked below gives further information on the construction and layout of the locomotive.
References
LSWR 0298 Class (Wikipedia).
Books
[1] 'A Pictorial Record of Southern Locomotives' by J.H. Russell: 1991 edition published by BCA.
[2] 'The London & South Western Railway' O.S. Nock: published by Ian Allen.
[3] 'Locomotives of the London and South Western Railway Part 1' by D.L. Bradley: published 1965 by RCTS.
[4] 'The South Western Railway' by Hamilton Ellis: published 1956 by George Allen and Unwin.
My Pictures
Easter at Shackerstone.
Wednesday, 3 April 2013
Freight Rolling Stock in Burma
This is a rather informal listing of types of vehicles I've come across. Originally, 'Chopper' couplers were used throughout Burma and, where required, vacuum brakes. On more recent equipment, 'Automatic' couplers (similar to the British 'Buckeye') are fitted with single-pipe air brakes.
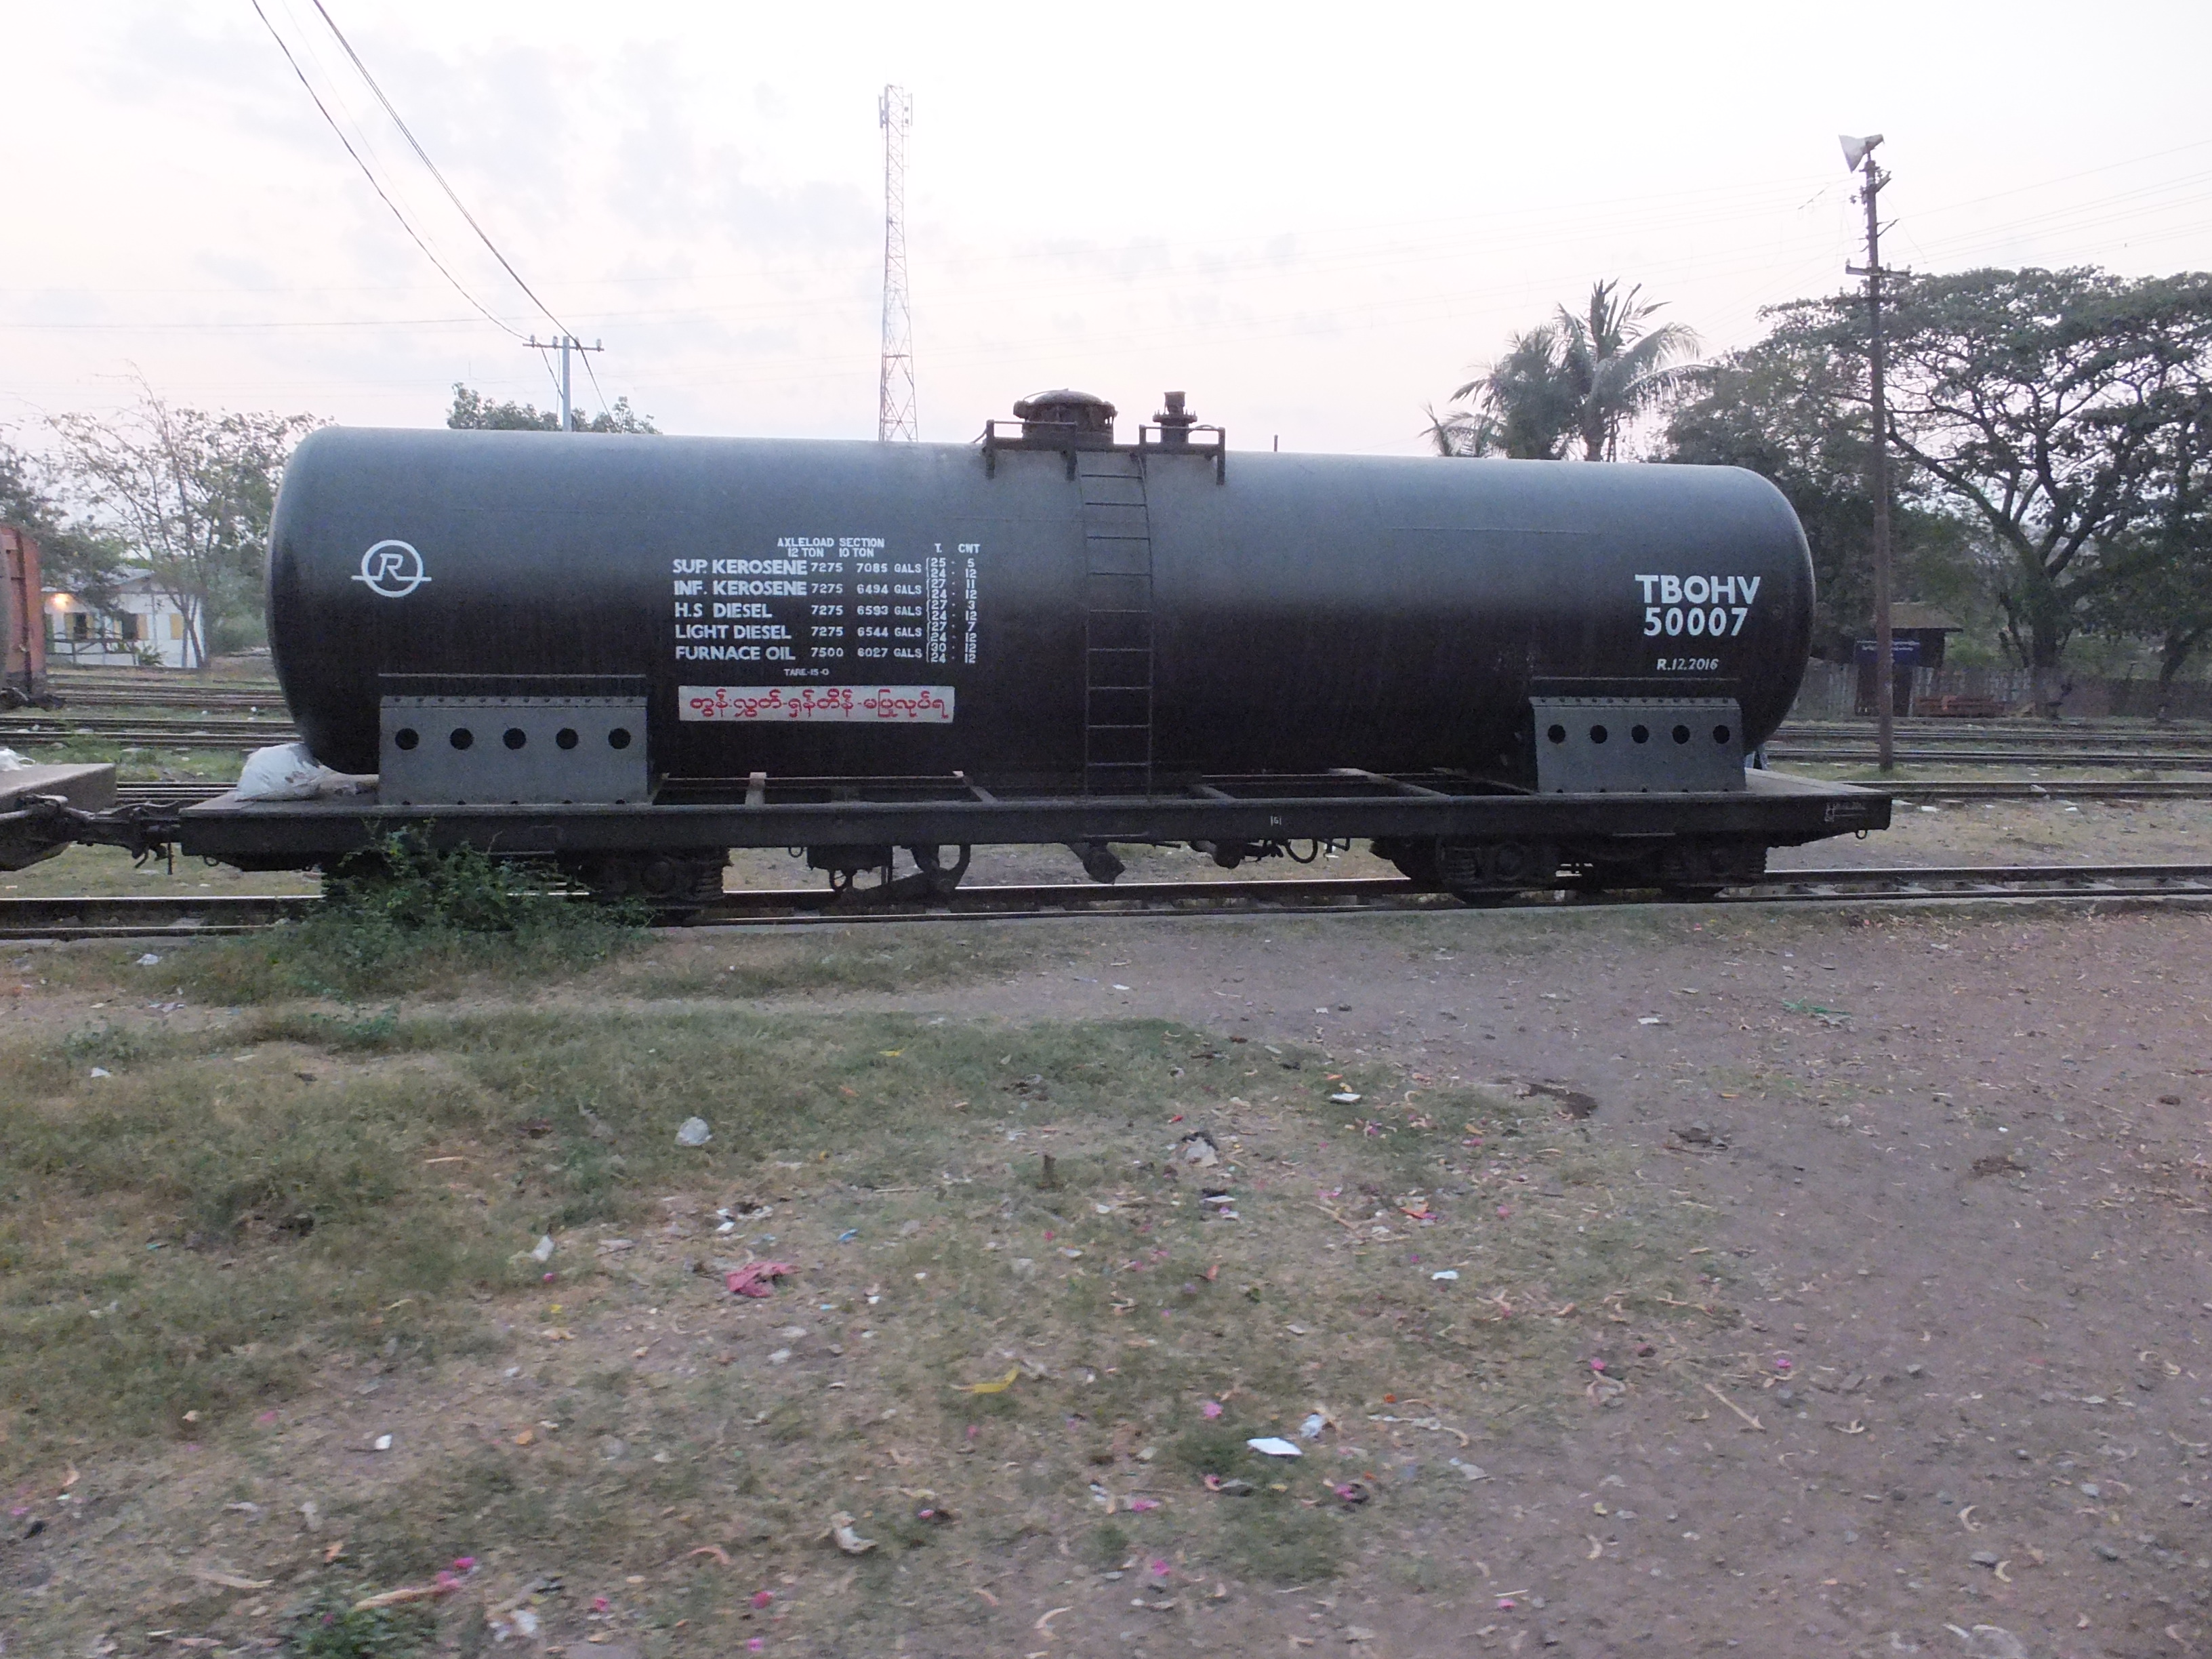
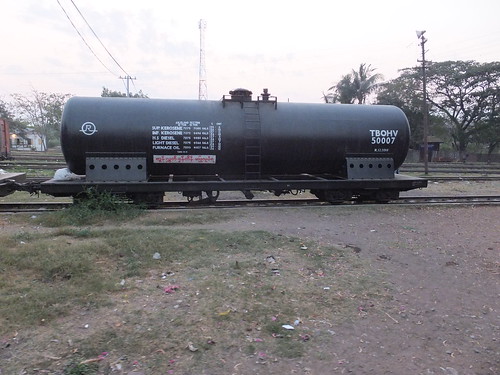
Tank, Bogie, Oil code TBOHV
Original size.
The standard tank wagon for oil is seen with 'Chopper' couplings. Vacuum Brakes are fitted.
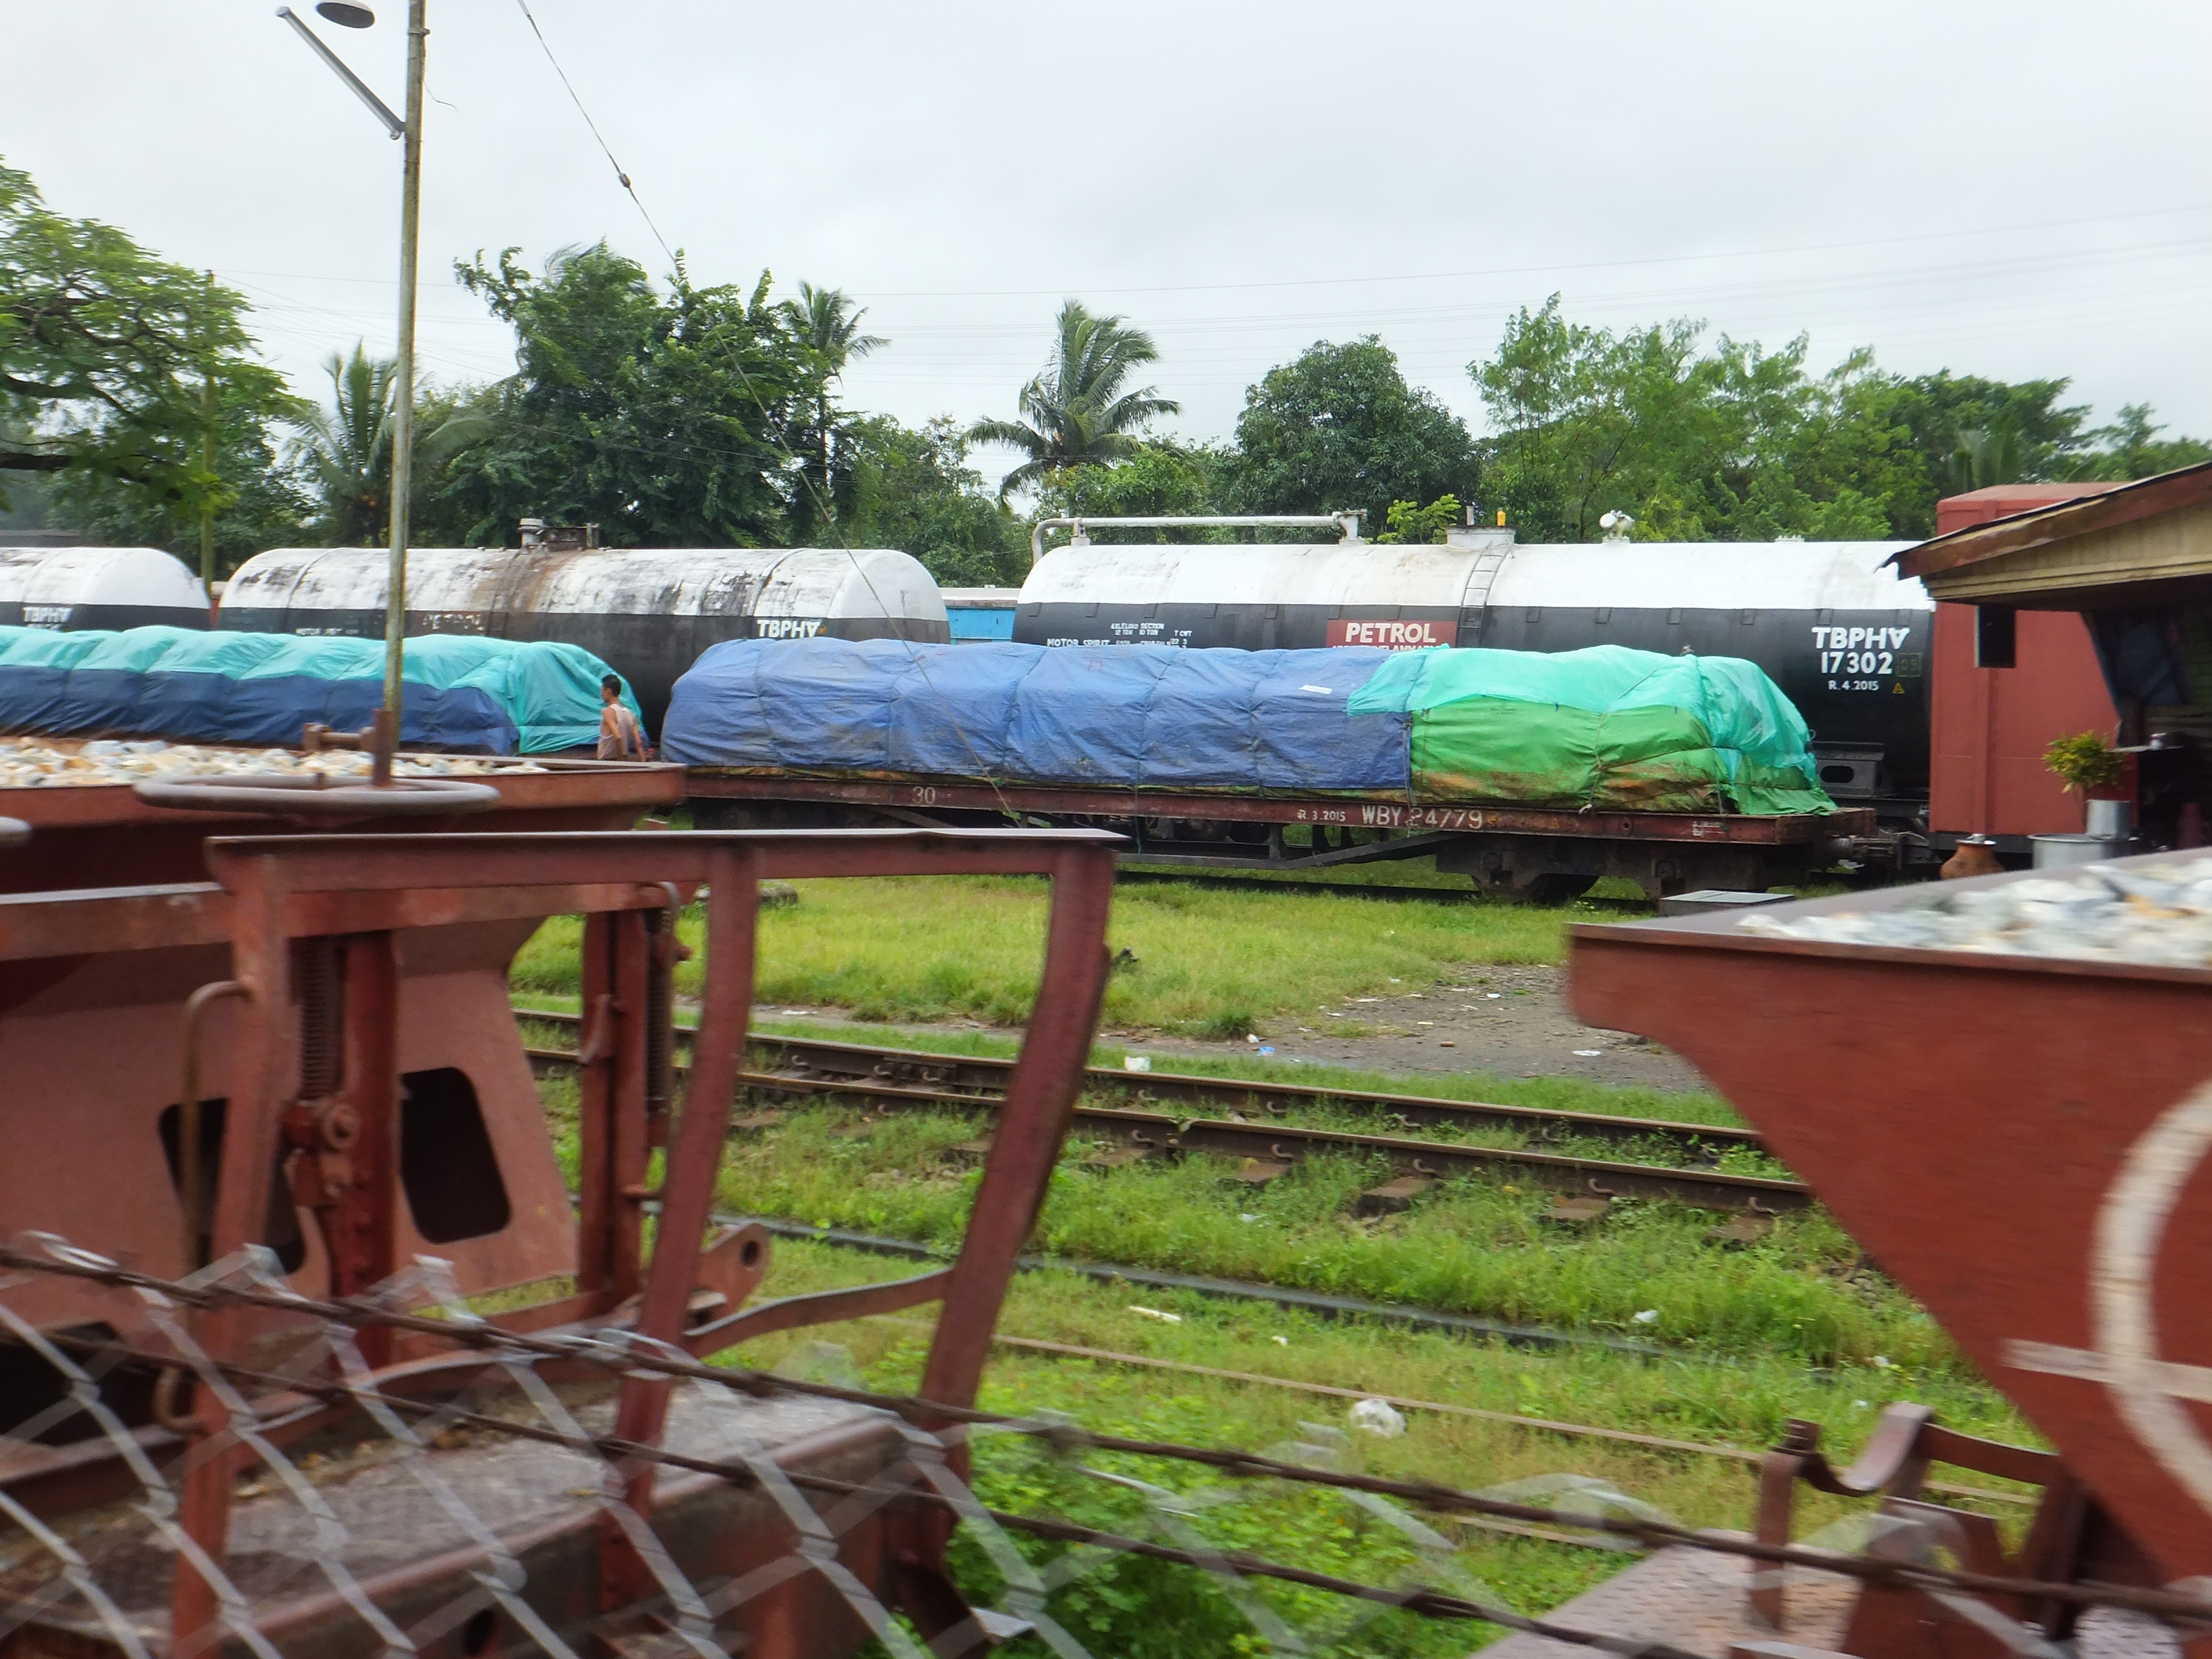
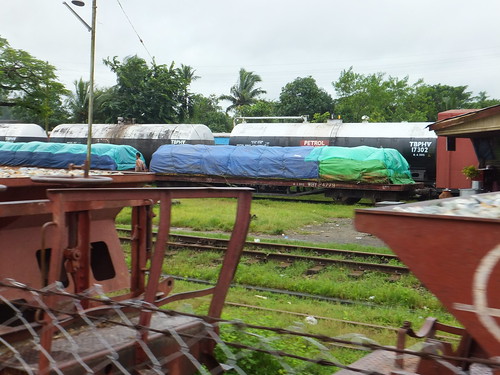
Tank, Bogie, Petrol code TBPHV
Original size.
Three Tank wagons for petrol can be seen in the background of this picture.
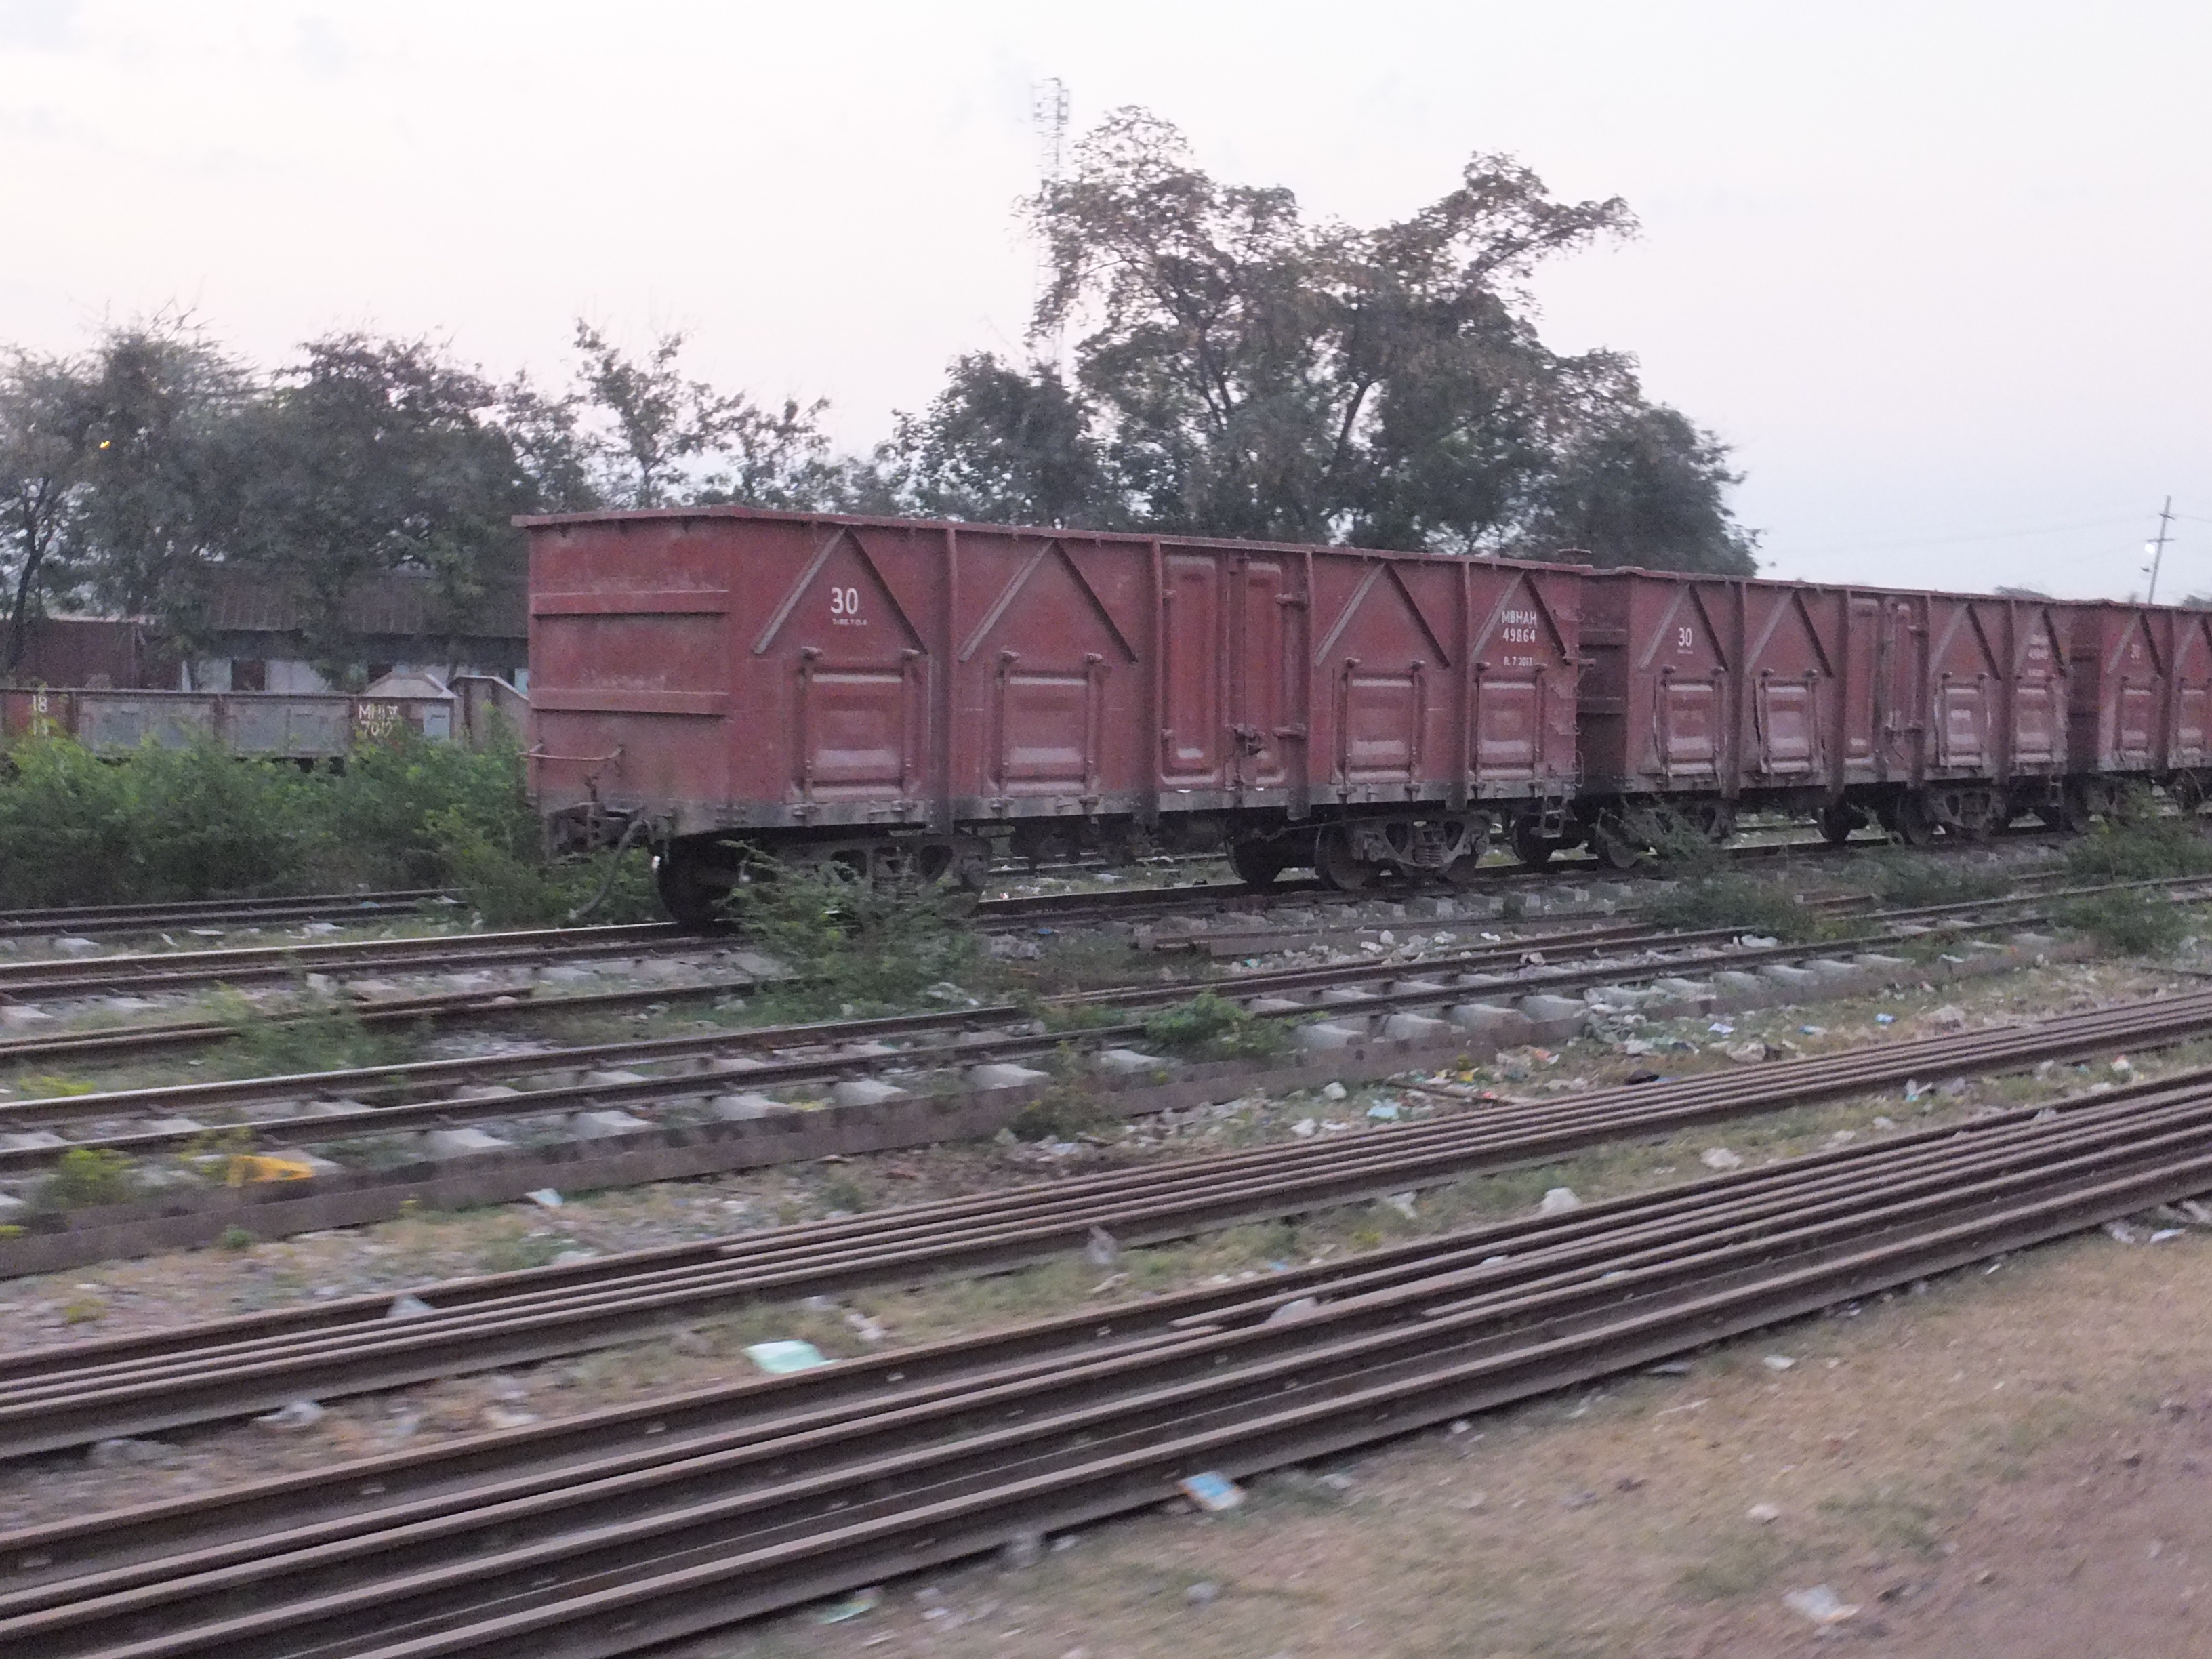
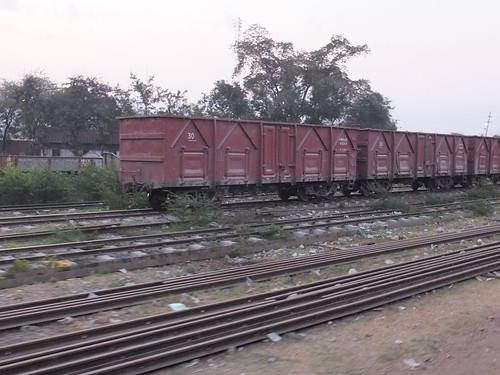
Mineral, Bogie code MBHAH
Original size.
Bogie Mineral Wagon, 30 ton capacity fitted with automatic couplers and air brakes.
There's also a 4-wheel long-wheelbase version coded 'MHV' with 18-ton capacity (not illustrated).
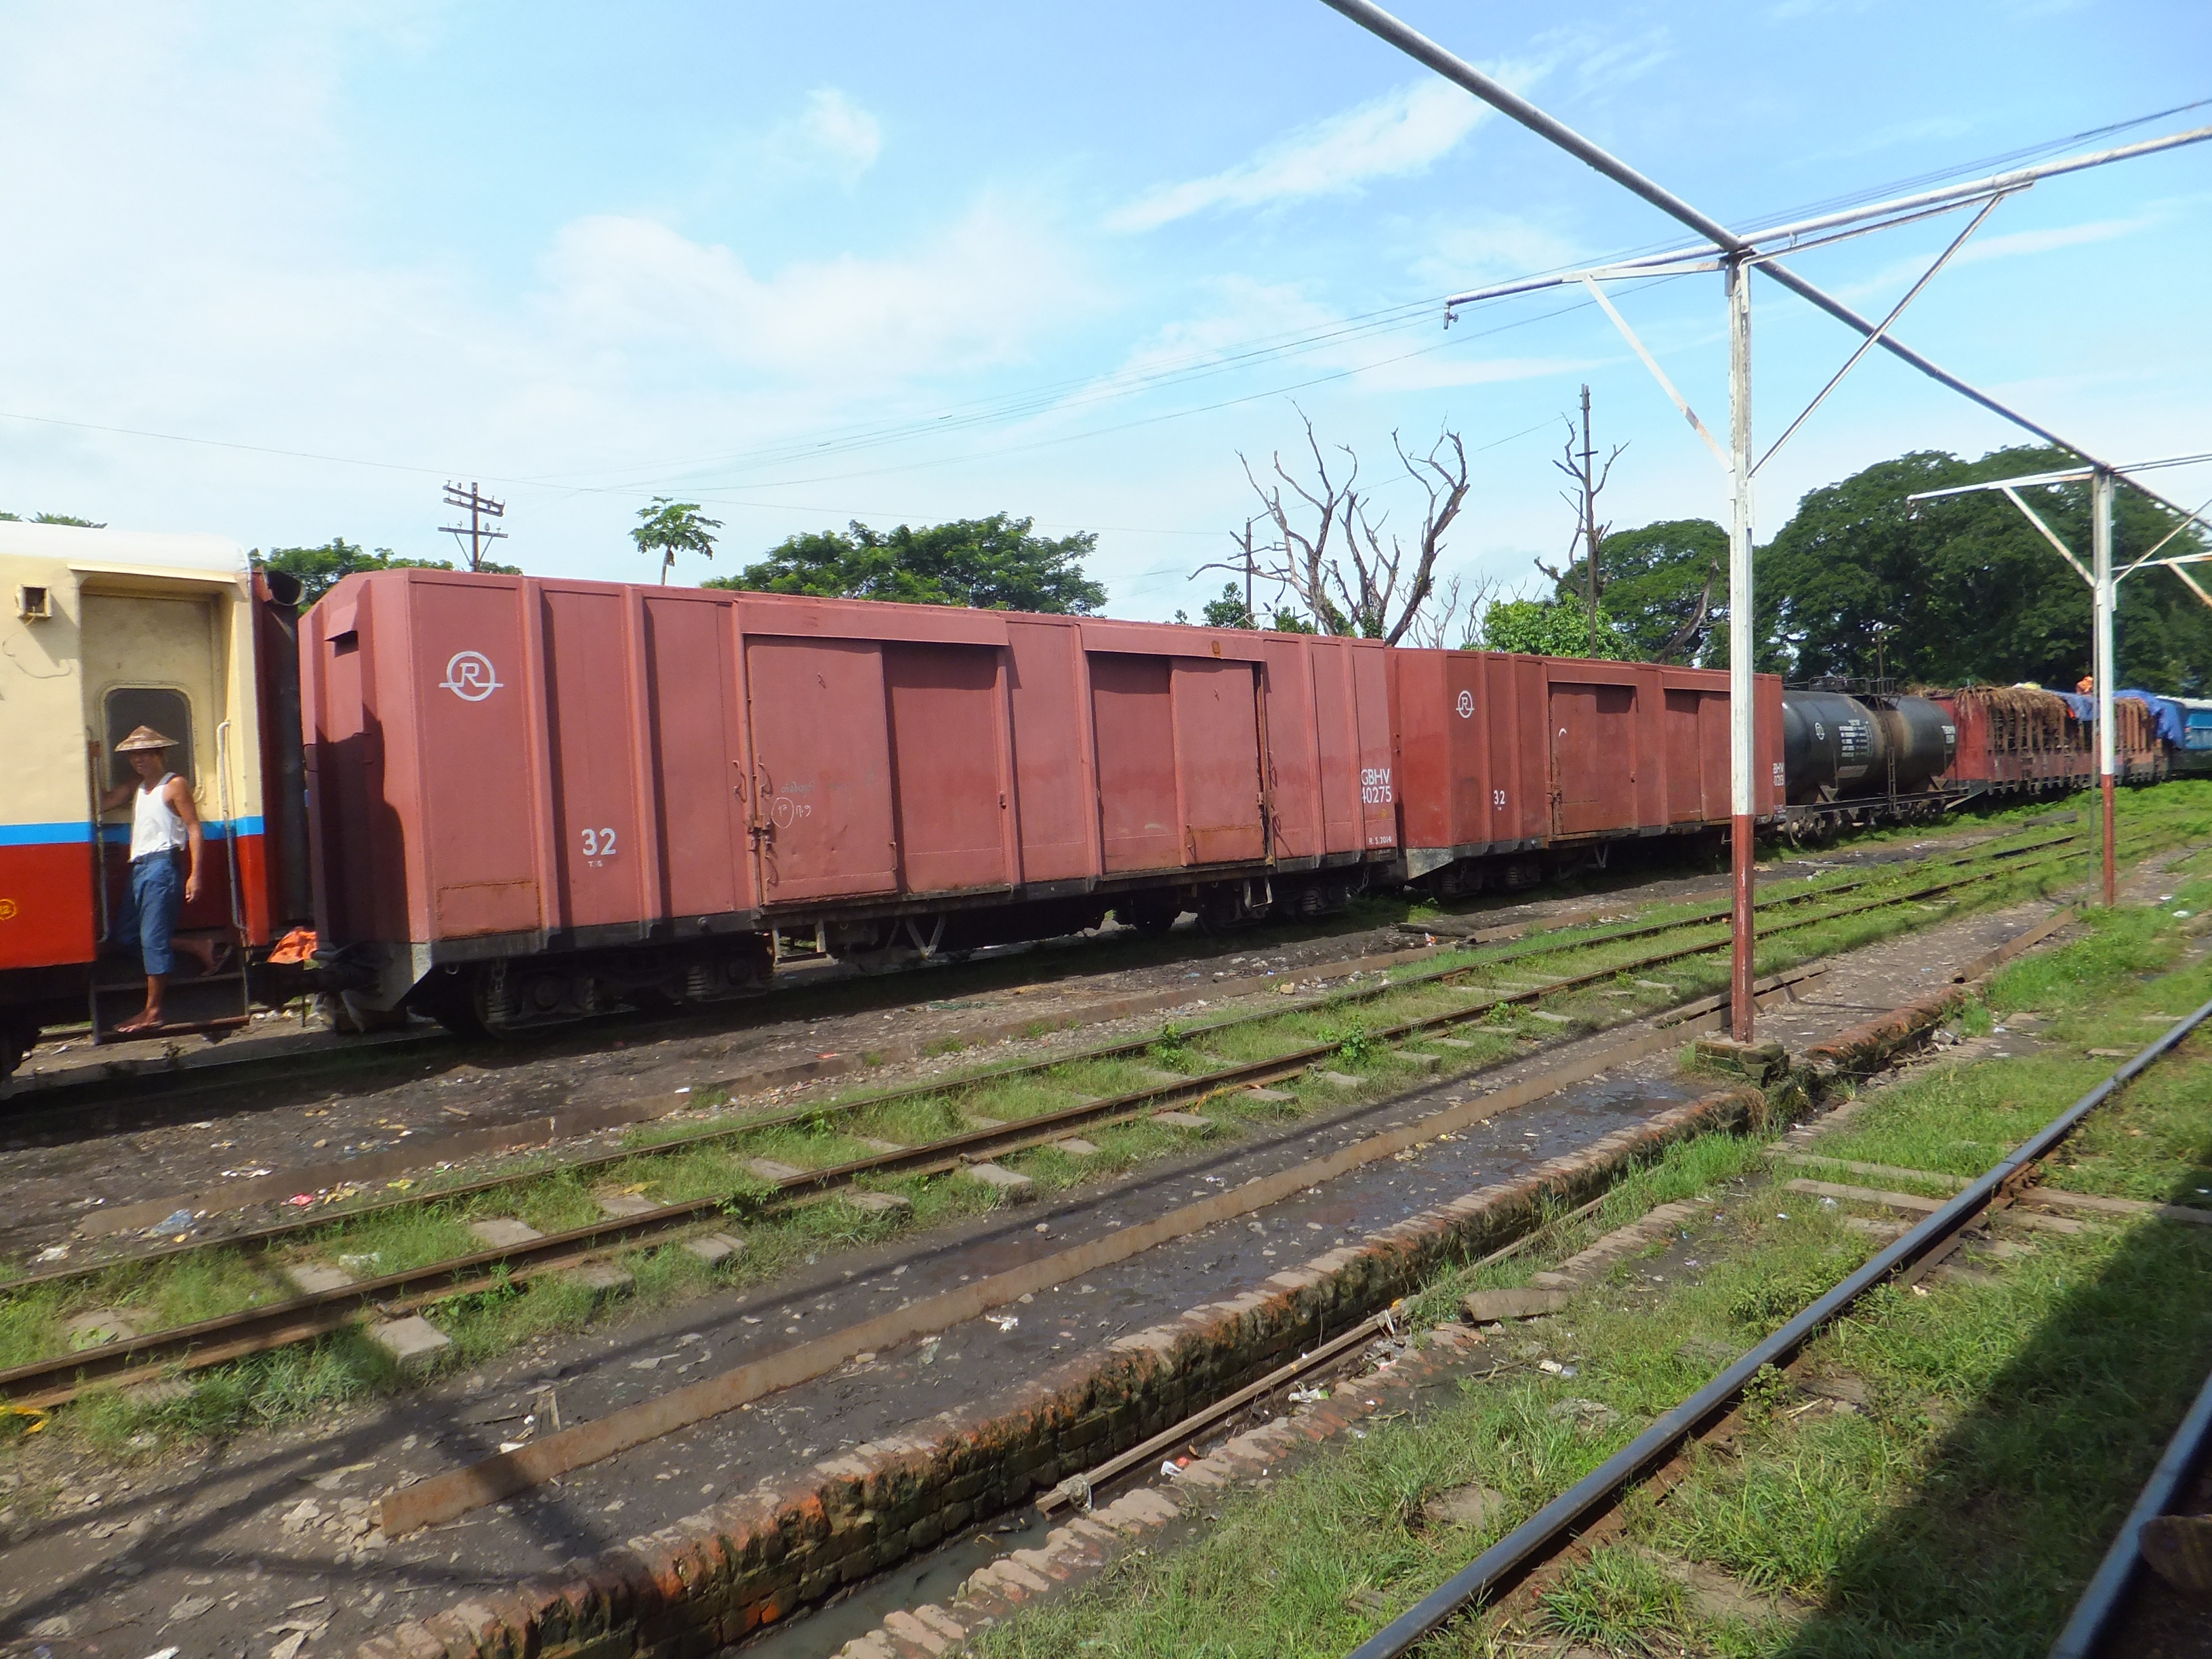
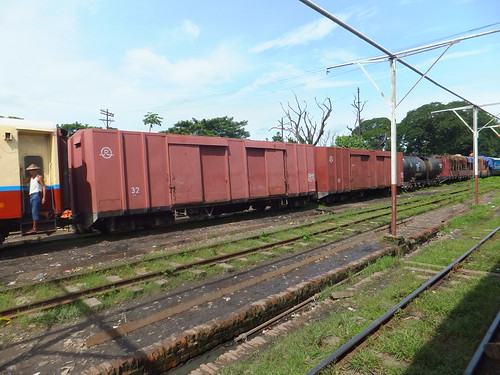
Bogie Goods Van code GBHV
 Original size.
Bogie Goods Vehicle. The examples shown are marked with capacities of 33 tons and 32 tons. Other examples, of a slightly different construction, are marked 36 ton capacity. They are fitted with two doors on each side. Each door is either sliding or, in some cases, made with two vertically hinged leaves with a third horizontally hinged section at the bottom. A similar-looking vehicle is coded 'PBHV'.
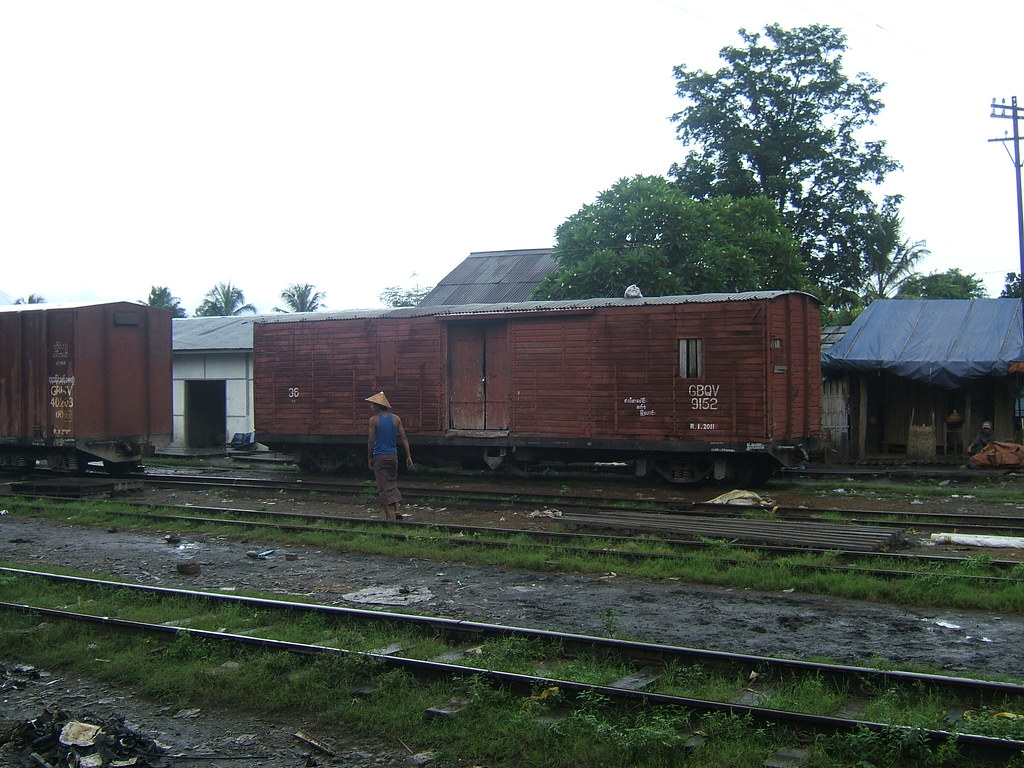
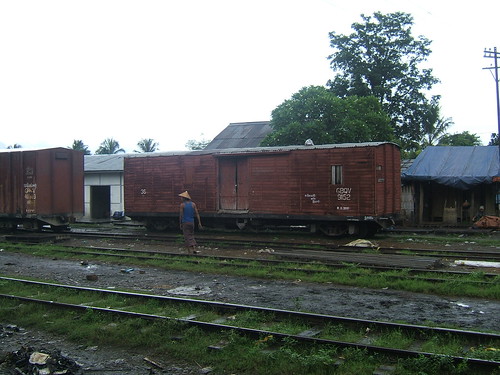
Bogie Goods Van code GBQV
 Original size.
Early boxvan retained for storage.
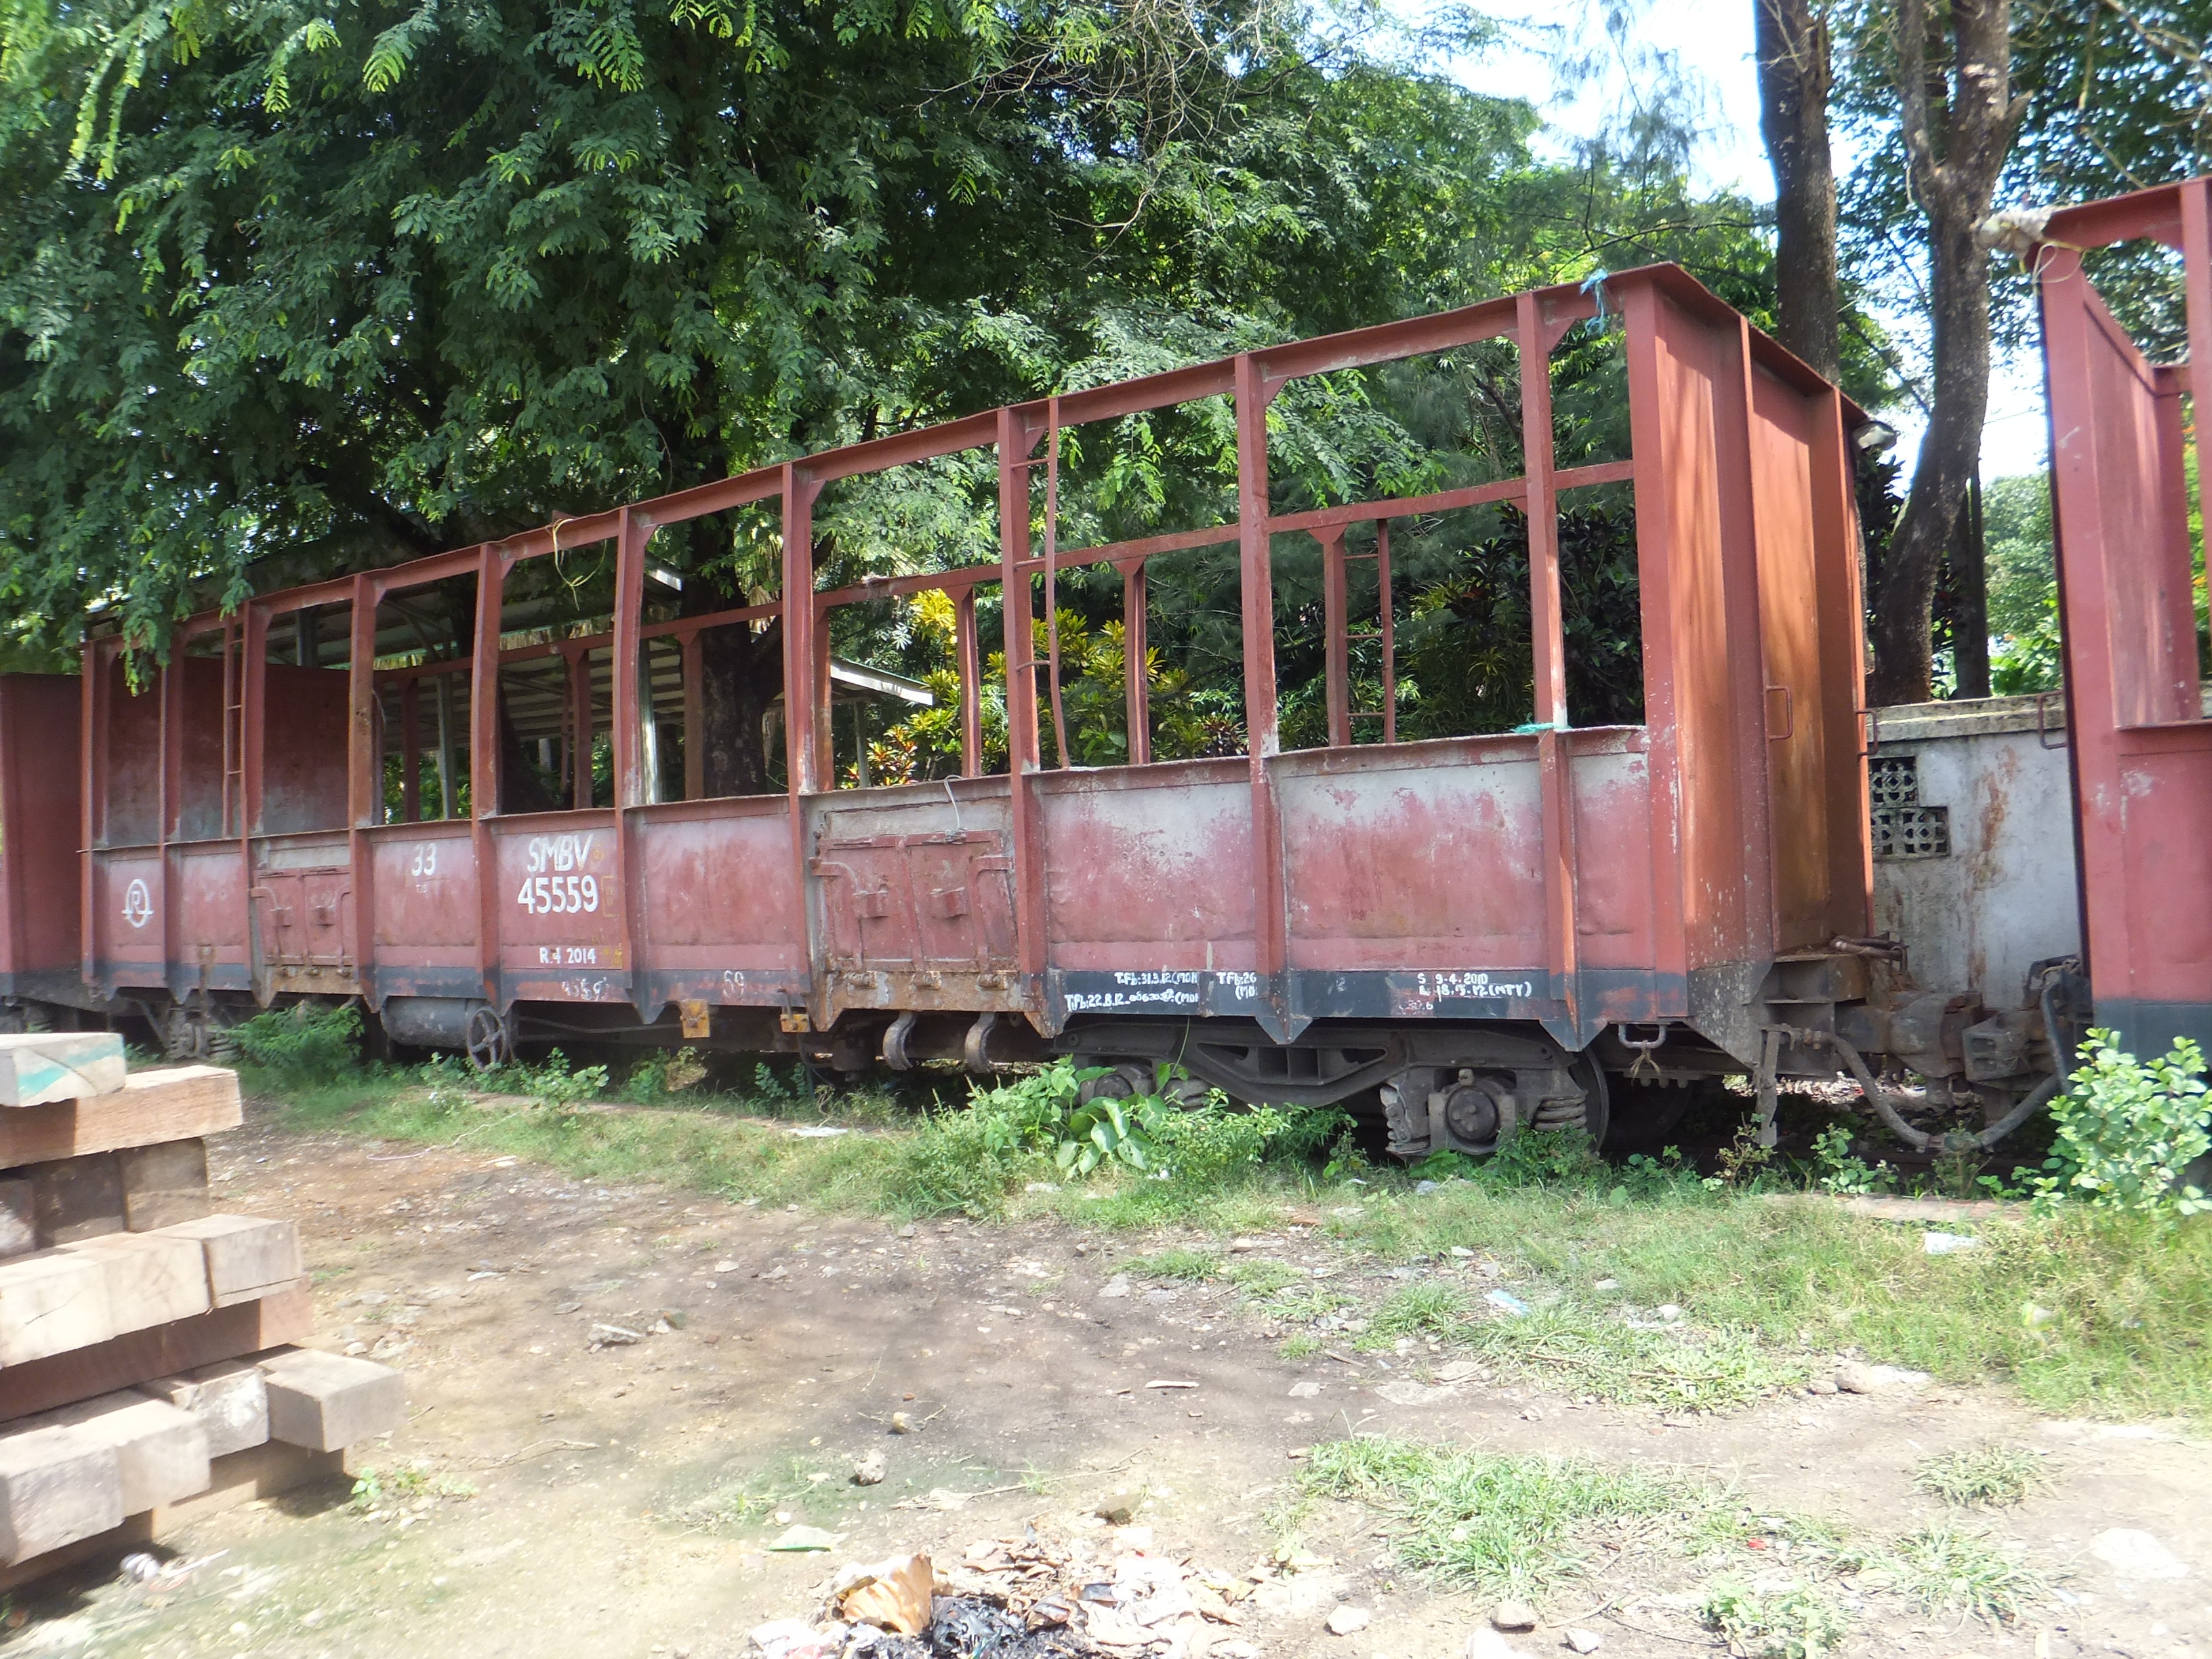
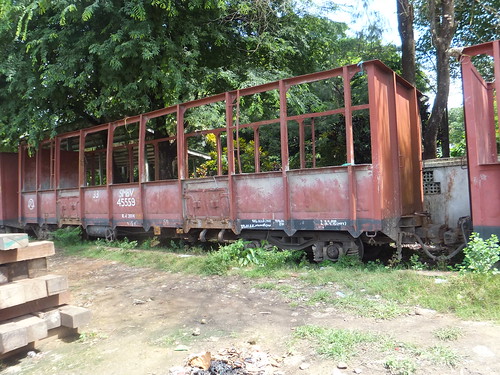
Livestock Wagon code SMBV
Original size.
Open wagon with framework allowing load to be sheeted, where required. The wagon shown has automatic couplers and air brakes.
Bogie Flat Wagon code WBY
Original size.
Two examples of this type, with the loads sheeted over, can be seen in this picture. They are marked as 30 ton capacity and fitted with chopper couplings.
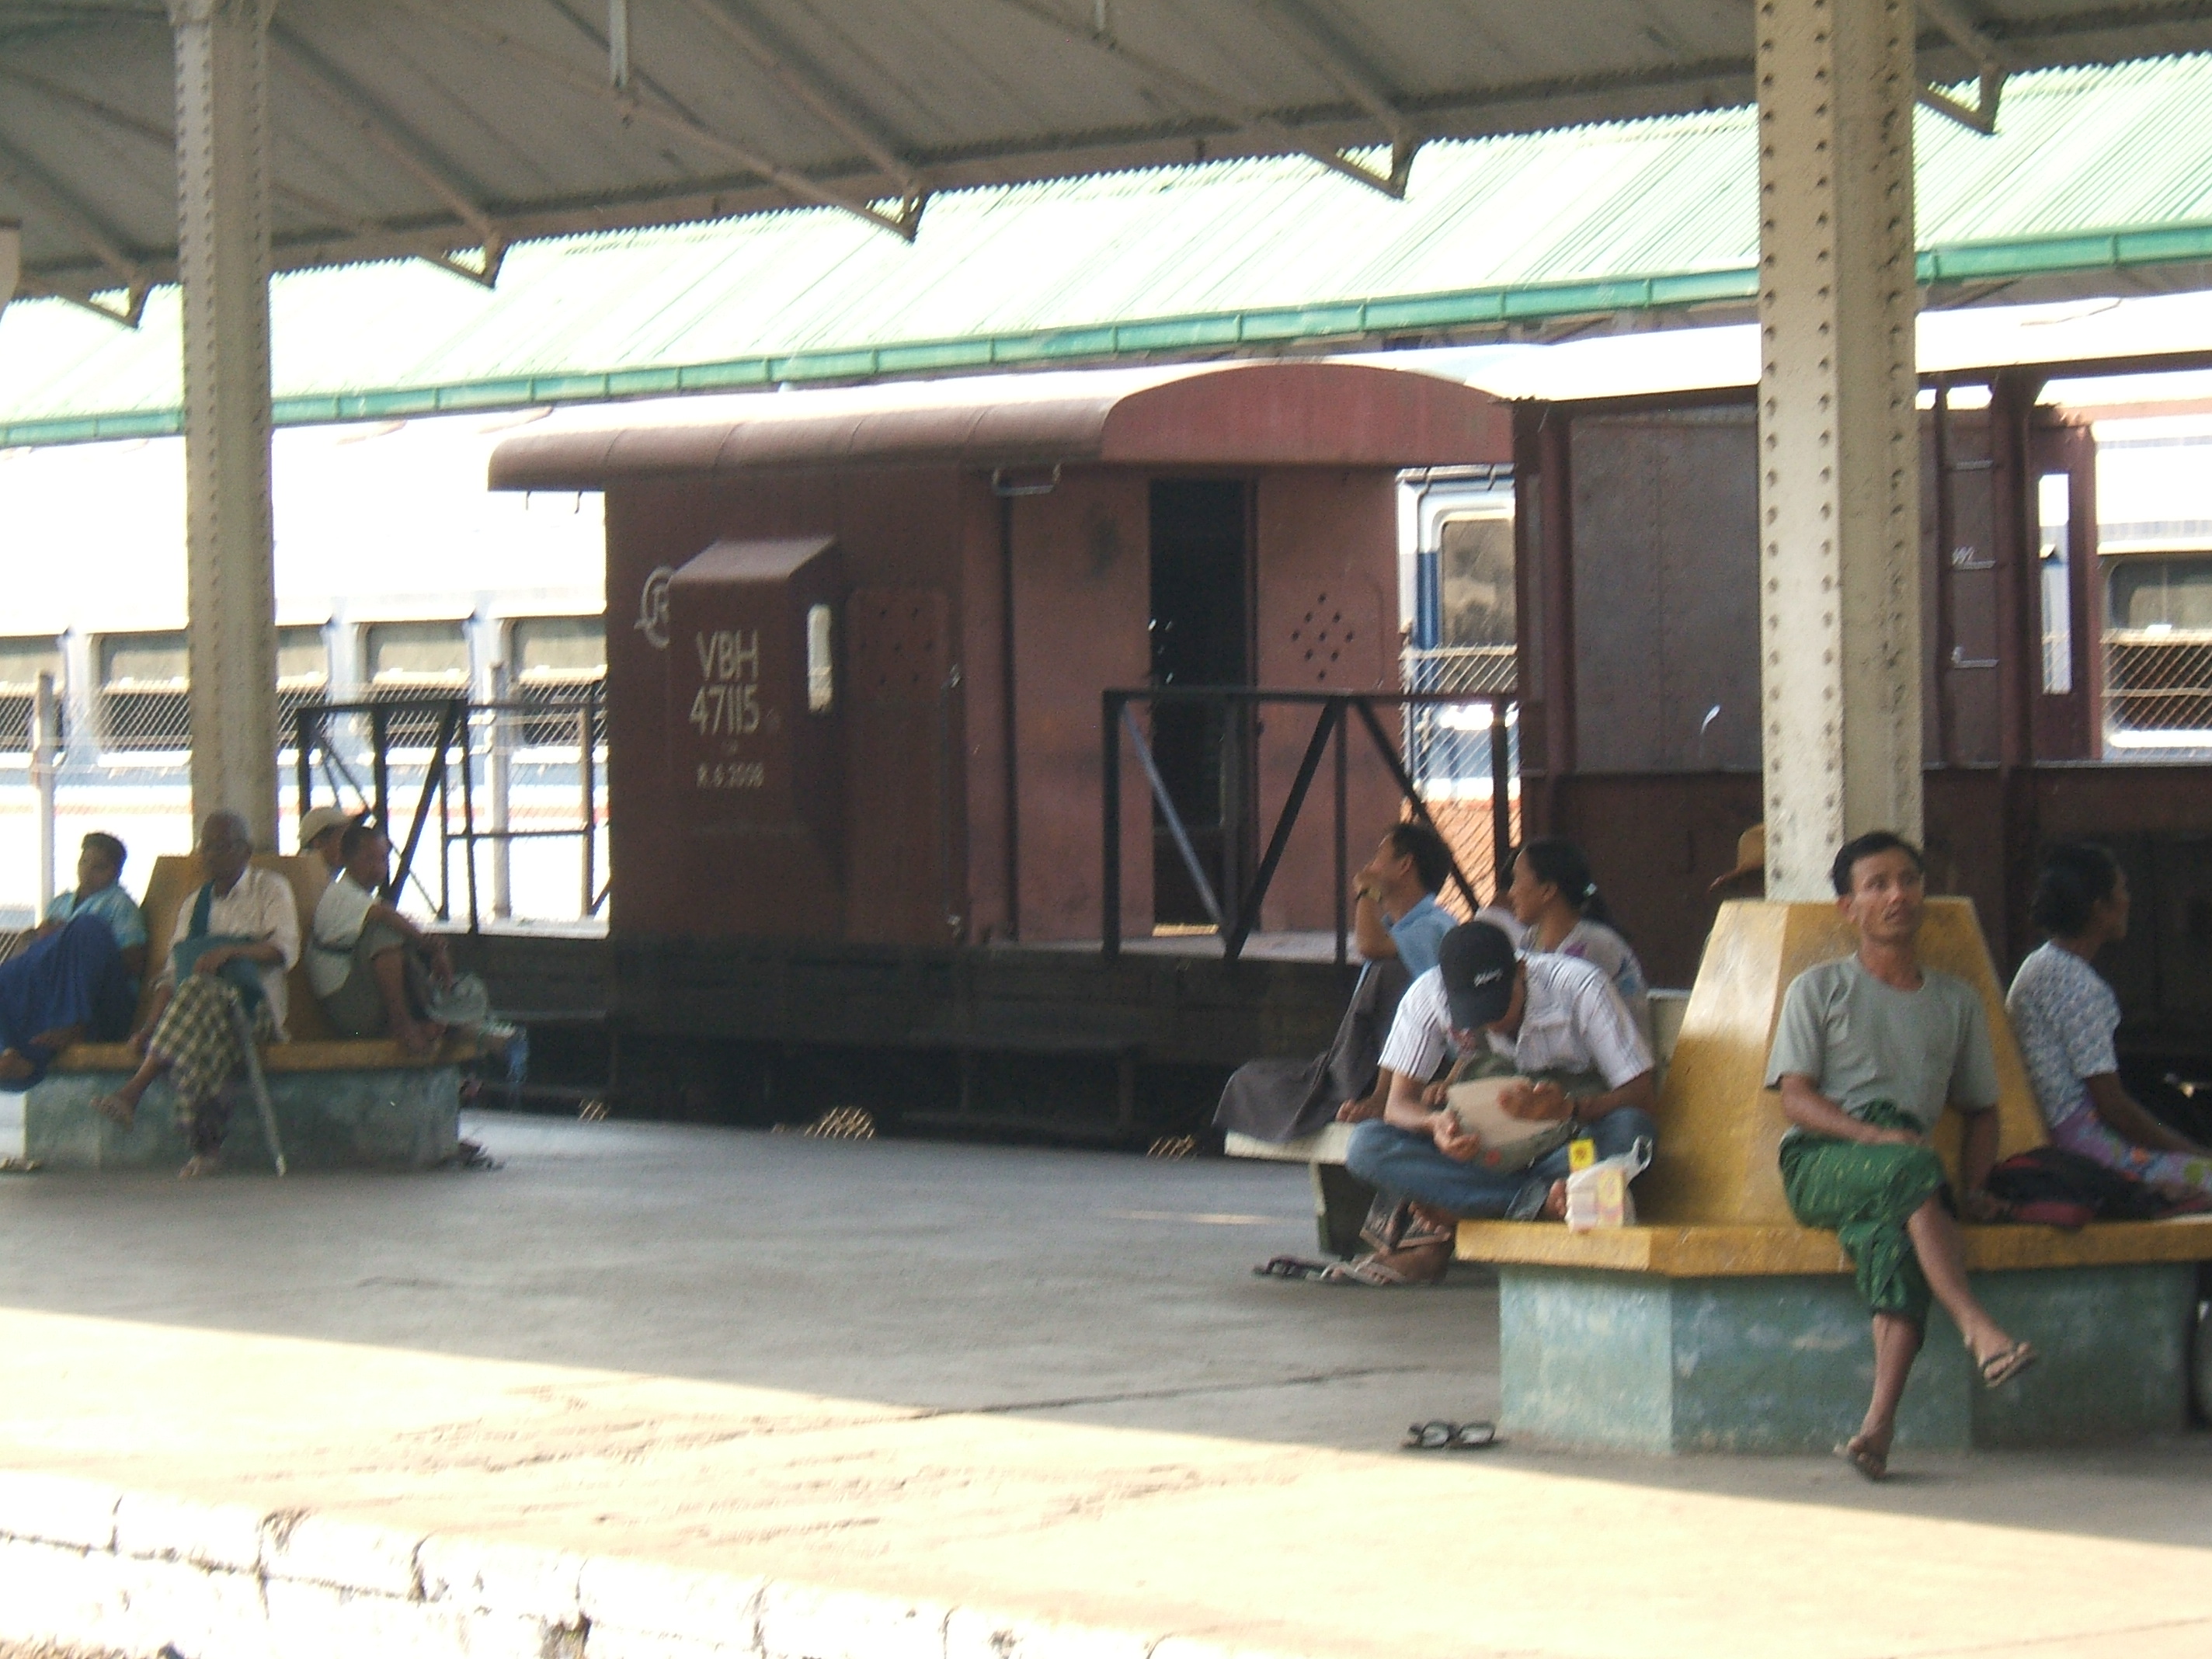
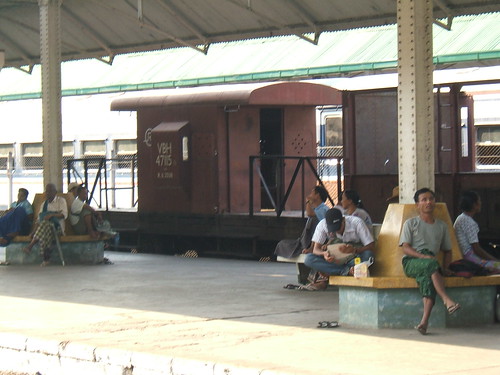
Brake Van code VBH
>
Original size.
Bogie long-wheelbase Freight Brake Van.
Passenger Rolling Stock in Burma
This is a rather informal listing of types of passenger vehicle I've come across. Originally, 'Chopper' couplers and vacuum brakes were used throughout Burma. On more recent equipment, 'Automatic' couplers (similar to the British 'Buckeye') are fitted with single-pipe air brakes.
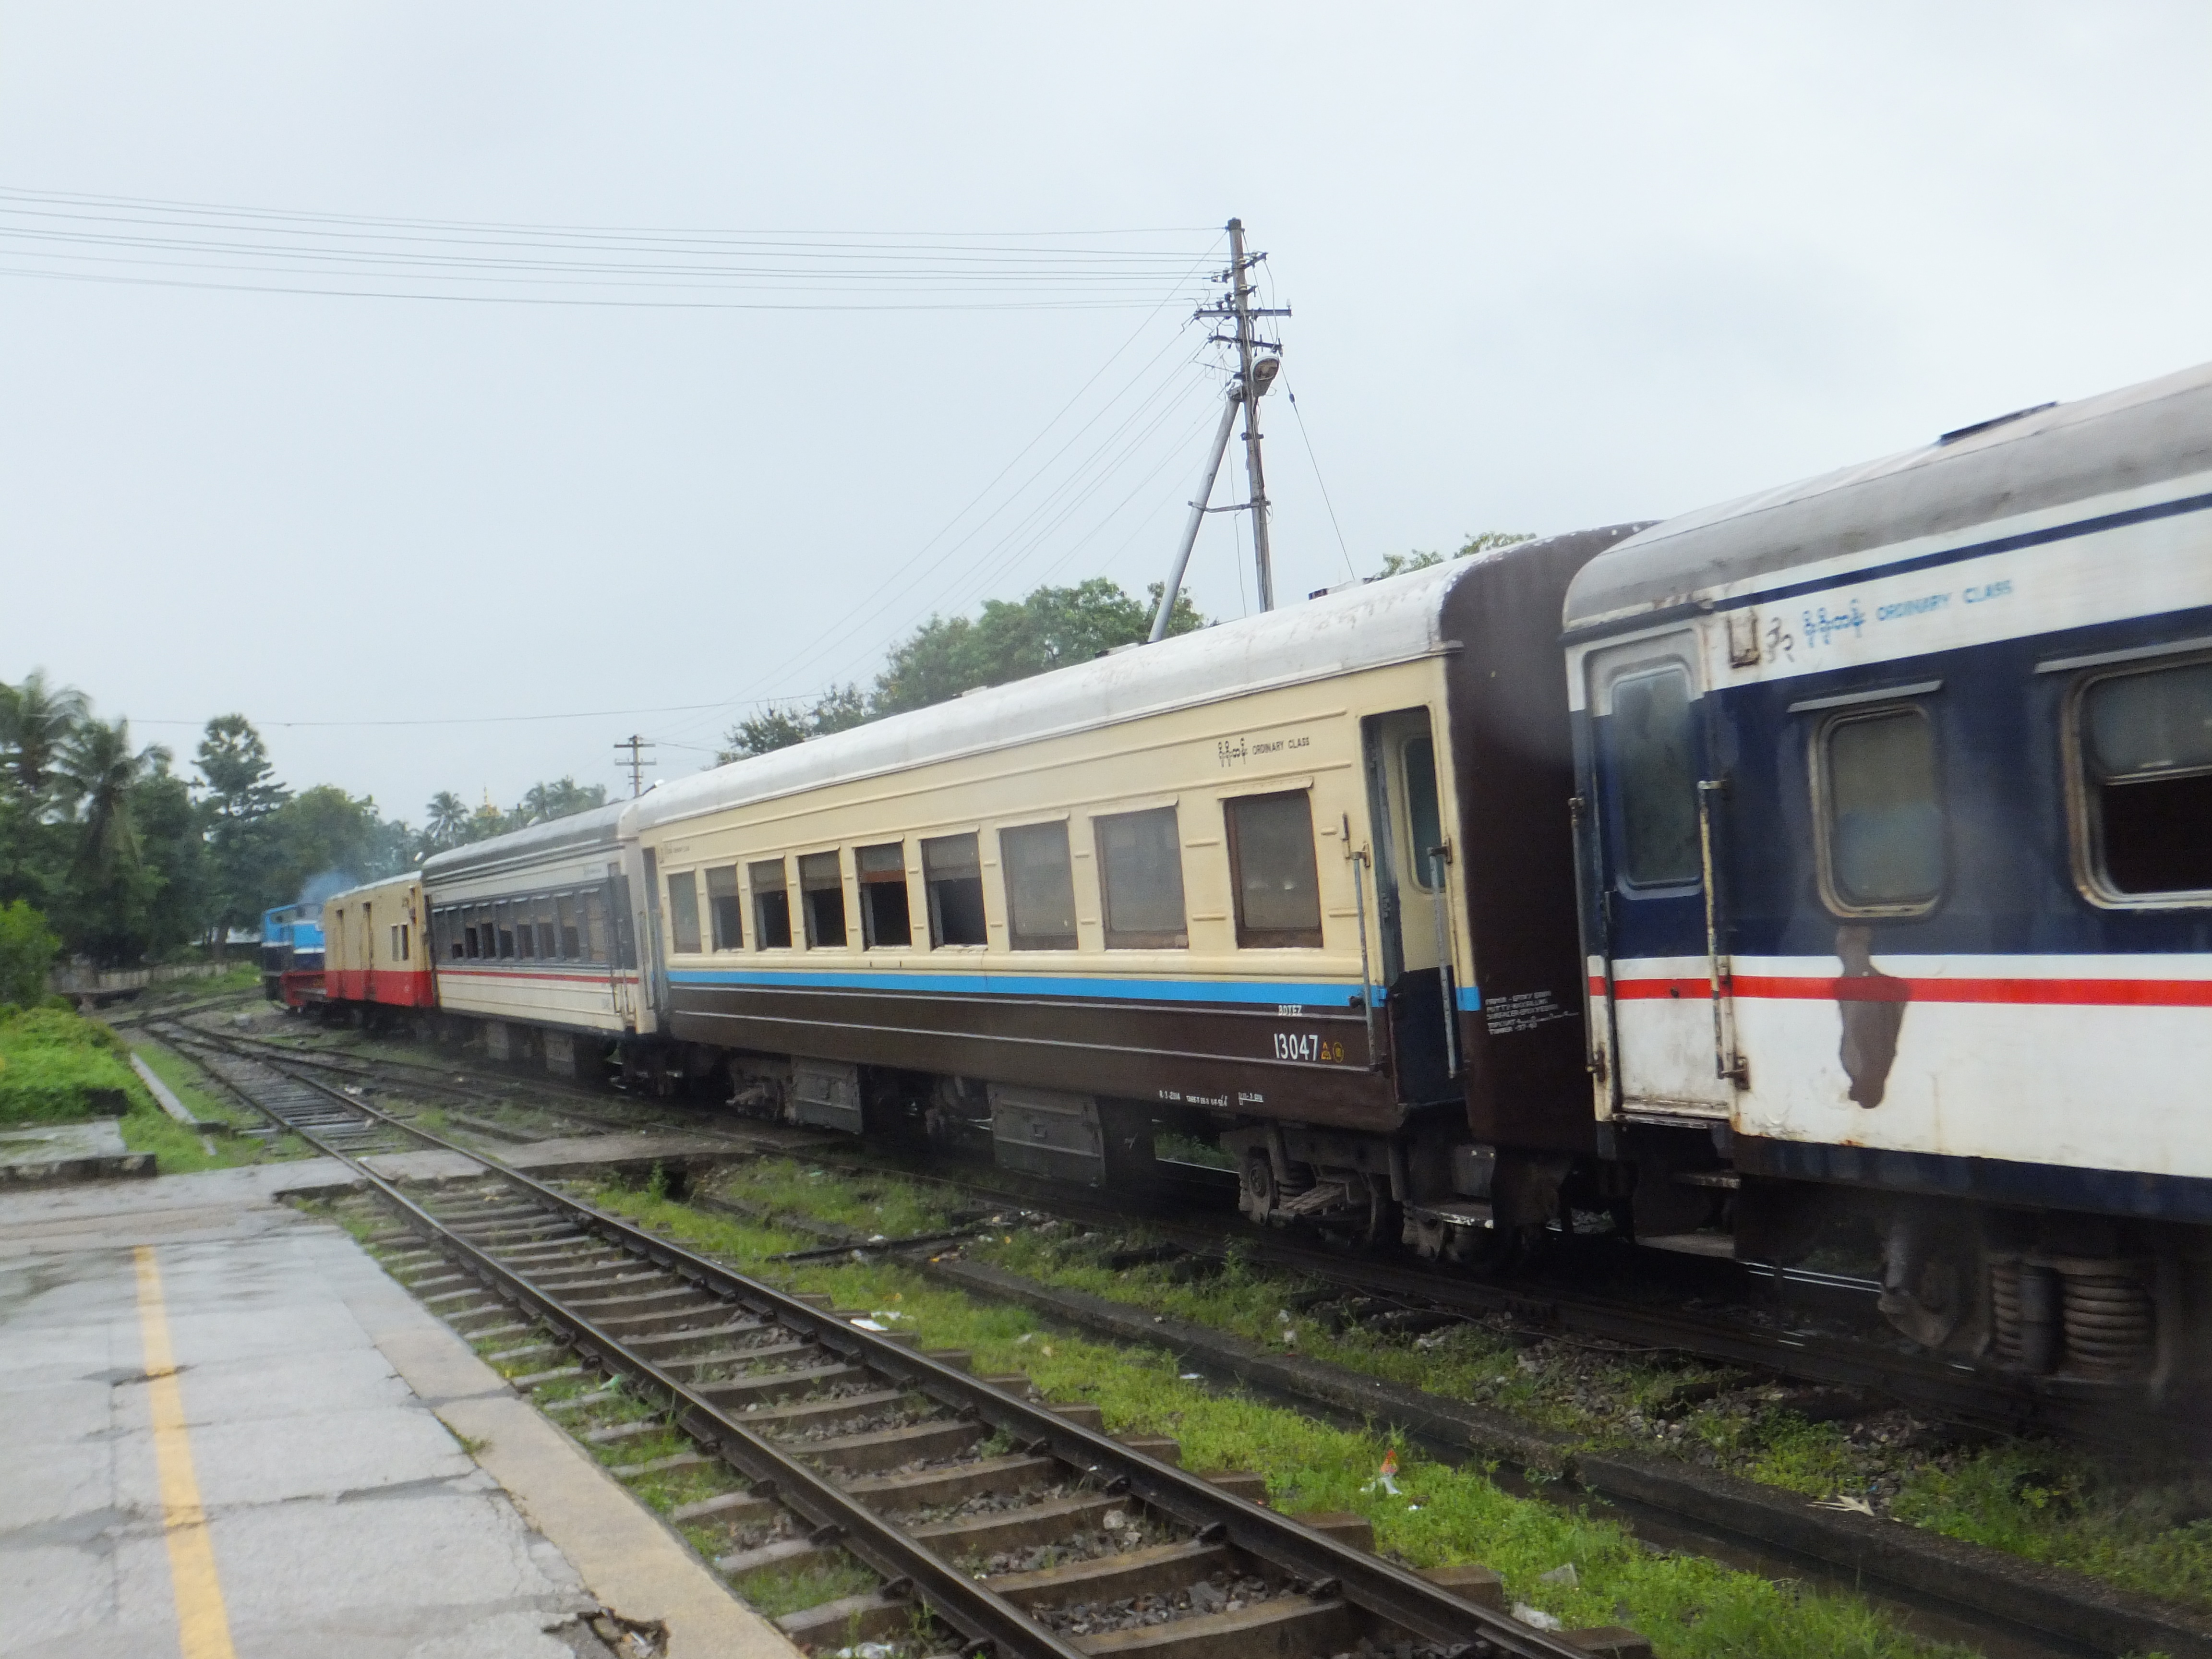
Ordinary Class Bogie Daycoach code BDT)

Ordinary Class Bogie Daycoach, cream and brown with a blue waistline. A modified version has been seen in blue and white with a red waistline.
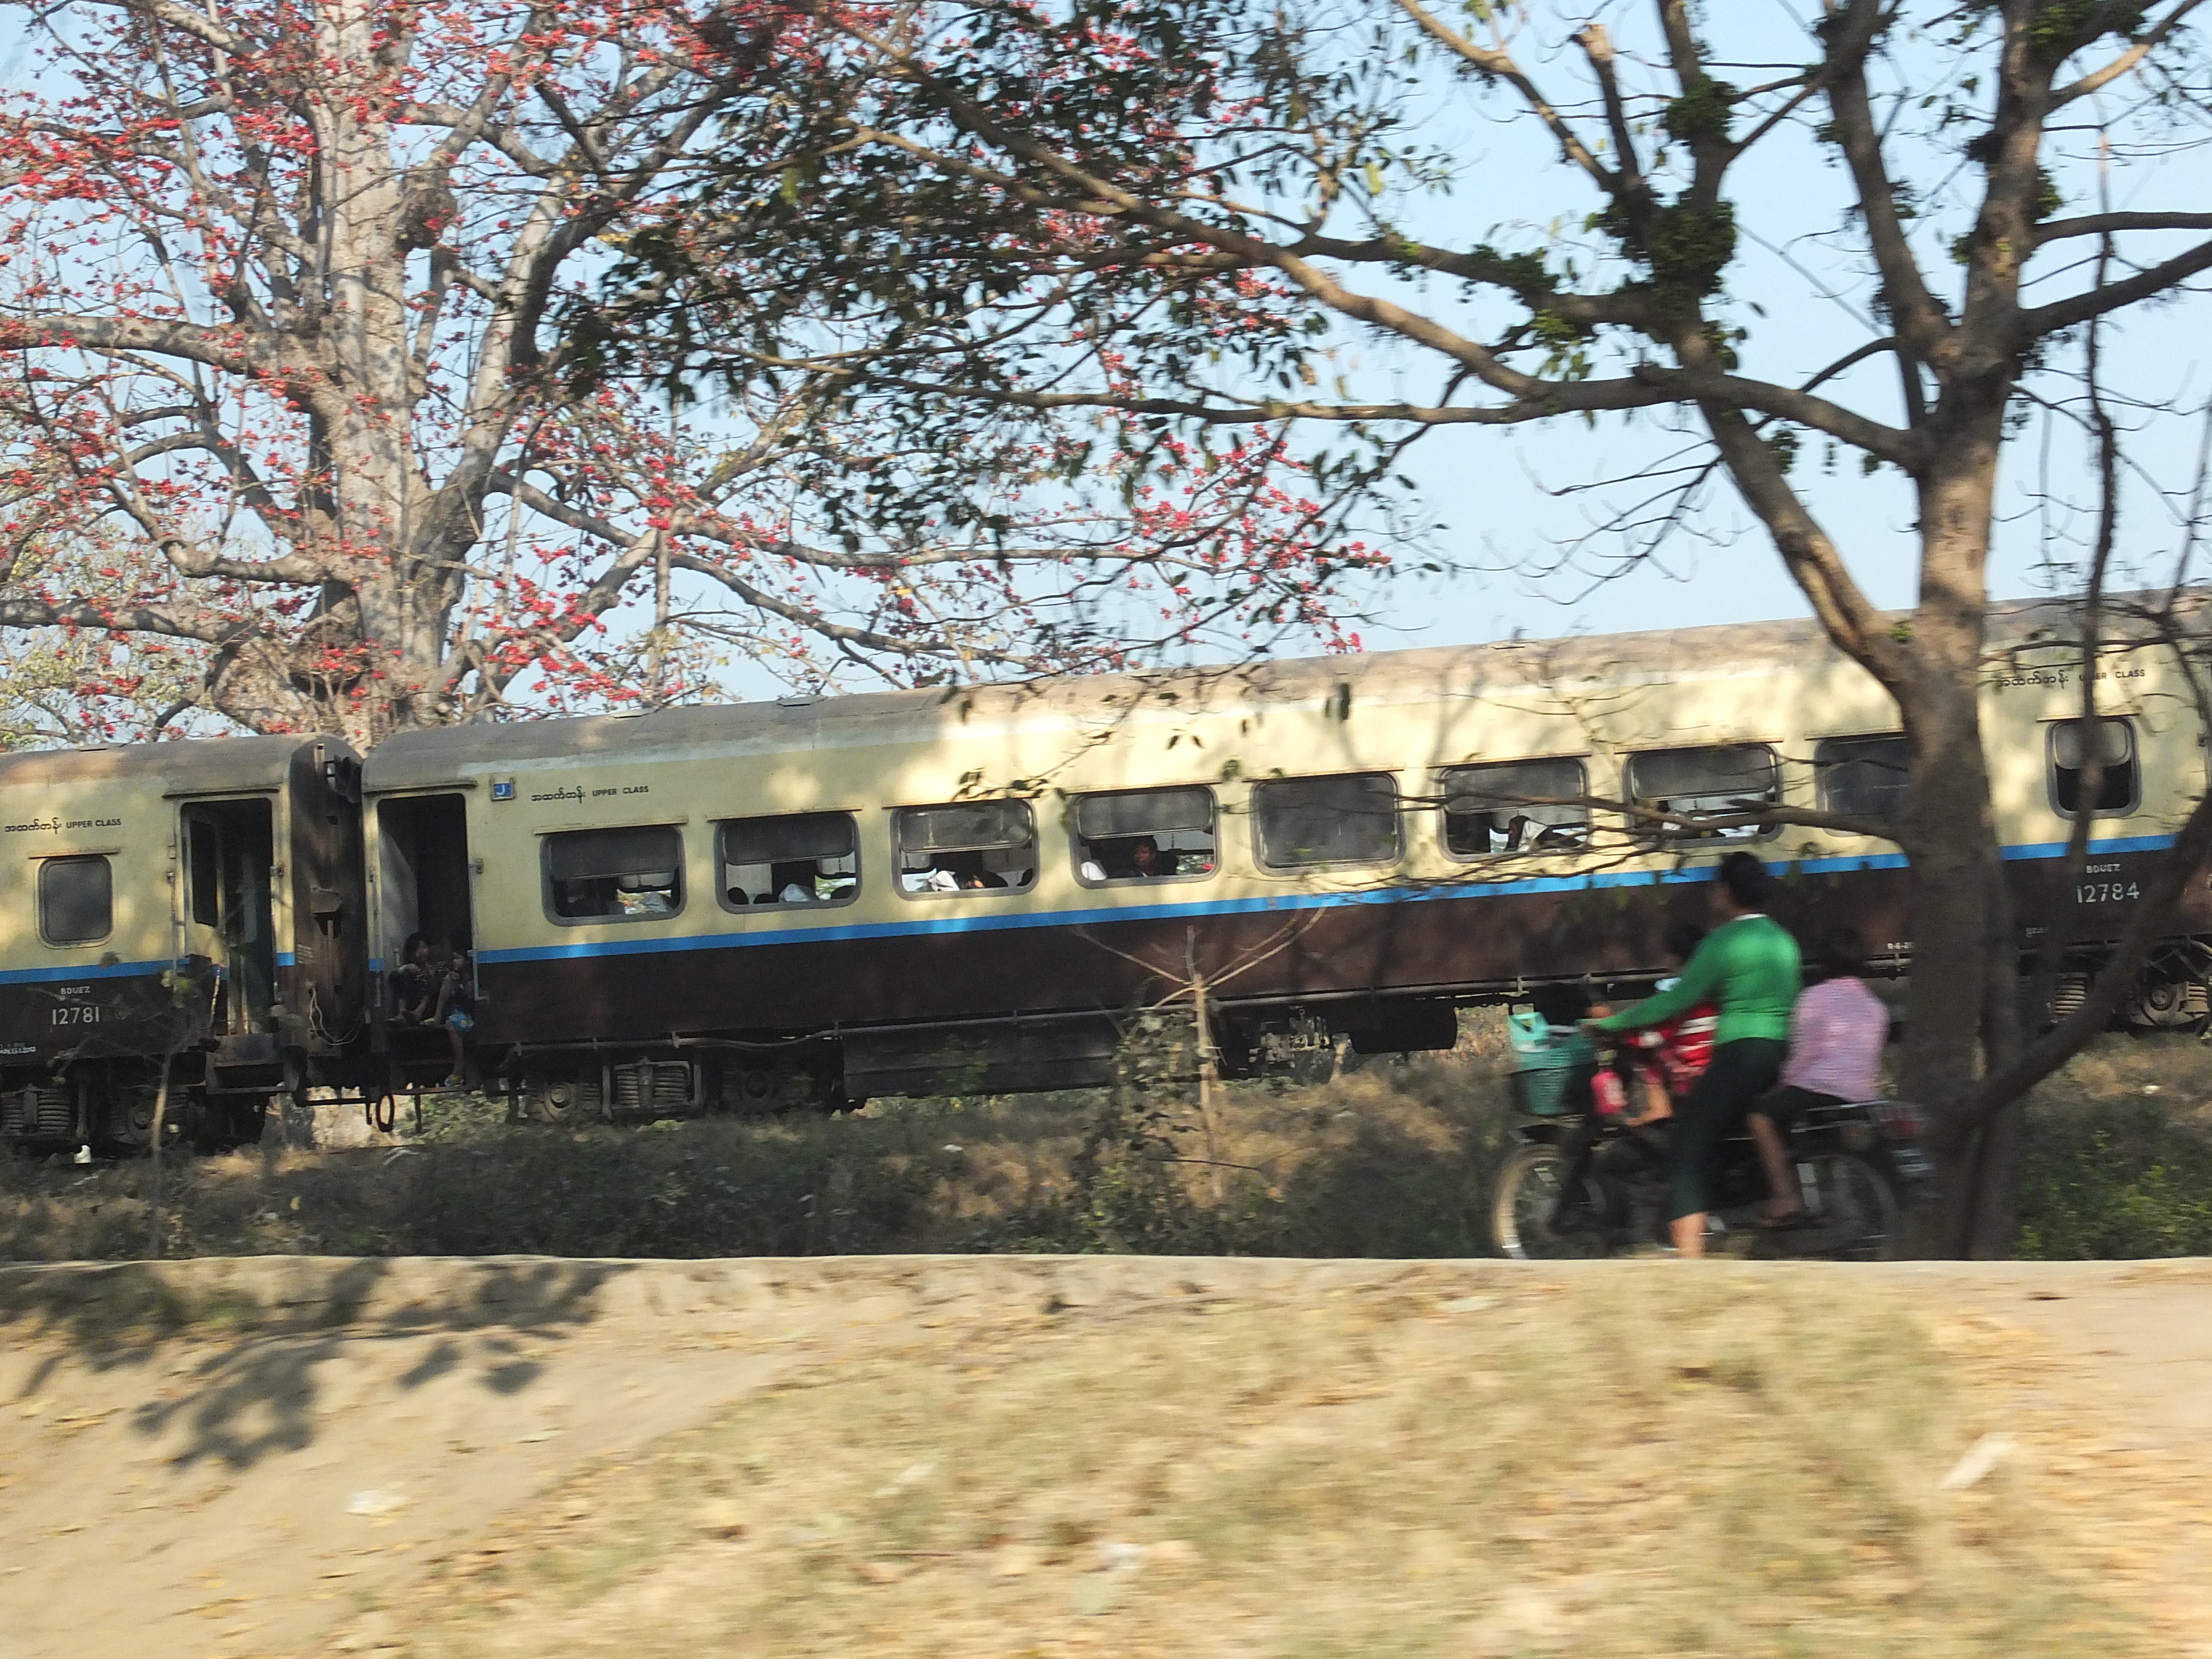
Upper Class Bogie Daycoach code BDUEZ
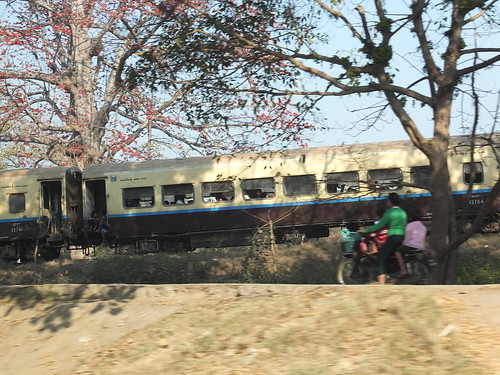
Upper Class Bogie Daycoach, cream and brown with a blue waistline.
Ordinary Class Bogie Daycoach code BDTE(subscript LED)Z
Original size
Ordinary Class Bogie Daycoach fitted with chopper couplings. No brakes on this example. The 'LED' presumably indicates that the original roof lighting fittings have been replaced by panels of white light emitting diodes.
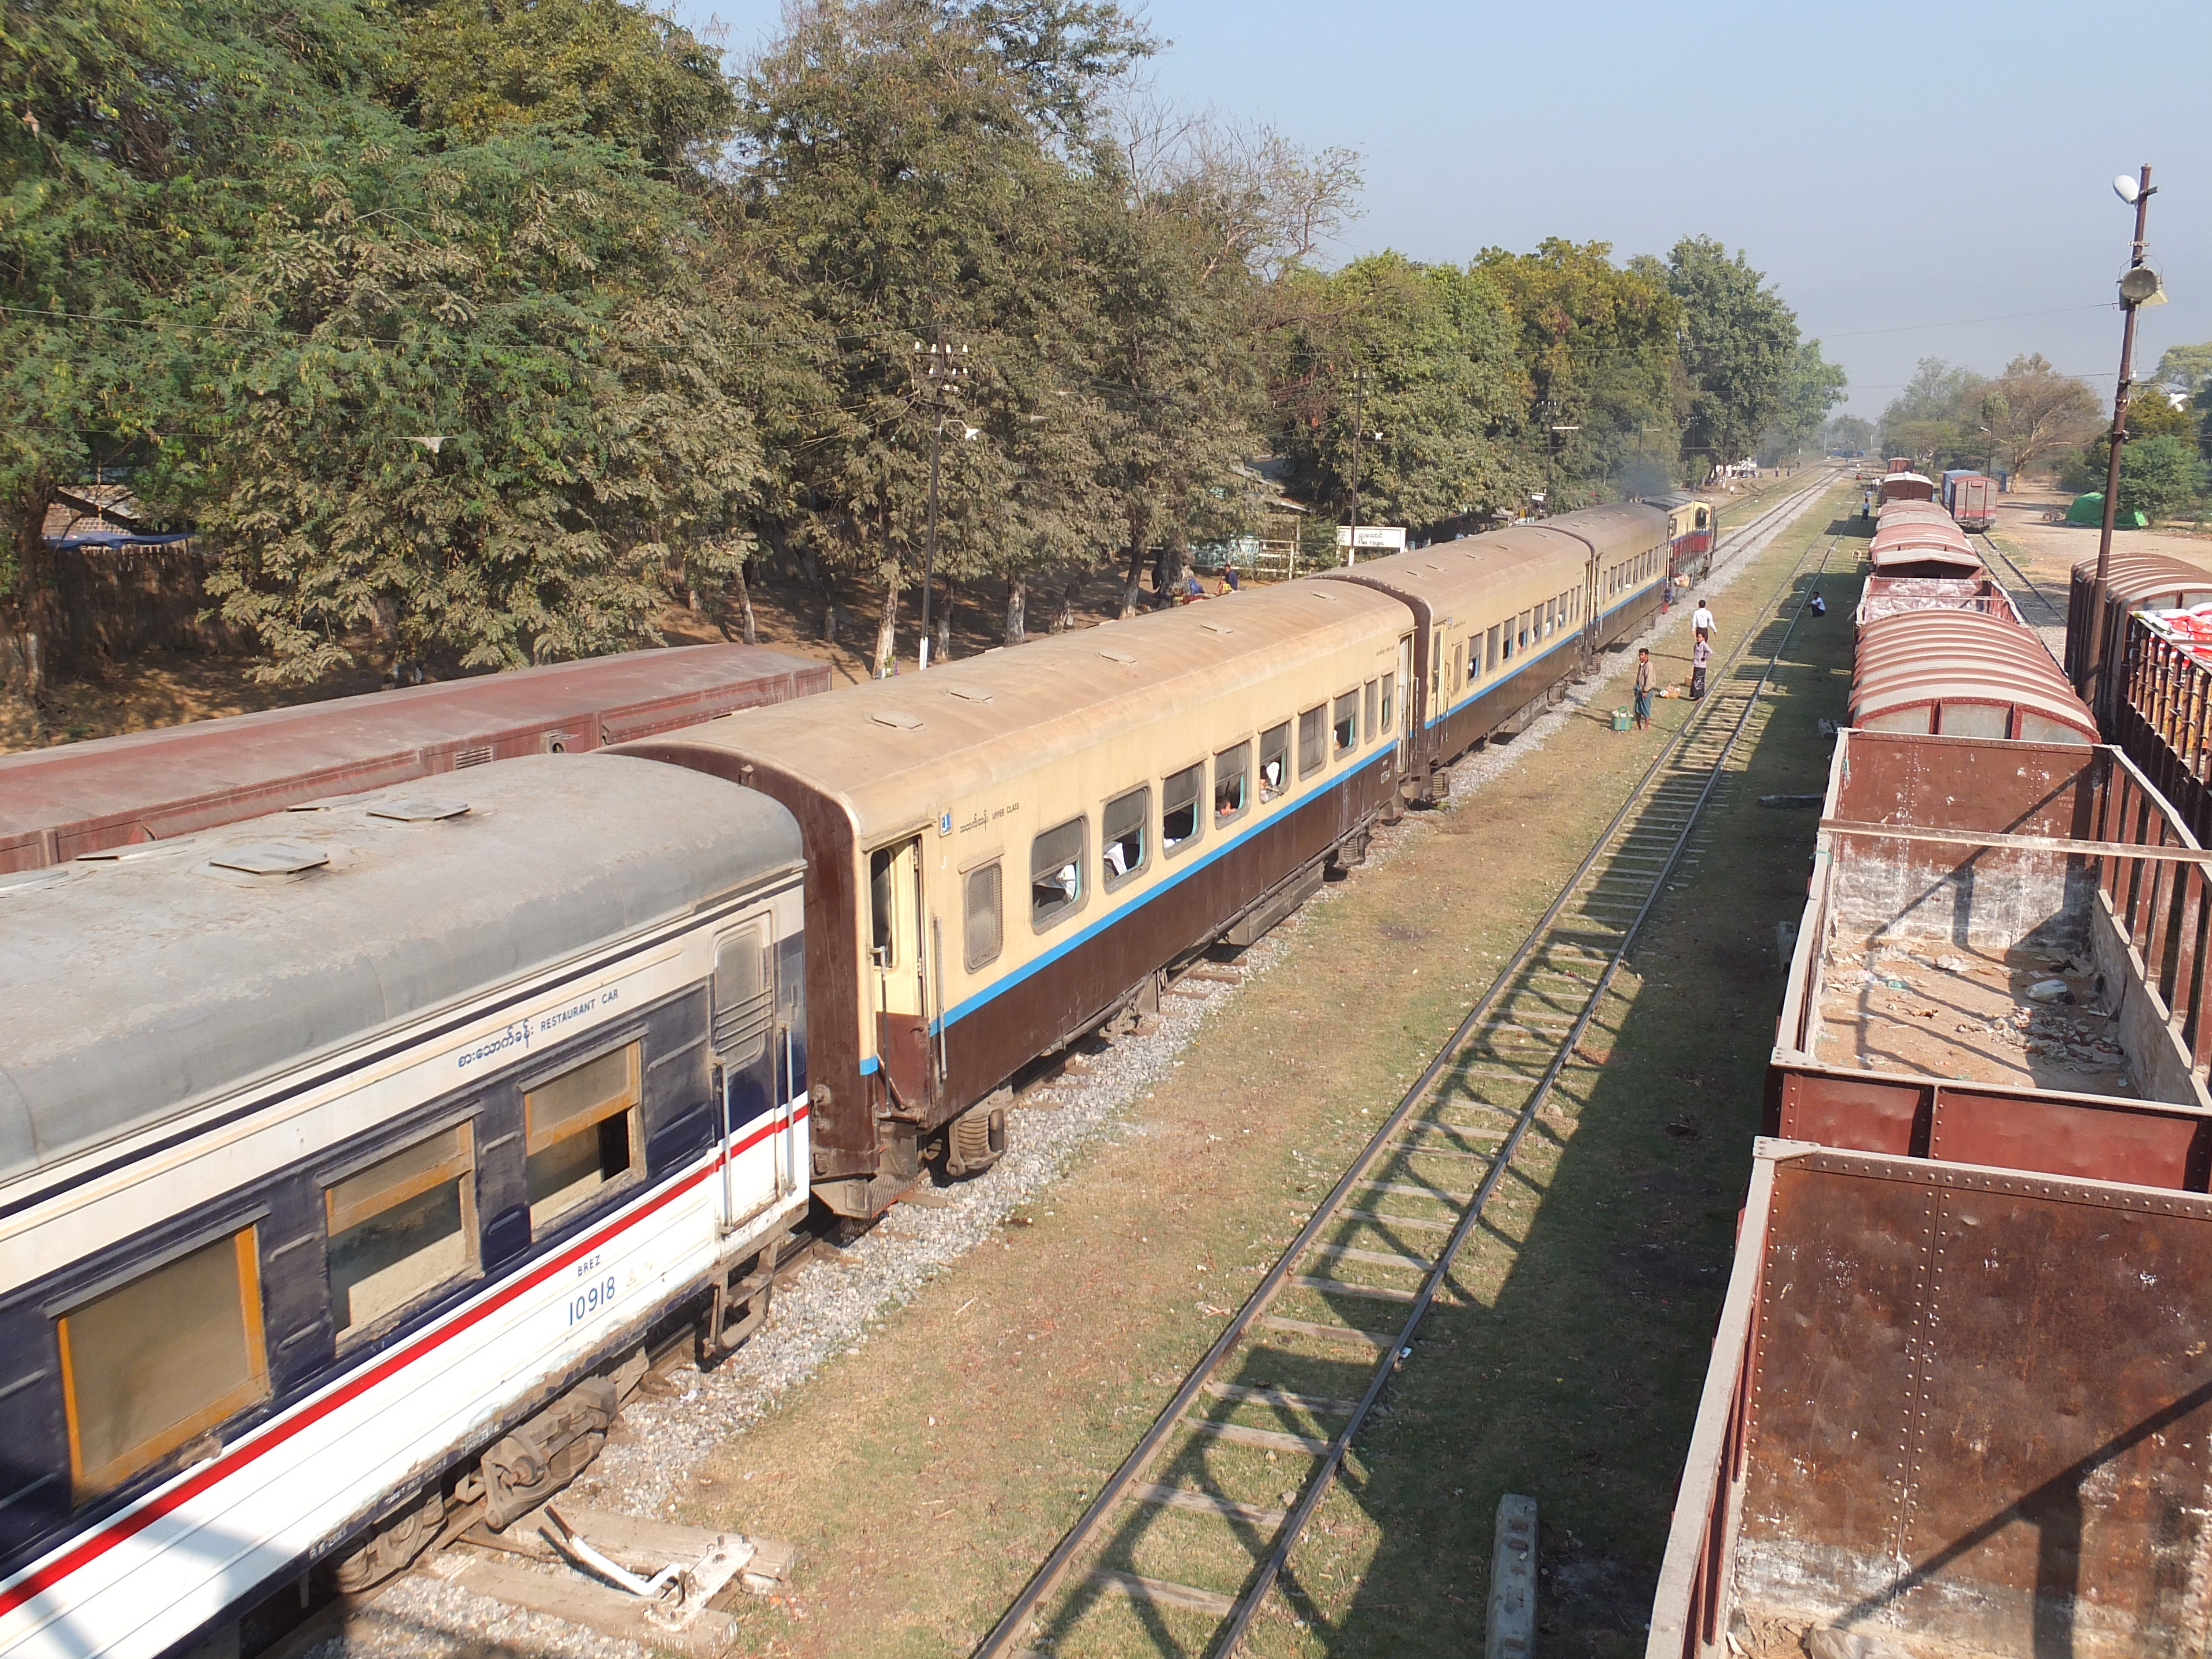
Restaurant Car code BREZ
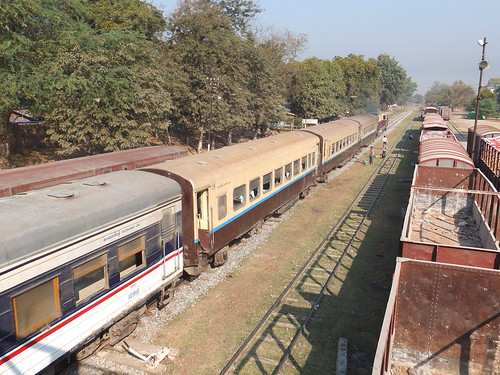
The coach on the left is a Restaurant Car, painted blue and white with a red waistline.
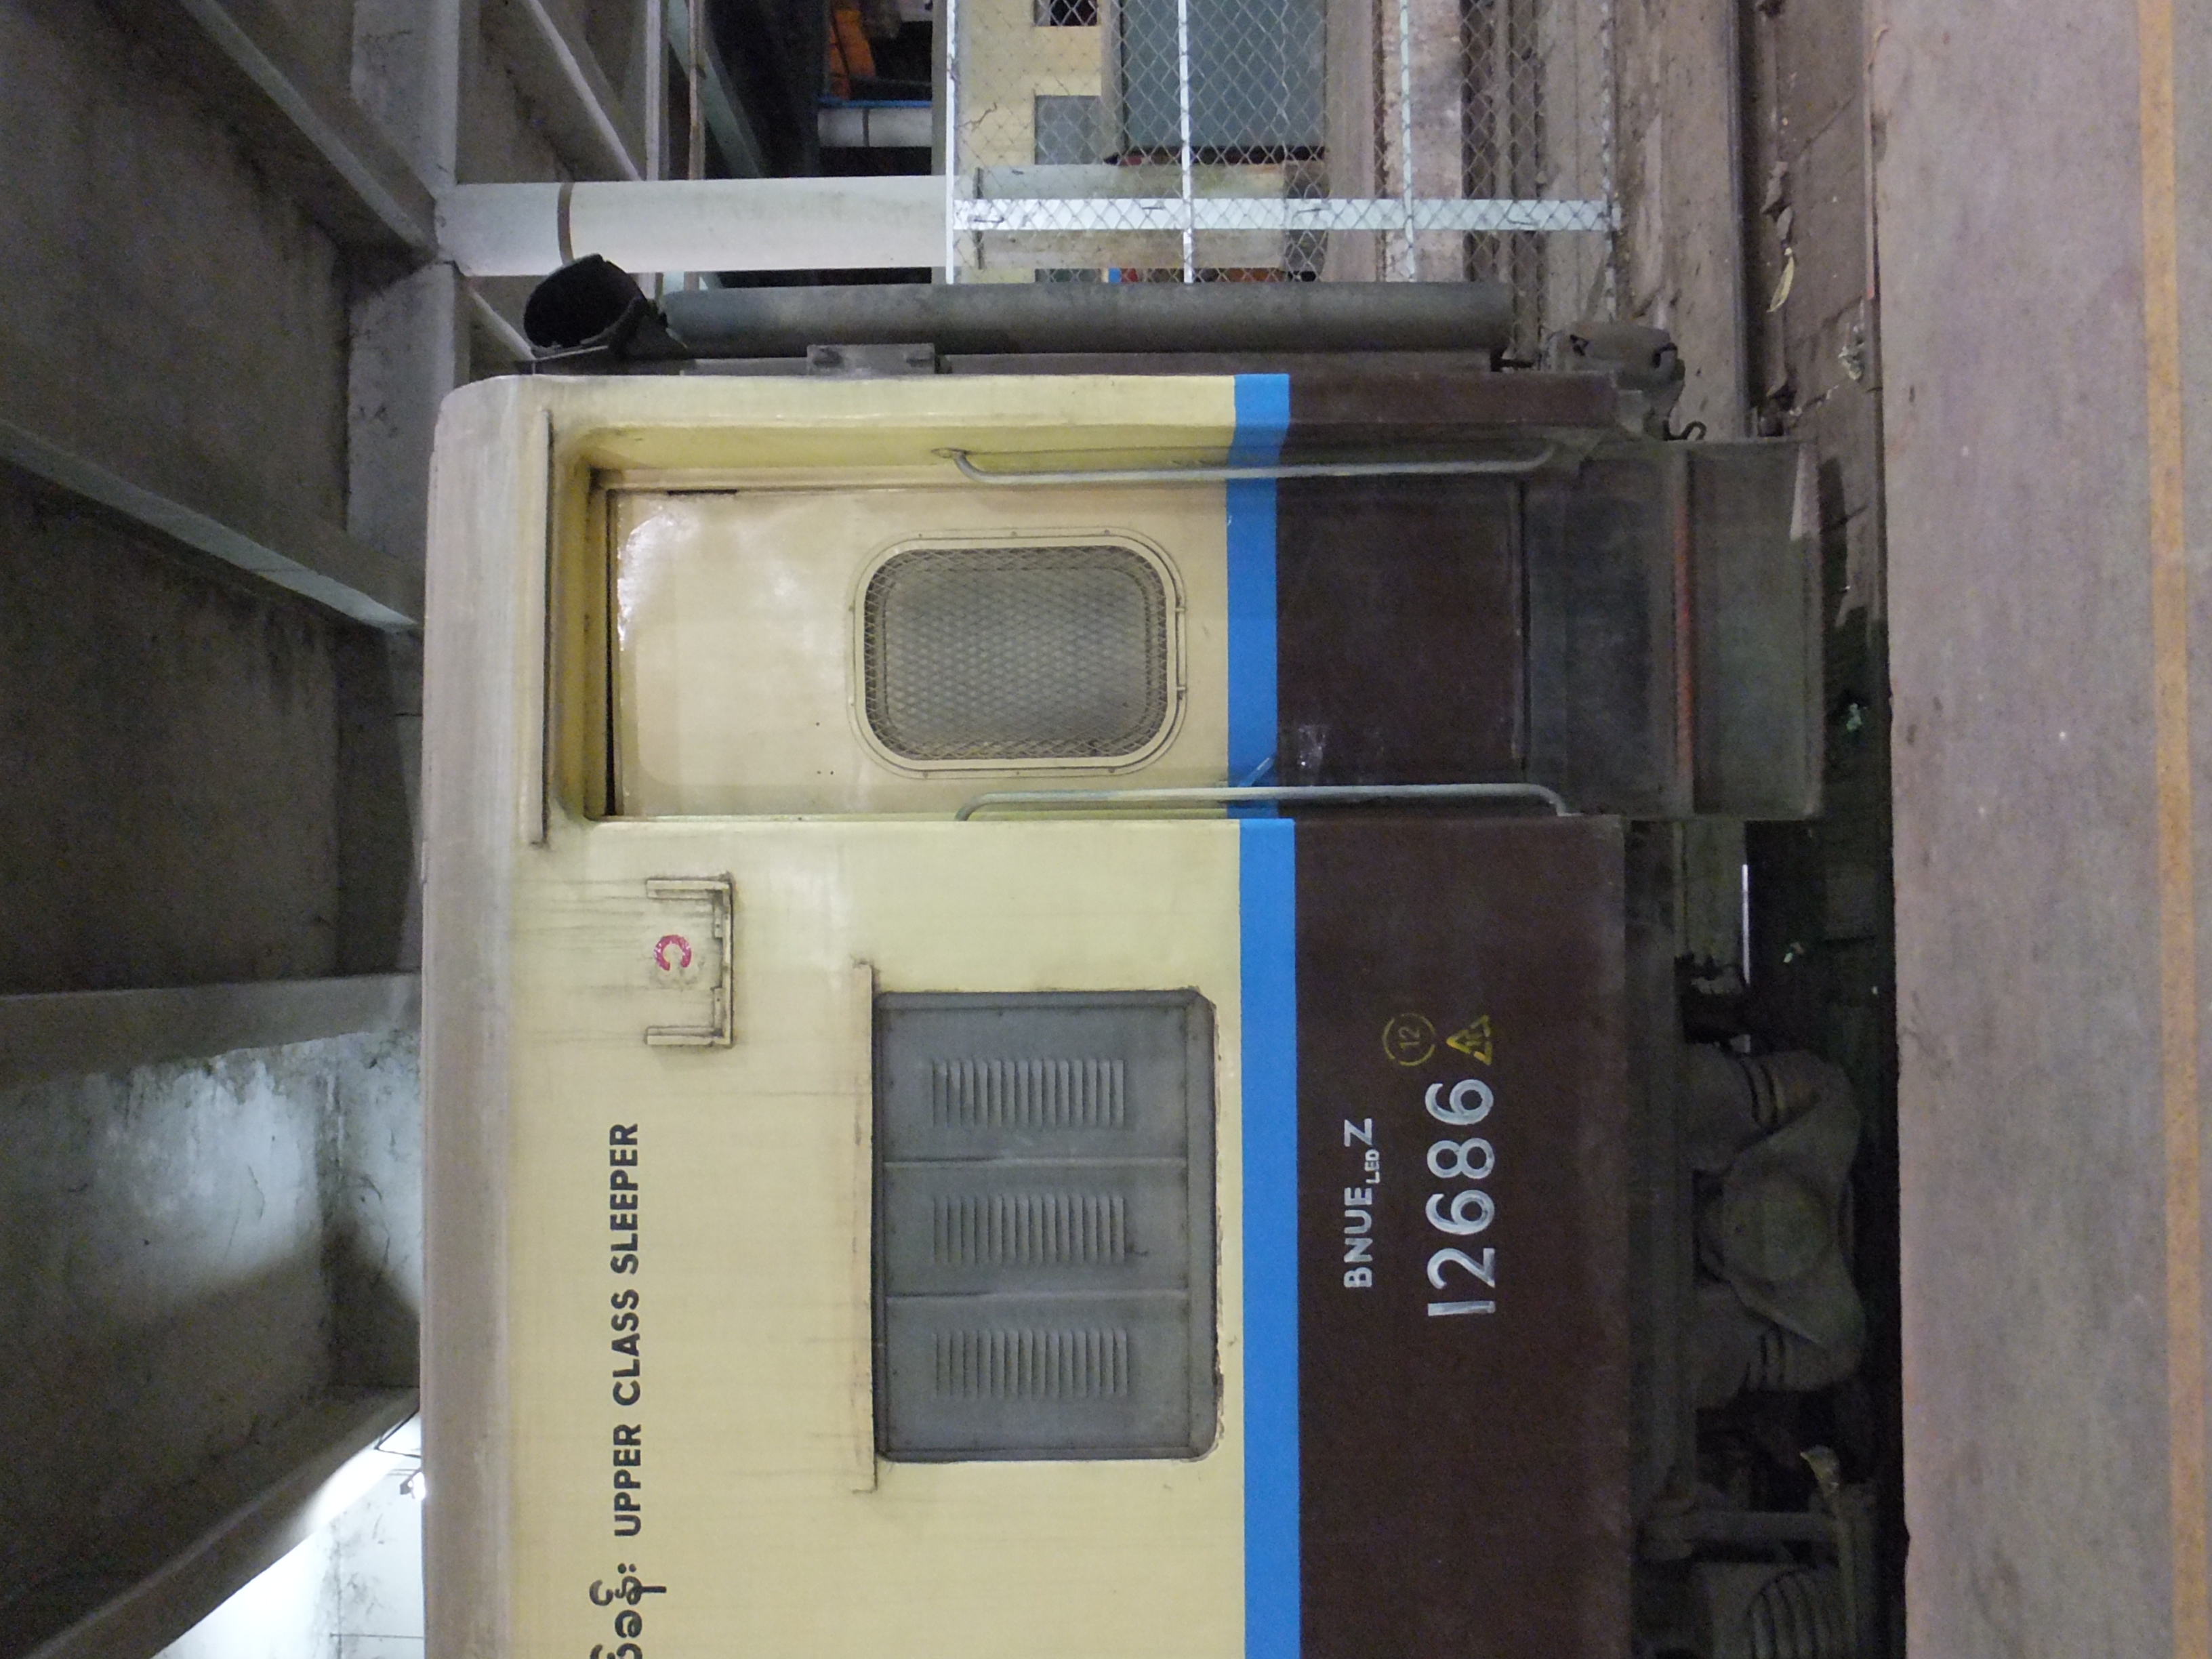
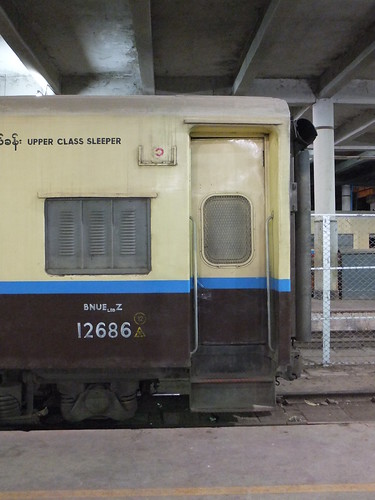
Upper Class Bogie Sleeper code BNUE(subscript LED)Z
Original size
Upper Class Bogie Sleeper fitted with automatic couplings and improved corridor connections.
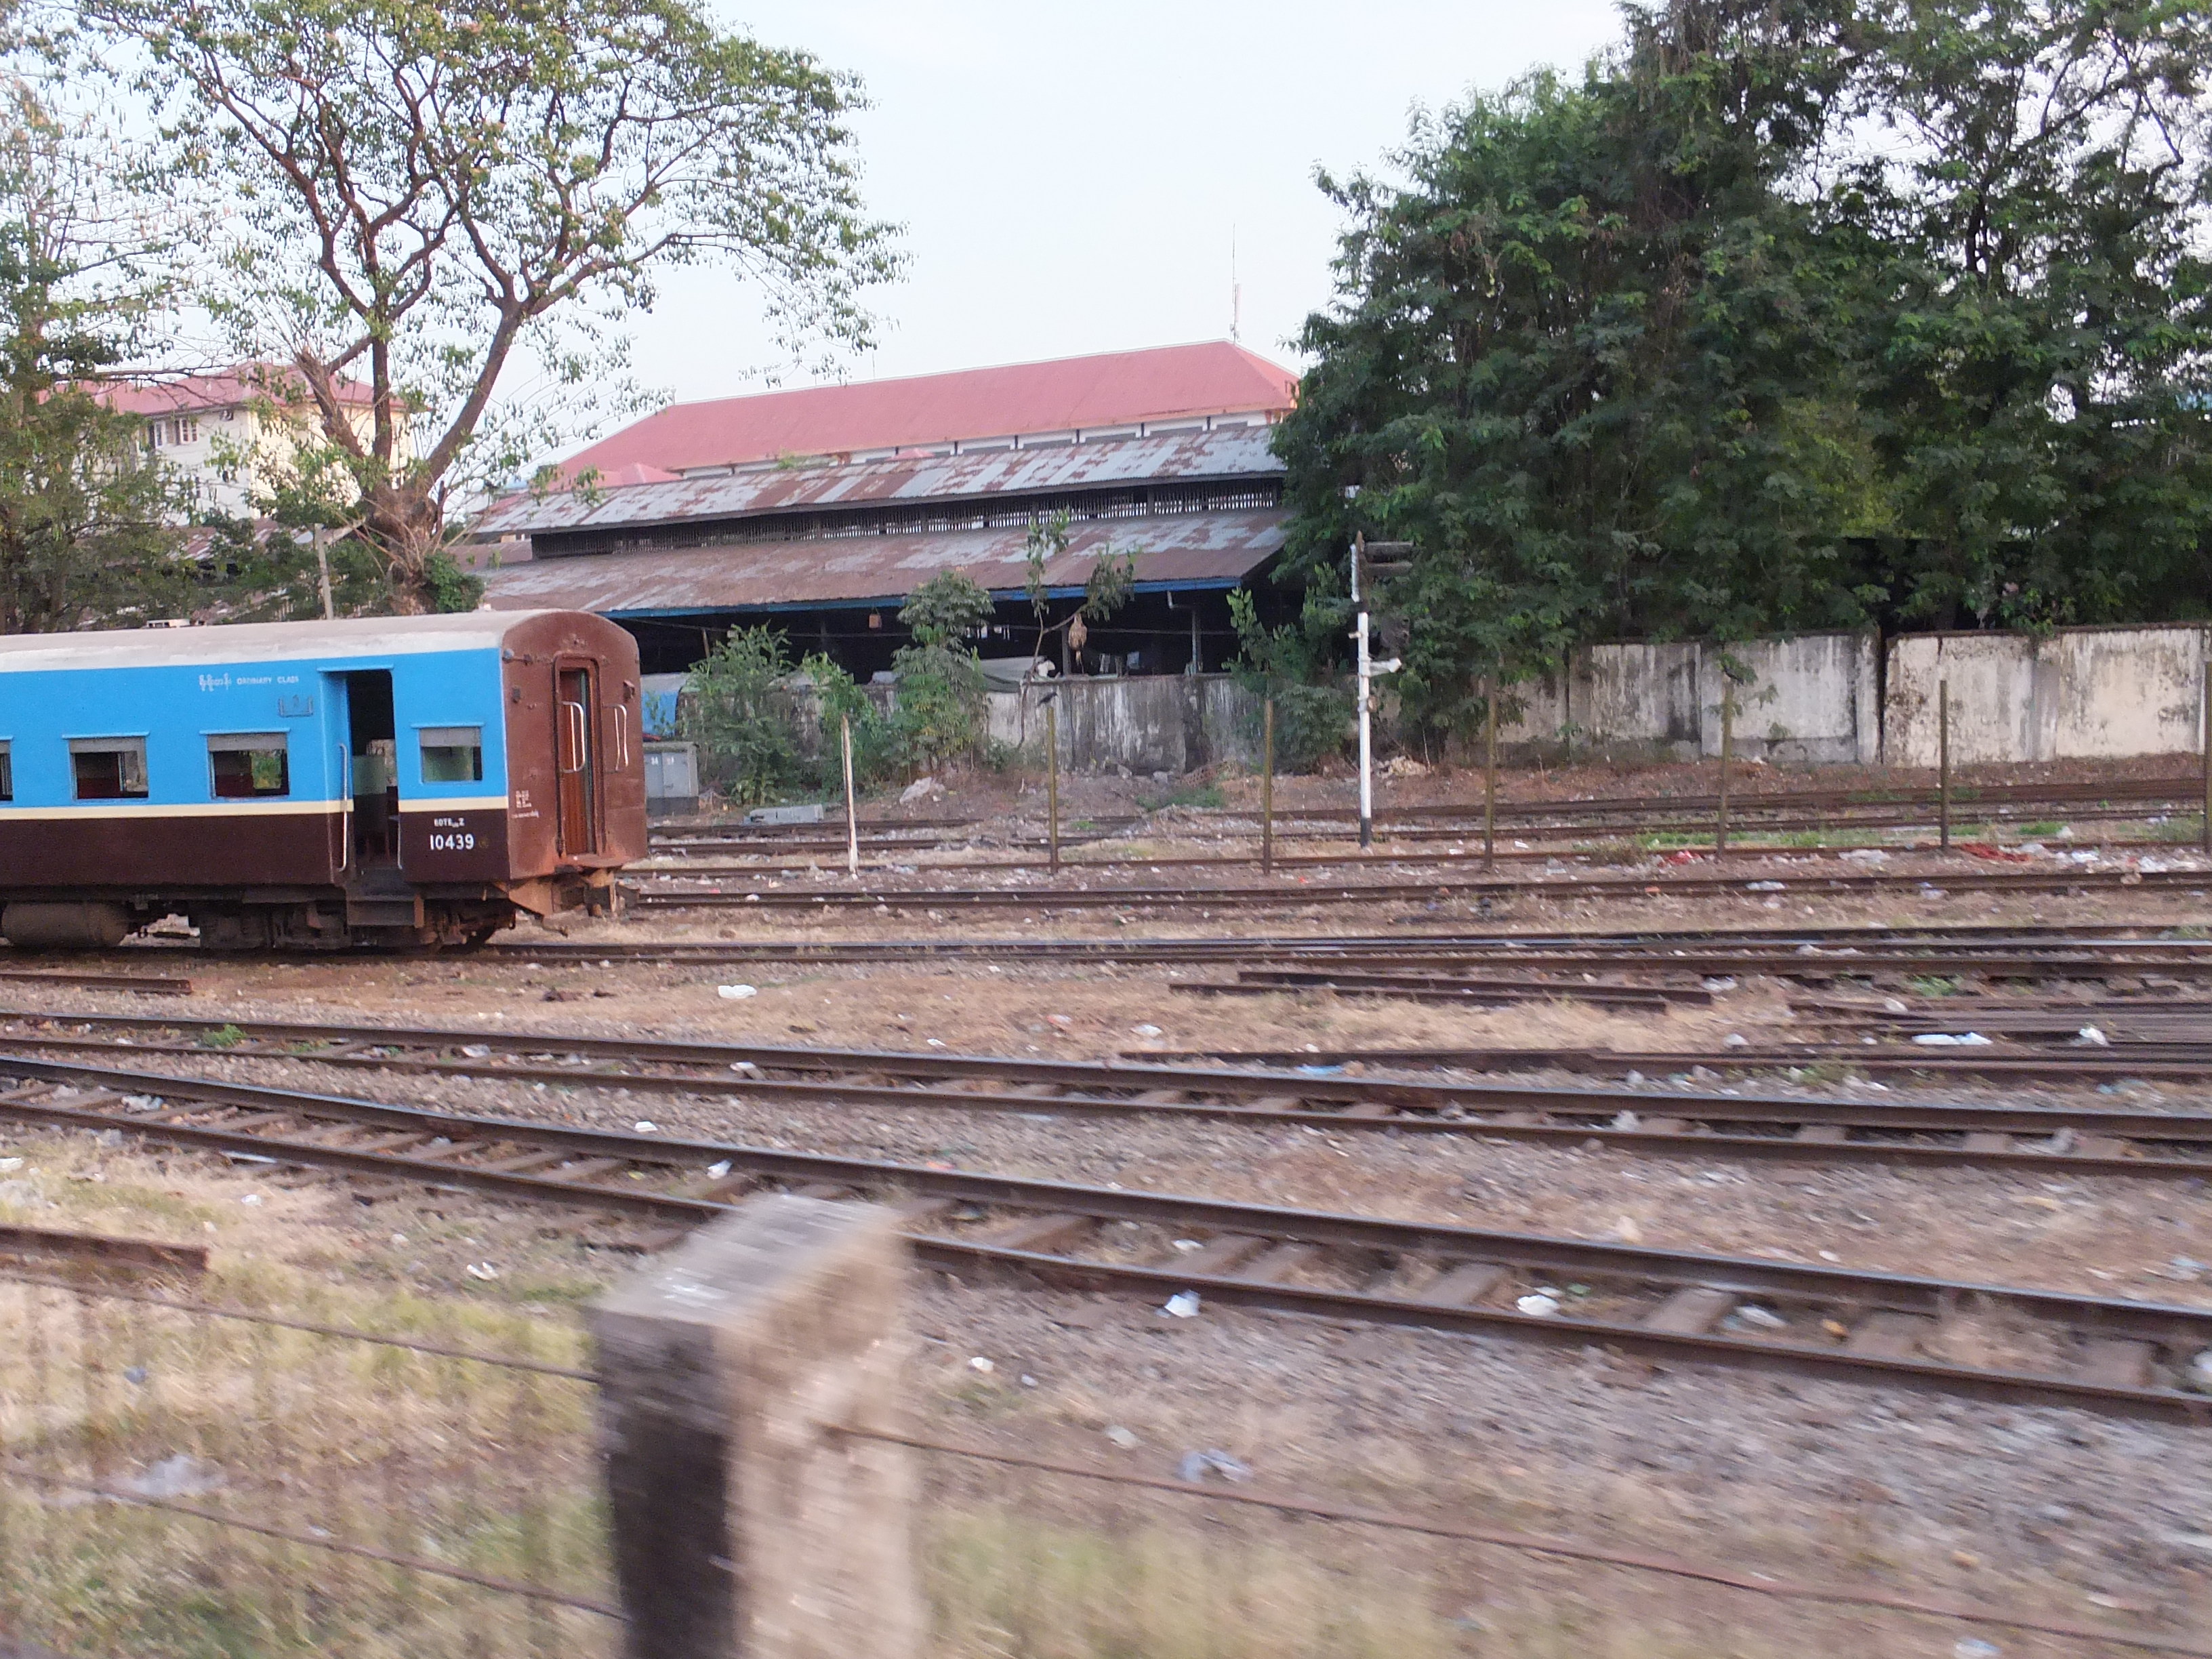
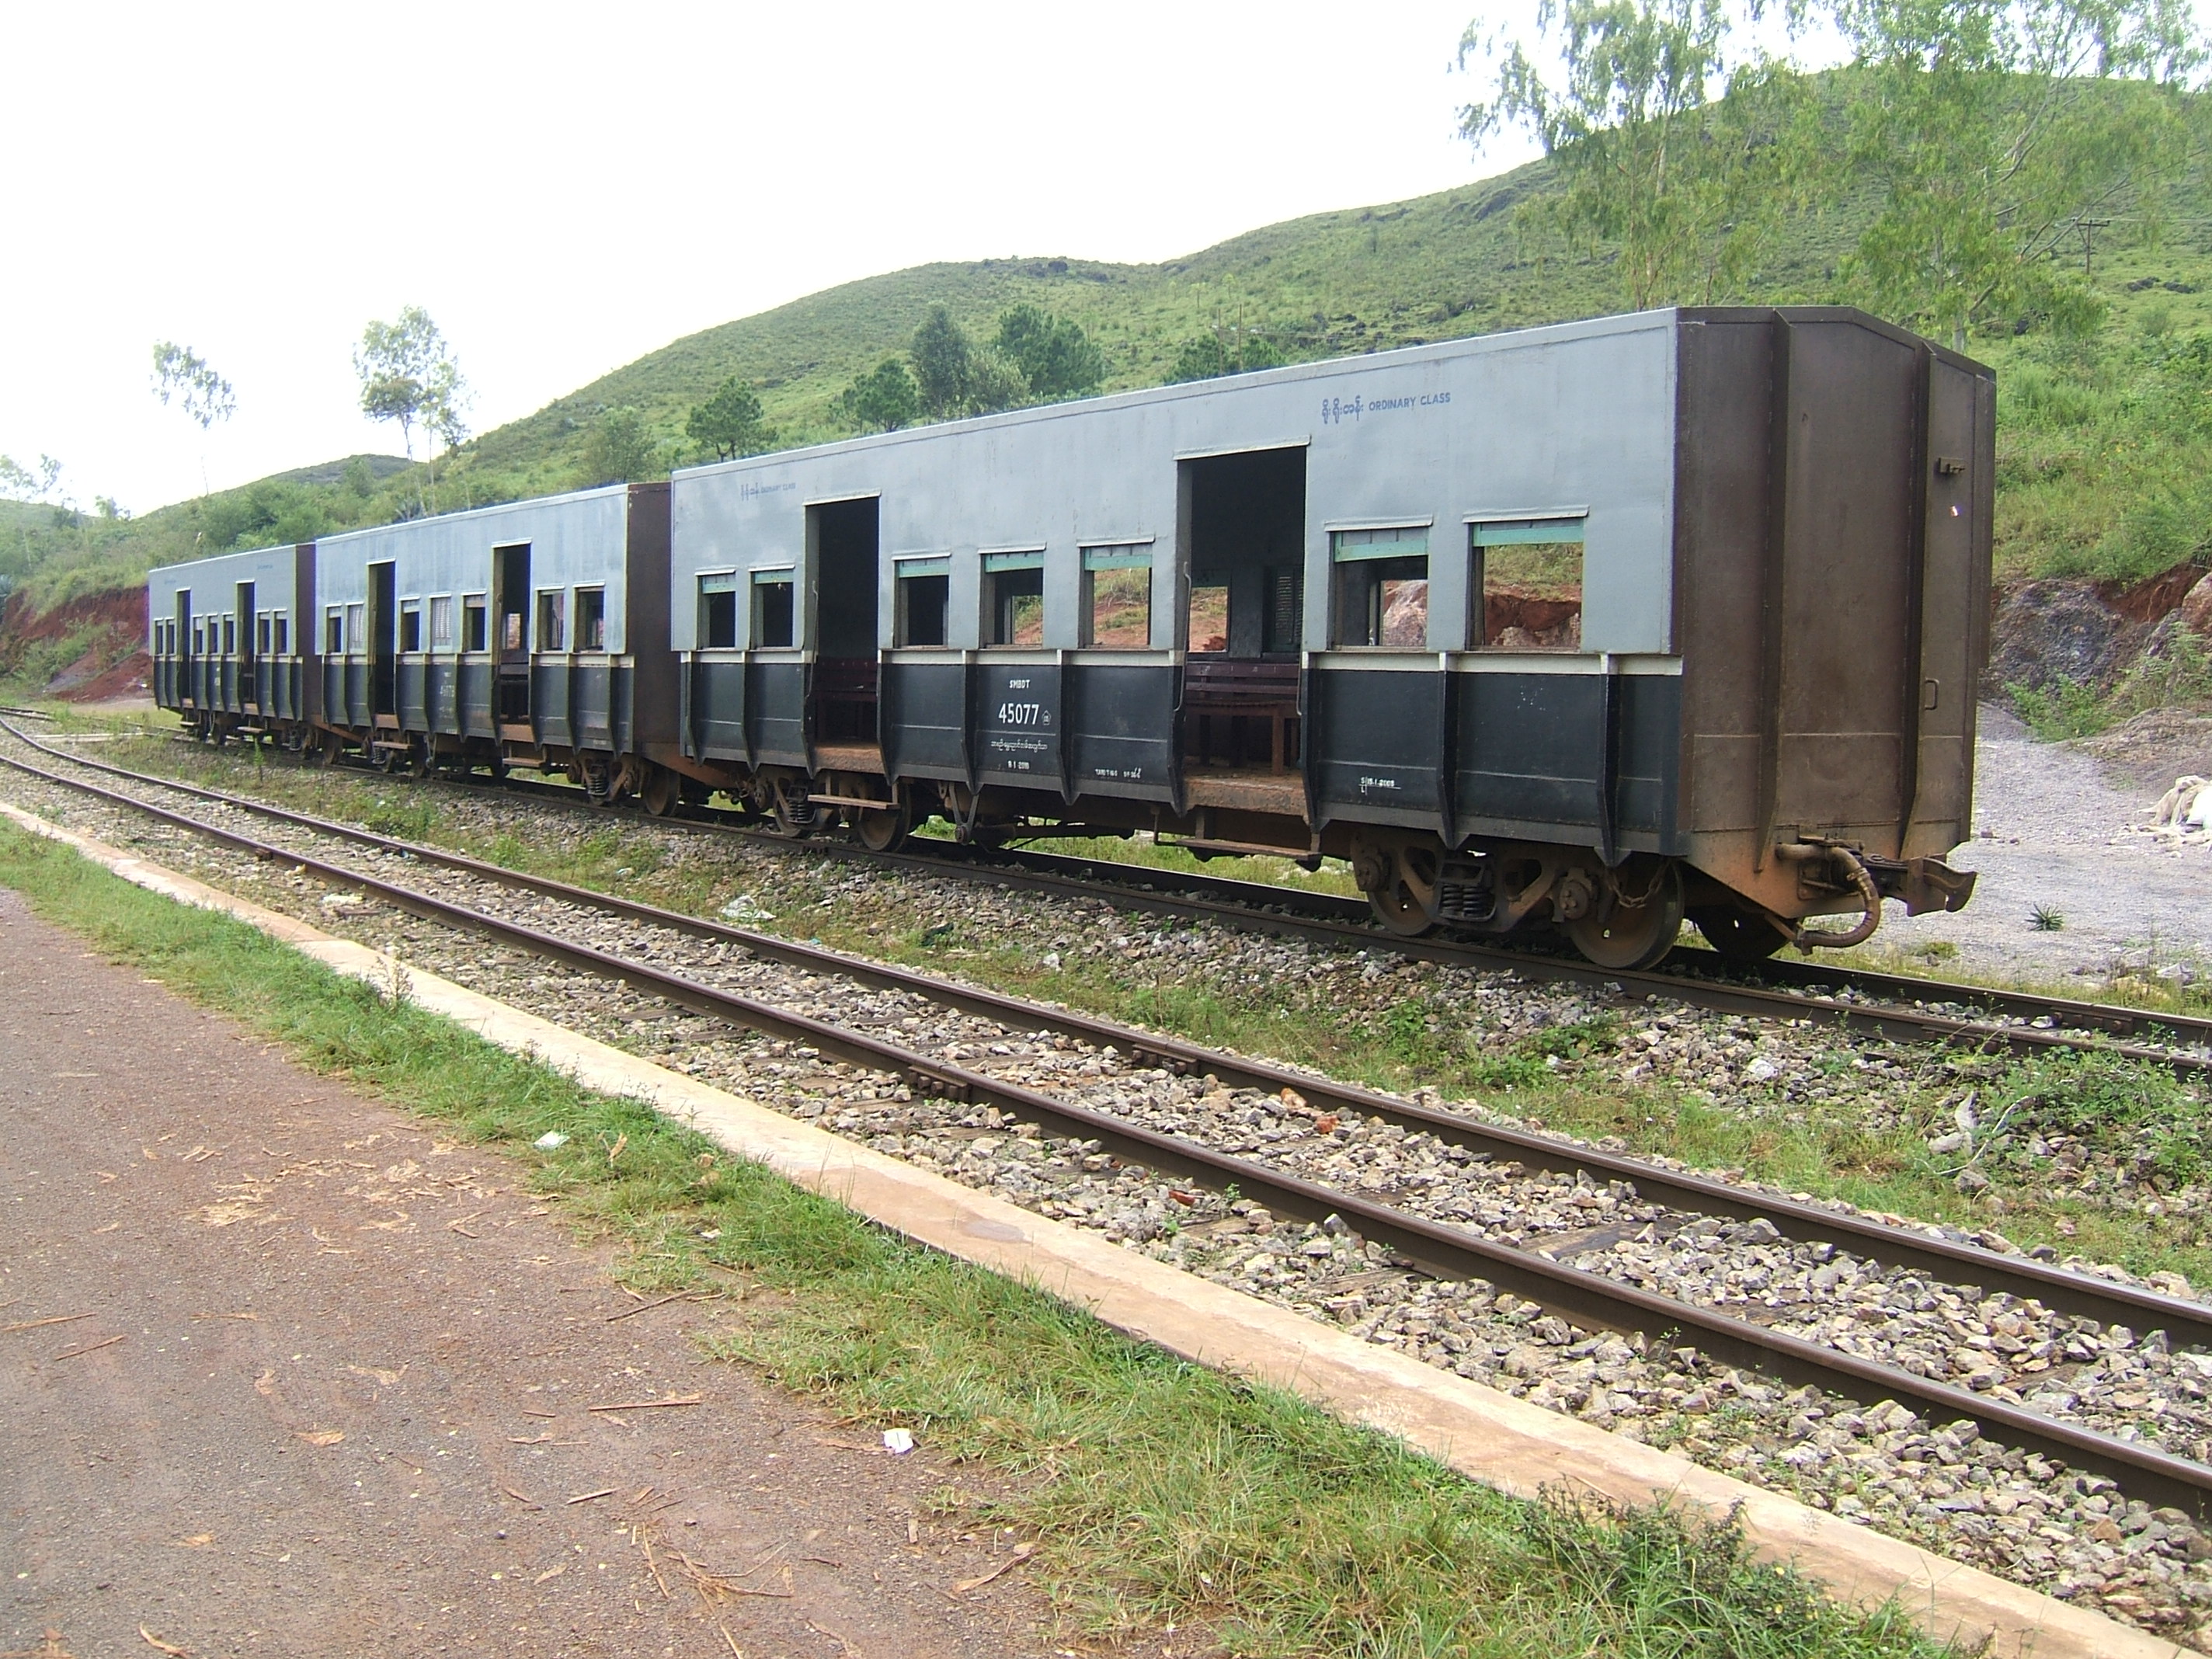
Ordinary Class Bogie Coach code SMBDT
Original size
Ordinary Class Bogie Coach fitted with chopper couplings and vacuum brakes. Grey and dark blue with a white waistline.
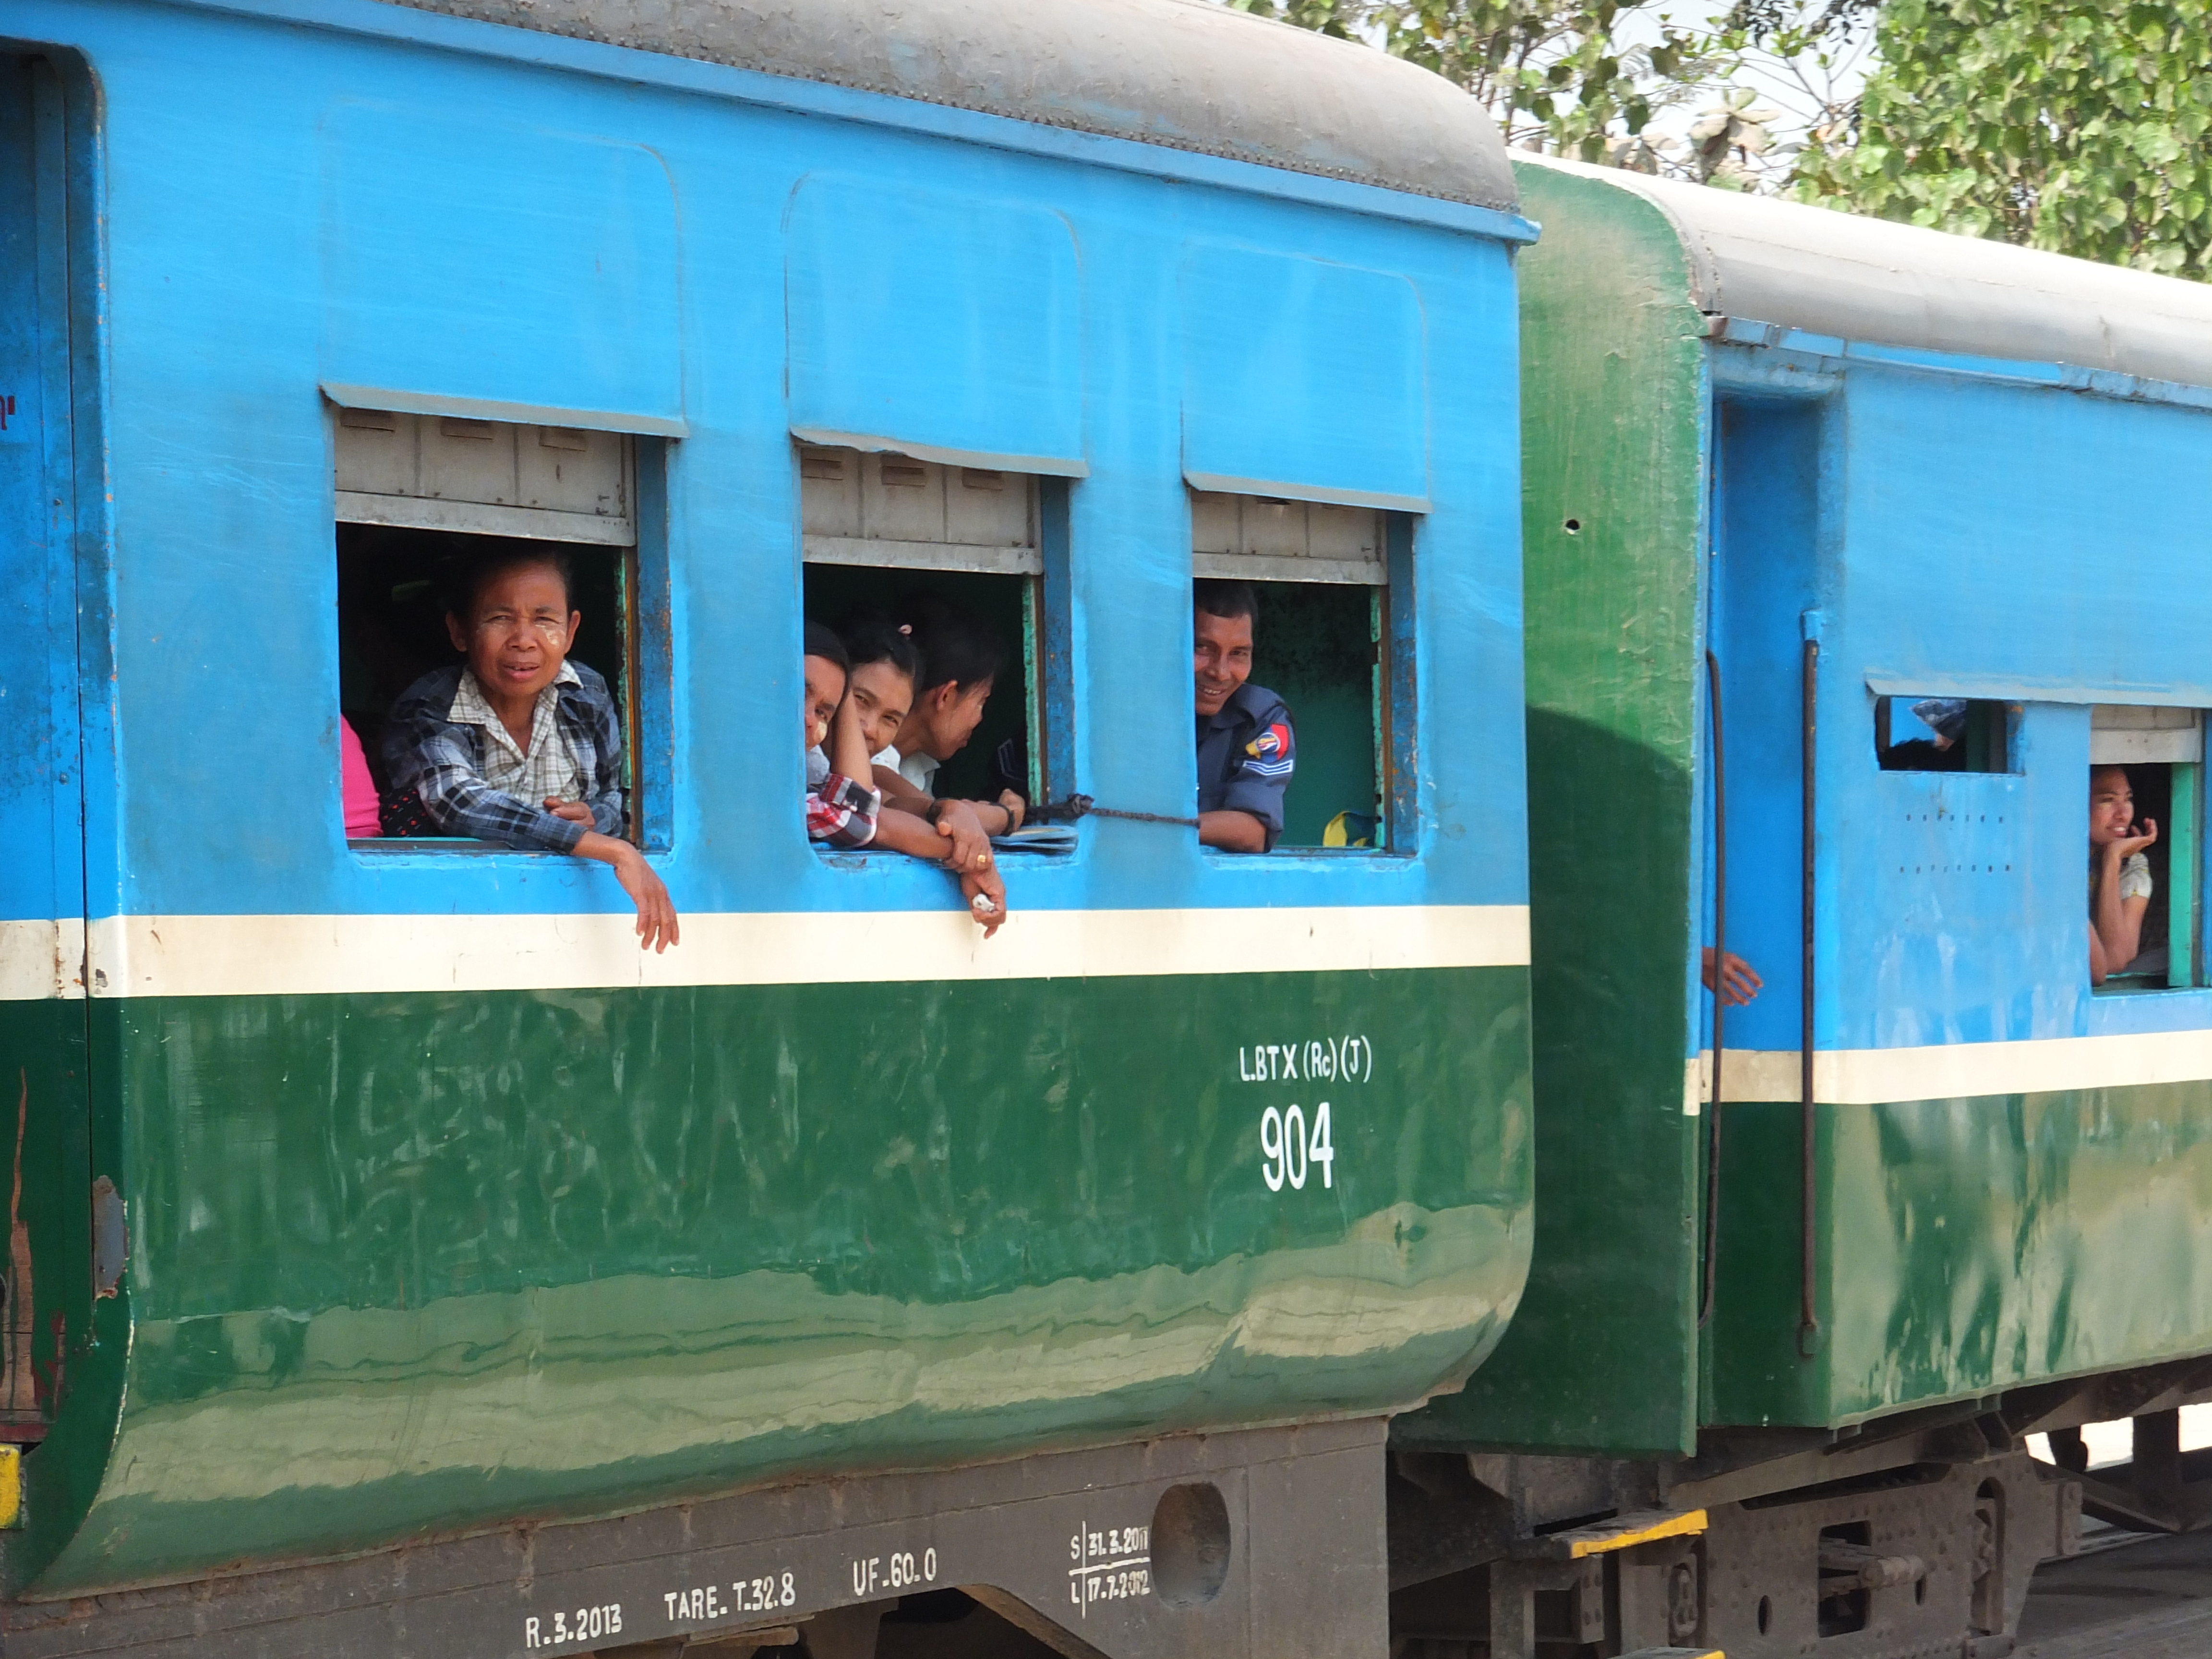
Ordinary Class Bogie Coach code LBTX(RC)(J)
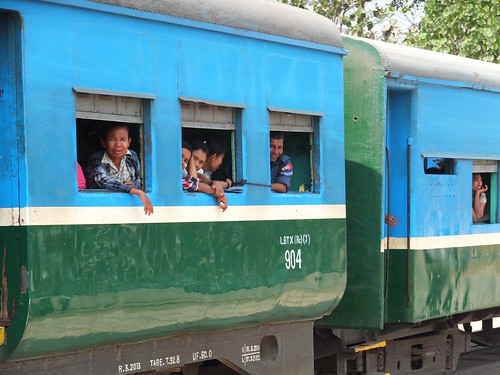
Ordinary Class Bogie Coach painted blue and green.
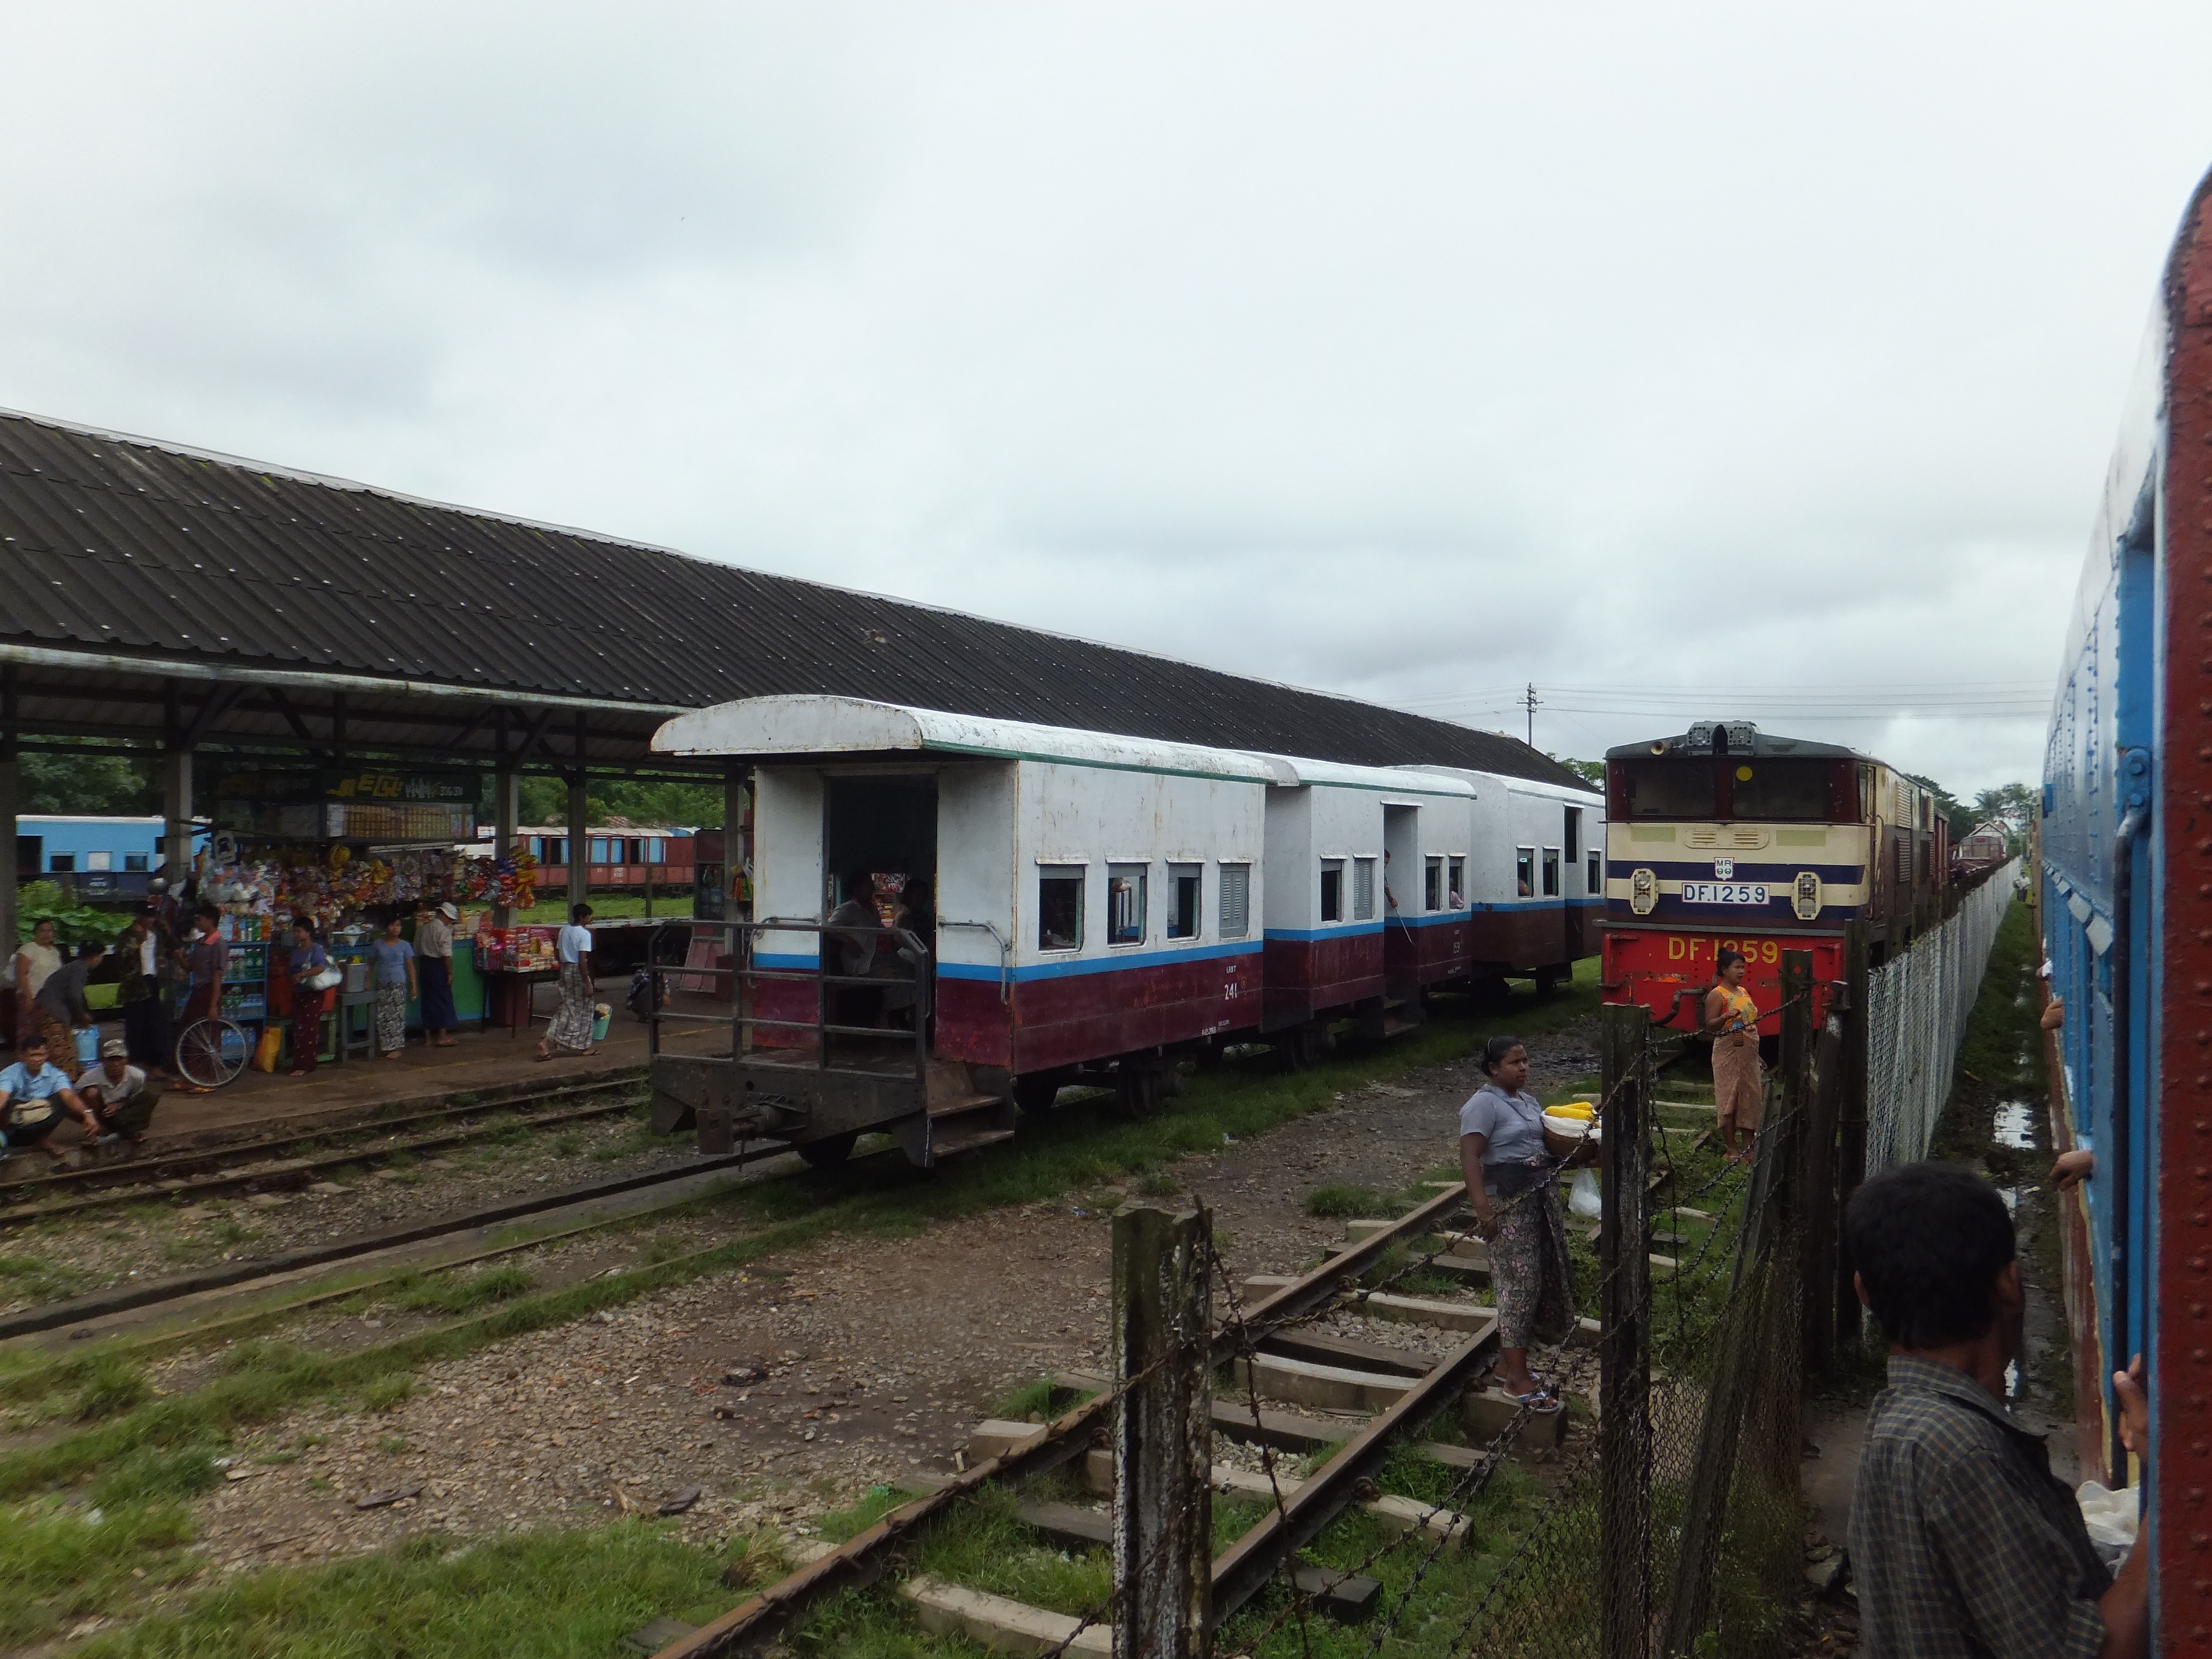
Four-wheel Passenger Coach code LZBT
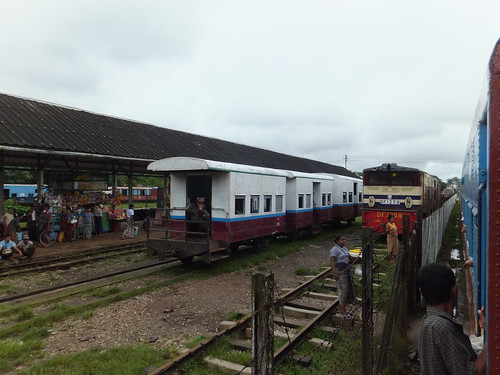
Four-wheel passenger coaches with chopper couplings and no continuous brake pictured at Bago. Livery: white and brown with a blue waistline.
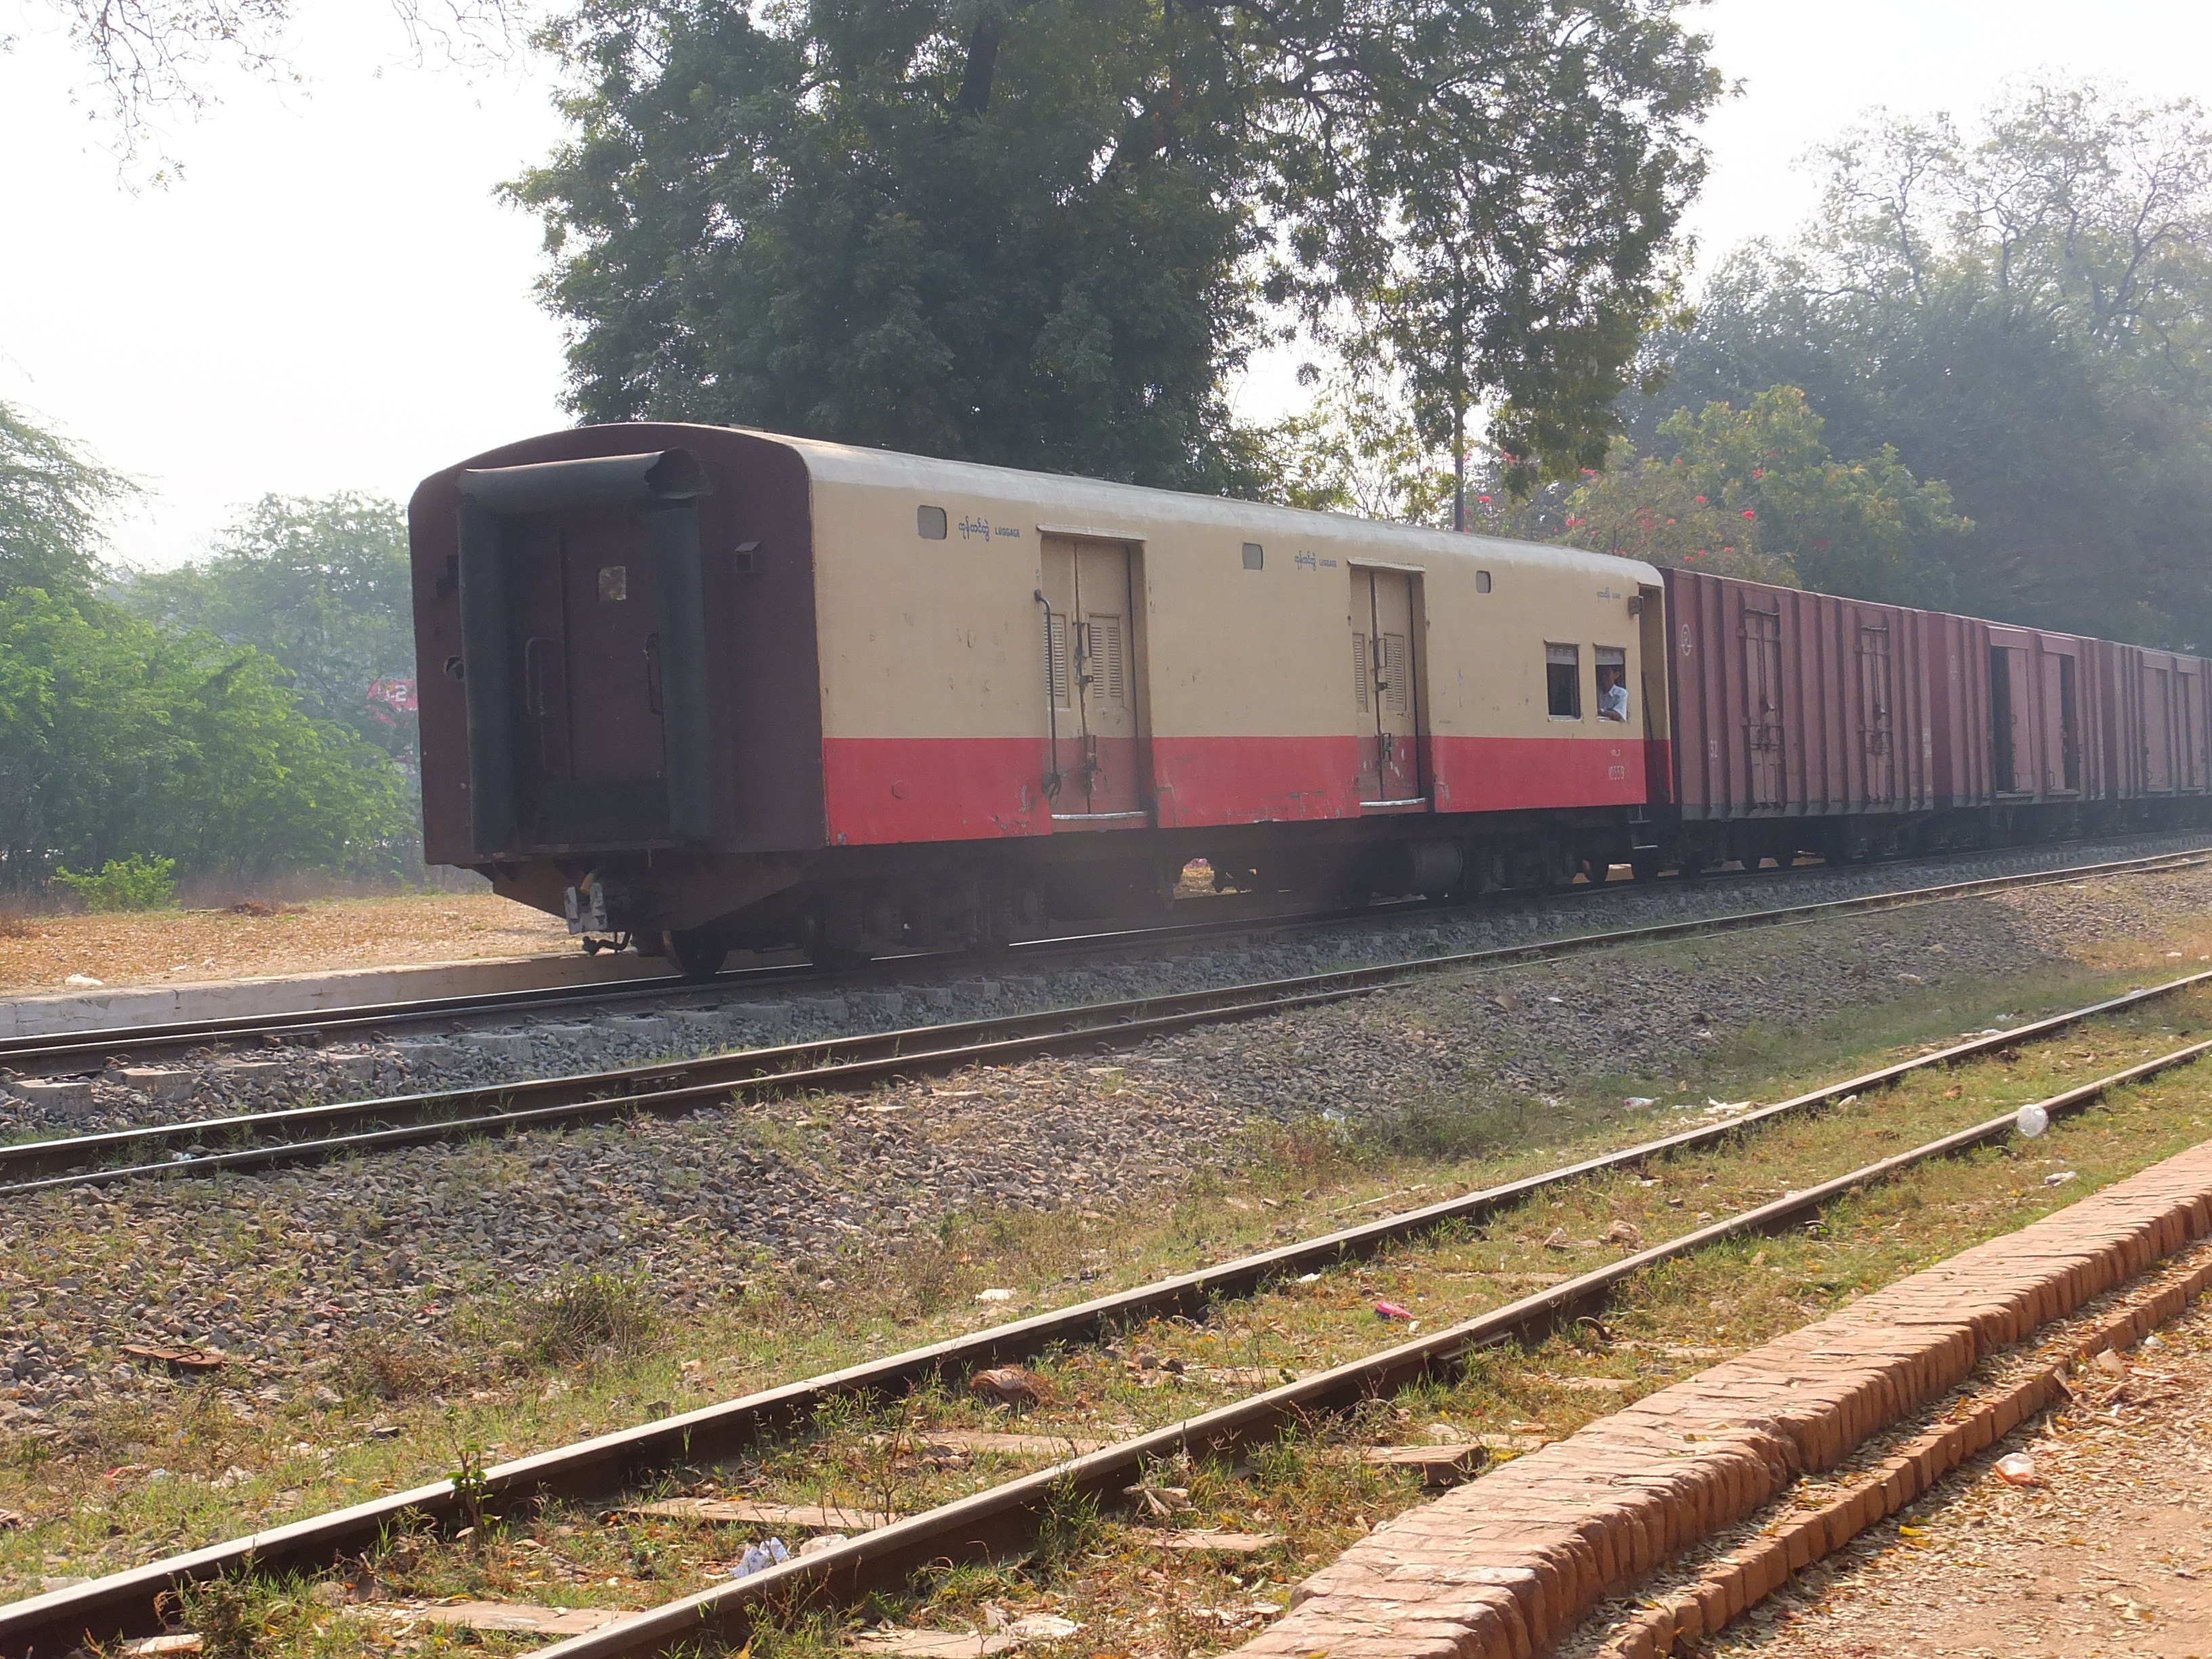
Bogie Guard's/Luggage Van
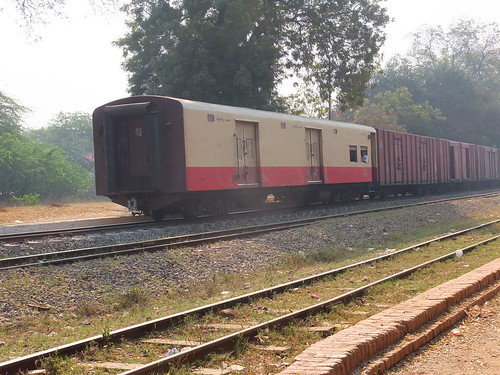
Bogie Guard's/Luggage van. Chopper coupling, originally vacuum braked. Livery: cream and red.
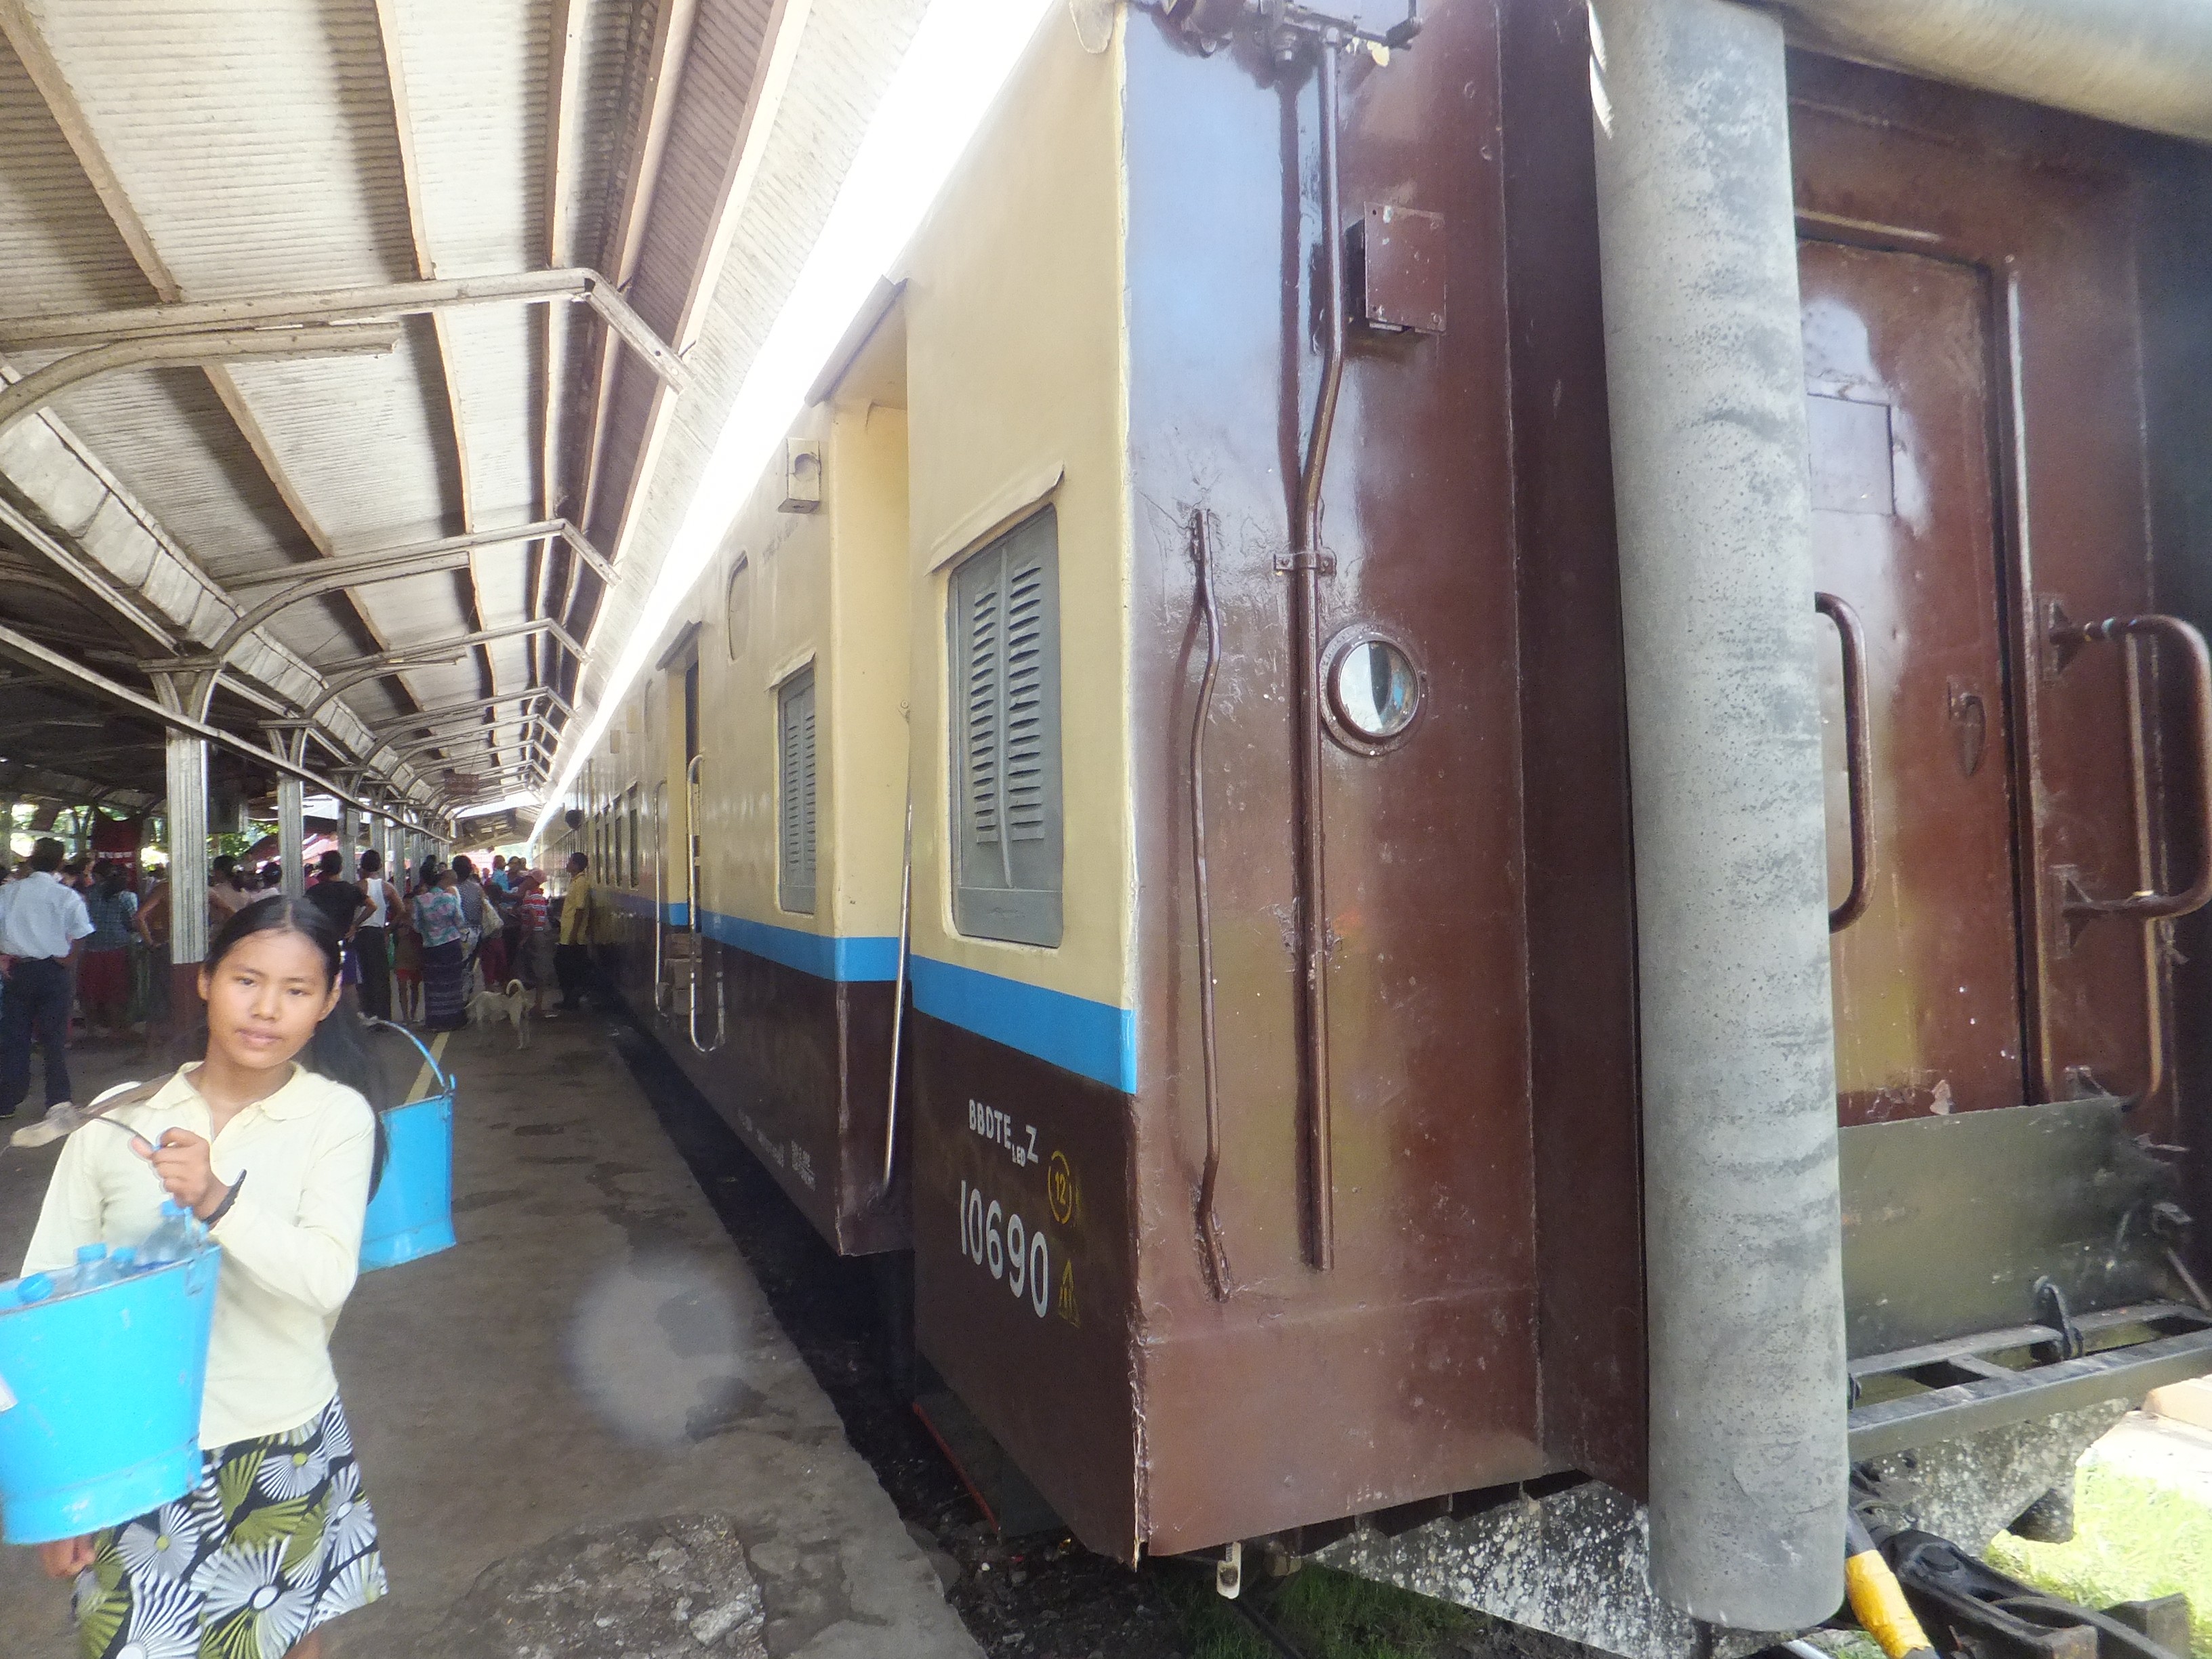
Bogie Guard's/Luggage Van/Ordinary composite code BBDTE(subscript LED)Z
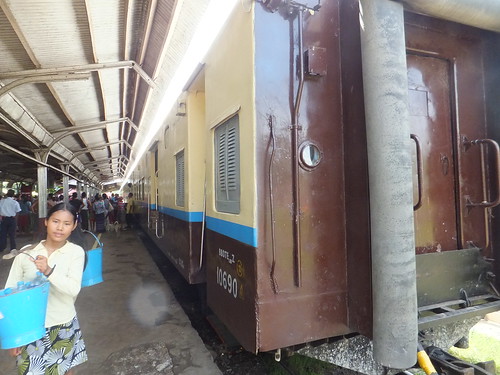
Bogie Guard's/Luggage/Ordinary composite. Chopper coupling, vacuum braked, improved corridor connections. Livery: cream and brown with a blue waistline.
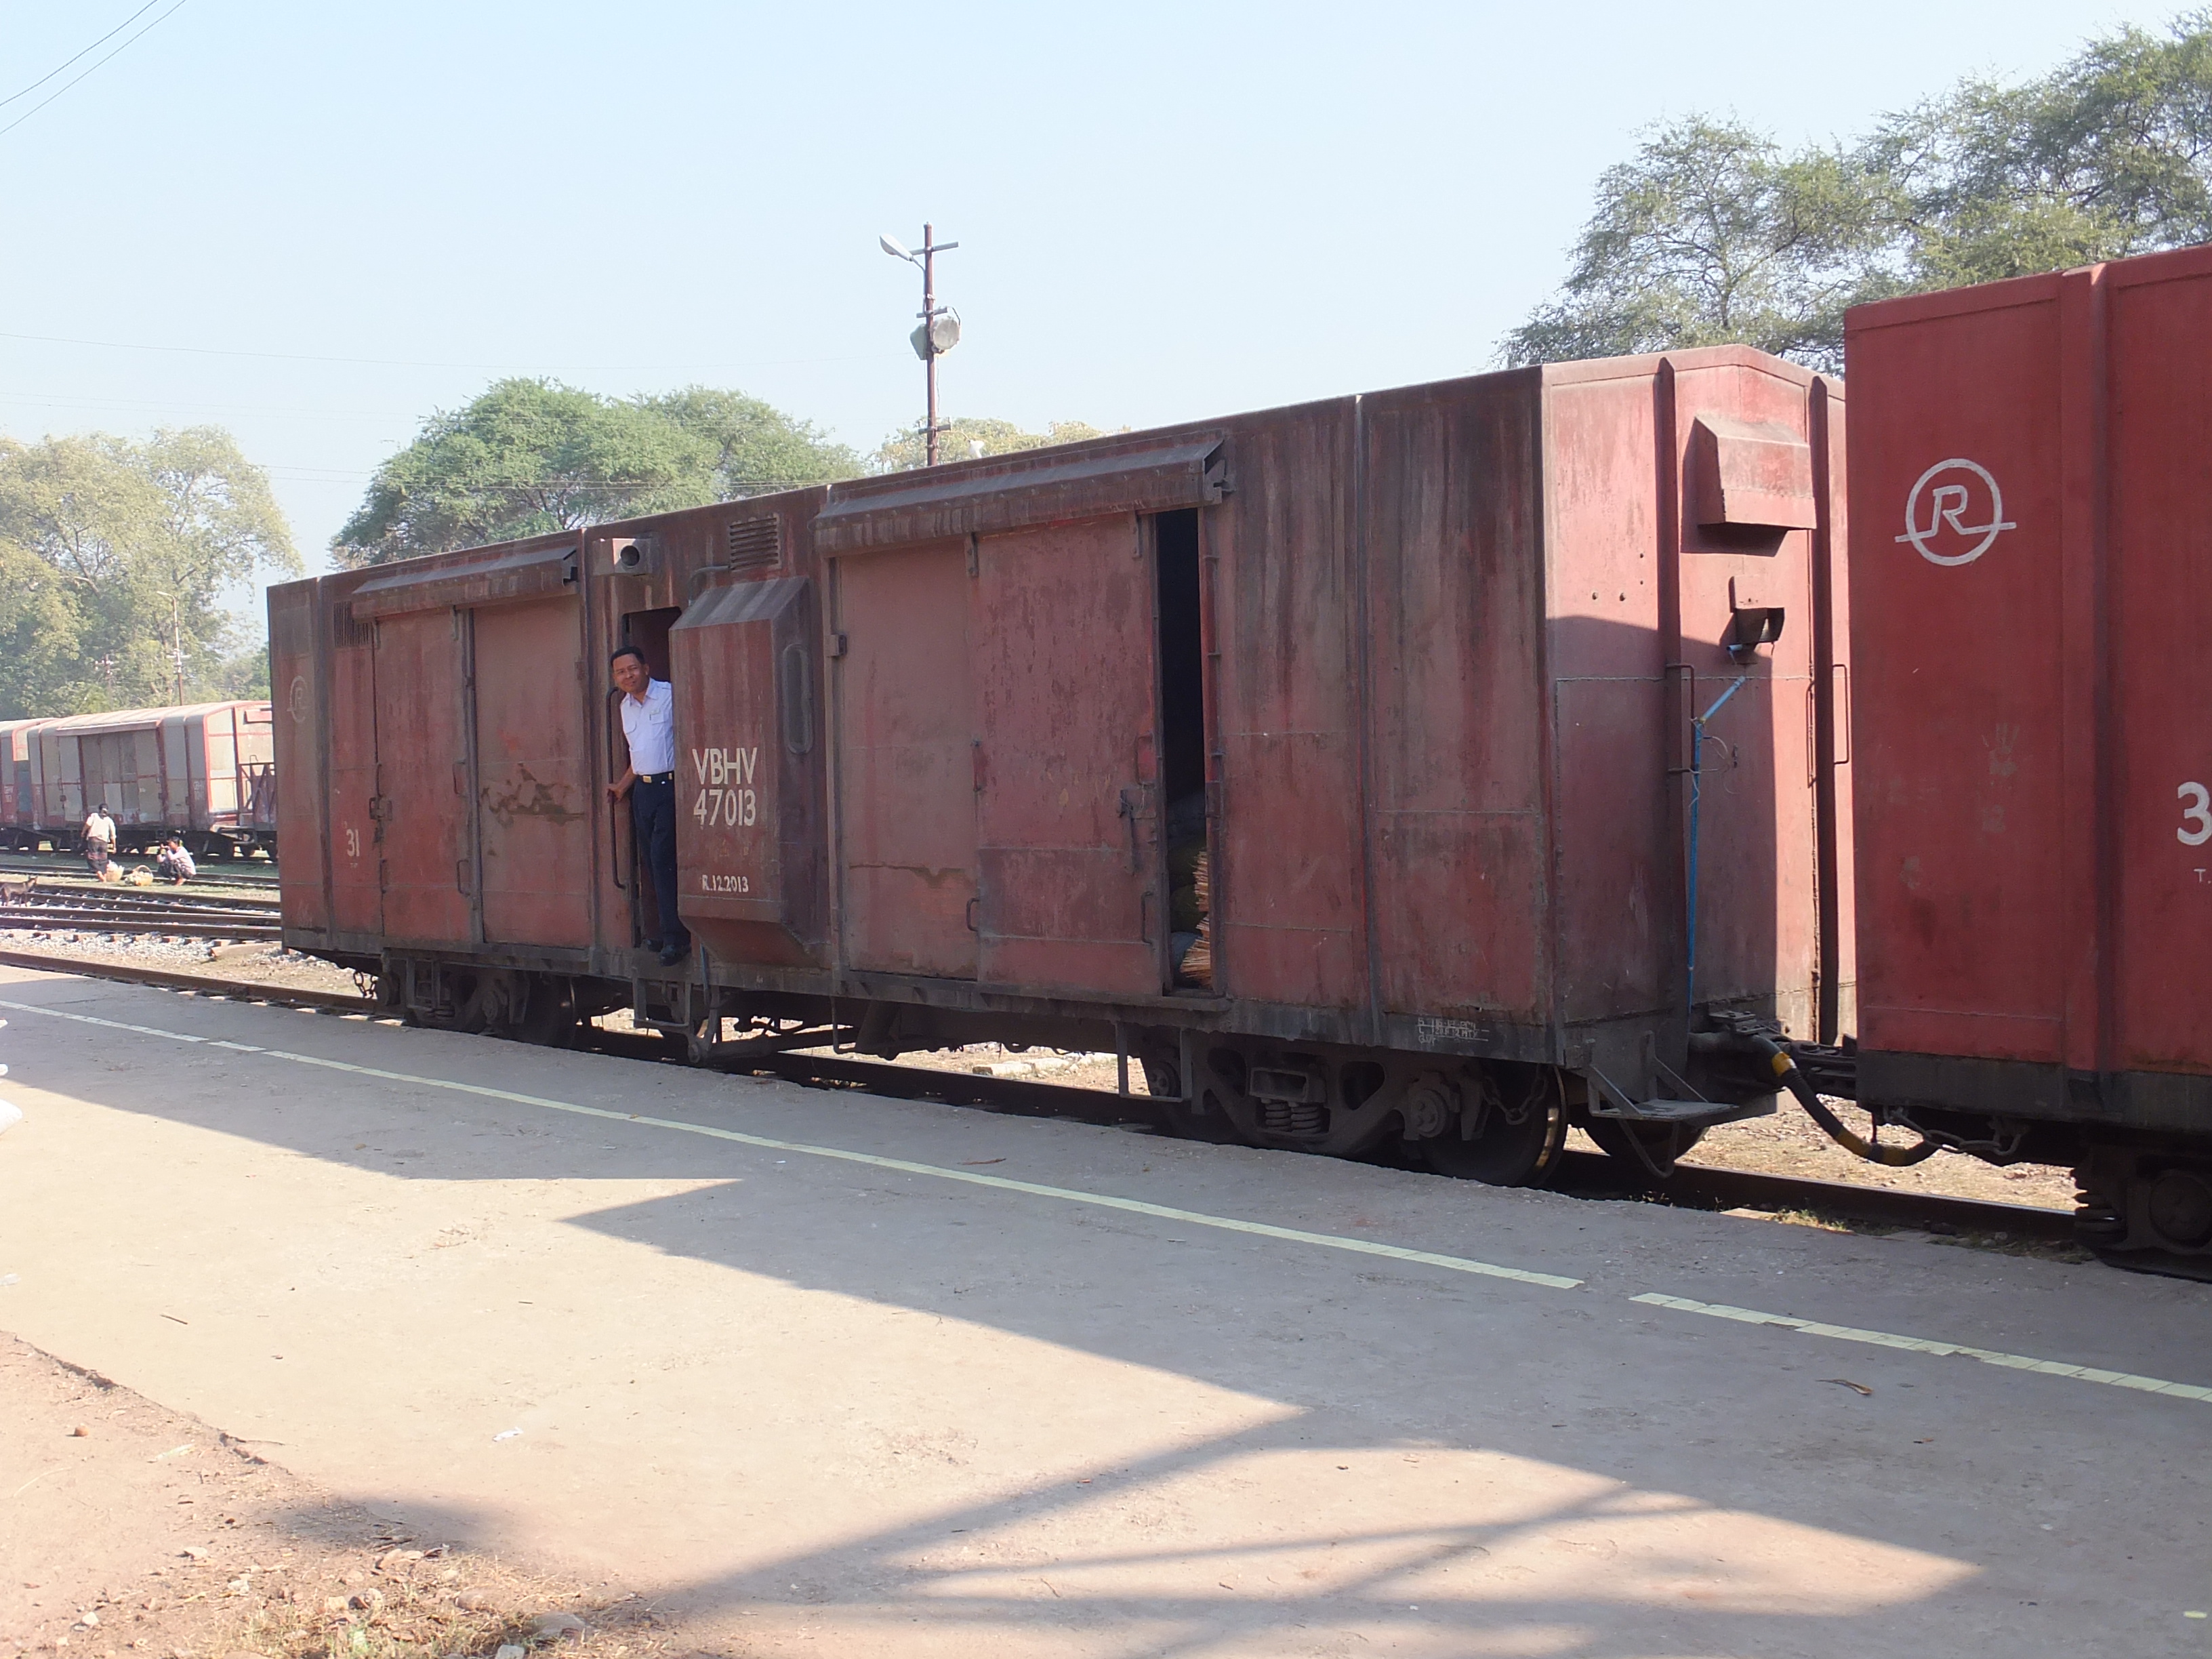
Bogie Guard's/Goods Van code VBHV
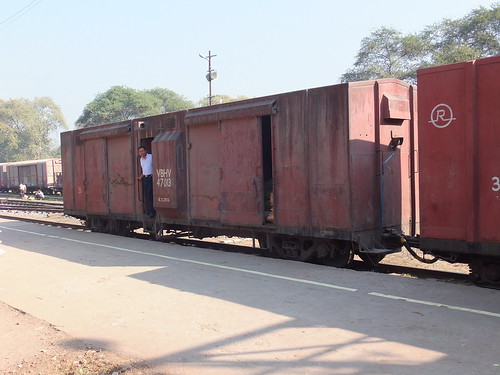
Bogie Guard's/Goods van with two sliding freight doors, Guard's door and ducket on each side. Shunter's step on end. Chopper coupling, originally vacuum braked. Capacity marked as 31 tons. Versions exist with 3-leaf hinged freight doors. Included with passenger vehicles as often seen on passenger trains.
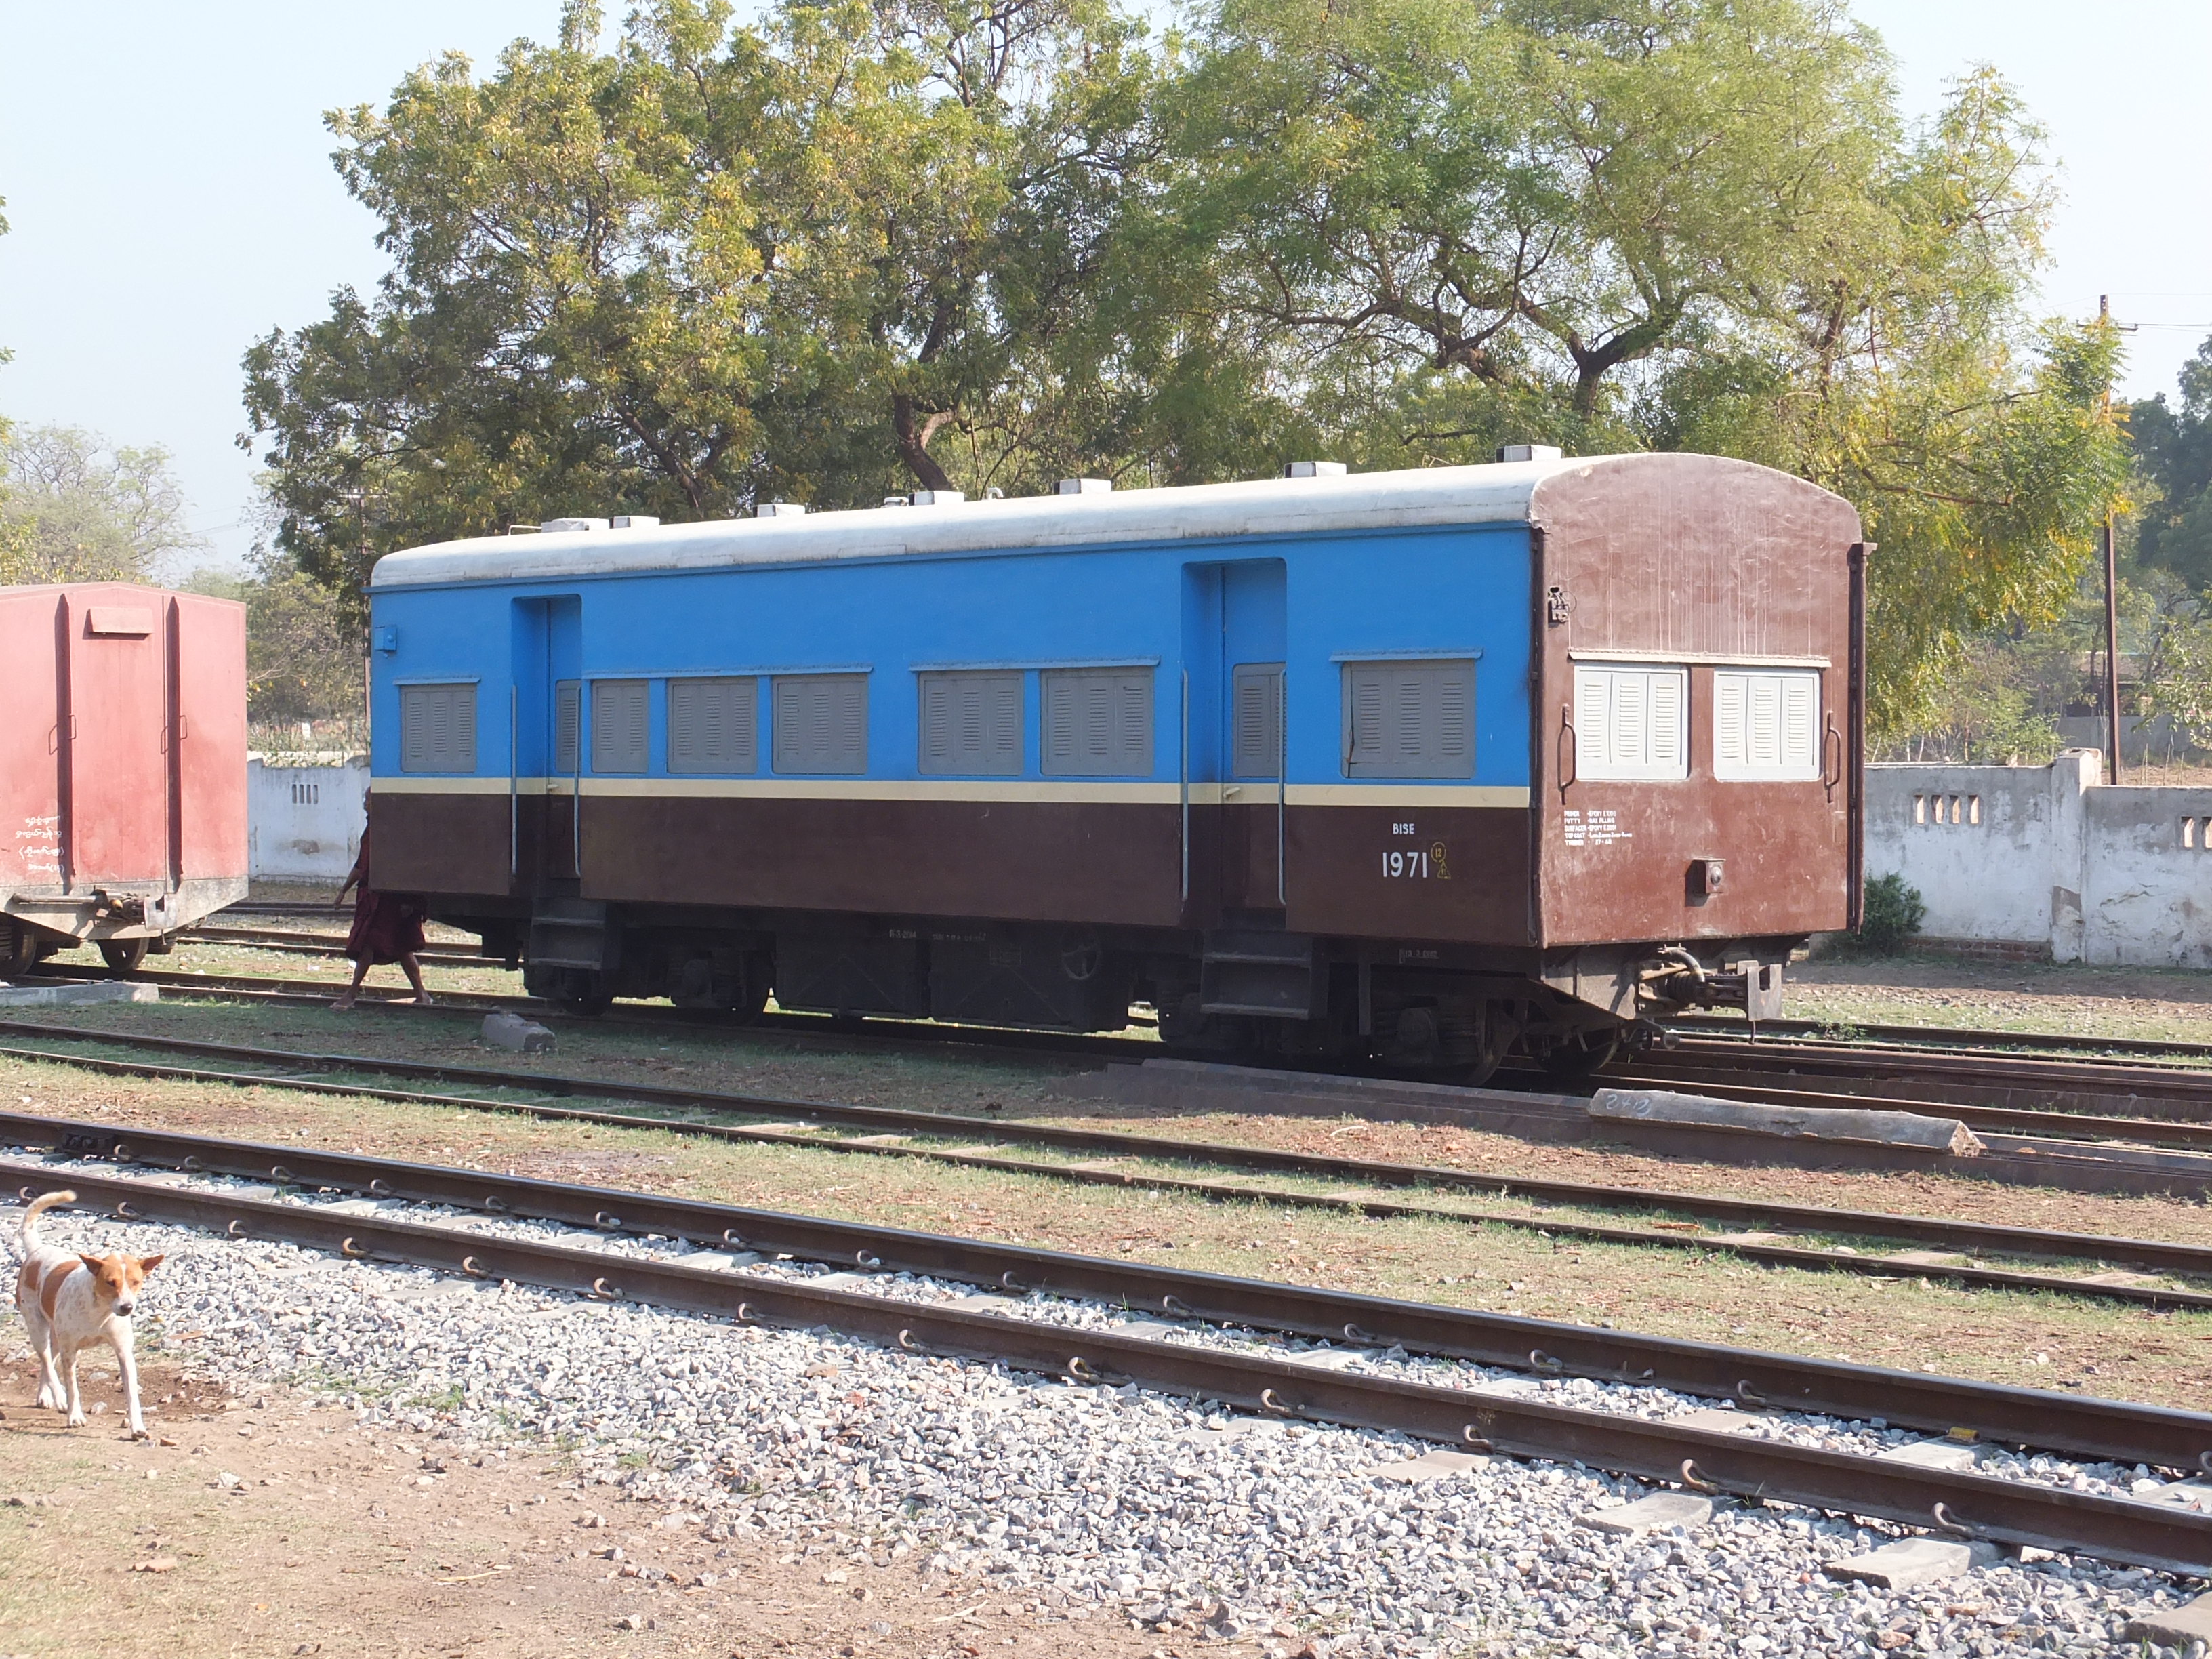
Bogie Coach code BISE
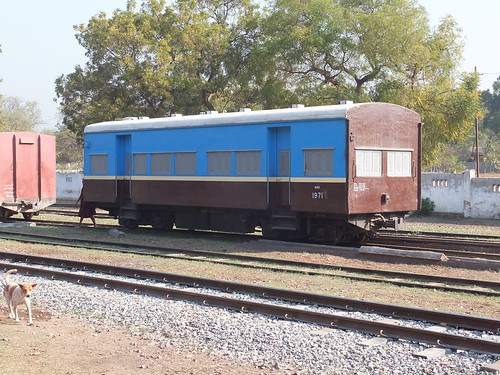
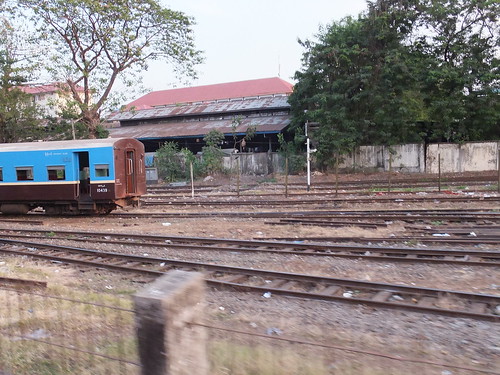
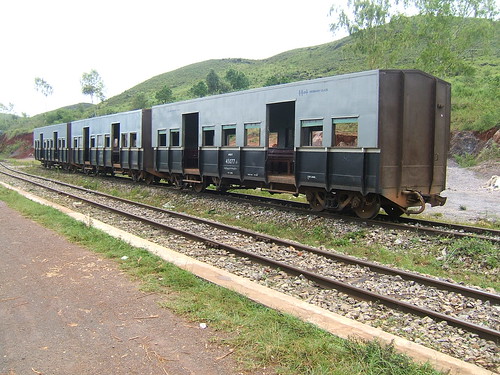
Appears to be a passenger design. Note end incorporates a tail lamp. Fitted with chopper couplings. Originally fitted with vacuum brakes, now removed. Livery: blue and brown with cream waistline.
[BBDTE(LED)Z added and minor changes 4-Apr-2013]
Diesel Railcars in Burma
This is a rather informal listing of types of railcar vehicles I've come across.
Lightweight Diesel Railcar (RBE)
Original size.
Railcar RBE.2546 arriving at Puzundaung Station, en route for Yangon. The railcar is provided with 'Automatic' couplers, presumably for attaching a trailer car.
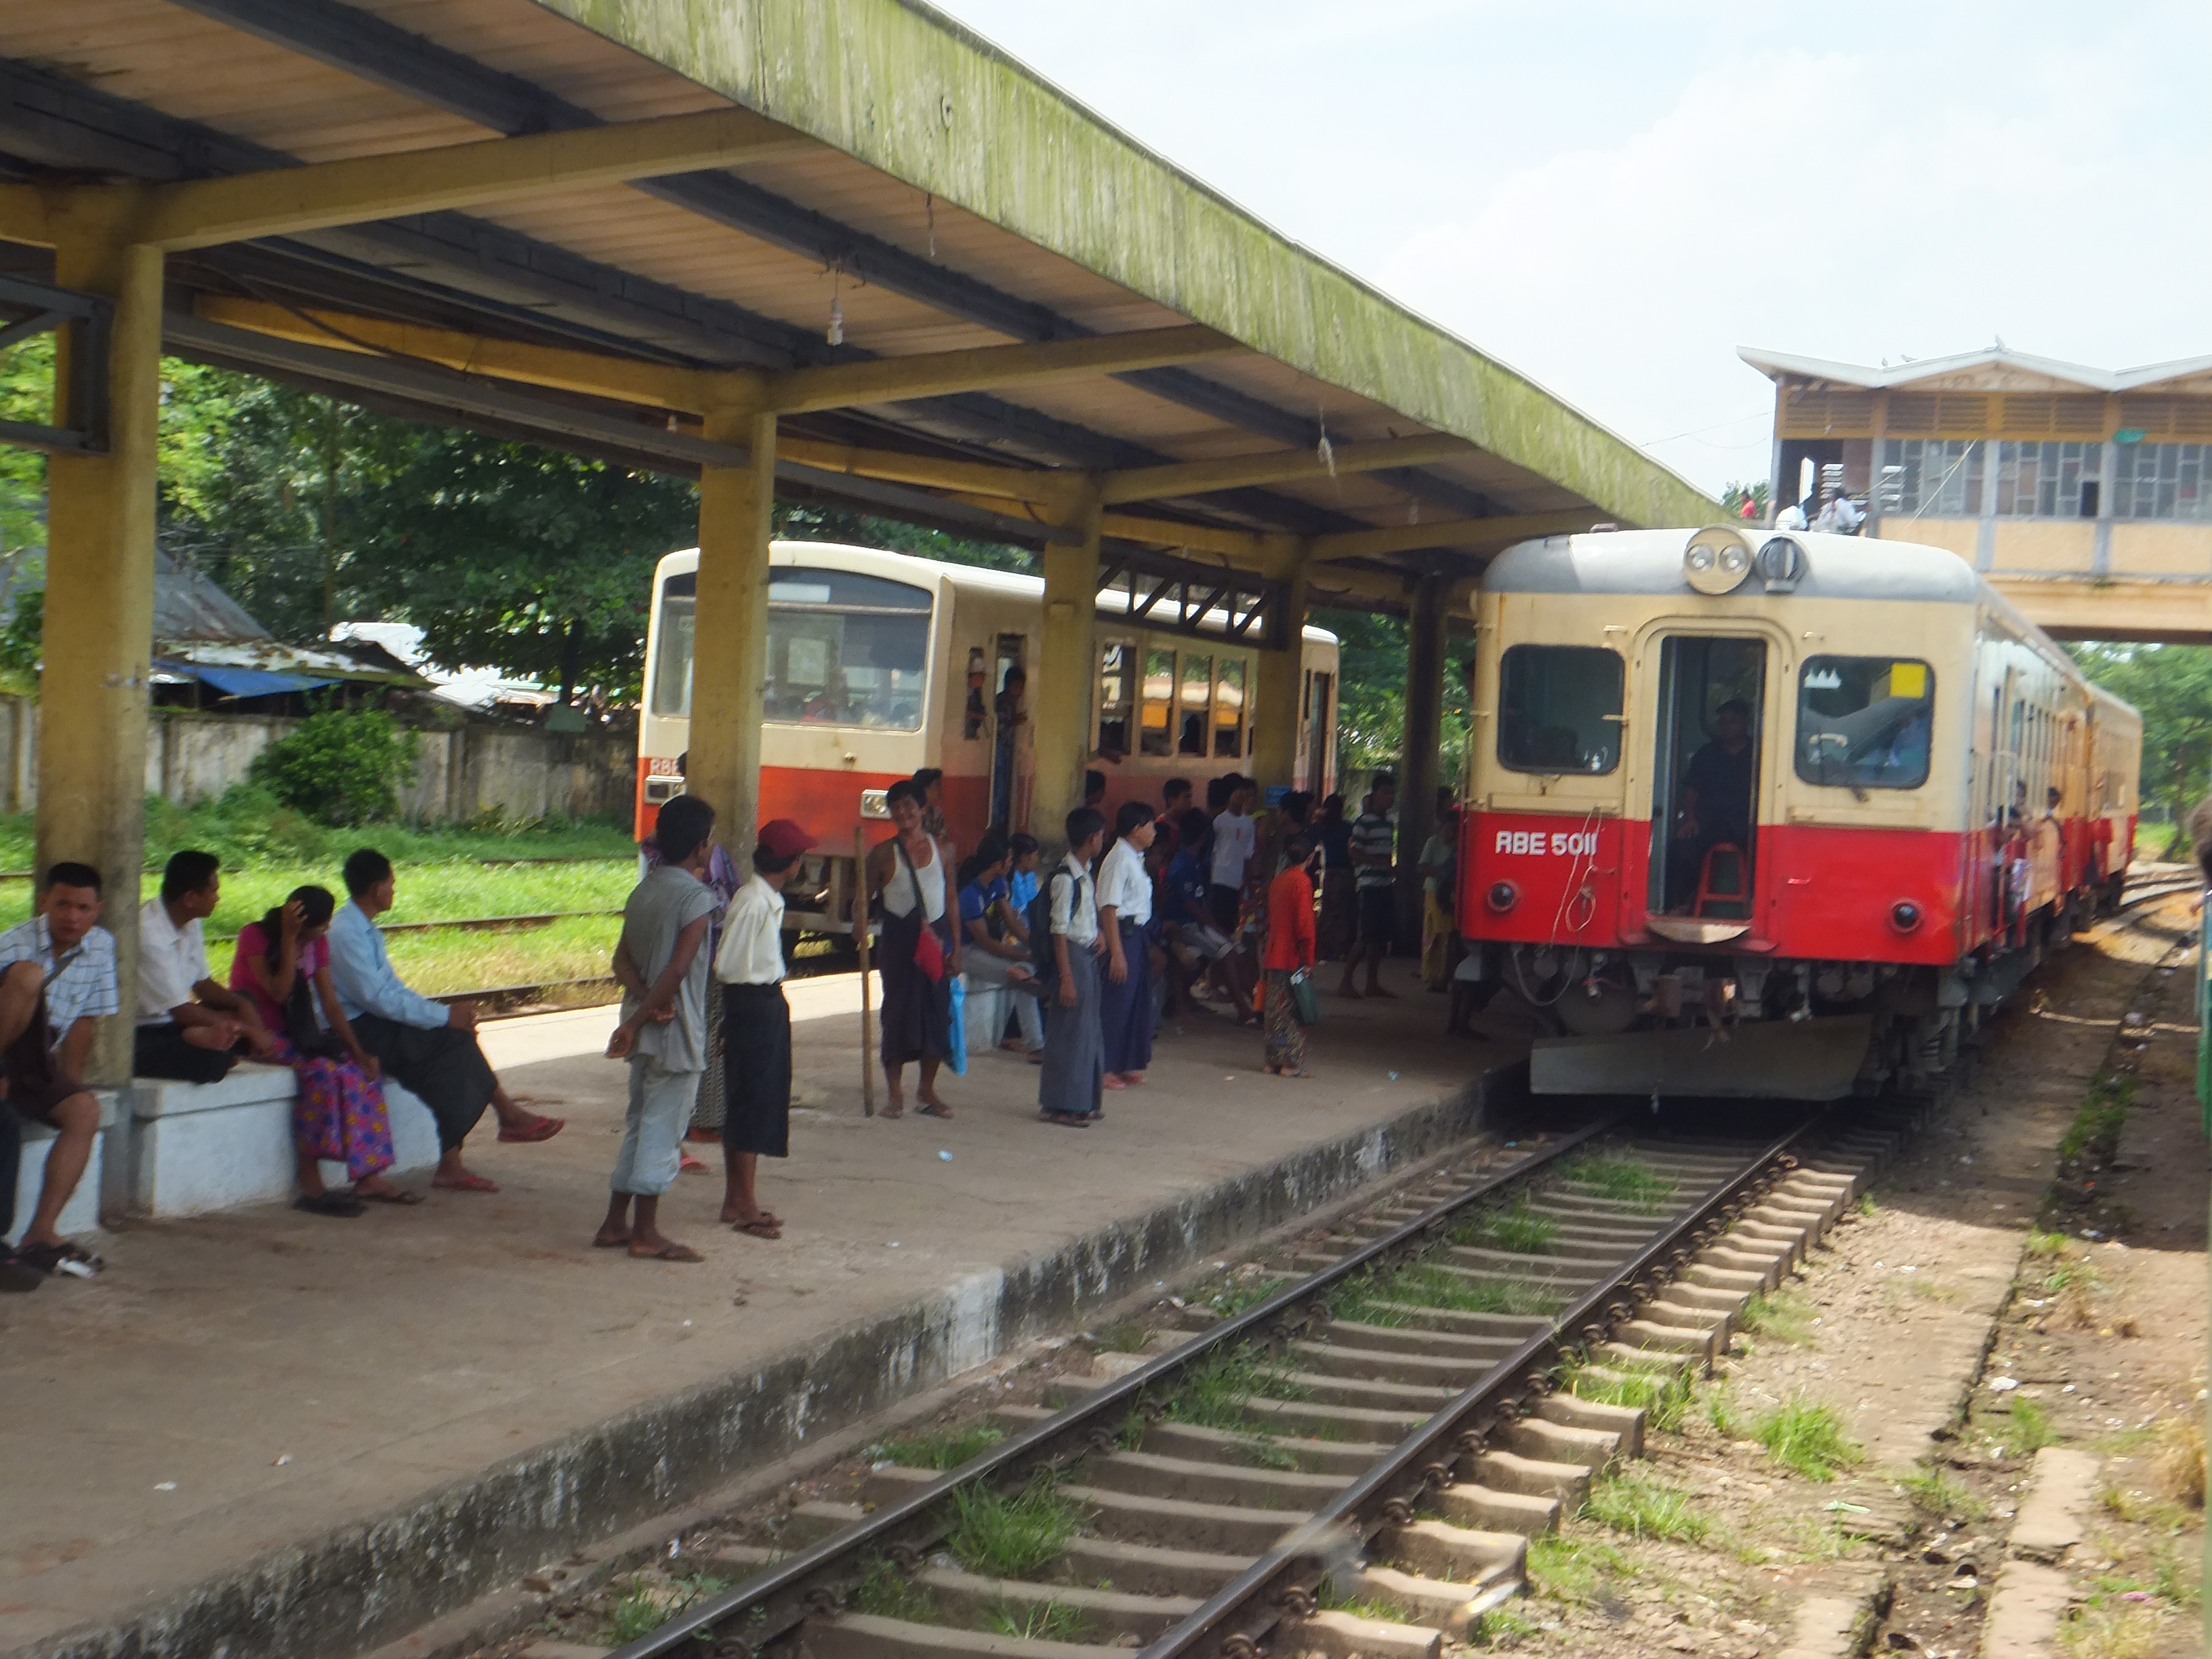
Diesel Railcar, 5000-series (RBE)
Original size.
Puzundaung Station: On the right diesel railcar RBE 5011, believed to be of Japanese manufacture, arriving from Yangon. Elsewhere, a defunct unit similar to RBE2011 was seen, locomotive hauled, in use as a coach. A second unit, RBE 2522 (similar to RBE 2508 illustrated below) can be seen on the rear of RBE 5011.
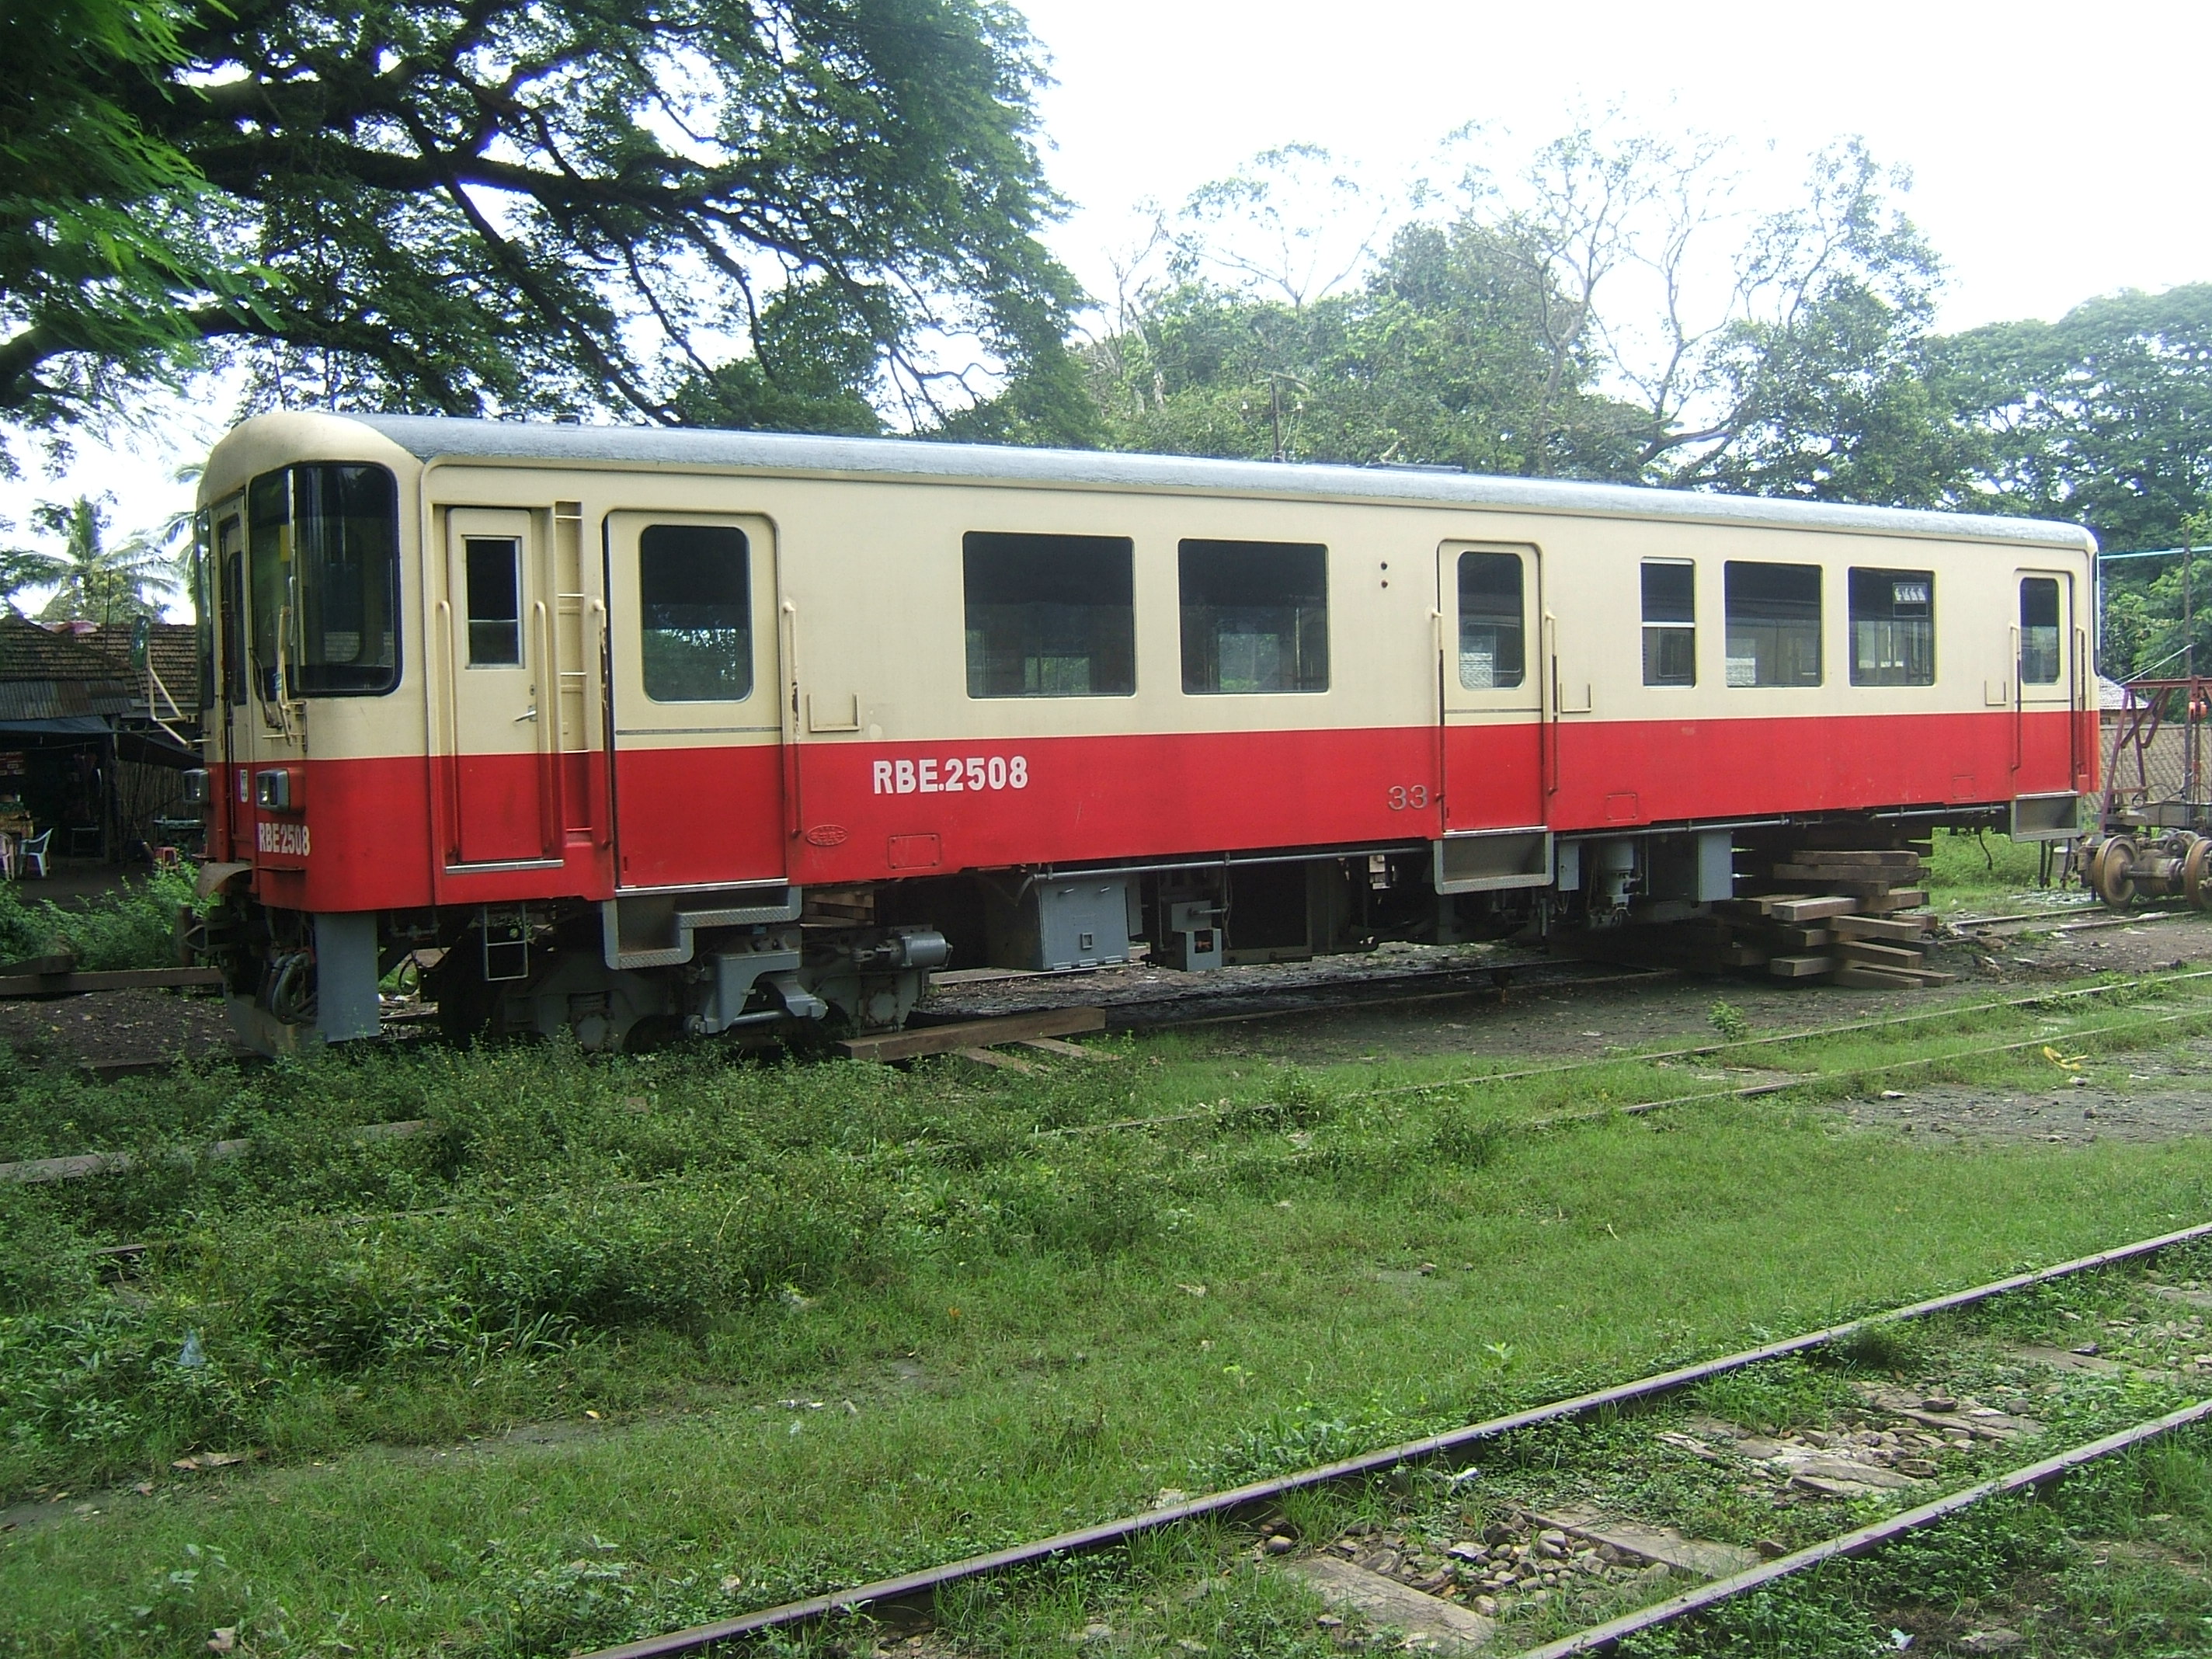
Diesel Railcar, 2500-series (RBE)
Original size.
Diesel railcar RBE 2508 under repair at Katha.
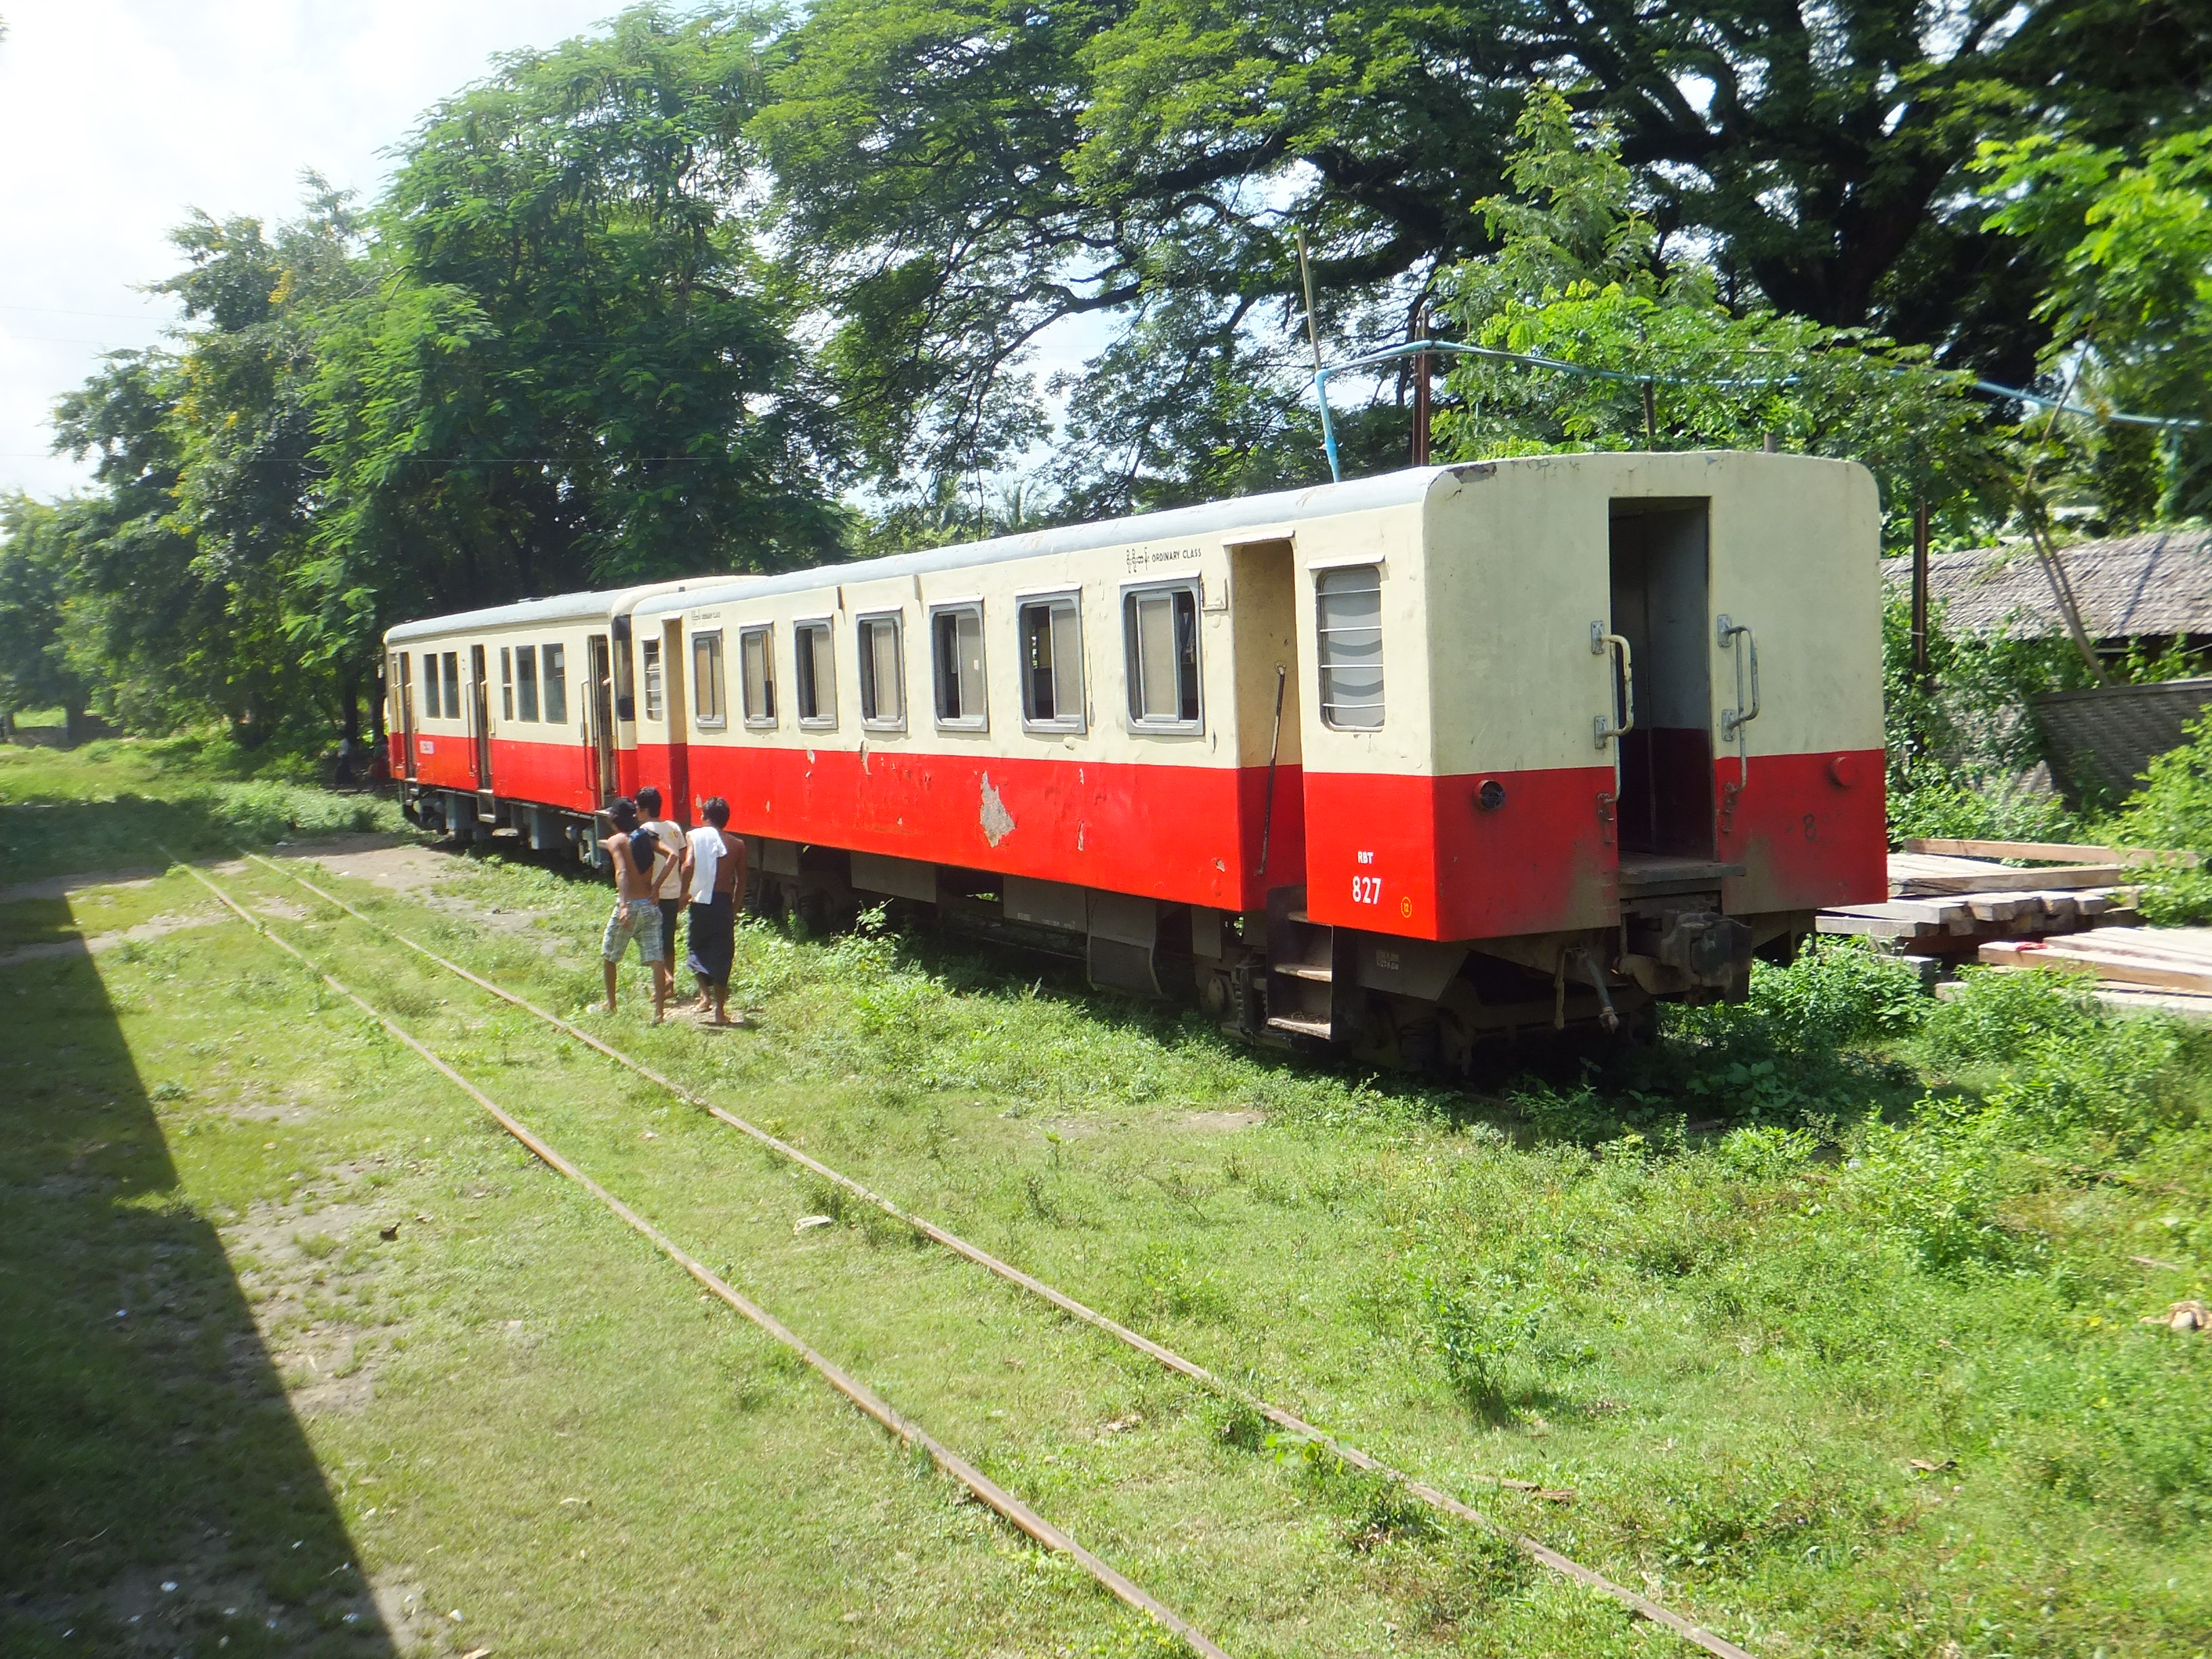
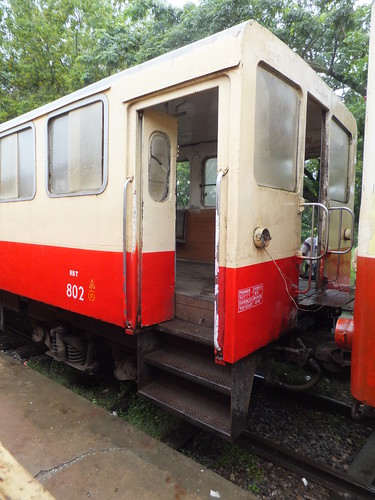
Railcar Trailer Car (RBT)

Diesel railcar trailer car 827, paired with the repaired RBE 2508.
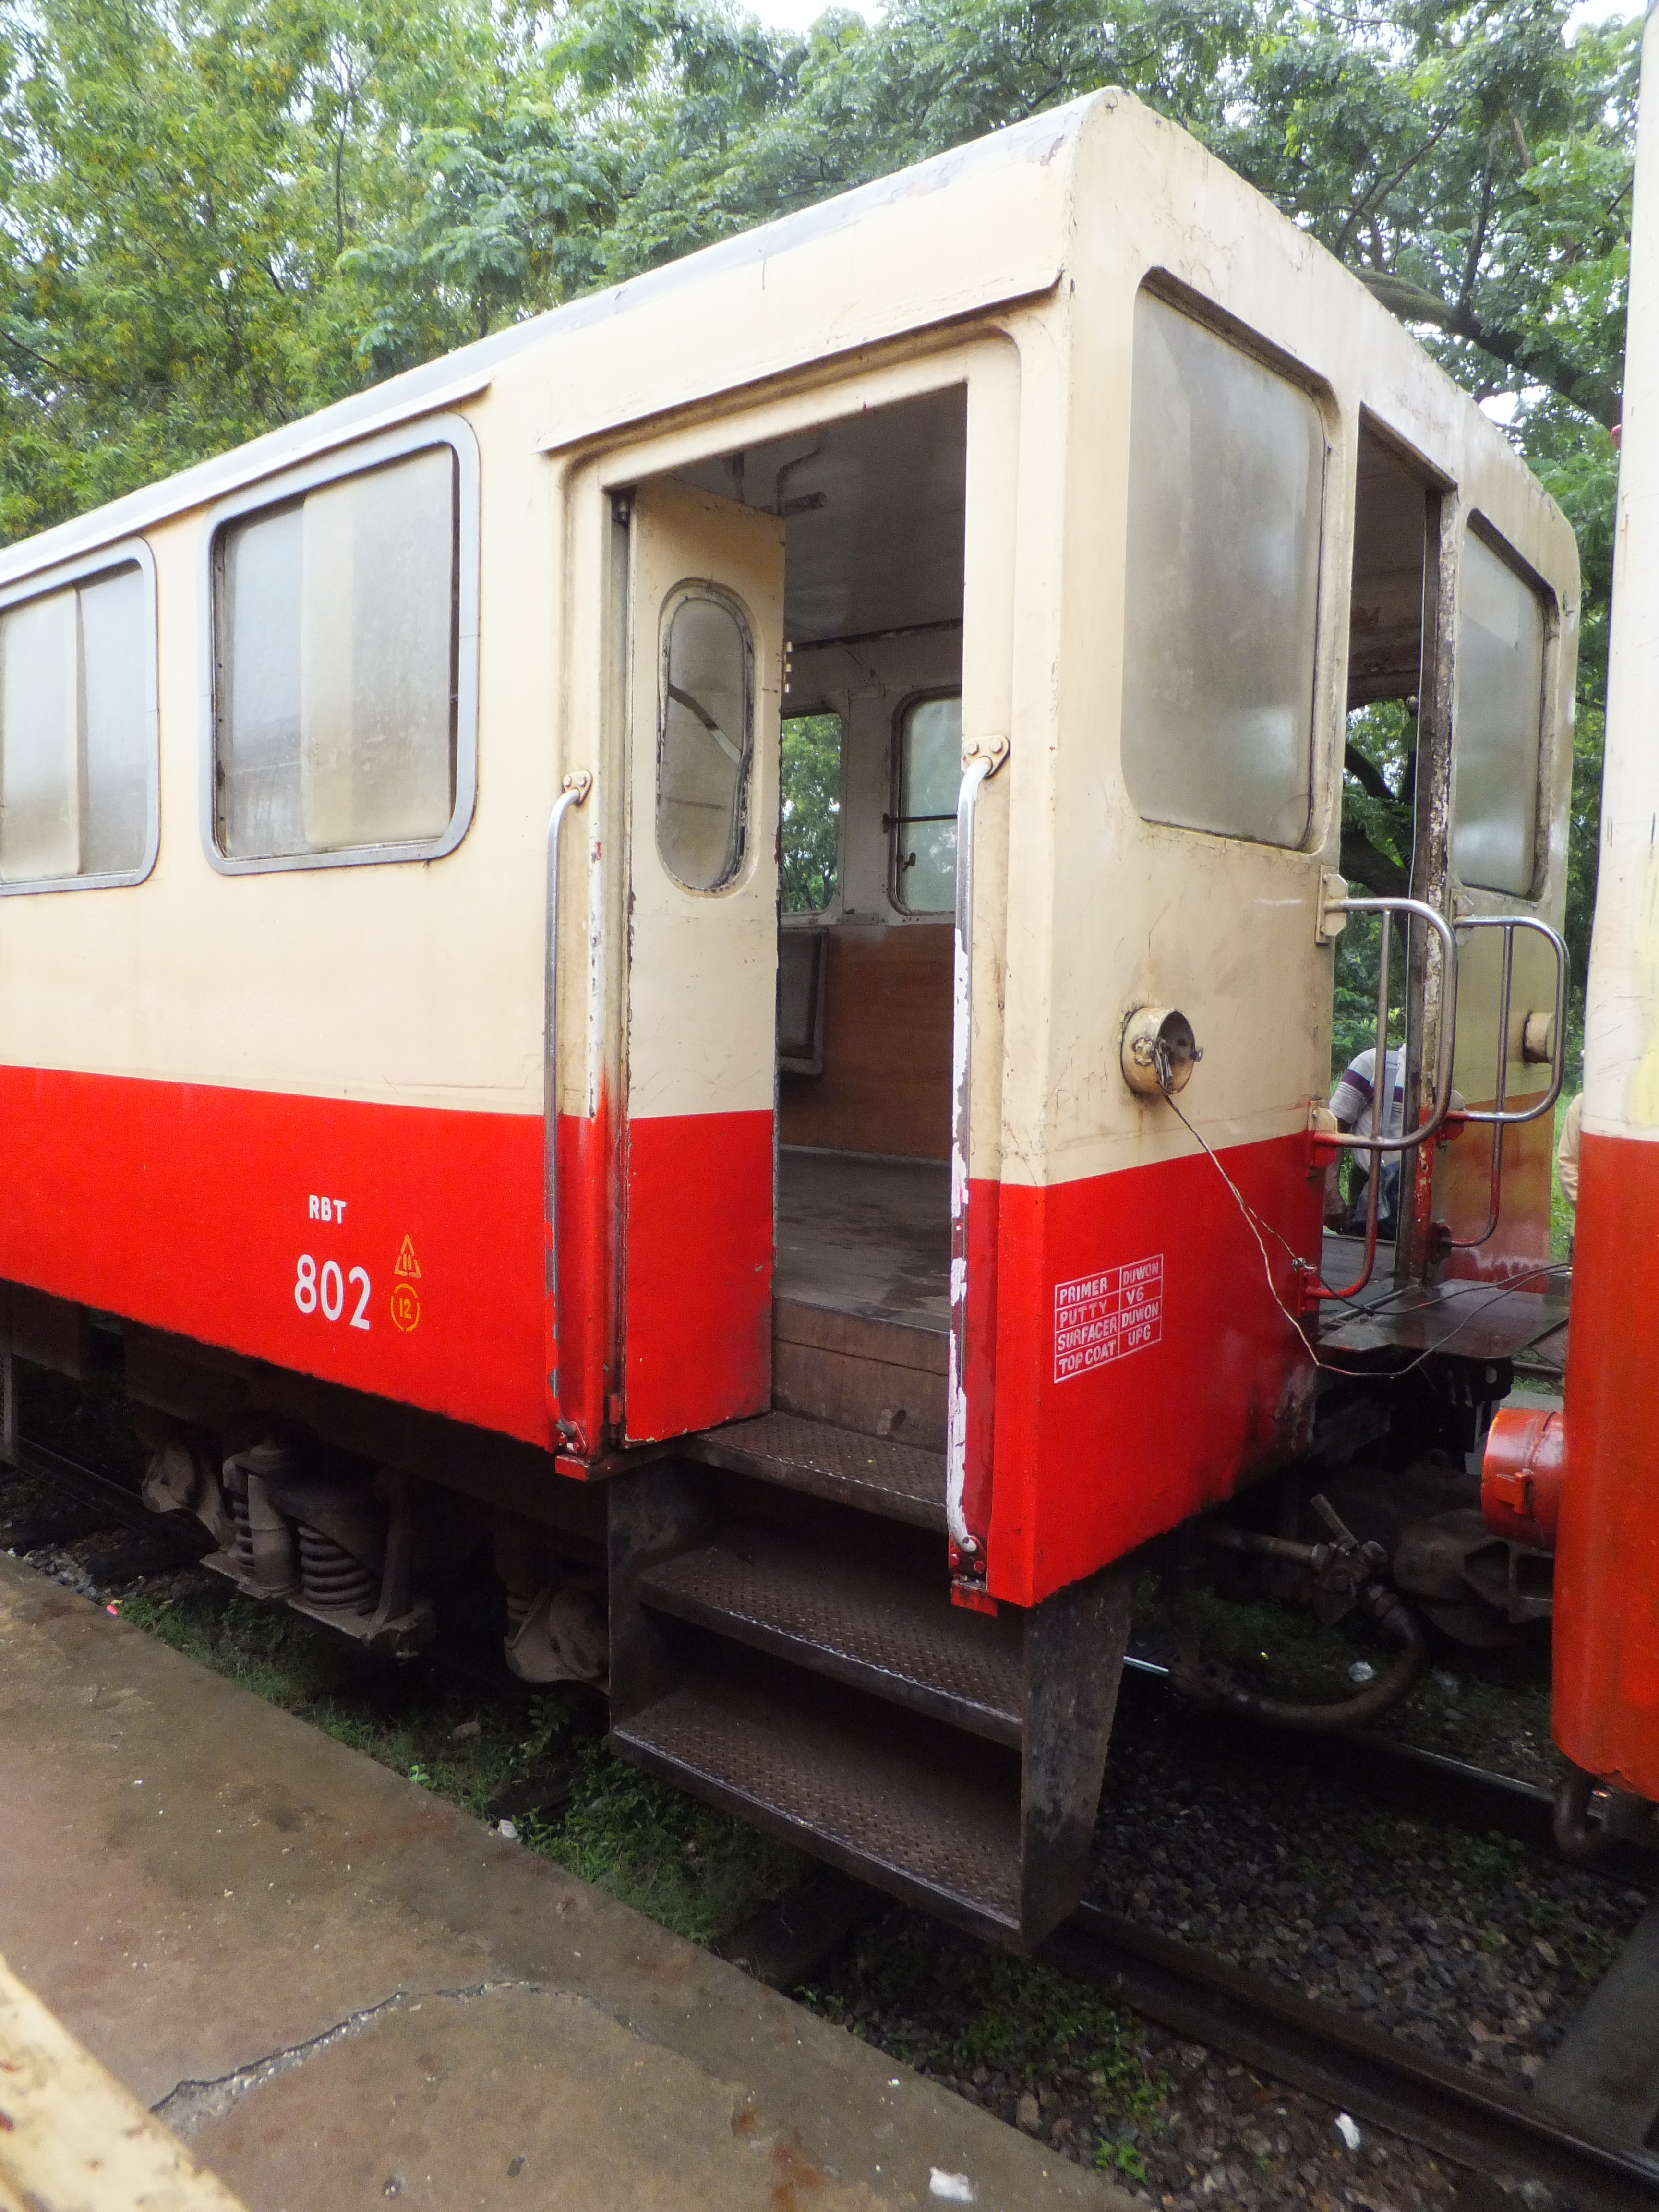
Railcar Trailer Car (RBT)
Original size.
Diesel railcar trailer car 802, forming part of a locomotive-hauled train.
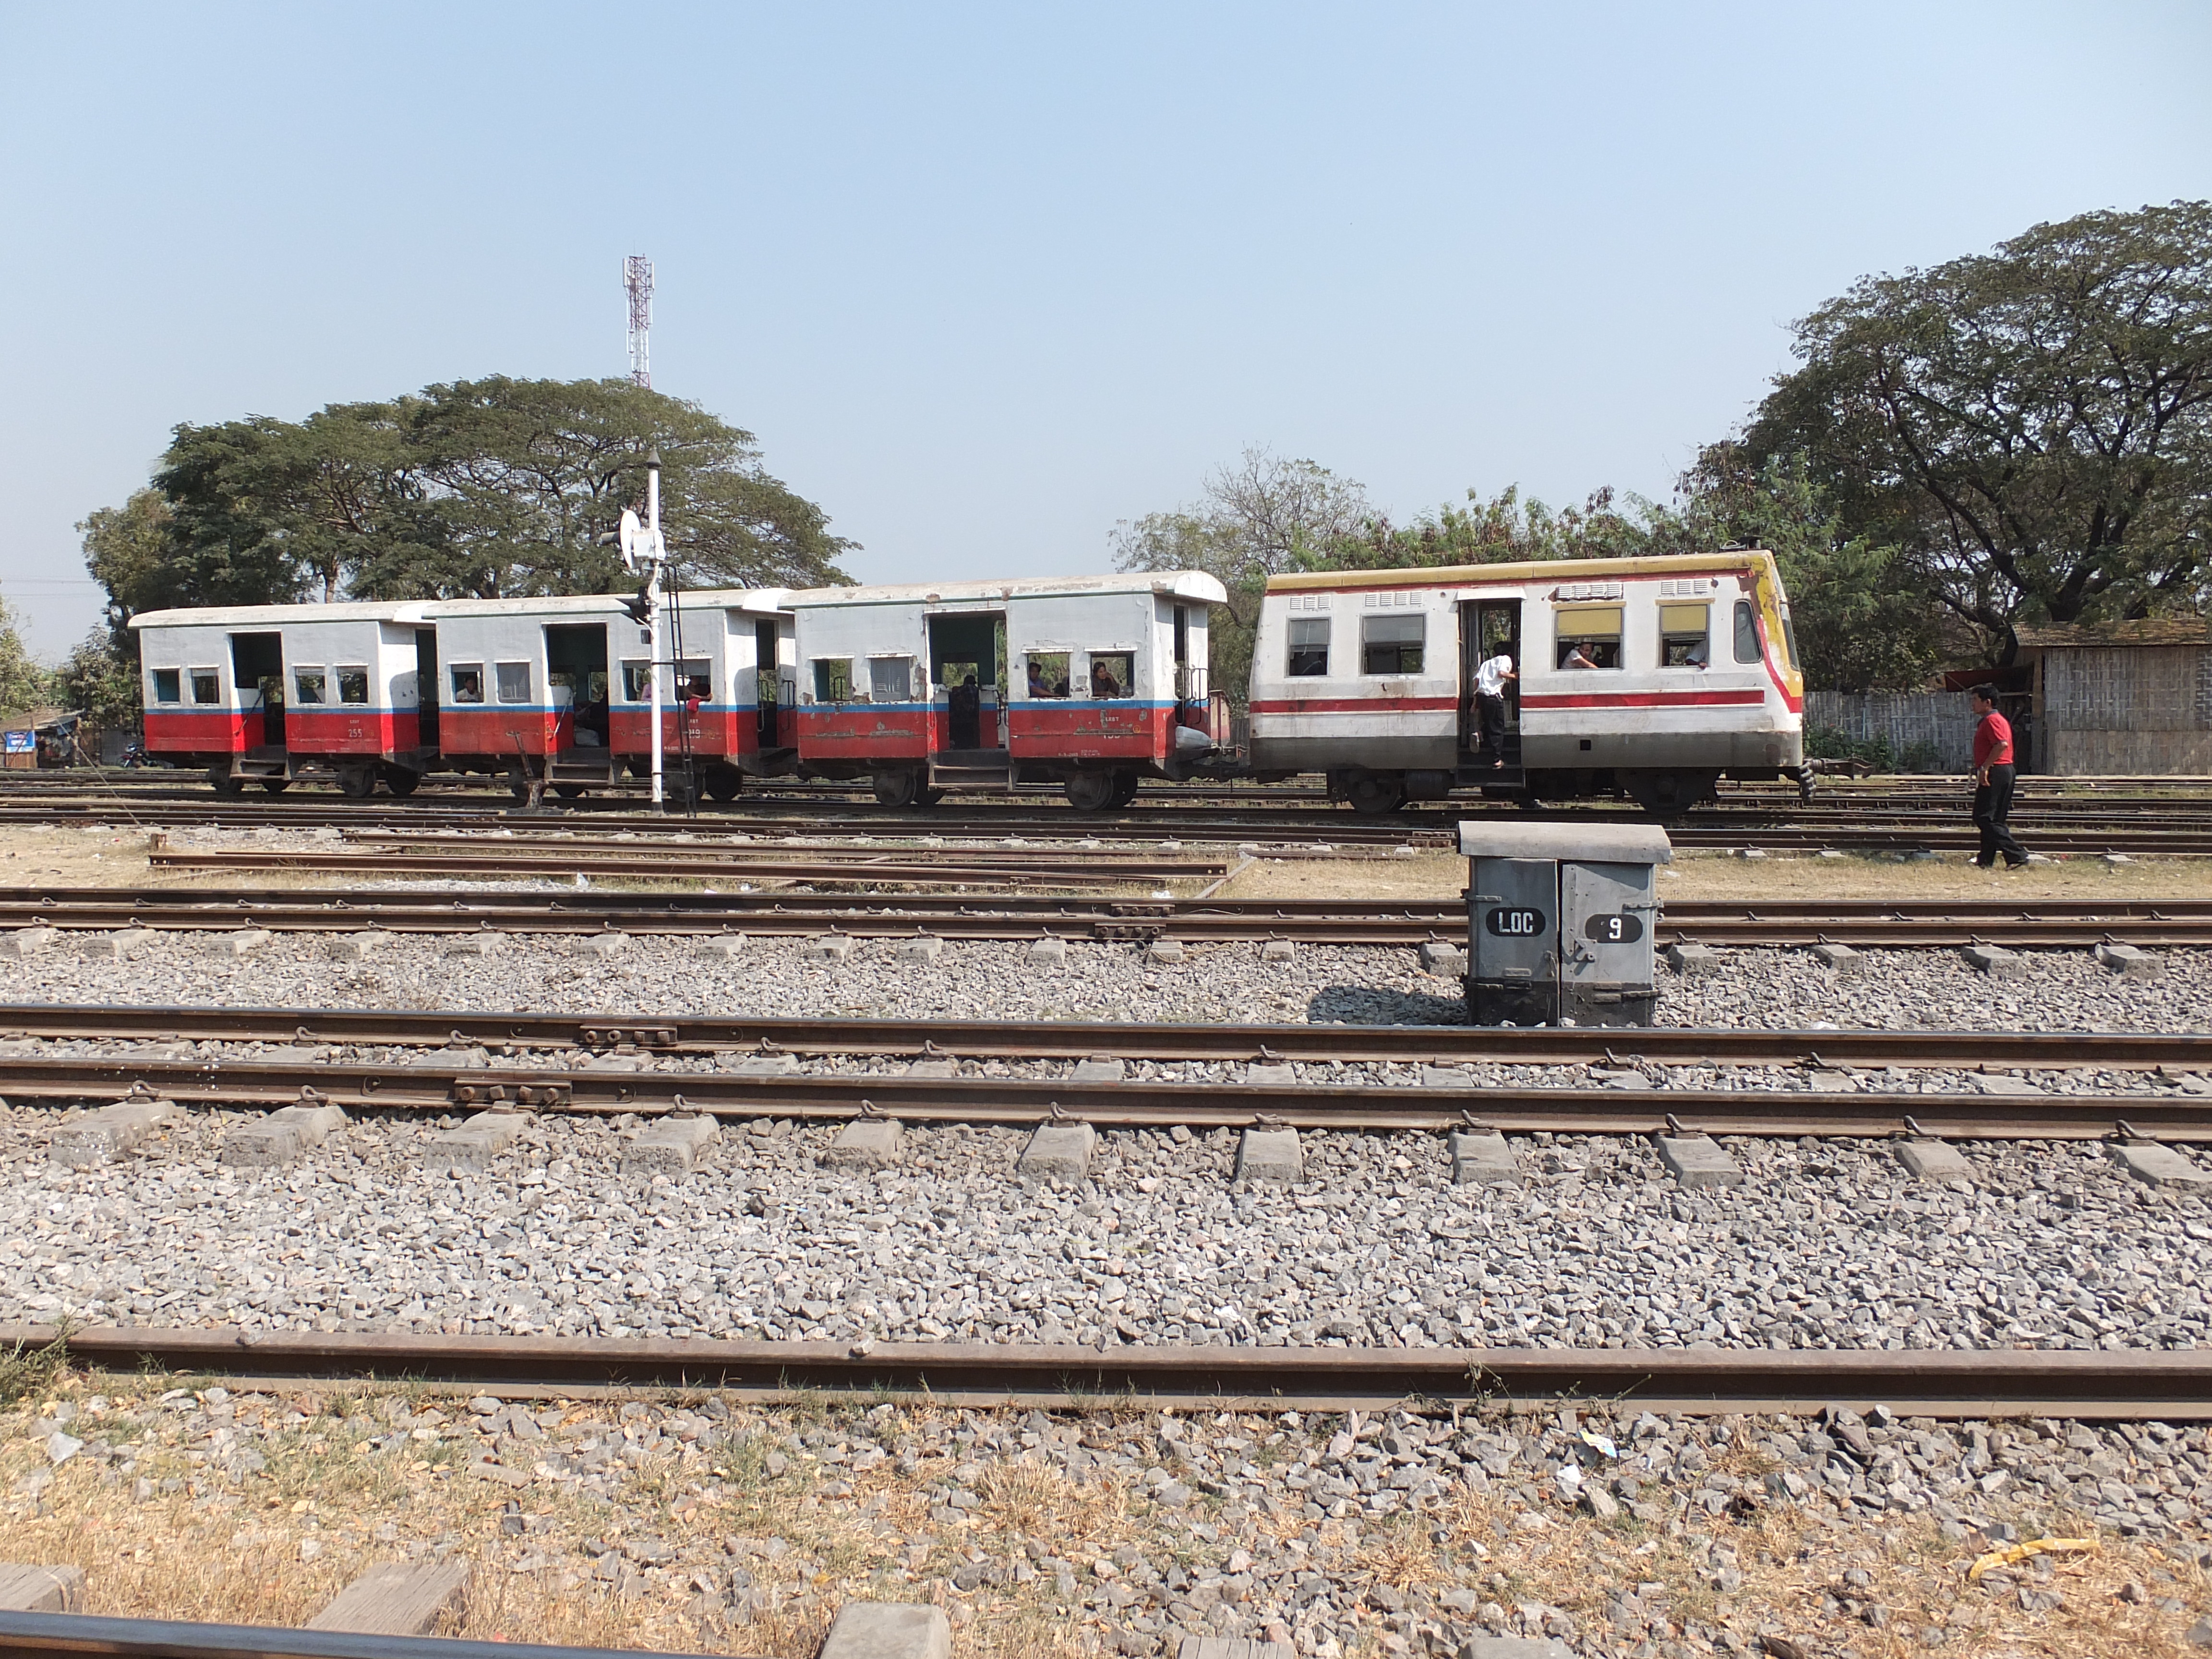
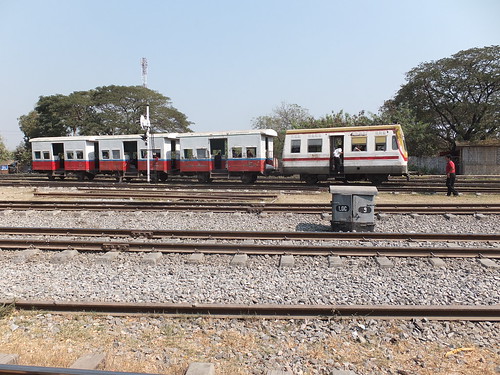
Very-Lightweight Diesel Railcar
Original size.
Very-lightweight diesel railcar (chopper couplings, livery white with yellow roof and red line) leaving Myo Haung with three 4-wheel coaches LZBT.
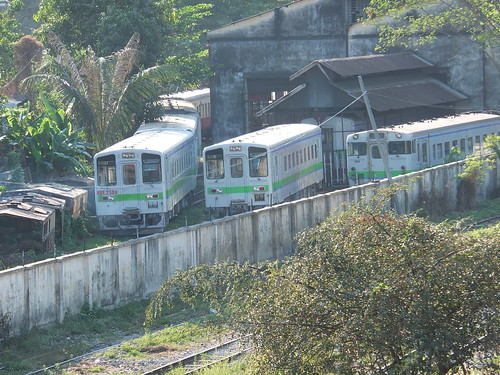
Recent Developments
These DMU spotted adjacent to Yangon Central station in February 2013 may be part of the Japan International Co-operation Agency (JICA) project in Myanmar. The JICA website referring to work in Myanmar says "a proposed multi-million dollar project will upgrade the maintenance and safety of railroad infrastructure, most of it dating from the pre-World War 11 British colonial era". The above picture shows what may be new or rebuilt Japanese units. The unit on the left carries a Myanmar Railways style running number 'RBE 2586' whilst the unit of a different on the right carries the number '301'.


Wednesday, 27 March 2013
By Rail to Maymyo
On Tuesday, 19th February 2013 I travelled from Mandalay to Maymyo (as the British called it - we should now say 'Pyin Oo Lwin') by train. A general description of the day is given in my post here. This article covers more technical aspects of the journey.
Whereas Mandalay is situated on the plain adjacent to the River Ayeyarwaddy, Maymyo is up in the mountains, at an elevation of 3506 feet above sea level. It required some ingenuity on the part of the builders of the railway to build a line suitable for normal locomotives. Beyond Sedaw, they used a zig-zag where trains shuffles backwards and forwards between four 'Reversing Stations' in order to gain height before completing the journey to Maymyo. The layout of the zig-zag section is shown below.

Plan of the Zig-Zag railway in the line to Maymyo.
The timings for my journey are given below.
| Station | Distance* | Arrive | Depart |
| Mandalay | 390 | - | 6.17 |
| Shan Zu | 389 | pass | 6.25 |
| Myo Haung | 383 | 6.30 | 6.37 |
| Thoe Gyan | 385 | 6.45 | 6.46 |
| Tonbo | 392 | 7.13 | 7.16 |
| Sedaw | 396 | 7.32 | 7.53 |
| Sa Tu Ta Lun Hto | 400 | 8.27 | 8.32 |
| Zybingi | 405 | 9.02 | 9.05 |
| Thondaung | 411 | 9.36 | 9.37 |
| Anisakan | 415 | 9.51 | 9.54 |
| Maymyo (Pyin Oo Lwin) | 422 | 10.17 | - |
* Distances are approximate in miles from Yangon, given by Wikipedia. They decrease between Mandalay and the junction at Myo Haung, then increase towards Maymyo.
As the table shows, the departure from Mandalay, scheduled for 04:00, did not occur until 06:17. I never found out why. The locomotive to haul our train (DF.2048, one of the Bo-Bo-Bo types with automatic couplings and air brakes which seem to be favoured in the mountains) was waiting at the south end of platform 4 when I arrived at 03:20 but the station pilot didn't arrive with our coaches until around six. Then, we had to wait while the porters loaded the waiting freight into the box car and guard's van at the rear. Admittedly, they did this very smartly.
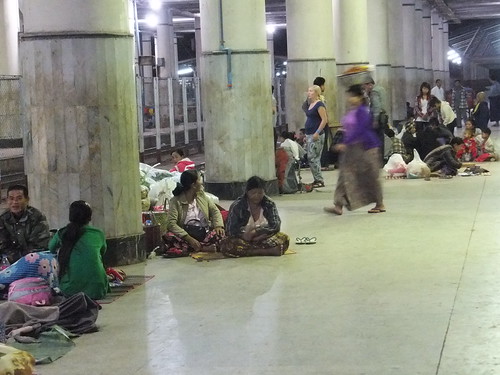 Waiting for the train at Mandalay Central.
It was still too dark to see much as our train made its way to our first stop - Myo Haung. I'd visited this station by car the previous day so there's a separate set of pictures showing this station. This is quite a large junction station with extensive yards. I suspect it was the location of a locomotive depot in steam days - there were plenty of diesel locomotives littered around the sidings during my visits. Up until Myo Haung, we'd been on double track with colour light signals (actually searchlight signals at Myo Haung). Here, we turned left onto the single line which would take us to Maymyo so there were no more colour lights and train control reverted to the methods outlined in the post Manual Control of Points and Interlocking.
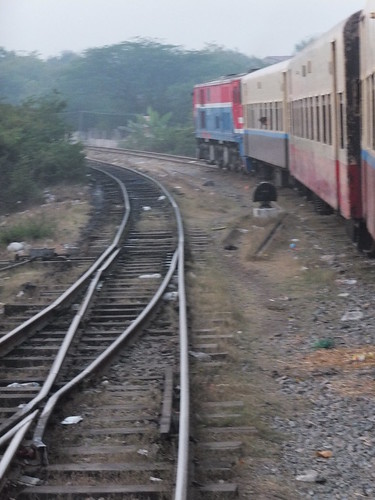
Leaving Myo Haung, entering Lashio line.
We passed some pretty impressive rubbish dumps - the Burmese don't seem to have yet fully grasped the concept of recycling. We should have passed the junction with Mandalay's Circle Line but I'm afraid I didn't spot it. I did see the turnouts leading to two short branch lines which I think serve quarries. Elsewhere, points have been controlled from single lever ground frames but, on the line to Maymyo, you can also see counterweighted 'lift-over' point levers, accompanied by the usual battered point indicator and often surrounded by whitewashed stones.
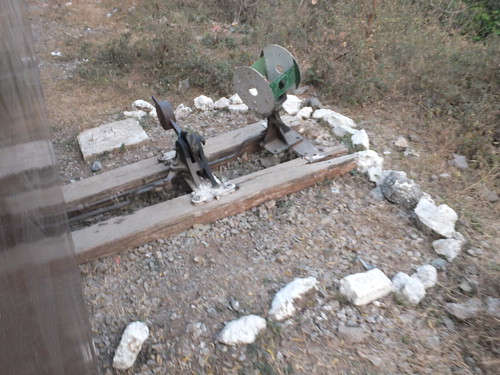
Passing Loop Points at Thoe Gyan. Counterweighted point lever and battered point indicator.
We paused at a couple of small but neat stations at Thoe Gyan and Tonbo before stopping at the more important station at Sedaw, nestling near the mountains we were about to climb. We stopped here about twenty minutes and passengers were able to de-train and examine the food offered by the numerous hawkers who had set up stalls on the platform. There was also plenty of freight to be offloaded here from the last two vehicles. In addition to a passing loop, there was an additional siding here. As we left, I saw two abandoned water cranes, conjuring up images from the steam era of locomotives 'topping off' their water tanks before the assault on the fierce gradients ahead.
The train made the usual slow start away from the station, then the locomotive was 'opened up' for the initial climb to the First Reversing Station. This only took about seven minutes.
 Looking back, entering the First Reversing Station. The line to Second Reversing Station climbs away to the right.
When we stopped, the pointsman changed the points so that the locomotive could propel the train to the next reversing station. The guard moved to the footstep on the end of his Guard's Van, which was now the front of the train, so that he could keep a lookout ahead. Although the guard could not be seen, the driver could watch the waving green flag peeking around the Guard's Van.
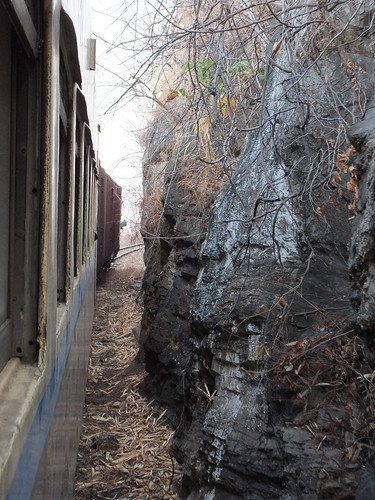
Being propelled from the First Reversing Station to the Second, with the Guard's Van now leading. The Guard is on the footstep at the end of the vehicle, brandishing a green flag.
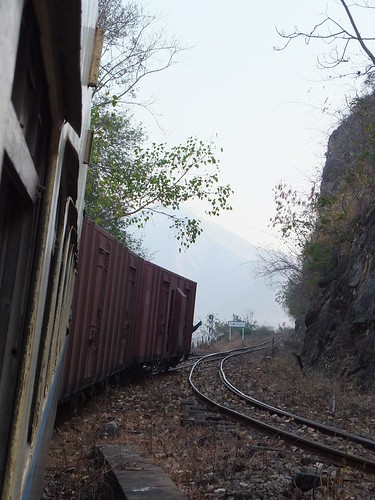
Approaching the Second Reversing Station. The Guard is still displaying a green flag.
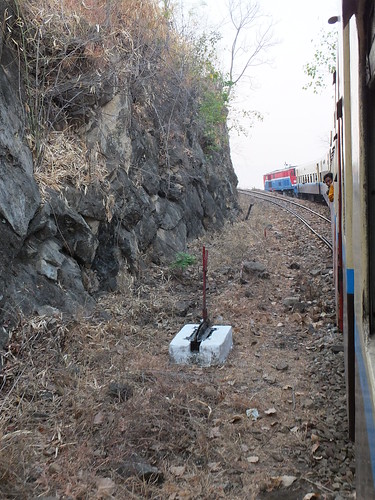
Looking towards locomotive as the train is propelled into the Second Reversing Station. The line climbing to the Third Reversing Station is on the left. The single lever frame is for a Home Signal. A Home Signal is visible behind the locomotive.
It only took a few minutes to reach the second reversing station and the guard regained his usual position in the Van whilst the pointsman changed and secured the points. Then we were away again, with the locomotive leading. The track clings to the edge of the mountain and, looking down, it was clear how far above the plains we'd already climbed.
 The Zig-Zag has already lifted us far above the line we started on.
As you can see from the plan above, the leg from the second to third reversing station is the longest and it took around twenty minutes to cover the distance, the diesel working fairly hard on the front. At first, the jagged rock wall was on our left, with stunning views across the mountains to the right. We passed through two short tunnels and then curled to the right, with the views now appearing on our left. We then passed the third tunnel with the Fourth Reversing Station directly above us! A fairly primitive white-painted elevated ground frame appeared on our right as we entered the Third Reversing Station. Very soon, we stated to move with the Guard's Van leading again as the locomotive propelled its train onto the right hand line to the Fourth Reversing Station. Both arms of the 2-doll bracket signal (an upper quadrant using the strange 'lower quadrant' arms common in Burma) remained 'on' - I assume the pointsman was giving us a green flag on the other side of the train.
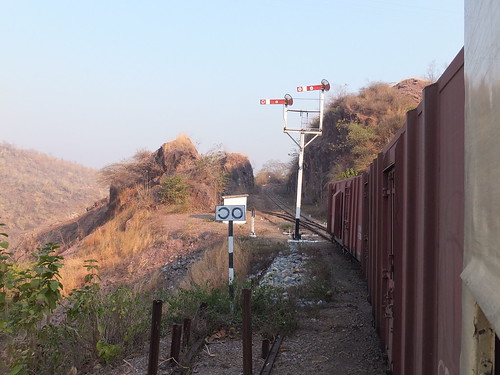 Leaving the Third Reversing Station with the Guard's Van leading.
It was only a short distance to the Fourth Reversing Station which is a public station called Sa Tu Ta Lun Hto). Here, a scissors crossover allows ascending and descending trains to pass one another.
 Looking back as we pass over the scissors crossover and enter the Fourth Reversing Station with the line continuing to Maymyo on the left.
Although I'd imagined we were in a remote spot, there seemed quite a few passengers waiting to board and we stood for five minutes whilst they sorted themselves out.
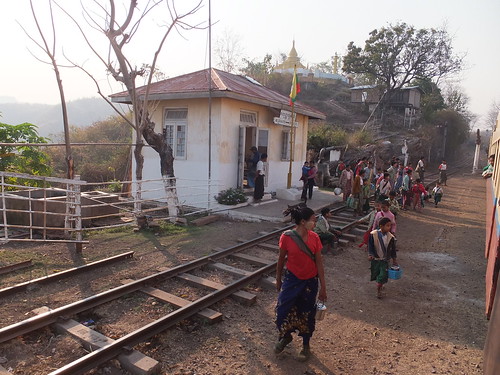 The modest station building at Sa Tu Ta Lun Hto.
With our locomotive once again leading, we set off, passing another abandoned water crane. We continued to climb, passing through a couple more tunnels before emerging on a high plateau but still climbing. Another half hour saw us arriving at Zybingi (1884 feet above sea level) and, I admit, after the early start and the excitement of the Zig-Zag, I wasn't paying too much attention. A further half hour took us to Thondaung. There was a rather odd windlass here, which I assume probably operated a home signal but soon we were off again.
 Thondaung: An unusual windlass.
Another fifteen minutes took us to the last stop before Maymyo - Anisaken.
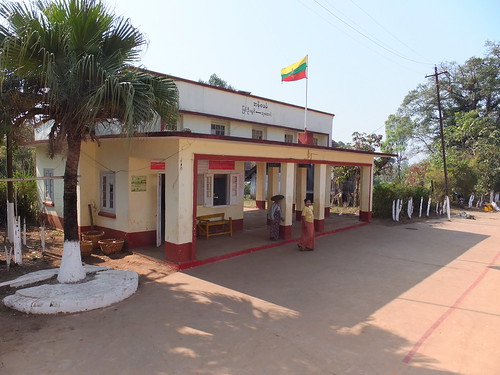 Anisaken station building.
Another half hour, and we were running into Maymyo, where my guide and driver were patiently waiting for my delayed train. After Maymyo, the train would then continue to Lashio but, on this occasion at least, without me.
A fascinating, if exhausting, trip.
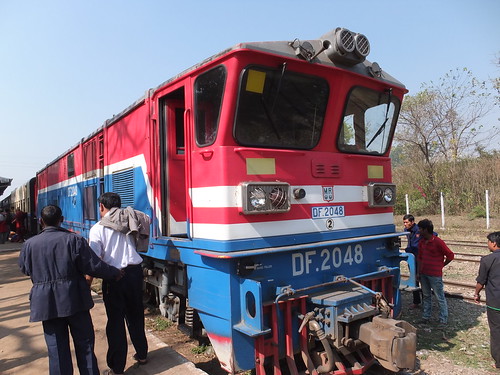 DF.2048 on arrival at Maymyo.
References
List of railway stations in Myanmar.
My pictures
Railways in Myanmar (Mandalay on earlier visit).
More Railways in Burma (Maymyo on earlier visit).
By Train to Maymyo.
Myo Haung.