Friday, 1 August 2014

A Trip to South Wales (Part 1)

On Saturday, 26th July 2014, I travelled to Shrewsbury, took the slow train on what's now marketed as the 'Heart of Wales Line' to Swansea then headed to Cardiff and Newport before returning to Wolverhampton via Hereford and Shrewsbury.

The weather forecast for the day was promising so I thought a day trip would be good. My choice of route owed more to serendipity than planning. I first thought "perhaps Swansea" as a destination (sea/seaport - a recurrent theme). In the past, I've reached Swansea by Cross Country to Bristol Parkway, changing to a First Great Western service to Swansea. But I couldn't remember travelling on the Shrewsbury - Hereford route (the 'Welsh Marches Line' which used to be called the 'North and West Route'). So I looked up trains from Shrewsbury to Swansea and found that some take an hour longer than others. The slow trains ran via what they now market as the 'Heart of Wales Line' through Llandrindod Wells. I was certain I'd never travelled that route, so I worked out some trains which would take me out via the 'Heart of Wales Line' and return me via the 'Welsh Marches Line'.

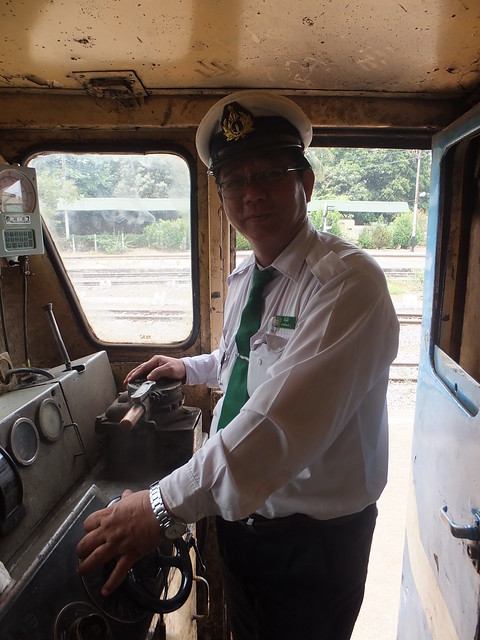
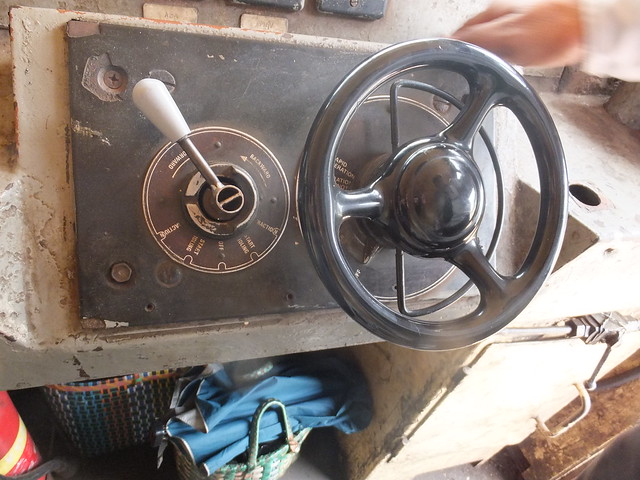
My first train of the day was the 07:25 from Wolverhampton to Shrewsbury - a Class 170 waiting in platform 6, the north end bay. The friendly driver was sprawled across the leading passenger compartment with the door to the cab open. He readily agreed to my request to photograph the cab and we chatted for a minute or two before the 'Right Away'. The journey to Shrewsbury was uneventful and we arrived in bay platform 6.

The cab of 170513.

Shrewsbury

I'd about 45 minutes before my train to Swansea so I left the station and climbed the steep steps to my left which led to 'The Dana'. This is a public footpath and a footbridge which crosses the railway station and leads to Howard Street opposite the front gates of the former prison (which closed in March 2013 and is now unoccupied), also often called 'The Dana'. The bust of John Howard, the prison reformer, still looks down from the niche above the entrance. The prison is listed Grade II - there's a little more information on the British Listed Buildings Site here.

The entrance to the former prison at Shrewsbury.

I then descended the steep steps to reach the bank of the River Severn allowing me to look at the railway bridge from underneath. The first stone arched bridge was built in 1838 and carried three lines of rails. At the end of the 19th century, this bridge was flanked on both sides by girder bridges allowing considerable expansion of the station.

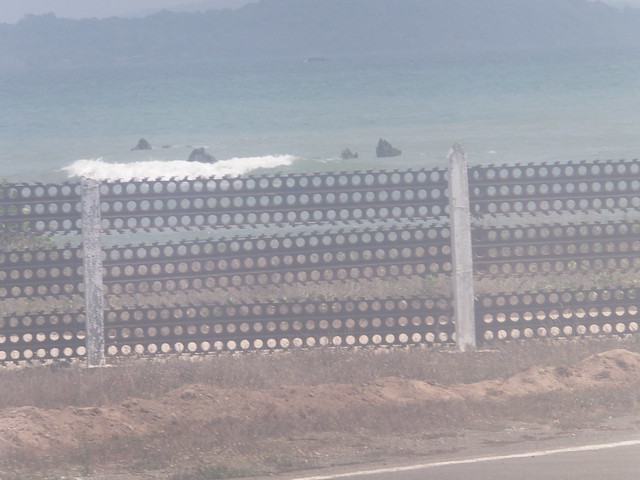
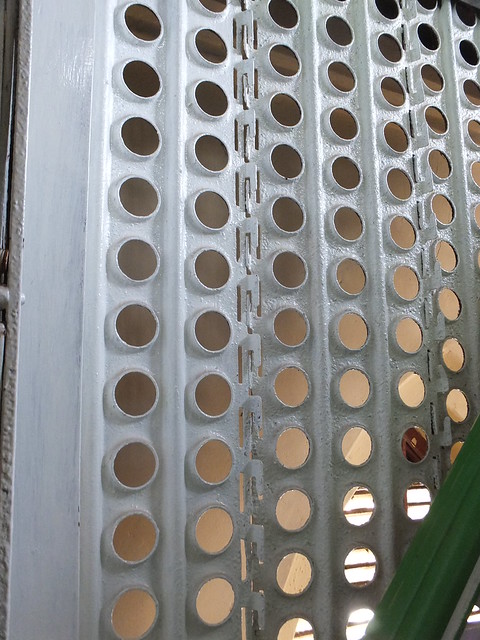
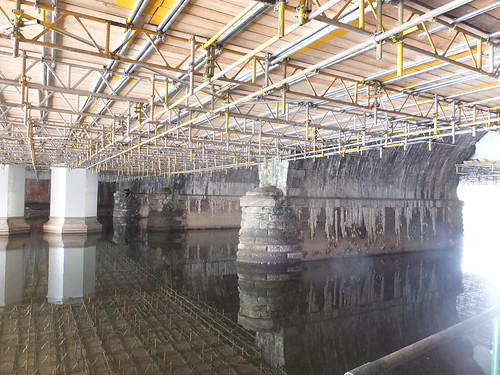
The Severn Bridge which carries Shrewsbury station across the river. On the left (still with maintenance scaffolding) is the girder bridge on the Up side. On the right, the original stone arch bridge.

Having walked under the bridges, I continued along the bank until a steep path led me into St. Mary's Water Lane and the town. I followed Castle Street and Castle gates back to the station.

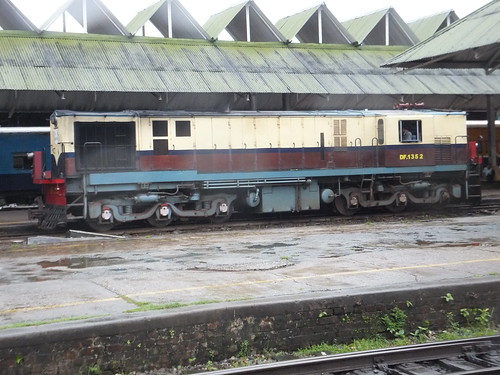
I found a single car Class 153 in bay platform 5 (unit 153362), with a knot of people waiting for the doors to be opened. After a short delay, the driver started the engine and the doors opened.

Class 153

Regular readers will know I'm not much of a diesel multiple unit fan but I'll admit to a sneaking regard for the 153s. Their origins were not promising. The 2-car class 155 'Super Sprinters' were built by British Leyland in 1997/1998 during the short-lived train manufacturing at Workington (which I only found out about recently following a visit to Workington described in my post Furness and the Cumbrian Coast (Part 2)). British Leyland used many of the techniques they'd used on the reviled 'Pacers' and there were other problems (particularly with the doors). The class was not popular and in 1991/1992 most of the class were rebuilt into single-unit Class 153 by Hunslet/Barclay and, as rebuilt units, they seem to have established a niche for themselves on lightly-loaded lines.

The vehicle is quite long at just over 76 feet and weighs in at a little over 40 tons. Seating capacity is 75. They're powered by a single Cummins NT855R5 developing 285 horse power. In connection with a Voith hydraulic transmission T21 1r, they have a maximum speed of 75 m.p.h. The drive train is similar to that on the Class 156 and there's more information about that here. I think Arriva Trains Wales have eight Class 153 and they are the standard vehicle used on the 'Heart of Wales Line'.

Shrewsbury to Craven Arms

We left Shrewsbury on time at 09:00. The famous Severn Bridge Junction Signal Box, a massive L.N.W.R. style box routed us onto the double-track Hereford Line, which we took for the first twenty miles as far as Craven Arms. After half a mile, we passed the G.W.R. style Sutton Bridge Junction Signal Box. Originally, this box controlled a 3-way junction where the Severn Valley Line diverged to the left and the Central Wales Line to Welshpool and beyond diverged to the right. There's now little sign of the Severn Valley Line but I did notice that the Down Home bracket signal was designed for three dolls but now carries only a centre doll (off for our passage) and a right doll for the Welshpool line.

The Welshpool line is single and, since 2010, has been controlled by ERTMS (European Rail Traffic Management System) Level 2, which replaced the earlier RETB (Radio Electronic Token Block) system. Network Rail is now starting to expand ERTMS across the system. There's a very brief report on the British ERTMS Programme here.

Click for larger image
The Railway Clearing House Junction Diagram showing the lines around Shrewsbury.


Our Class 153 continued to bat along under conventional signalling past the disused sidings at Bayston Hill which served what is now the LaFargeTarmac aggregates and asphalt plant, Dorrington Signal Box and made out first stop at Church Streeton. Then it was on past Marshwood Signal Box to come to a standstill at the signal protecting the facing points at the entry to the Down Goods Loop at Craven Arms. I don't know what the problem was but there was at least one Lineman working at an equipment case. After a short delay, we slowly moved forward, over the Manually Controlled Level Crossing with Barriers adjacent to the odd-looking signal box with modern cladding and rather small uPVC window units. We stopped again briefly by the box, probably to collect the Token for the first single line section from Craven Arms to Knighton. We were then routed through a facing crossover to stop at the 'Up' platform for Hereford line trains. Starting off, we were turned onto the single line for Knighton, running parallel to the Hereford line for a few yards before turning away on the Heart of Wales Line.


A Swansea-bound Class 153 sets off from Craven Arms on the 'Heart of Wales Line' (Photo: Chris McKenna under Creative Commons License).

Single Line Working

To ensure safety on single lines, drivers originally carried a unique 'Token' authorising the train to travel on a specific section between one passing loop and the next. When the train had safely cleared the section, the 'Token' could be issued to a train travelling in the opposite direction. But a second train travelling in the same direction as the first could not be allowed to proceed even when the first train had cleared the section because the Token was at the wrong end of the section.

To provide operational flexibility, the Electric Key Token system was developed with a number of Tokens for each single section secured in Token Instruments at either end of the section. Electrical interlocking would only allow one Token to be removed at a time.

In the old days, single line working usually involved station staff or signalmen at passing loops who would work the points, operate signals, collect the token for the rear section from an arriving train and issue a new token for the next section.

There's a very good description of Electric Token Block working on the excellent 'Railway Signs and Signals of Great Britain' site here.

Single Line Working on the Heart of Wales Line

The line survived the Beeching Report but in 1972, to simplify the operational requirements, British Railways elected to operate this line under a Light Railway Order. In 1986, British Railways introduced 'No Signalmen Token Remote' (NSTR) working on the Heart of Wales Line where traincrew are responsible for exchanging the Token at each passing loop and points are automatically worked. This variation of Electric Token Block Working is also described on the 'Railway Signs and Signals of Great Britain' site here. The 'British Railways Board (Central Wales Railway) Light Railway Orders 1972 to 1990' gives the following brief summary of the method of working:-

“The ‘No Signalman’ Electric Key Token system shall be regulated from Pantyffynnon signal box and the railway shall be divided into six Absolute Block single line sections operated by Method IV (Electric Token)”.

The Heart of Wales Line

It was just over 12 miles to the first passing loop at Knighton, passing over 12 level crossings with various methods of operation. Frequent level crossings are a feature of the 'Heart of Wales Line'. The Token we'd collected at Craven Arms guaranteed that we were the only train in the section to Knighton. A number of the intermediate stations are Request Stops so we didn't halt at Broome or Hopton Heath. We paused briefly at Bucknell which retains its attractive stone-built station building which, of course, has been sold off. At least a number of stations on the line which have lost their original station buildings now have a modern recreation of a traditional simple open shelter with an awning. Pastiche it may be but better than the execrable 'bus shelters' which nowadays seem mandatory. Four miles beyond Bucknell, we paused at Knighton. Here, the driver obtained the Token for the next section to Llandrindod.

Knighton Station with its modern open shelter.

The next section is around twenty miles through attractive country. Shortly beyond Knucklas station, we crossed the 13-arch Knucklas Viaduct, built by the Central Wales Railway in 1865.

View from Knucklas Viaduct.

We passed through the 600-yard Llangynllo tunnel and its station then Llanbister Road station. The 'Road' is a warning that you've a five mile walk from the station to the village! We paused at Dolau, a particularly well cared for station.

The attractive station at Dolau.

Three miles further on, we passed through the 400 yard Pen-y-Bont tunnel and its station then another three miles took us to Llandrindod. This was developed as a Spa and Resort in the 19th century and was called by the English Llandrindod Wells. It still attracts tourists. The station here retains its original building which has been 're-victorianised' and provided with a suitable glazed platform canopy. This station is staffed. Just beyond the station, I was delighted to see the LNWR-style signal box preserved although, of course, no longer functional.

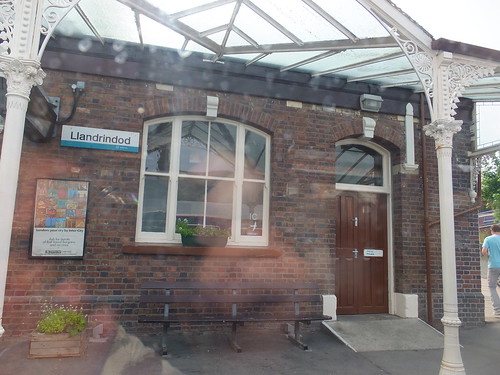
Station building at Llandrindod.

My train set off again on the 16-mile section to Llanwrtyd. Our first stop was Builth Road (only three miles from Builth Wells and there are three buses a day). Builth Road used to be 'High Level' because it passed over the Cambrian line from Llanidloes to Three Cocks Junction. The Cambrian platforms here formed the 'Low Level' and the Cambrian line provided a station at Builth Wells. The original station buildings survive, apparently converted into two residences and modern passengers (the Train Operating Companies prefer the title 'customers') have the use of a stainless steel 'bus shelter'.

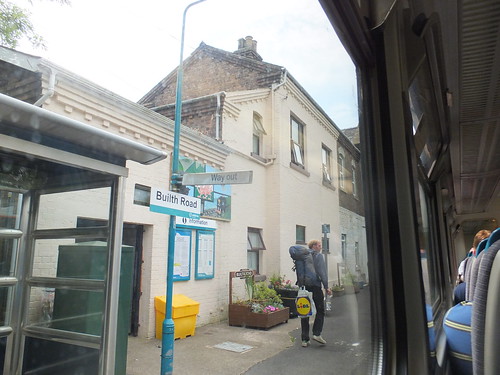
Builth Road station.

Continuing, we didn't need to make all the request stops, but when we did stop there always seemed to be a number of people to get off or get on - mainly local people. The train steadily filled but never became packed. We carried on over the River Wye, through Rosferig Tunnel (64 yards), Cilmeri Tunnel (115 yards), Cilmeri station, Garth station, Llangammarch Tunnel (56 yards), Langammarch station. Another three miles took us to Llanwrtyd where we met another Class 153 working an Up service to Shrewsbury. I noticed that this train had the benefit of a refreshment trolley which was lacking on our train. The two crews changed over so that we continued with a different Driver and Guard.

The next section to Llandovery was around 19 miles. This involved a climb to Sugar Loaf and the 'remotest station on the Heart of Wales Line', a tiny halt called Sugar Loaf. There's a little more information in Wikipedia here. At the railway's summit (820 feet above sea level) the railway pierces the Sugar Loaf with a 1,000 yard curving tunnel reached by gradients of around 1 in 60 on either side. Once through the tunnel, we bowled downhill and, as we descended, I caught a glimpse of the impressive Cynghordy Viaduct some minutes before we passed over it. This viaduct has 18 sandstone arches lined with brick, extends about 280 yards on a gentle curve and rises over 100 feet above the valley. The Transport Trust operates the 'Our Transport Heritage' site which has some information about the viaduct here.

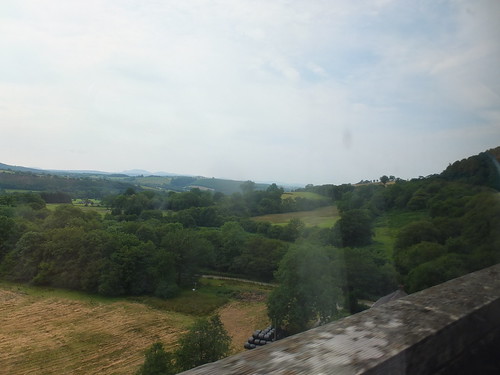
View from Cynghordy Viaduct.

We stopped at Cynghordy station (another 'bus shelter', I'm afraid) then continued another five miles to the passing loop at Llandovery. The attractive stone-built former station building appears to have found a new use as a cafe.


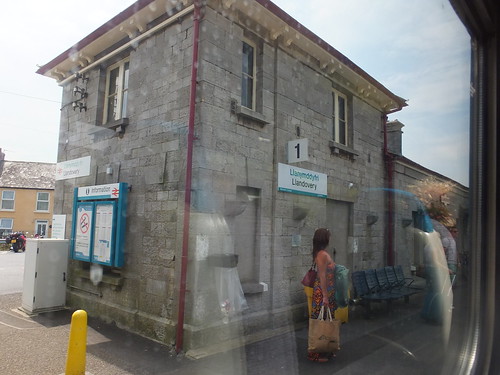
The former station building at Llandovery.
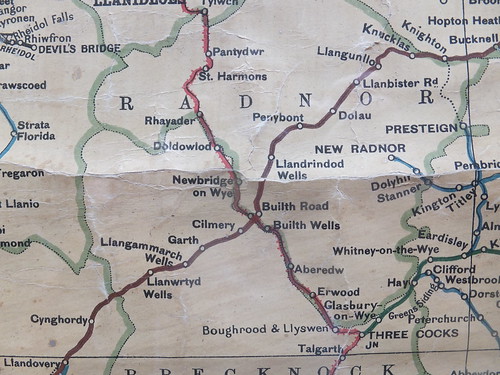
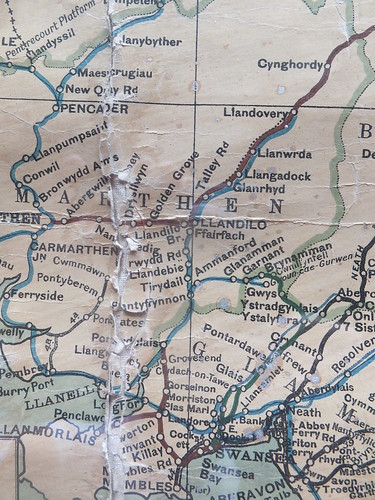
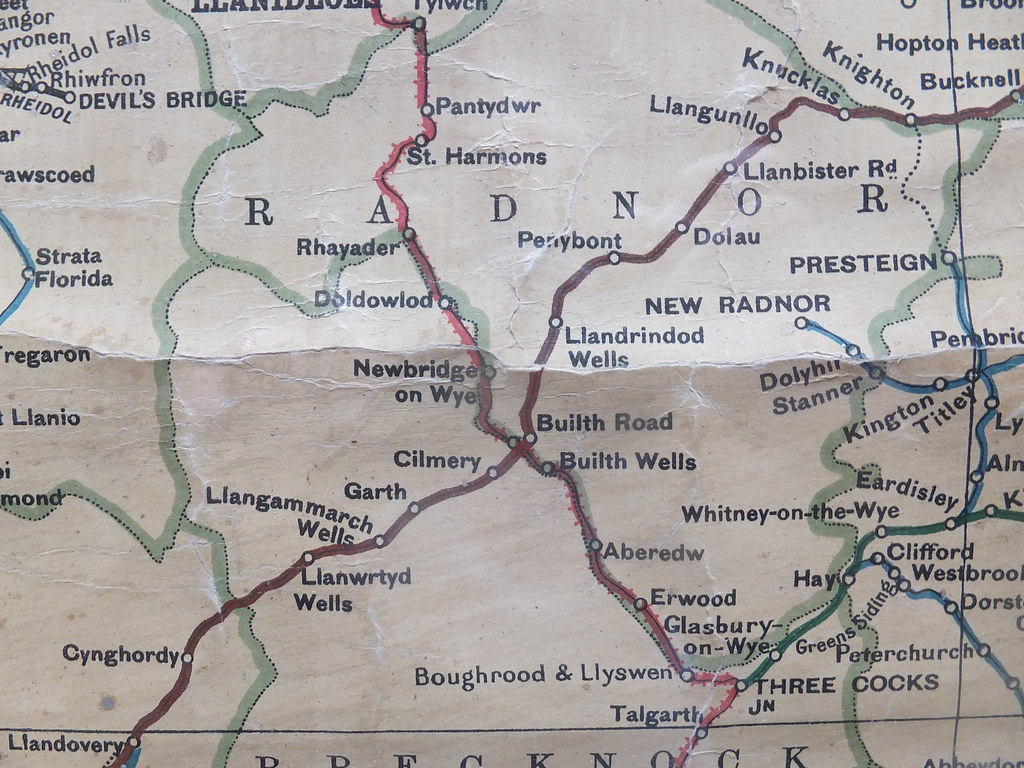

Click for larger image
.
This pre-grouping map extract shows the northern part of 'Heart of Wales Line' extending from top right to bottom left shown in brown for LNWR. At Builth Road, the Cambrian Railway (red with cross lines) passes under the LNWR ('Railway Map of England & Wales, 11th Edition', published W. & A. K. Johnston).

The next single line section was about 11 miles long. We passed over the Afon Tywi Viaduct (108 yards), passed Llanwrda station, crossed the 93 yard River Towy Viaduct, continued through Llangadog Station and over Llangadog Viaduct, over the Afon Tywi and stopped at Llandeilo.
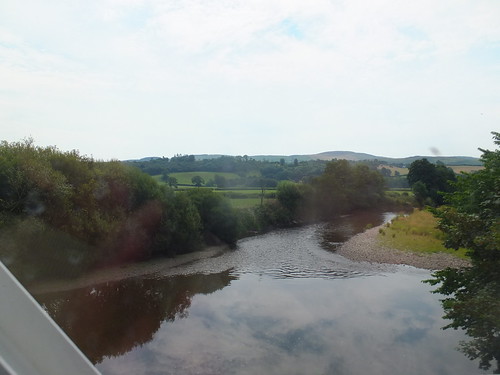
Afon Tywi.

Leaving Llandeilo, we were now on our last 'NSTR' single line section to Pantyfynnon. We stopped at Ffairfach where there's a road crossing just beyond the station. Here, it was the Guard that operated the plunger on the platform to initiate the crossing barriers. The nature of the line was starting to change. At our next station, Llandybie, there seemed a lot more houses and a longer queue of cars at the level crossing. Ammanford station advertised its industrial history, for there was a colliery tub on the platform, in use as a planter.

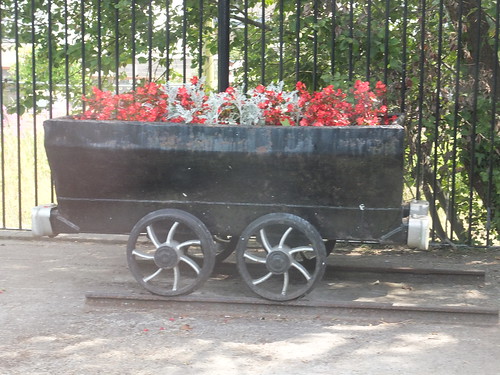
A colliery tub on the platform at Ammanford.

Another mile took us to Pantyfynnon, where a Western Region tubular post lower quadrant outer home signal beckoned us into the platform. The original station building survives and builders were renovating it but it was not clear whether this was for private or railway use. We passed the inner home signal and paused st Pantyfynnon signal box which had been monitoring our progress since we left Craven Arms. I presume the signalman had collected the staff from our driver.


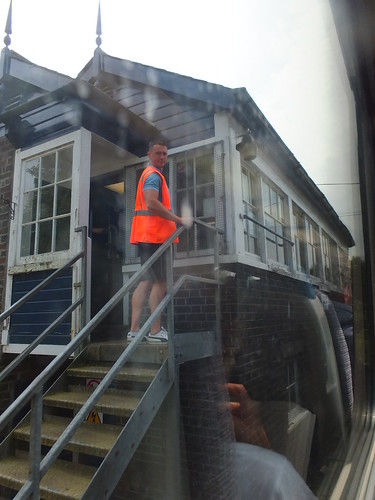
Pantyfynnon signal box.

We continued to Pontarddulais still on a single line but I assume with continuous Track Circuiting, rendering a Token unnecessary. At Hendy Junction, we passed into the area controlled by Port Talbot Power Box and at Morlais Junction we joined double track again, managed by Track Circuit Block (TCB), with stations at Llangennech and Bynea. At Llandeilo Junction, we joined the Down main line from Paddington to Llanelli and beyond. A two mile burst of speed (passing the Tata Trostre Works on our right) took us to Llanelli. Here, the crew changed ends and we set off back to Landeilo Junction, this time on the Up main and staying on the Paddington route. There's about five miles of singled track before resuming double track before Cockett Tunnel. At Swansea Loop West Junction, we took the right hand route to take us to Swansea's terminal station, rather than the left hand Swansea Avoiding Line. We pulled into platform 1 about 'Right Time' and I happily 'bailed out'. My train was about to reverse again and continue to Newport but I decided to walk around Swansea a little before continuing.

The story continues in the post A Trip to South Wales (Part 2).

153362 on arrival at Swansea in platform 1.


Click for larger image
.
This pre-grouping map extract shows the southern part of 'Heart of Wales Line' extending from top right as far as Llandeilo (near the middle of the map) shown in brown for LNWR. GWR (blue) extends from Llandovery south and west to Llanelli, where a reversal allowed our train to continue east to Swansea ('Railway Map of England & Wales, 11th Edition', published W. & A. K. Johnston).

Book References

[1] 'Rail Centres: Shrewsbury' by Richard K. Morriss, published by Booklaw Publications (ISBN 1-901945-20-0).
[2] 'A Regional History of the Railways of Great Britain: Volume 11 North and Mid Wales by Peter E Baughan, published by David & Charles (ISBN 0-9153-7850-3).
[3] 'A Regional History of the Railways of Great Britain: Volume 12 South Wales by D. S. M. Barrie, published by David & Charles (ISBN 0-7153-7970-4).

Track Diagrams

For more details of the present track layout from Shrewsbury, refer to the latest edition of 'Railway Track Diagrams Book 3: Western', published by Trackmaps (ISBN: 0-9549866-1-X).

Related articles on other sites

Wolverhampton to Shrewsbury Line (Wikipedia).
Heart of Wales Line (Wikipedia).
Welsh Marches Line (Wikipedia).
Shrewsbury and Hereford railway (Wikipedia).
Railway Signs and Signals of Great Britain

Related articles on this site

By Rail to Chirk.
By rail to Liverpool (Part 1).
A Trip to South Wales (Part 2).

My pictures

General:
Shrewsbury.
Swansea.

Railway pictures:
Wolverhampton to Shrewsbury Line.
Shrewsbury area railways.
Heart of Wales Line.
Swansea area railways.
Shrewsbury-Hereford line.

Railway Maps:
Railway Clearing House Junction Diagrams.
'Railway Map of England & Wales, 11th Edition', published W. & A. K. Johnston..

Monday, 28 July 2014

Services to Birkenhead Woodside in Steam Days

On Saturday, 8th February 2014, I travelled from Chester to Birkenhead on the line which now forms part of the electrified Merseyrail service. This trip, with some historical background, is described in a group of posts starting at Birkenhead and New Brighton by train (Part 1), which has links to parts 2 and 3.

Until 1967, the Chester to Birkenhead line terminated at Birkenhead Woodside station.

Birkenhead Woodside station in 1961 (Photo: Ben Brooksbank under Creative Commons License).

For more details of Woodside station, before and after closure, refer to the excellent Disused Stations site - their article on Birkenhead Woodside is here.

A correspondent started me thinking about the services in the past so I found the 1961 Working Timetable for June to September that year and produced the simplified list (below) of passenger trains on weekdays (Monday - Saturday) between Chester and Birkenhead (Woodside). I've only shown Down trains (towards Birkenhead) from the Chester and Helsby lines which converged at Hooton. For more detail, refer to my scans of the Working Timetable pages here.

In 1961, diesel Multiple Units (DMU) were in use for many of the local services but steam locomotives were still in widespread use.

Four character headcodes had been introduced for important services so, for instance, '1M03' meant a Class 1 (express), inter-regional but terminating on Midland region. The last two digits identified a particular train. For stopping services, trains are just shown with a class letter 'B' or, for DMU which could show 2-character headcodes, B1 or B2 according to route.

British Railways had not then embraced the 24-hour clock, leading, no doubt, to no end of confusion between a.m. and p.m. timings. I have adopted the convention often used in railway circulars at the time: hours and minutes are separated by a '.' for times before noon and by a '/' for times after noon.

Origin Time Destination Time Notes
Chester 5.55 Birkenhead (W) 6.39 3D08 Parcels
Helsby 6.8 Birkenhead (W) 6.47 DMU
Chester 6.26 Birkenhead (W) 6.57 DMU
Ditton Jn. 6.10 Birkenhead (W) 7.19 via Helsby
Chester 7.8 Birkenhead (W) 7.46 DMU
Paddington 12.5 Birkenhead (W) 7.57 1M00 (Note 1)
Helsby 7.32 Birkenhead (W) 8.13 DMU
Hooton 8.0 Rock Ferry 8.14 DMU
Chester 7.50 Birkenhead (W) 8.28 DMU
Helsby 7.59 Birkenhead (W) 8.40 DMU
Chester 8.15 Birkenhead (W) 8.44 DMU
Helsby 8.12 Rock Ferry 8.47 DMU
Llandudno 7.8 Birkenhead (W) 9.4 1D96
Wrexham 7.30 Birkenhead (W) 9.10 B
Helsby 8.45 Birkenhead (W) 9.26 DMU
Chester 9. 8 Birkenhead (W) 9.37 DMU (SX)
Wellington 7.12 Birkenhead (W) 9.42 B (SO)
Helsby 9.8 Birkenhead (W) 9.49 DMU
Bala 7.12 Birkenhead (W) 10.0 B
Chester 10. 8 Birkenhead (W) 10.37 DMU
Helsby 10. 8 Birkenhead (W) 10.49 DMU
Greenford (SX) 8/30 Birkenhead (W) 11.25 3M10 (MX)
Birmingham 8.10 Birkenhead (W) 11.25 1M03 (SO)
Chester 11. 8 Birkenhead (W) 11.37 DMU
Helsby 11. 8 Birkenhead (W) 11.49 DMU
Leamington Spa 7.45 Birkenhead (W) 11.56 1M04
Chester 12/ 8 Birkenhead (W) 12/37 DMU
Helsby 12/ 8 Birkenhead (W) 12/49 DMU
Chester 12/40 Birkenhead (W) 1/18 DMU
Chester 1/ 8 Birkenhead (W) 1/37 DMU
Helsby 1/13 Birkenhead (W) 1/54 DMU
Barmouth 10.20 Birkenhead (W) 2/5 1M07 (Note 2)
Chester 2/ 8 Birkenhead (W) 2/37 DMU
Helsby 2/ 8 Birkenhead (W) 2/49 DMU
Paddington 9.10 Birkenhead (W) 3/8 1M09
Chester 3/ 8 Birkenhead (W) 3/37 DMU
Helsby 3/ 8 Birkenhead (W) 3/49 DMU
Pokesdown 8.47 Birkenhead (W) 4/10 1M10 (SO)
Paddington 11.10 Birkenhead (W) 4/38 1M11 (SO arr 4/48)
Helsby 4/ 8 Birkenhead (W) 4/49 DMU (SX)
Ince & Elton 4/ 6 Rock Ferry (SO) 4/44 B Unadvertised
Helsby 4/15 Birkenhead (W) 4/56 DMU (SO)
Chester 4/26 Birkenhead (W) 5/4 DMU
Helsby 4/50 Rock Ferry (SX) 5/27 B Unadvertised
Chester 5/ 8 Birkenhead (W) 5/42 B (DMU SO)
Stanlow 5/18 Birkenhead (W) 5/47 B (Note 3)
Bournmouth West 9.33 Birkenhead (W) 5/52 1M13 (Note 4)
Helsby 5/15 Birkenhead (W) 5/56 DMU (SO)
Chester 5/39 Birkenhead (W) 6/11> B Note 5
Ince & Elston 5/38 Rock Ferry 6/11 B (SX)
Hooton 6/ 0 Rock Ferry 6/23 DMU
Barmouth 2/36 Birkenhead (W) 6/48 B (Note 6)
Helsby 6/12 Birkenhead (W) 6/54 DMU
Paddington 1/10 Birkenhead (W) 6/58 1M16
Crewe 5/58 Birkenhead (W) 7/5 1D54
Helsby 6/38 Birkenhead (W) 7/19 DMU
Chester 7/8 Birkenhead (W) 7/37 DMU
Helsby 7/8 Birkenhead (W) 7/49 DMU
Paddington 2/10 Birkenhead (W) 7/53 1M18
Chester 8/8 Birkenhead (W) 8/41 DMU (SO)
Helsby 8/8 Birkenhead (W) 8/49 DMU (SO)
Llandudno 7/20 Birkenhead (W) 8/53 1D98 (Note 7)
Chester 8/38 Birkenhead (W) 9/10 DMU (SX)
Helsby 8/45 Birkenhead (W) 9/26 DMU (SX)
Chester 9/8 Birkenhead (W) 9/37 DMU
Helsby 9/8 Birkenhead (W) 9/49 DMU
Paddington 4/10 Birkenhead (W) 10/4 1M20
Chester 9/40 Birkenhead (W) 10/14 DMU (Note 8)
Chester 10/8 Birkenhead (W) 10/36 DMU
Helsby 10/8 Birkenhead (W) 10/49 DMU
Chester 11/15 Birkenhead (W) 11/43 DMU (Note 9)
Paddington 6/10 Birkenhead (W) 11/50 1M21
Helsby 11/20 Little Sutton 11/33 DMU (SO)

Note 1: Makes unadvertised stops at Chester and Hooton.
Note 2: On Saturdays, starts from Pwllheli at 8.45.
Note 3: Rock Ferry some days. Times vary.
Note 4: Time varies on Saturday.
Note 5: Unadvertised stop at Capenhurst Mon-Fri.
Note 6: On Saturdays, starts from Pwllheli at 12/45.
Note 7: SO: Dep 7/0 via Chester Cutting.
Note 8: Adv. from Hooton.
Note 9: Additional stops SO.

Monday, 21 July 2014

Brewood Music Festival 2014

Every two years, Brewood holds its own Music Festival. In 2014, it was held on Thursday, Friday, Saturday and Sunday 10th to 13th July, at various venues around the village. The Festival has its own website here with links to Facebook and Twitter.

On Sunday, a temporary stage was set up in the Market Place (involving temporary closure of a number of roads) for a free concert featuring mainly local acts. The weather was kind, so I went to have a look. There were hundreds of people in the square, served by a number of commercial stalls. There had been some problems with the electric generator, I understood, so the concert was rather late starting but nobody seemed to mind too much.

The running order had been changed and the concert started with a couple of songs from the Brewood Music Festival 'Scratch Choir'. I'm afraid the sound system wasn't terribly effective so they weren't heard to best effect. The 'Jeremiah Johnson and the Disciples' band followed.

'Jeremiah Johnson and the Disciples' at the Free Concert.

Their set included a number of blues standards which I knew from The Blues Brothers but I'd have enjoyed their performance more if the vocals had been more audible. Next, Dennis Cornes followed at the keyboard, supported by two trumpeters.

Dennis Cornes performing at the Free Concert.

'The Mess' restaurant was open with reasonable views of the stage so I joined my friend John there, where I enjoyed a leisurely soft drink. Everybody appeared to be enjoying themselves as I returned home.

More pictures

Brewood Music Festival Free Concert.

Friday, 11 July 2014

Diesel Traction in Burma

Introduction

Myanma Railways use diesel traction. A handful of steam locomotives were kept serviceable until a few years ago, but I'm not sure whether any remain in use.

This is a very informal listing of types of diesel traction I've come across. Since first publishing this article, I have received additional information from a correspondent who was involved in the delivery and commissioning of the DD.1500 class. I've incorporated this information, with thanks. He is the author of an excellent article published in the August 2013 edition of 'Railway Gazette International' titled 'MR eyes a 10 000 km network' and is currently completing a much-anticipated book on the history of railways in Myanmar.

Locomotives

When diesel locomotives replaced steam in Myanmar, they were sourced from Europe. Japan supplied a number of smaller diesel locomotives. Following the military takeover, for many years, Myanmar was regarded a pariah state so even obtaining spares for their existing diesel locomotives became problematic. Relations with China developed during this period and there are a number of Chinese diesel locomotives. Second-hand diesel locomotives from India were also acquired.

Railcars

Japan supplied a number of railcars - see my post Diesel Railcars in Burma for more details. Myanmar managed to build some single-cab Very-Lightweight Diesel Railcars incorporating bus parts.

Running numbers

Locomotives

Running numbers for locomotives comprise two letters followed by three or four digits (sometimes with a suffix digit). The first letter is 'D', presumably for 'Diesel'. No distinction is made between diesel electric, diesel hydraulic and mechanical transmission. The second letter indicates number of axles - 'B' and 'C' for 2- and 3-axle locomotives but I've not seen examples. I've seen 'D' (4-axle) and 'F' (6-axle) locomotives. On six-axle machines, no distinction is made between locomotives carried on two 6-wheel bogies and those carried on three 4-wheel bogies. The first one or two digits of the running number indicate the nominal horsepower (in units of 100 h.p.). The last two digits identify a particular locomotive. 1200 h.p. locomotives built in Insein Works carry a suffix digit. Within each horsepower class, there may be sub-classes which are not separately identified. Locomotives can have 'chopper' or 'buckeye' couplings and be fitted with vacuum brakes or air brakes (or both) to provide a train brake and, again, this is not separately identified.

Railcars

Railcar numbers comprise three letters followed usually by three or four digits to identify the class member. The first letter is 'R' (railcar) followed by 'B' (bogie). Although there are certainly 4-wheel railcars, I've not found a classification letter for that arrangement. The third letter is 'E' (engine - a powered car) or 'T' (trailer - an unpowered car). Recently-introduced railcars appear to have the class member represented by a 'P' followed by four digits.

Livery

Locomotives

Locomotives have a wide range of liveries. Some may indicate the manufacturer.

A common livery is cream (upper body) and brown (lower body) with a blue waistline. Since many coaches share this livery, I think of it as the 'standard'. Locomotives often have a grey solebar.

500 h.p. locomotives are light blue (upper body) dark blue (lower body) with a white waistline.

900 h.p. locomotives around Yangon are in a striking livery: cream (upper body) narrow orange (lower body) with broad blue and narrow red waistlines. Elsewhere, the 'standard' cream and brown livery is adopted.

1100 h.p. locomotives are either blue with a white waistline and cream solebar or green with a partial white waistline and white solebar.

1200 h.p. locomotives can be orange (upper body) and brown (lower body) with a white waistline or cream (upper body), light blue (lower body) with a red waistline or 'standard' cream and brown.

1300 h.p. locomotives are usually in 'standard' livery with grey solebars.

1500 h.p. locomotives I've seen have also been in the 'standard' livery but with black 'solebars' (actually, black lower body, below the brown).

1600 h.p. locomotives I've seen have been orange (upper body), brown (lower body) with a white waistline and grey solebars.

2000 h.p. locomotives appear in red (upper body) and Blue (lower body and solebar) with a white waistline, cream (upper body) and blue (lower body and solebars) with a red waistline and in 'standard' cream and brown with a blue waistline, but with orange solebars.

There's a lot more variability in detail between locomotives than the above suggests, particularly in the treatment of the ends of locomotives. Paint shades vary: 'cream' sometimes appears almost white and 'brown' can be 'maroon'. I don't know whether this is intentional or the effect of aging or other cause.

Railcars

Until recently, I'd only seen bogie railcars in cream (top) and red (bottom) but recently-introduced railcars carry full-colour advertising. The Very-Lightweight Diesel Railcar I've seen had a white body with grey near the bottom and a red waistline. The roof was yellow (extending downwards over the driving end) with a red roof-line.

Repowering

Some locomotives have received an uprated engine. Details are signwritten on the bodywork for easy identification. Uprated engines are either CAT from the U.S.A., MGO or Chinese. The DD15 class received MTU engines.

Locomotive Classes

500 h.p.

All locomotives are single-cab diesel-hydraulic carried on two 4-wheel bogies (B-B). They are from various manufacturers in Japan. There's a nice model of Kawasaki-built DD.506 in Myanma Railway Museum, Naypyidaw, although cab design differs from those I've seen. The data given is:-

Type Diesel Hydraulic
Maker Kawasaki
Wheel Arrangement B-B
Manufactured 1978
Rated Horsepower 500
Overall Length 11390mm (37'4.5")
Overall Width 2810mm (9'2.5")
Overall Height 3840mm (11'5")
Weight in working order 37.6 tons
Axle Load 9.4 tons
Maximum Speed 40 km/h (25 m.p.h.)
Diesel Engine 6V396TC11 MTU, Germany
Hydraulic Transmission L4r2U2 Fuji-Voith
Bogie 4-wheel Rigid Bolster Type
Brake System Air, Hydrodynamic, Hand Brake


DD.517 at Yangon Central Station in the rain.

500 h.p. Photographs.

900 h.p.

All locomotives are single-cab carried on two 4-wheel bogies (Bo-Bo). There are sub-classes.

900 h.p. locomotives around Yangon are in the cream and orange livery with a plain nose at the 'front', cab at 'back'. But they normally run on the Circle Line cab-leading. I don't know whether this is for visibility or ventilation (the centre cab door is usually left open). At least one has been re-engined - DD.931 carries the marking CAT3512 (642kW)(860 h.p.), together with the information 'Weight 48t Length 39'10 1/2" '. There's data on the CAT3512B Generating Sets here.

Elsewhere, 900 h.p. models have a radiator in the flat nose and a short hood at the cab end. They normally carry the 'standard' brown and cream livery.

I'm told the class is divided into four types:-
901-906 Krupp DH (1969)
907-913 KSK DH (1971)
914-942 Alsthom DE (1975)
943-969 Krupp DH (1978-1987)
It's believed only two of the Alsthom DE are still in service (I spotted DD934 and DD940 in April 2014).

DD.931 running round its Circle Line train at Pa Ywet Seit Gone.

900 h.p. Photographs

1100 h.p.

All locomotives are single-cab carried on two 4-wheel bogies (Bo-Bo) and are assumed diesel-electric. Believed to be Chinese - certainly, DD.1145 carries a 1983 worksplate from the Sifang Loco and Rolling Stock Works in the P.R.C. Some cabs are flat ended but others have a bulge, like a vestigial low hood. There are two paint schemes - blue and green.

DD.1145 about to depart eastbound from Yangon Central station with a local passenger train.

1100 h.p. Photographs

1200 h.p.

All locomotives are diesel-electric carried on three 4-wheel bogies (Bo-Bo-Bo) but there are a number of sub-classes.

Early units from Alsthom are dual-cab with slightly rounded ends with vertical windscreens. Some are marked 'Length: 49'10-9/16" Weight 71 tons." Later units from Alstom have rounded ends but with sloping windscreens. Chinese examples are dual cab, with a very angular body and sloping windscreens. DF.1267 (in cream and pale blue livery carries a 1995 worksplate from the Sifang Loco and Rolling Stock Works in the P.R.C. Some locomotives were built in Insein Works and carry a suffix digit. They use the CAT3508B marine engine, coupled to a Chinese generator. There is at least one single cab locomotive (DF.1202), which looks rather odd.

There's a nice model of Insein-built DF.1200-08 with 'CAT' prime mover in the Myanma Railway Museum, Naypyidaw. The data given for the Insein Locomotives is:-

Type Diesel Electric
Maker Insein Locomotive Workshop, Myanmar
Axle Arrangement Bo-Bo-Bo
Constructed 2010
Rated Horsepower 1200
Overall Length 15204mm (49'10.5")
Overall Width 2816mm (9'3")
Overall Height 3450mm (11'3.75")
Weight in working order 68 tons
Axle Load 11.33 tons
Maximum Speed 90 km/h (56 m.p.h.)
Gear Ratio 92:19
Diesel Engine CAT3508B (Electronic), USA
Main Generator JF205F, Yongji, China
Auxiliary Generator JGL405, Yongji, China
Traction Motor ZD110, Yongji, China
Bogie R109 Alstom, France
Brake System Air


I've travelled in the cab of DD.1263 around the Circle Line in Yangon. That's described in the post Cab Ride around the Circle Line, with notes about the Driving Controls and links to pictures showing the cab layout.

DF.1248 in brown & cream livery awaiting signal R56 at Yangon Central before commencing another clockwise circuit.

1200 h.p. Photographs

1300 h.p.

All locomotives are single-cab diesel-electric carried on two 6-wheel bogies (Co-Co) and are refurbished 'YDM4' locomotives from India, which had a large fleet, originally supplied by Alco (their type DL535A) but later built in India. The excellent Indian Railways Fan Club website gives more information of the YDM4 class here and here.

My picture of YDM4 6466 at Delhi Junction, Northern Railways, India taken in 1992.

Ten refurbished YDM4 were supplied to Myanmar in 2000, with a further 20 in 2011. An article in 'The Hindu' here shows three locomotives (including DF.1344) setting off from the Golden Rock Railway Workshop for Myanmar.

DF.1352 1300 h.p. Co-Co in Yangon Central Station.

At least one of the refurbished locomotives (DF.1307) has been marked 'YDM4' on the 'buffer' beam.

1300 h.p. Photographs

1500 h.p.

The class comprises 28 locomotives DD1501 to DD1528 supplied in 1964. They were built by Fried Krupp Maschinenfabriken in Essen but were supplied under the 'brand name' Krauss-Maffei. All locomotives are dual-cab diesel-hydraulic carried on two 4-wheel bogies (B-B). They are very similar to types supplied to Thailand. DD.1521 is marked "Length: 42' 7-7/16" Weight: 49 tons."

In 2010 I travelled in the cab of DD.1527 from Katha to Naba and back. There's a post on the outward journey here with links to a post on the return journeys and to my photographs (including pictures showing cab layout). In 2012 a repeated the trip (not in the cab) as described here, with links to my pictures.

DD.1521 at Katha with a 'Road to Mandalay' special train to Naba.

1500 h.p. Photographs

1600 h.p.

These locomotives are dual-cab diesel-electric carried on three 4-wheel bogies (Bo-Bo-Bo) and appear to be an uprated version of the 1200 h.p. locomotives. From the rounded corners and vertical cab windows they were supplied by Alstom. Some have been re-engined. For instance, DF.1631 and DF.1627 carry the marking 'A8V190ZL' together with the information 'Weight 73t Length 49'10 9/16" '. The diesel engine is Chinese, from Jinan Diesel Engine Co. Ltd, intended as part of a generating set and there's more data here. The solebar of the DF.1631 carries the marking "REPOWER.ISN.9.2009", indicating the work was done at the Insein Workshops. DF.1627 is marked "REPOWER.ISN.6.2009". DF.1637 has been uprated to 2000 h.p. with the fitting of an MOD6V170 (?) engine.

DF.1610 at Pazundaung heading towards Mahlwagon with a train of bogie tanks.

1600 h.p. Photographs

2000 h.p.

These are the most powerful locomotives I've seen in Myanmar and appear to be a 'stretch' of the 1600 h.p. locomotives (which themselves 'stretched' the earlier 1200 h.p. design). They are dual-cab diesel-electric carried on three 4-wheel bogies. Yunnan Machinery & Equipment Import & Export Co.,Ltd (YMEC) first supplied the type in 1991, receiving an order for 20 off in 2007. There's a brief report on their website here. The Chinese CNR Corporation delivered 22 of their CKD7 locomotives to Myanmar from their Dalian Works since 1993 in 3 batches. Their report here describes 20 locomotives (including DF.2047) in red/blue livery being despatched in December 2008. The CKD7 design is described here. The CKD7 uses the CAT3516A described here with AC/DC transmission. Union Resources and Engineering Co. Ltd. also took credit for the despatch of these locomotives.

2000 h.p. Photographs

Book Illustrations

Various locomotive types are illustrated in a book (in Burmese) my friend showed me. I believe the title translates as '100 years of Burma Railways 1877 - 1977':-

The page on the right possibly shows a 1300 h.p. locomotive.

Top left: Possibly a 900 h.p. Bo-Bo. Bottom left: Alstom 1200 h.p. Bo-Bo-Bo. Top right: Three-axle jackshaft drive shunter. Bottom right: Alstom Bo-Bo-Bo.

Top left: 1500 h.p. Krauss Maffei B-B. Bottom left: Unidentified 4-axle Loco. Top right: Unidentified 4-axle Loco. Bottom right: Diesel Railcar (believed withdrawn).

Top left: Unidentified 4-axle Loco. Bottom left: Diesel Railcar (believed withdrawn). Right: Unidentified 4-axle Loco.

[Revised 1-Jan-2015 to incorporate additional information.]

Monday, 7 July 2014

Brewood Vintage Garden Party 2014

The Second Vintage Garden Party was held at Brewood Hall on Saturday, 5th July 2014. This was just a year after the first such event described in the post Brewood Vintage Garden Party 2013.

Brewood Vintage Garden Party 2014.

Once again, the event was organised jointly by the Parish Church of St. Mary and St. John and Brewood Scouts. In 2014, planning started some months ahead of the event and a series of organising committee meetings was held at Brewood Hall. The first event in 2013 had enjoyed glorious weather and was deemed a great success - everybody hoped that we could measure-up to that standard in 2014. The weather is such an important element in outdoor functions so the tented covered space provided in 2014 was increased to three modern tents and one traditional marquee, in case the weather on the day was unhelpful.

The auguries were not, initially, very promising. After a few days of warm weather, heavy rain started on the day before the Garden Party, later turning to a heavy drizzle. This was the day allocated for setting-up so the group of volunteers involved became somewhat bedragged. In the evening, reinforcements arrived in the form of the young Scouts. By late evening, three tents were erected and the marquee was put-up but for the side sheets.

Erecting the marquee in the rain on the evening before the Garden Party.

It continued to rain in the night and the day of the Garden Party dawned with drizzle still coming down. At nine o'clock, volunteers started to arrive to complete the work and set-up the various stalls and then, mirabile dictu, the drizzle stopped and the sun came out. By the time the Garden Party opened to the public at 1.00 p.m., things had dried out remarkably well and it turned into a warm, bright afternoon.

Jan (in Victorian dress) welcomes visitors. In the rear, the large Tea Tent is ready for visitors.

The modest admission fee included tea, coffee or squashes with a remarkable selection of home-made cakes which were generously dispensed by the hard-working volunteers in the large Tea Tent. Nearby, on the lawn, Strawberries and Cream were on offer. In addition to the tables and chairs provided inside the Tea Tent, there were more tables and chairs outside for people to take their ease and let the location work its usual 'magic' on well over 300 guests.

Left: Marquee with various stalls, rear: Spectators at the Coconut Shy, right: The large Tea Tent, foreground: Visitors relaxing in the sun.

The Public Address system played vintage music of various periods during the afternoon. There was a range of stalls including White Elephant, Plants, Books, Jewellery, Handicrafts, the P.D.S.A., Confectionery, Tombola. Various games were provided like 'Hook-a-Duck', 'Splat the Rat' and 'Beat the Buzzer'. Wet Sponge Throwing (at a human target) and the Coconut Shy were kept busy all afternoon. Some youngsters sported Face Painting and a few grown-ups attended in vintage clothing of the period of their choice (which ranged from around 1600 to 1980).

Ann (P.D.S.A. stall) and Dean (Sealed Knot).

Other attractions included the competition for the Best Home Bake and a demonstration of tent-pitching by the Scouts.

The erected tent can sleep 8 - 12 persons.

Raffle winners were drawn before the Garden Party closed at 5.00 p.m. The event gave a boost to the funds of both the Church and the Scouts but, of equal importance, quite a few visitors took the trouble to say how much they'd enjoyed the afternoon which made the hard work of all those involved worthwhile.

My Pictures

Setting-up.
The Event.

Thursday, 3 July 2014

Cab Ride around the Circle Line

In the earlier post Exploring Yangon's railways I briefly described my visit to Yangon's Power Signal Box and a Cab Ride on the Circle Line on Friday 25th April 2014. This post gives a little more technical information about my Cab Ride.

My fascination with Myanmar's railways was kindled during my first visit to the country in 2008 when I first travelled on the Circle Line. That journey is described in the post The Circle Line, Yangon and I made a startling discovery:-
At each of the frequent stops, the rear coach in which I was riding kept oscillating back and forth on the slack in the 'chopper' couplings. I couldn't understand why the driver didn't lightly hold the brake on the train for the safety of people getting on and off. Eventually, I found the answer. Although the coaches were originally vacuum-fitted (as evidenced by the partial rigging and the steel pipework remaining), vacuum hoses, vacuum cylinders, most of the rigging and the brakeblocks had been removed. The train was unbraked, relying upon the locomotive brake!
The situation was the same on my cab ride in 2014 on the 13:00 clockwise Circle Line train, scheduled to complete the 32-mile round trip in 3 hours! I was made welcome in the cab by the friendly Driver, the Second Man and a third member of crew I took to be a mechanic.

The Locomotive

The locomotive was one of the Alsthom Bo-Bo-Bo diesel electrics, running number DF.1263.


The very smartly turned out Driver of the 13:00 Clockwise Circle Line Train. The Driver's right hand rests on the (unused) Vacuum Brake Application Valve. The 'stalk' to the left of the driver's right hand (as you view the picture) is the Straight Air Brake which was used for all braking.

Although trains use left-hand running on double track, the driving position is on the right of the cab. The picture below shows the control panel and most of the driving controls.

The control panel of DF.1263.

Driving the Alsthom diesel-electrics

Burma operates both vacuum-braked and air-braked trains. DF.1263 is arranged for working vacuum-braked trains and there is a Straight Air Brake operative on the locomotive. Since the Circle Line trains still run without an automatic brake, all the braking was performed using the locomotive Air Brake.

Master Selector

A 5-position Master Selector switch is mounted on the left of the Control Panel. It is operated by a specially-shaped removeable key carried by the driver. The third position of the switch is 'Off'. Moving clockwise from 'Off', the positions are 'Start Idling' and then 'Forward Traction'. Moving anti-clockwise from 'Off', the positions are 'Start Idling' and then 'Reverse Traction'. During normal running, the Mater Selector is left in the 'Forward Traction' position.

The Master Selector.

Power Controller

Power control is by 'notching-up' and 'notching down' using a moulded 3-spoke 'steering wheel' which also has an inset semi-circular wire handle. The 'steering wheel' has seven positions. From the extreme anti-clockwise position, the positions are marked:-
Off
Idle
Rapid Deceleration
Decelerate Notch by Notch
Stabilise
Accelerate Notch by Notch
Rapid Acceleration
When stationary, the Power Controller is normally in the 'Stabilise' position. To apply power, the Driver applies 'First Notch' by moving the 'steering wheel' one position anti-clockwise to 'Accelerate Notch by Notch' and then immediately back to 'Stabilise'. The Driver uses his judgement to determine when to move onto 'Second Notch', which is achieved by again moving the 'steering wheel' to 'Accelerate Notch by Notch' and then immediately back to 'Stabilise'. Subsequent 'notching-up' is carried out, as required, to produce the appropriate line speed. Reducing power is achieved by 'notching-down' using the 'Decelerate Notch by Notch' position on the 'steering wheel'.

L: Master Selector, R: Power Controller,

Straight Air Brake

The 'stalk' rising up from the fascia below the window on the right of the cab controls the air to the brake cylinders on each of the three bogies. Normally, the three-position 'stalk' is vertical, in the 'lapping' position. To apply the brake, the driver moves the stalk towards his body, admitting air from the reservoir to the brake cylinders. This moves the brake pistons against the return springs and the movement of the piston is communicated by the brake rigging so as to pull the cast iron brake blocks against the wheel tyres. The Driver must admit air judiciously to avoid locking up the wheels.

The Driver applying the Straight Air Brake.

The level of braking can be judged by checking the duplex brake gauge. The one pointer shows the air reservoir pressure (normally 5 Bar), the other shows the pressure which has been fed to the brake cylinders. However, most drivers will judge the correct level of braking pressure simply by the 'feel' of the train. When the appropriate pressure has been fed to the brake cylinders, the driver moves the brake 'stalk' back to the 'lapping' position, maintaining that air pressure in the brake cylinders and that level of brake force. To release the brake again, the Driver moves the brake 'stalk' to the third position, away from his body, which vents the air from the brake cylinders (producing a loud 'hiss' in the cab), allowing the return springs in the brake cylinders to move the pistons back to the 'released' position with the brake blocks clear of the wheel tyres.

Locomotive Horn

An air horn is mounted on top of the roof of the cab. This is controlled by a simple Air Valve mounted on the vertical panel of the control desk below the Vacuum Brake Valve.

Speed Recorder

From previous visits, I knew that Speed Recorders were fitted to Myanma Railways locomotives. In 2010, I'd managed a cab ride from Katha to Naba and back, described here (with links to pictures) showing Hasler Speed Recorders fitted in the cabs. In 2012, I'd travelled from Katha to Naba described here (with links to pictures). I didn't manage a cab ride on the 2012 trip but I did take some cab pictures, again showing Hasler Speed Recorders fitted. The Speed Recorders were rather battered and apparently unreliable.

In 2014, locomotive DF.1263 was similarly battered but, to my surprise, was fitted with a new recorder, made in 2013 by the Indian company Medha Servo Drives Pvt. Ltd. The manufacturer's technical information on the MRT918 Speed Recorder is here.


List of stations on the Circle Line

Stations are listed in a clockwise direction, starting at Yangon Central. Burmese words can be Anglicised in various ways, so alternative spellings of at least some of names may be found.

Route Map of Yangon Division (from Myanmar Railways)
YANGON CENTRAL
Pha Yar Lan
Lanmadaw
Pyay Road
Shan Road
Ahlone Road
Pan I Daing (or Pann Hlaing)
Kyee Myin Daing
Hanthawaddy
Hledan
Kamaryut
Thin Myaing
Oakkyin
Thamine
Gyogone
Insein
Ywa Ma
Phi Taw Thar
Phaw Khan
Aung San
Da Nyn Gone (#2) Golf Course
Kyait Ka Lei
Mingalardon Market
Mingalardon
Wai Bar Gi
North Okkalapa
Pa Ywet Seit Gone
Kyauk Yae Twin
Tadalay
Yaegu
Parami
Kanbe
Bauk Hlaw
Tarmwe
Myittar Nyuni
Mahlwagone (#1)
Pazundaung
YANGON CENTRAL

#1: Before Mahlwagone the line from the north and east converges with the Circle Line.
#2: Beyond Da Nyn Gone the line to the west diverges from the Circle Line to Golf Course.
The Journey

Before we left, the Driver tested the horn. Air could be heard escaping up on the cab roof, but there was no horn sound. Helped by the Second Man, the Mechanic scrambled onto the cab roof, carrying a roll of some sort of tape. Within seconds, he'd made things airtight and we had a working audible warning. The Driver gave a long blast as a final warning, engaged first notch and we slowly moved through the pointwork onto the Up Line.

On my first trip on the Circle Line back in 2008, I was quite rude about the condition of the permanent way. I'm pleased to confirm that, since then, a lot of work has been done - large numbers of concrete sleepers have been fitted and an awful lot of ballast has been added. There remain some areas, particularly around points and crossings, that are rather scary and the effect is more noticeable when you are travelling in the cab. So I was not surprised that we didn't exceed 20 k.p.h. anywhere.

The Circle Line is more-or-less flat so the braking technique was similar at each of the 38 stops. As we ran-in, the Driver would judge where on the platform to remove power then he would apply a fairly modest level of braking, leaving that brake force applied almost until we'd stopped, then releasing the brake so as to stop without a jerk. At a few stops, the brake was applied, released and applied a second time. In the cab, all the stops were very gentle.

All the signals were 2- or 3-aspect colour light (the majority 3-aspect automatic) and were normally showing yellow or green as we approached. In the very bright sunlight, I didn't find these colour lights too easy to 'read' from a distance. Just after leaving Pyay Road station, we passed a passenger train heading in the opposite direction. Within six minutes, we passed another Yangon-bound passenger train. The stations are usually less than a mile apart. Most have two platforms, flanking the two running lines but a few (like Pann Hlaing) have an island platform.

The next stop was Kyee Myin Daing, which the British called 'Kemmendine'. Here, we passed another Down train. Kyee Myin Daing is interesting for various reasons. It was, I believe, the first station in Yangon when the line ran from here to Prome. It has a more elaborate station building (on the Down side) and an island platform on the Up side to serve a passenger loop. There are also a number of sidings on the Up side which don't seem much used nowadays. The station is served by two manual signal boxes, one each end of the station. 2- or 3-aspect colour light signals are provided on the main lines but points are still mechanically operated from the two signal boxes and are provided with facing point locks and locking bars. The sidings retain some glorious semaphore signals, some with subsidiary arms. An unresolved puzzle is that in the section 'Equipment supplied by Westinghouse Brake and Signal Company' of post Yangon Area Railways, I report a Power Frame being ordered for 'Kemmendine'. It certainly hasn't been used here, so where is it?

A mixture of semaphore and colour light signals at Kyee Myin Daing.

We passed yet another train heading towards Yangon. There are a number of road overbridges on the route and most stations have fabricated steel footbridges but there are also road level crossings. On major roads, rolling barriers (rather than a hinging gate) are often used. An elaborate red-and-white painted steel framework is carried on a short length of railway track allowing the gatekeeper to push it into place to obstruct the road. All level crossings are 'half-barrier', that is, a barrier is only provided against oncoming traffic. Whilst Myanmar originally followed the British practice of driving on the left, in 1970, General Ne Win decreed that Myanmar would drive on the right. Unfortunately, the majority of vehicles in Myanmar remain right-hand drive.

A level crossing featuring rolling half-barriers.

We came to a 2-aspect colour light showing yellow with a theatre-type route indicator above reading '5'. We were approaching Insein but I remain puzzled by the signal identification plate marked 'IR'. We were slowing down, I thought in response to a lineside speed restriction sign and the tangle of pointwork ahead. The Driver said "Heat" and it was a few seconds before I realised we were still slowing because the diesel engine had quit. We rolled to a quiet standstill and the Mechanic and Second Man scurried into the Engine Room behind the cab. After a short pause, the engine 'fired-up' again and caused no further problem. The Driver gently drew the train into Insein's platform 5, where a fair crowd awaited us.

Platform 5 at Insein station.

We were soon under way again, making frequent station stops. A 3-aspect colour light beckoned us on with a 'yellow'. The signal had an unlit 'line-of-lights' route indicator angled to the left. Just as well it was unlit - if lit, that would have put us on the Prome line, for this was the junction at Da Nyn Gone, where there are always lots of people, either waiting to board or trying to sell produce to the passengers.

Da Nyn Gone junction station.

We'd now passed the halfway point on our journey. At a stretch of line built on a low embankment, it looked as if they were building it up with quite large stone. We came to an automatic signal showing 'red' which declined to change. Automatic signals are often arranged on a 'Stop and Proceed' basis to keep traffic moving. I was told afterwards that the Rules require a one minute pause before proceeding in the day and a two minute pause at night. Well, we stopped for what seemed quite a short minute and then carried on. The most likely cause was a track circuit failure but I never confirmed that.

During my visit to Yangon Power Signal Box, I had been told there was now some sort of signalling facility at Mingalardon. Two crossovers had been put in, driven by point machines, and there were a number of 2-aspect colour light signals. It all looked fairly new and mimicked the facilities I'd previously seen at Pa Ywet Seit Gone (see post The Circle Line Revisited and pictures Circle Line Revisited).

Mingalardon Stion, looking south, showing crossover and colour light signals.

More later ...

Related posts in this blog

Exploring Yangon's railways.
Railway Signalling in Burma - Part 2: Colour Light Signals & Motor Points.
The Circle Line Revisited (2012).
The Circle Line, Yangon (2008).
All my Myanma Railways posts.

My Pictures

Cab Ride on the Circle Line (2014).
The Circle Line, Yangon (2013).
Circle Line Revisited (2012).
The Circle Line, Yangon, Myanmar (2009).
Railways in Myanmar (2008).
All my Myanma Railways Pictures.

Wednesday, 2 July 2014

Pierced Steel Planking

Just before the outbreak of World War II, the United States developed a sectional steel 'mat' which could be used for the rapid construction of temporary aircraft landing strips. It was originally called 'Marsden Matting' (after the first location of manufacture) but it's also known as 'PSP', short for 'Pierced' (or 'Perforated') 'Steel Planking' or 'Landing Mat'. There's a description in Wikipedia here.

Large quantities were produced during the war and there was a later aluminium version which, of course, was a lot lighter. Whilst some of this useful material is still retained by the military, large amounts became 'Army Surplus'. Calumet Industries in the USA offered PSP when I first published this post but they seem to have disappeared. But etp-trade.de have information here (including installation instructions in English and Russian!).

I've spotted 'PSP' finding a secondary use in a number of places, particularly in the far East. The most common use is for fencing, where 'PSP' can form the horizontal rails joining brick pillars, like the example below from a private house in Yangon, Myanmar.


Yangon (2013).

The boundary fence at Thandwe Airport in Myanmar seems to be entirely made from 'PSP' horizontal rails fastened to concrete posts, as below.

Thandwe Airport (2014).

Perhaps the oddest use I've spotted was during a visit to Sittwe, in Myanmar. I visited a former Merchant's House (described in the section 'Merchant's House' of my post Sittwe, Myanmar) where 'PSP', enamel painted white, is used to panel-in the staircase.


Air conditioned-cladding for the staircase in the Merchant's House.

There are more pictures of the Merchant's House here.

I'm confident that there must be more outlandish uses for 'PSP' out there - I just haven't noticed them. Can anybody help?

[Dead link to Calumet Industries updated 10-Jul-2019]

Airedale Foundry Luncheon (1989)

This post is adapted from an article I wrote for the Summer 1989 edition of 'Lionsheart' - the newsletter of the Old Locomotive Committee (OLCO) which is the supporters group for the locomotive 'Lion'.

Locomotive building in the early days was restricted to a handful of locations. Everybody knows the importance of Tyneside, but Leeds was early into the game. ‘Lion’, of course, was built in 1838 by the partnership of Todd, Kitson and Laird in Leeds. But, shortly afterwards, the partnership was dissolved and Charles Todd joined with John Shepherd trading from the Railway Foundry in Leeds. This enterprise survived until 1858. Meanwhile, James Kitson and David Laird set up the Airedale Foundry which opened on 13th May 1839. This enterprise ultimately becoming Kitson and Company Limited and contined a proud record of locomotive building into the 1930s.

Mr. E. F. Clark, one of the founder members of OLCO, is a descendent of James Kitson and he suggested that the sesquicentenary of the opening of the Airedale Foundry should be marked by a luncheon on 13th May 1989, exactly 150 years later. Initially, the Kitson College of Technology in Leeds was chosen as the venue but, at short notice, this had to be changed to Leeds Industrial Museum at Armley Mills which made us very welcome. At the time, I was secretary of OLCO so I was involved in the organisation of the event.


The ‘flyer’ which advertised the event
(Click on image for larger view).


On the day, forty or so Guests attended the Luncheon. In 'Lionsheart' at the time I reported:-
"The weather, venue, food and, most importantly, the guests combined to produce a most happy and enjoyable occasion. Various memorabilia from the Airedale Foundry were on display. Mr. E. F. Clark appropriately described the event as 'an extended family occasion'. Later in the afternoon the Assistant Curator of the Museum, Mr. Ron Fitzgerald, gave guests a private tour of the Museum".
Some years later, in 2004, Mr. E. F. Clark donated ephemera from the Airedale Foundry Luncheon to the OLCO Archives. I remember the occasion as being very enjoyable. There was an excellent meal and plenty of good conversation (not quite all about railways). The guests were able to tour the galleries - the Museum has a wide range of displays relating to the area's industrial, mining and railway past. I particularly enjoyed a preview of a new mining gallery featuring mine locomotives which was just being readied for public exhibition.


Jan Ford and the much-missed Mike Satow (he passed away in 1993) during the lunch.
(Click on image for larger view).


Mike Satow was one of the guests at the Airedale Foundry Luncheon. He made a major contribution to the study of early locomotives and left us with a series of full-size, working replicas, such as 'Locomotion' and 'Sans Pareil'. He developed an unobtrusive emergency air brake system for the 'Locomotion' project which has been used on a number of replicas and formed the basis of the emergency braking system used on ‘Lion’ to allow her to give public rides. He was also closely-involved in the setting up of New Delhi Railway Museum. I made my first visit to this museum in 1992 (there's a brief description in my post My First Trip to India (continued) and an album of pictures here. I made another visit to the museum in February 2006 (in a hectic trip described in a long post here) which produced a second set of pictures here.

Photograph of Mike Satow displayed in New Delhi Railway Museum.