
The Battlefield Line ran its Modellers' Weekend on Saturday 26th and Sunday 27th May 2012. On the Saturday, the service was provided by the diesel railcar and I was the driver. The formation was the single-unit 'Bubble Car' coupled to half of the 2-car Diesel Multiple Unit (DMU) and we were booked to operate five round trips from Shackerstone to Shenton, stopping at Market Bosworth where most of the models were exhibited.
Although preparing a DMU is much quicker than getting a steam locomotive ready, I always like to allow plenty of time, because you never know what you'll find. What I found was that the DMU was 'boxed in' by a Class 47 coupled to a van and 20-ton brake van. I did the normal checks and successfully started up the four 150 horse power engines.
Whilst the compressors produced sufficient air pressure for the Electro-Pneumatic (E.P.) controls, I considered whether we could propel the Class 47 and the two vehicles out of the way so that we could operate the first train at 11:15. The early DMUs had standard buffers and standard screw couplings meaning that, when necessary, they could run with 'tail traffic' or, as in this case, shunt other vehicles. The weight of the vehicles to be moved was approaching 150 tons but moving the vehicles was not the major consideration, rather it was had we sufficient brake power to safely control the movement.
I judged that the movement was safe so I moved the DMU up to the Class 47 and coupled up. By the time I'd released the handbrakes on the Class 47 and the box van, Adrian had arrived and he agreed to release the handbrake on the leading vehicle (the 20-ton brake van) and then 'ride the brake' acting as our shunter. Once the road was set from the signal box, we slowly moved the odd-looking train out of the DMU Siding and into Platform 1. We 'tied down' the Class 47 and the two vehicles at the North End of the Platform and detached them from the DMU, allowing the DMU to operate from the South End of Platform 1.
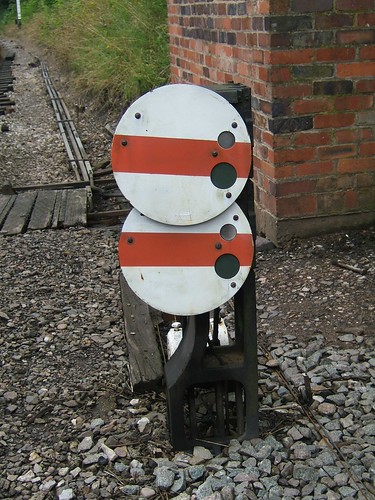
At Shackerstone, we're allowed to bring a passenger train into an already-occupied platform. The signal box authorises movements into both platforms with ground disc signals and, conventionally, ground signals authorise a driver 'as far as the line is clear towards the next signal' rather than to the next main signal. Many passenger stations needed this flexibility back in the days of mechanical signalling and a special form of Permissive Block Working called 'Station Yard' was often used. An approaching driver would be given an 'Off' Main Arm if the whole platform was clear or an 'off' subsidiary arm displaying a 'C' when 'off' for 'Calling On' onto an occupied line. In modern installations with colour light signals, matters are somewhat different but it is still common to find a 'subsidiary aspect', two white lights displayed diagonally when 'off' (often called 'cat's eyes') underneath a 'main aspect' displaying red for 'stop'.
On a glorious hot sunny day, we made the scheduled five round trips to Shenton, stopping at Market Bosworth in each direction.

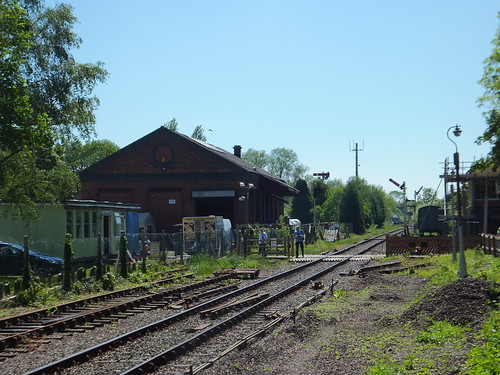
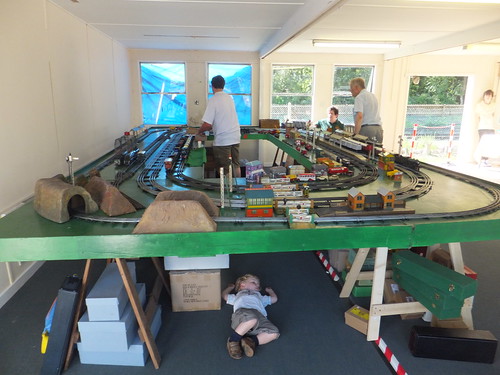
An awful lot of effort has gone into bringing Market Bosworth station back into use. There's a car park and a gated pedestrian level crossing over the railway to reach the platform. Major work continues on the restoration of the ex-L&NWR signal box (there are some pictures of the work in progress here. With a childrens' play area and refreshments available, the station is now a destination in its own right. The former Goods Shed at Market Bosworth was in use as exhibition space for Modellers' Weekend and a large relocatable office building in the Yard held more layouts and displays.
Currently, the end of the line is at Shenton. We use the former up platform. There''s a run round loop flanked by the former down platform which is not in use but fenced off from the large car park. Another gated crossing allows people to cross from the cark park to the station and, via a footpath, the Visitor Centre for the Battle of Bosworth.

With only a two minute booked stop at Market Bosworth, there wasn't really time for me to look at the exhibits but, on the last round trip, I agreed with the guard that I'd dash across to look at the models on display. As soon as we arrived, I 'tied down' the DMU and removed the Master Key before running over the crossing for an exceptionally quick look at what was there before returning to the DMU and continuing with the diagram.
By the time we returned to Shackerstone for the last time, Mike had pulled '3803' (the Great Western 2-8-0) out of the shed and lit up so that the Sunday service would be steam hauled. There's some information on '3803' here.
So it only remained to position the DMU in the long siding, shut down and perform the final checks before locking-up and signing off after an enjoyable 'non-steam' day.
More pictures here.
