skip to main |
skip to sidebar
Introduction
Liverpool has always had a fascination for me and there are a number of posts in this blog about Merseyside and the Wirral, starting with the 2009 post Liverpool.
Although most of my trips to Liverpool are undocumented, a few of my journeys are outlined in this blog. I've written about various journeys by train via Crewe:-
'Black 5' to Birmingham (1950s steam).
Day Trip to Liverpool (2010 EMU).
Liverpool by Train (2012 EMU).
On Saturday, 8th March 2014 I decide to make another trip to Liverpool, this time by a more unusual route.
I started by re-tracing the route I'd used on my earlier trip to Chirk, described here. Once again, this involved taking an Arriva DMU from Wolverhampton to Shrewsbury, using a 'semi-fast' train only stopping at Telford and Wellington.
Shrewsbury
At Shrewsbury, I planned to change onto an Arriva Trains Wales service from Cardiff to Holyhead. The train was reported as a few minutes late and I was surprised to find that it would use platform 3, which I didn't think was much used. Getting to platform 3 was a bit odd. We'd arrived on bay 5 which is part of the island platform comprising through platforms 4 and 7 together with bays 5 and 6. Exit from this island platform was via broad stairs down to a subway leading to a series of automatic ticket barriers. Access to platform 3 wasn't obvious but a ticket inspector at the barrier seemed to be letting some passengers through. When I enquired, he waved me through, telling me to pass through the ticket hall, turn left and go up the stairs. The small ticket hall was thronged with passengers entering and leaving but I was reassured by a sign pointing left to platform 3. I continued onto the station forecourt, puzzled for a moment until I saw an anonymous set of open double doors with steps leading upwards. It was rather confusing but I'd apparently found platform 3.
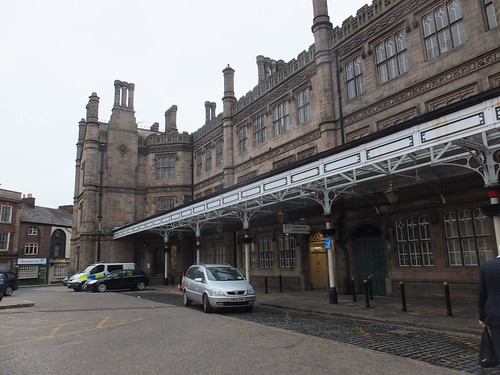 The imposing ashlar-faced facade of Shrewsbury station, viewed from the forecourt.
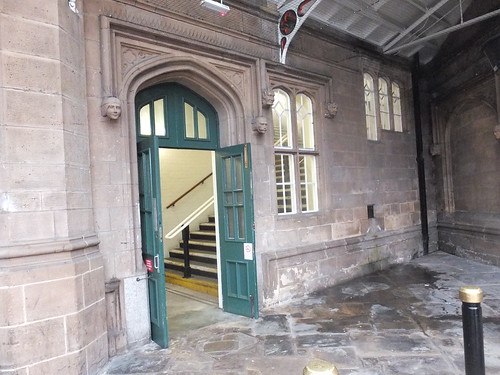 The impressive, but rather anonymous, entrance to platform 3 from the forecourt.
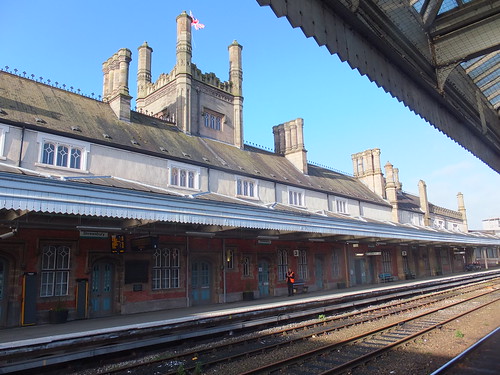
The train was a few minutes late so I still had time for a few photographs. The design of the station building on platform 3 (the earliest part of the station) I found most attractive. The detailing I'd found on the elevation facing the forecourt is continued on the platform face. It was no surprise to find the building listed Grade II, but I was surprised to find it was by Thomas Penson Junior, whose station at Gobowen (in Italianate style) I'd previously admired. See the entry on the British Listed Buildings site.
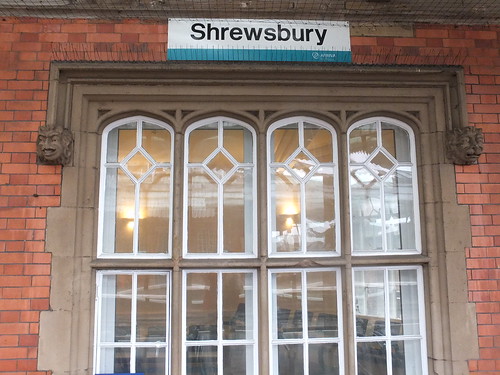 Window to waiting room on platform 3.
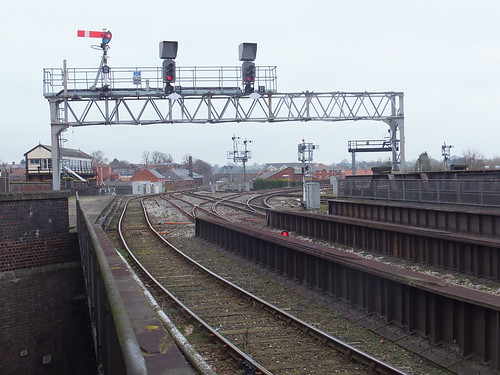 Crewe Junction, Shrewsbury, viewed from platform 3.
The train arrived, people alighted and boarded and we departed with a well-filled train about ten minutes late. On this trip, I managed a (rather poor) shot of Coton Hill North Signal Box, long disused and converted into a private house with modern extensions to one side and at the rear.
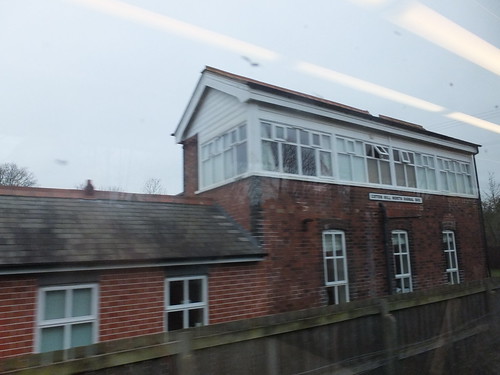 Coton Hill North Signal Box now forms part of a private house.
Gobowen
Approaching Gobowen, I was a little surprised to pass a modern LED signal displaying a double yellow, followed by another LED signal showing single yellow. I assumed that the intention was to give drivers the best possible warning before the semaphore signal protecting the level crossing at the north end of the platform. At Gobowen, a remarkable number of passengers got off and got on whilst I, once again, admired the Italianate station building by Thomas Penson Junior. I also wondered whether the semaphore signal protecting the level crossing was the ugliest semaphore I'd seen (there's some heavy competition from some of the signals in Burma - see Railway Signalling in Burma - Part 1: Semaphore Signals). A tubular post topped with a Western Region 'ball and spike' finial is fitted with an upper quadrant arm at a fairly low level (to improve sighting, presumably). Although only a few yards from the controlling signal box, Gobowen North, this arm is motor-operated from a motor perched near the top of the post. There are clearly constraints because the signal post is mounted on the platform in a public area but, combined with the usual modernised ladder and hoop access arrangements, the effect is awful.
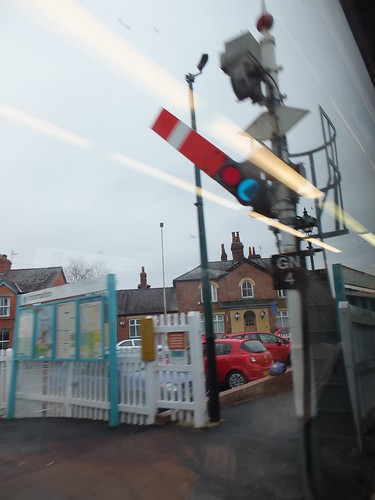
Gobowen North signal 'GN4'.
We paused briefly at Chirk (where I'd disembarked on my previous trip) and then crossed the Dee valley on the impressive viaduct. I'd forgotten how industrialised the area had once been around Ruabon and Brymbo with coal mines, heavy engineering and numerous railway branches to serve them. All gone now, of course.
Wrexham
Soon, we were running into Wrexham General. Logically, I would have stayed on my train until Chester, then caught a Merseyrail service to Birkenhead and Liverpool. There are a series of posts describing travelling on the Merseyrail network, starting with Birkenhead and New Brighton by train (Part 1).
However, my plan was to leave the train at Wrexham General, on the former Great Western Main line to Saltney Junction and Chester, take a few pictures and then travel forward to Bidston on the old Great Central line, now marketed as the 'Borderlands Line'. The Great Central Line ran through its own platforms at Wrexham General, to allow interchange, but then continued to its own station more conveniently sited in the town called Wrexham Central. I knew the remaining single line from Wrexham General to Wrexham Central now operated simply as a 'long siding'. I'd originally hoped to walk from Wrexham General to Wrexham Central, and catch the Bidston train from there but the late-running of the Holyhead train caused me to change my mind so I bought a ticket to Bidston at Wrexham General and settled for a few pictures around the Wrexham General station.
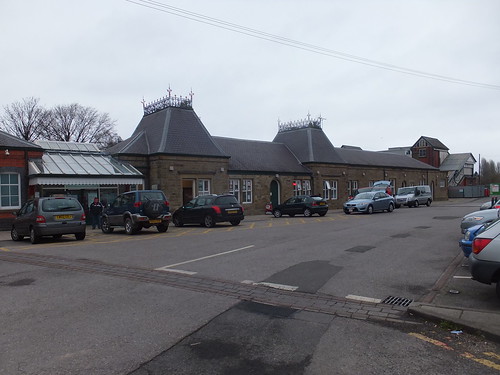 The neat appearance of the station buildings at Wrexham General.
The trackwork around Wrexham General has been significantly simplified over the years and the only remaining signal box in the area is Croes Newydd North Fork Signal Box, a few hundred yards south of Wrexham General station.
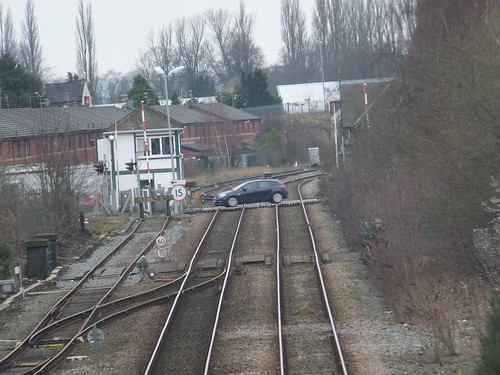 Croes Newydd North Fork Signal Box.
Having taken some pictures, I went to platform 4 which serves the Borderlands Line and found that the next arrival was going to Wrexham Central. A driver and guard were waiting to relieve the incoming crew. So, when the train arrived (a Class 150) I hopped on and got to ride to the very simple station platform at Wrexham Central (or Wrecsam Canolog, if you prefer), sandwiched between the modern buildings of a shopping centre. After a few moments, the driver and guard had changed ends, and we set off for Bidston.
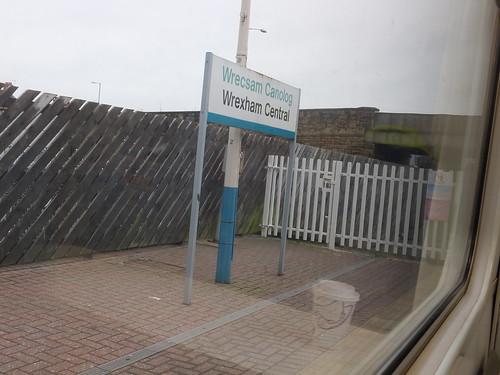 View of Wrexham Central station from the train.
Borderlands Line
The Borderlands Line currently serves the following stations:-
Wrexham Central
Wrexham General
Gwersyllt
Cefn-y-Bedd
Caergwrle
Hope
Penyffordd
Buckley
Hawarden
Shotton High Level
Harwarden Bridge (peak periods only)
Neston
Heswall
Upton
Bidston
Although we were on a single line from Wrexham Central to Wrexham General (where the remains of the disused second platform could be seen), north of the station the original double track is retained. This seems curious, because the old Great Western main line from Wrexham to Saltney Junction has been singled (although there are plans to reinstate double track to increase capacity). I've never thought this singling very sound. In an earlier post Princes End I commented:-
At the time, there was also what seemed to me a rather perverse fashion for reducing track maintenance costs by singling double track sections. I was never convinced that this idea was justified, taking into account the signalling complication at each end of the single line where it rejoined normal double track and the operational problems of having to wait for a train in one direction to clear before a train could pass in the opposite direction.
I was quite surprised at the number of passengers we were dropping off and picking up along the line. Approaching Penyffordd, we whistled at three whistle boards in succession and then passed an upper quadrant tubular post distant showing 'off' before stopping at the station. The Home signal was also a tubular post, with a lower left-hand bracket and subsidiary signal controlling facing entry to sidings just after the B.R. standard signal box.
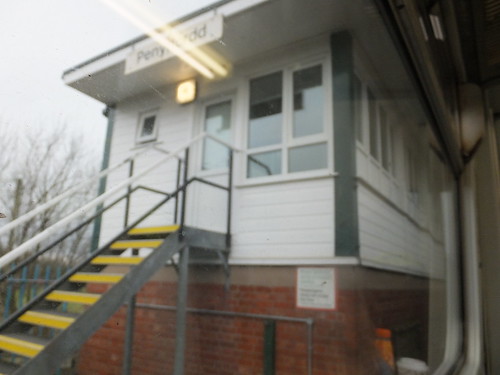 Penyffordd signal box.
The sidings didn't appear to be in use. A little further on, we passed a ground frame controlling access to another group of sidings. A branch curved away towards a modern cement plant but, again, there wasn't much sign that the rail connection was used.
The cement works (formerly Castle Cement but now Hanson, part of the Heidelberg Cement) is called Padeswood Works and there's a little more here. The massive Kiln 4 looks more like an assembly building for a Space Shuttle and its commissioning in 2005 allowed three older kilns on the site to be shut down. The owners proudly claim of Kiln 4:-
Central to the greatly improved performance is the use of alternative fuels, in which we have been a pioneer. Alternative fuels used at Padeswood include Cemfuel, which is processed from the residue of recycled waste solvents; Profuel, which comprises paper and plastic wastes and also MBM which is processed meat and bone meal. Vehicle tyres can also be used as an alternative fuel.
Buckley station has what would once have been an impressive station building, now derelict. Nearby, a well-maintained area had a wheelbarrow forming a planter filled with flowers. The wheelbarrow had been painted black and lettered 'LNER' as a reminder of the 'foreign' incursion into this part of Wales and was also chained to the nearby fence as a security precaution.
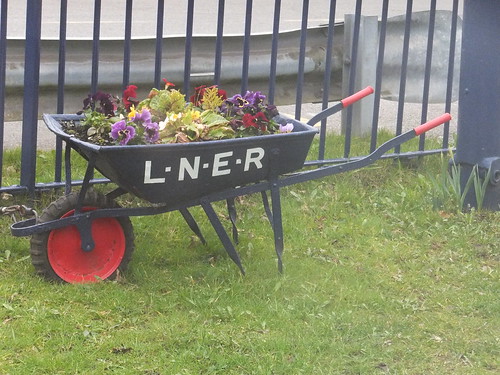 Flowers on Buckley station.
Hawarden station had the usual type of 'bus shelter' for passengers. Next, we took the bridge over the busy Chester Road in Shotton and paused at Shotton High Level station, which sported a rather up-market version of the 'bus shelter' featuring stainless steel. I was intrigued by a box of rodent bait set up on the platform ("Super rats eat stainless steel!" perhaps?). As we started away, we passed over the railway line to Holyhead and Shotton Low Level Station.
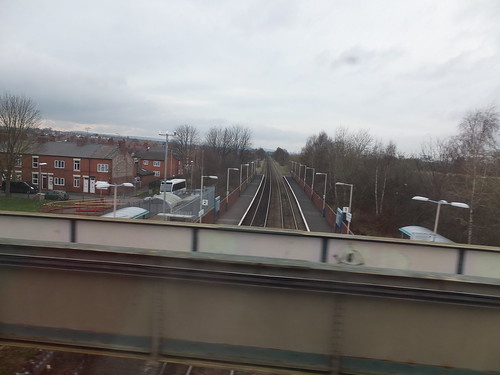 View of Shotton Low Level (looking towards Holyhead) from a Down Bidston train.
I'd previously travelled on the line from Shotton High Level to Bidston, years ago. This was the era when the North Wales Coast line had blue diesel-electrics hauling five blue and grey coaches (I think it was one of the last hunting grounds of the Class 40s). I travelled out from Chester to Shotton Low Level on one of these trains, took the footpath to high level and travelled to Bidston on a 'Modernisation' series Diesel Multiple Unit.
Passing through Shotton reminded me of a minor incident on another occasion years ago when I was off to Llandudno for the day - always a favorite destination as mentioned in posts A Trip to the Seaside (Part 1) and Part 2. Not all of the North Wales Coast line trains were booked to stop at Shotton Low Level but I'd noted that the early-morning service I'd chosen was due to stop. On the approach to Shotton, I thought my train was coming in rather 'hot' but then I realised the driver had forgotten the stop. I don't know whether the driver suddenly remembered or the guard 'put the brake in' but we did a rapid deceleration and came to a stop a couple of hundred yards beyond the platform. To my surprise, the train then gently set back to the platform and obediently waited for the guard's 'Right Away'.
Back in the present, as my Class 150 approached the Dee crossing, the sprawling Tata Steel complex came into view on the Wirral side. The history of steelmaking on this site is due to John Summers who, in 1852, established a successful nail making business in Stalybridge. After his death in 1876, three of his sons (later joined by a fourth) carried on the business. Needing space for expansion, they acquired land at Shotton in 1895 and Hawarden Bridge Steelworks opened the following year, later under the name John Summers and Sons Limited. In 1951, the steelworks was nationalised but shortly afterwards re-privatised. I think this is when I first became aware of Shotton's modern 'Integrated Steelworks' (where hot metal produced by a blast furnace is taken directly for processing into steel on the same site). The site was nationalised for a second time in 1967, becoming part of British Steel Corporation. In the 10-year plan for steel approved by the Government in 1973, Shotton was to lose its steelmaking as its blast furnace was regarded as too 'small batch' and its Open Hearth steelmaking as 'too expensive'. In-fighting with the Unions continued until 1980, and there was major local unemployment. To reduce unemployment, part of the site became Deeside Industrial Park. Some steelworking continued and in 1988 the British Steel Corporation was privatised as British Steel. In 1999, British Steel merged with the Dutch steelmaker Koninklijke Hoogovens to form Corus. Corus was acquired by the present owners, Tata Steel, in 2007 and Shotton is now responsible for their pre-finished steel products. There's a brief timeline produced by Tata Steel here.
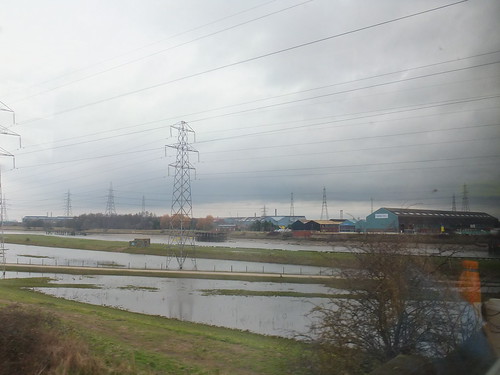 View from Down Bidston train approaching the Dee Crossing with the Tata Steel complex in the background.
The double track railway (and a footpath) cross the Dee on a bridge of three spans of arched trusses. The span on the Wirral side was built as a hydraulically operated swing bridge but that's now welded shut. The bridge, opened in 1889 was built by the Manchester, Sheffield and Lincolnshire Railway (later the Great Central Railway). There's more information on the bridge in Chapter 10 of the Shotton History site here. It's only when I was compiling this post I found the Movable Bridges in the British Isles site, which also has some information on the bridge. Well, the view of the bridge I got was rather disappointing. I didn't realise Network Rail had started a 3.5 million pounds Sterling project to strengthen and repaint the bridge which is currently covered in scaffolding and heavy white plastic sheeting whilst sand-blasting to remove old paint is carried out. As the Network Rail News Release puts it, the bridge is "encapsulated to protect the environment from dust and debris from the work".
 Hawarden Bridge before "encapsulation" (Photo: John S. Turner, Creative Commons).
Only certain trains stop at the tiny station of Hawarden Bridge, so we kept going and passed the signal box at Dee Marsh Jn. This once controlled one corner of a triangular junction with the Great Central Line to Chester which is long gone. Now, provided with a few elderly 2-aspect colour light signals, it controls connections to the extensive sidings around the steel complex.
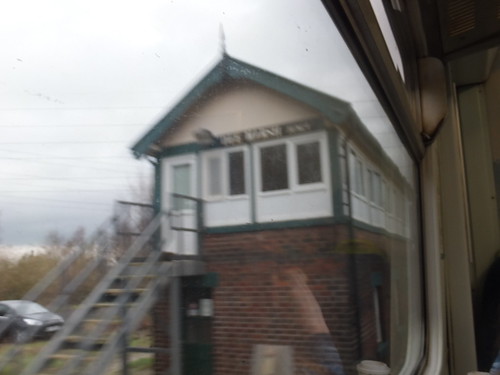 A fuzzy picture of Dee Marsh Junction signal box.
Although there were a few freight wagons scattered around the sidings, the area looks rather barren and neglected. Once we'd left the former steel complex behind, we made our way across the Wirral with stops at Neston, Heswall and Upton before our final destination at Bidston.
Bidston Station has a single island platform on the double-track third-rail electrified Merseyrail Line from Birkenhead North to West Kirby. With four trains an hour each way on the West Kirby line, the Borderlands Line trains have to sneak in out fairly quickly. Approaching Bidston from Wrexham, there's a facing crossover so, whenever possible, Sandhills Control Centre cross Borderlands Line trains into platform 2, and that's what happened to my train.
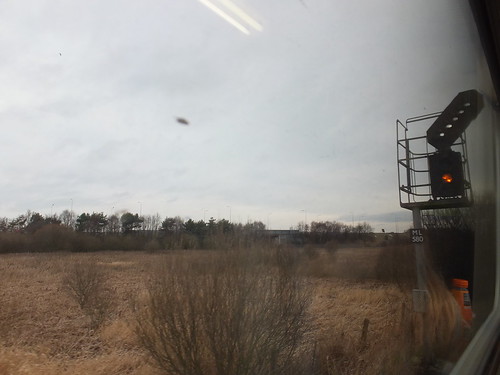 Approaching Bidston, my train gets a 'Yellow and a White Feather' for platform 2.
Running into platform 2 means that the train can arrive, crew can change ends, passengers get off and board and the train can depart without blocking platform 1 (the line towards Birkenhead) at all. Arriving in platform 1 fouls the line towards West Kirby until the train has arrived and the line towards Birkenhead is fouled until the train has drawn forward into the Stock Siding (part of a triangle which formerly allowed trains from West Kirby direct access to New Brighton). On leaving the Stock Siding, a trailing crossover allows Borderlands Line train into platform 2.
The not very pre-possessing station building actually has a decent waiting area, toilets and a small ticket office. By the time I'd bought my Merseyrail ticket to continue my travels, the Borderlands Line train had already left for Wrexham!
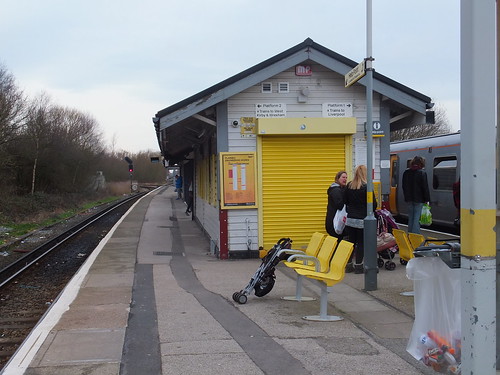 Bidston Station. The train I arrived on has already left platform 2 and a crowded electric train for Liverpool Central is arriving at platform 1.
The rest of my journey is described in By rail to Liverpool (Part 2).
Book references
[1] 'Rail Centres: Shrewsbury' by Richard K. Morriss, published by Booklaw Publications (ISBN 1-901945-20-0).
[2] 'A Regional History of the Railways of Great Britain: Volume 11 North and Mid Wales by Peter E Baughan, published by David & Charles (ISBN 0-9153-7850-3).
Related articles on other sites
Wolverhampton to Shrewsbury Line (Wikipedia).
Shrewsbury to Chester Line (Wikipedia).
Borderlands Line (Wikipedia).
Borderlands Line.
Related posts on this site
By Rail to Chirk.
By rail to Liverpool (Part 2).
My pictures
Wolverhampton to Shrewsbury line.
Wellington.
Shrewsbury area railways.
Wrexham's Railways.
Borderlands Line.
Merseyrail.
[Link to part 2 added 5-Jun-2014]
Introduction
On 26th February 2014, I travelled from Wolverhampton to Chirk by rail in order to visit the Ty Gwyn woodland. There's a report on the visit here.
Wikipedia have some information on the line from Wolverhampton to Shrewsbury here and on the line beyond Shrewsbury to Chester here.
I've been familiar with the G.W.R. route from Wolverhampton to Shrewsbury and beyond since childhood. Back then, manual signal boxes with Absolute Block working controlled the route from Wolverhampton to Shrewsbury but over the years, one by one, they've been eliminated. I've continued to use the line to Shrewsbury and beyond intermittently for various trips.
Shrewsbury
I took an Arriva Trains Wales DMU from Wolverhampton to Shrewsbury, calling at Telford and Wellington. At Shrewsbury, I had a few minutes to take photographs before my connecting train to Chirk was due.
 The impressive station building on platform 3 features a tower flying the Union flag!
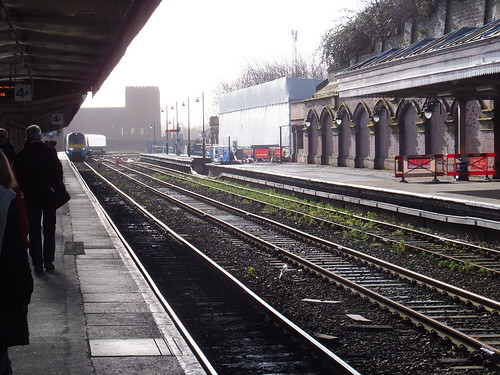
There were plenty of people waiting to join the 3-coach Arriva Trains Wales service from Cardiff to Holyhead but we were soon on our way.
 Cardiff - Holyhead DMU arriving at Shrewsbury.
Gobowen
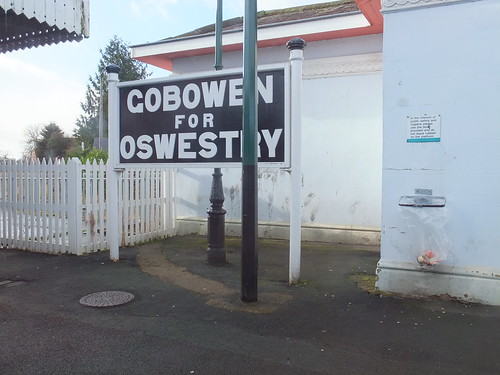
After traversing a number of level crossings set in a fairly flat and rather wet landscape, we stopped at Gobowen. The station sports a Great Western railway nameboard 'GOBOWEN FOR OSWESTRY' (partly hidden behind the compulsory tall pole for mounting a CCTV camera). The currently-unused and rusty single line to Oswestry about 3 miles away is still intact and enthusiasts hope to re-open it, but the bay platform at Gobowen has lost its track.
 The nameboard hints at the station's former importance.
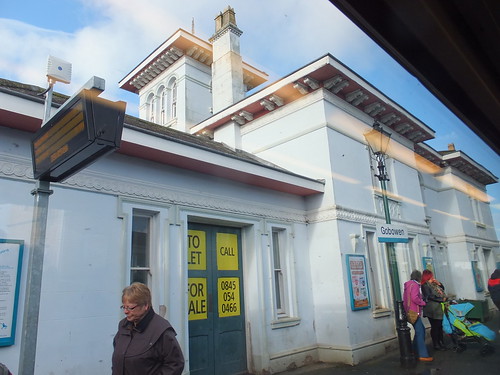
A further reminder of former better times is the rather attractive Italianate station building with a turret and stucco detailing, designed by locally-born Thomas Penson Junior and built around 1846 for the Shrewsbury and Chester railway. The building is now unused and available for sale or to rent. Wikipedia has more on the station here.
 The Down side former station building at Gobowen
Both the nameboard and the building are Grade II Listed:-
Railway station. Circa 1848 by Thomas Penson Jun. on the Shrewsbury and
Chester Railway with later additions and alterations. Stuccoed red brick
on moulded stone plinth; low-pitched hipped slate roofs have brick and ashlar
ridge stacks with moulded capping and dentilled cornices. Italianate style.
2 storeys. Entrance side has 3-storey rectangular tower projecting to right
with finial to low-pitched pyramidal roof and modillioned eaves cornice.
'Belfry' has blind round-headed arches with balustrade. 2-bay centre section
has round-headed sash windows to first floor, paired to right, with continuous
moulded impost bands and interlacing wheel decoration to aprons. Glazing
bar sashes in lugged architraves to ground floor. Projecting left range
has paired round-headed sash windows to first floor. Tall double doors
to centre approached by flight of 3 steps and flanked by round-arched sash
windows. Single-storey exedra to left with dentilled cornice and 4-paned
sashes in lugged architraves. Platform side has bracketed canopy, removed
at time of resurvey (April 1986) to top end of platform but continued, supported
by cast-iron columns, to south; cusped quatrefoils to spandrels of brackets.
Footbridge linking down-line side with up-line side has latticed cast-iron
girders to covered walk-way. Single-storey yellow brick range to up-
line side with round-arched sash windows and doorways; ornamental cast-iron
brackets supporting canopy. Later platform canopy to south of footbridge.
Station name-boardslettered "GOBOWEN / FOR / OSWESTRY" between cast-iron
columns with moulded capping at north end of up -line platform and south
end of down-line platform. Extensive restoration was in progress at time
of resurvey (April 1986).
See the British Listed Buildings entry here.
Chirk
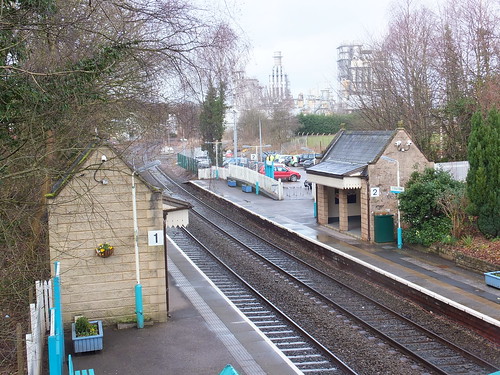
The next stop was Chirk, where I alighted and continued by road. The tiny station is looked after and kept attractive by local support.
 Chirk Station.
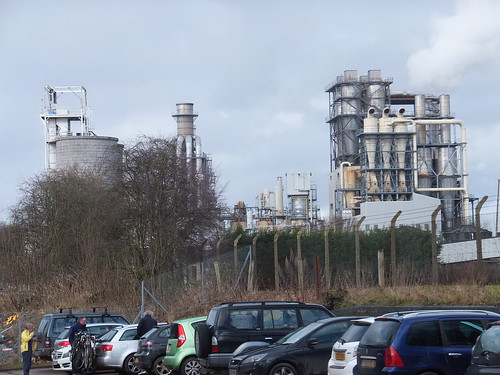
Chirk is dominated by the huge Kronospan factory. Kronospan claim to be the world’s largest manufacturer of wood panel products and laminate flooring. Worldwide, it has more than 30 manufacturing sites. There's more information here.
 View of the Kronospan plant from Chirk Station car park.
Returning from Chirk
Later in the day, I was back at Chirk station for the return journey. I'd forgotten, until I saw a plaque on the station, that Chirk was the end of the Glyn Valley Tramway, opened in 1873, finally closed in 1935. There's a 'Wikipedia' article here. The New Glyn Valley Tramway & Industrial Heritage Trust are seeking to conserve, research and interpret the Industrial Heritage of the area and Glyn Valley Tramway and have experimentally laid a length of track to the tramway's odd 2ft 4½in track gauge. The Glyn Valley Tramway Trust are separately pursuing similar aims.
 Glyn Valley Tramway Plaque, Chirk station.
The 3-car DMU which I took back to Shrewsbury was going through to Maesteg.
 The Maesteg train arriving at Chirk.
Passing through Shrewsbury
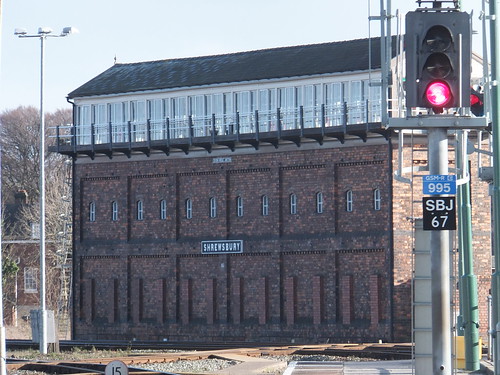
I was quite tired by the time we arrived at Shrewsbury (after spending a few hours romping round the woodland in the rain earlier) so I was relieved to be able to get on my connecting train back to Wolverhampton. The late afternoon sun improved my picture of Severn Bridge Jn. signal box. I noticed that the 3-aspect colour light in the foreground of my shot now sports a blue GSM-R plate. The world is changing!
 The monolithic bulk of Severn Bridge Junction, with a 3-aspect colour light in the foreground.
Book references
[1] 'Rail Centres: Shrewsbury' by Richard K. Morriss, published by Booklaw Publications (ISBN 1-901945-20-0).
[2] 'A Regional History of the Railways of Great Britain: Volume 11 North and Mid Wales by Peter E Baughan, published by David & Charles (ISBN 0-9153-7850-3).
Related articles on other sites
Wolverhampton to Shrewsbury Line (Wikipedia).
Shrewsbury to Chester Line (Wikipedia).
Glyn Valley Tramway (Wikipedia).
My pictures
Wolverhampton to Shrewsbury line.
Wellington.
Shrewsbury area railways.
In a couple of earlier posts (Winter Timetable at Peak Rail and Peak Rail in early 2014) I've described the winter operations between Rowsley and Matlock Riverside. In March 2014, we changed to the Summer timetable, with five round trips top-and-tailed between Rowsley and Matlock Town.
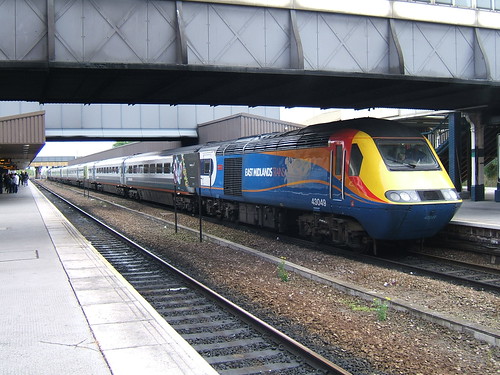
My first turn was during March was on Sunday, the 2nd. However, we were running a special timetable that day because a main line HST Charter train from St. Pancras was scheduled. Originally marketed in the 1970s as 'Inter City 125' trains, these High Speed diesel-electric trains are still in widespread use on mainline services.
Phil and I had 'Lord Phil', facing north. We came off shed nice and early so as to start warming our 7-coach train. The advantage of being at the north end was the relative ease of taking water during the day from the 4-wheel long wheelbase petrol tank wagon just off the north end of the platform, compared with the exhausting business of dragging a long canvas water hose around when watering from the tank wagon at the south end of Rowsley station.
 'Penyghent' coming 'off-shed' to work the 10:20 service train to Matlock Town.
A few minutes late, 'Penyghent' came 'off-shed' and 'hooked on' at the south end of the train ready for the first of six round trips we were booked to run to Matlock Town that day. The guard gave the 'Right Away' and 'Penyghent' took the train to our first stop at Darley Dale. With D8 on the front and seven coaches, 'Lord Phil' was well short of the platform when we stopped. I made a careful note of our position by placing three small lumps of coal on the sleeper end of the Down Line opposite our cab. Then, we carried on to Matlock Town. There wasn't much chance to make up list time because the track has recently been slewed approaching Matlock Riverside and a temporary speed limit of 10 m.p.h. has been imposed.
At Matlock Town, 'Penyghent' surrendered the single line staff to us for the journey back to Darley Dale, this time with 'Lord Phil' doing the work.
At Darley Dale, the fireman surrendered the staff to the signalman and I carefully drew the train through the platform and stopped with the engine cab level with the three small lumps of coal. Obviously, I had to ensure that the whole train, including 'Penyghent', had been drawn clear of the level crossing so that the gates could be opened to road traffic. But there's another constraint. In the post Peak Rail in early 2014 I talked about stopping 'behind' a signal and said "In some cases, track circuits are provided to indicate to the signalman the position of vehicles and electric locking may prevent the changing of points unless the movement is correctly standing 'behind' the signal". The Down platform at Darley Dale is such a case. Unless the whole train was 'behind' the ground signal, we would still be occupying the track circuit and the facing points could not be changed. This doesn't matter too much if there's only one train but, later in the day, I'd need to stop our train in this position to allow the HST Charter to return to Matlock. Stopping in the wrong place for this one would have made me very unpopular! Fortunately, all was well.

View of Midland Railway 'dwarf' shunting signal on the Down Main at Darley Dale, looking towards Matlock.
I stopped 'right' at Rowsley, allowing us to take water without difficulty. Although we were only working the train in one direction, we were providing steam heating for seven coaches, so we were boiling a fair amount of water.
The second departure from Rowsley was booked to stand at Darley Dale and wait for the HST Charter to pass on its way to Rowsley. Telephone messages informed station staff that the HST Charter was 'on time' and before long we heard the horn of the approaching train.

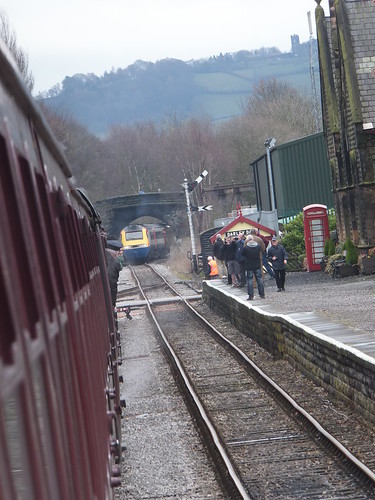
A cluster of photographers on the Down Platform at Darley Dale to record the HST.
The HST made its stately passage through the station on the Down line and, after a few minutes, we continued to Matlock Riverside. Phil drove the return journey back to Rowsley, stopping accurately at Darley Dale and Rowsley, where we watered again. The HST had parked itself neatly on the loop at Rowsley, out of our way.
 Phil takes the train back to Rowsley.
I think there were around 400 passengers on the HST Charter and many of them took a trip to Matlock Town on the service train. There were sales stands on Rowsley platform and the various preservation groups around the Rowsley site were welcoming the visitors. I was particularly taken with the project to build a full-size re-creation of Ivatt's prototype L.M.S. diesel electric '10000' - their website is here. Unfortunately, the weather deteriorated at this stage and we were all rather wet and windswept.
On our fourth round trip, we were booked to stand in the Down platform at Darley Dale, to allow the HST Charter to pass on its way back to St. Pancras. I walked across to the Up platform to take a few pictures.
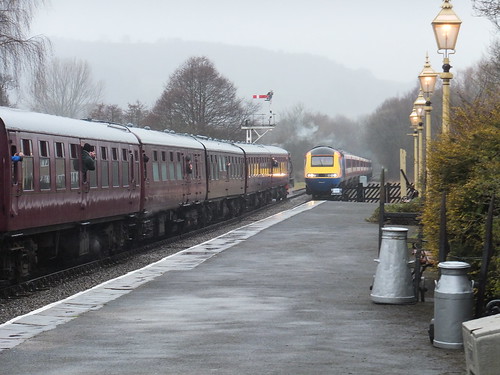
 The HST passes 'Lord Phil' in Darley Dale.
We completed our journey to Rowsley, plus two more round trips, by which time we were quite ready to go on shed and dispose, concluding a most interesting day.
HST Gallery
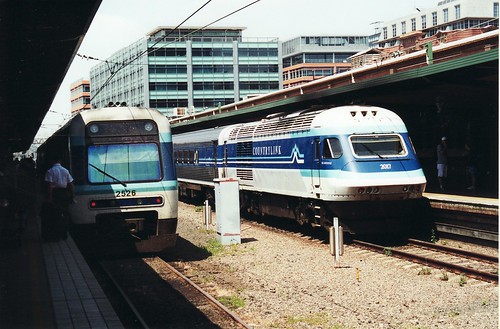
 The Australian version (the 'XPT') pictured in Sydney in 2001.
 East Midlands Trains HST at Leicester in 2009.
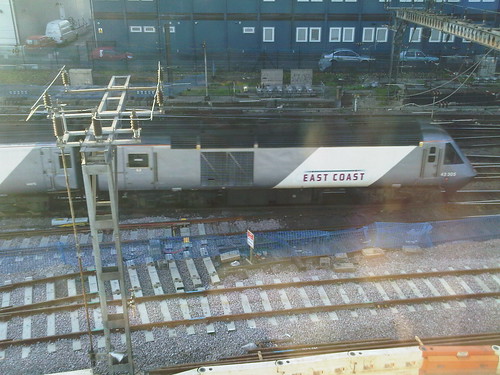
 'East Coast' liveried HST viewed from King's Cross Power Signal Box in 2009.
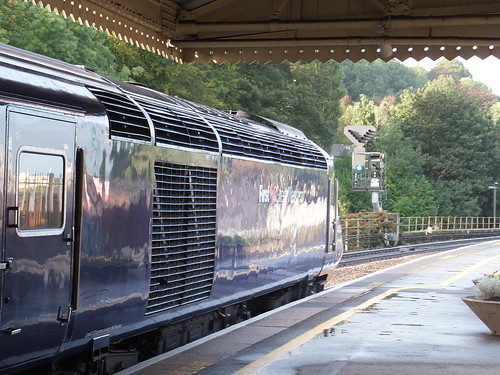
 First Great Western HST at Bath Spa in 2013.
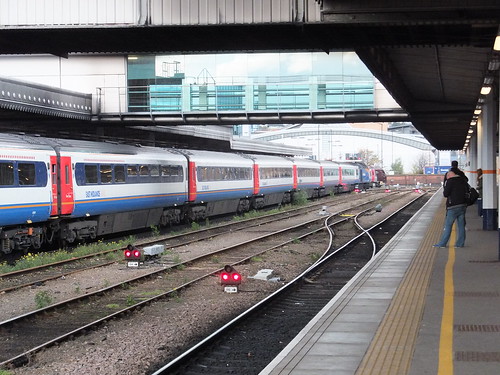
 East Midlands Trains HST at Sheffield in 2013.
Book references
'Inter City 125' by R. M. Tufnell published by Haynes Publishing Group (ISBN 0 85429 428 7).
Related articles on other sites
British Rail Class 43 (HST) (Wikipedia).
Inter City 125 (Wikipedia).
125 Group
Related posts in this blog
D8 'Penyghent'
My pictures
HST Charter to Peak Rail.
'Lord Phil'.
'Penyghent'.
In the earlier post Winter Timetable at Peak Rail I described the arrangements in use, particularly running round at Matlock Riverside now that the points are controlled from the new signal box.
Under these arrangements, I had a couple of turns in January and two more in February. Under the Winter Timetable, the service terminates at Matlock Riverside allowing a single locomotive to work the service, running round at Matlock Riverside and Rowsley. Even with only four round trips in the day, it was quite tiring with all the uncoupling, running round and coupling and, of course, the need to keep taking water at Rowsley but I find it more satisfying then the 'Top and Tail' working which prevails otherwise.
As I described in the earlier post, prior to formal commissioning of the new arrangements at Matlock Riverside, Signal & Telegraph Department staff operate the points from the signal box, and the various new fixed signals remain fitted with a white 'X' indicating that they are not yet in use. All movements take place under the authority of Hand Signals (red and yellow flags). I'll describe running round at Matlock Riverside under these temporary arrangements in a little more detail.
There's a line speed limit of ten miles an hour approaching Matlock Riverside (there's a sign with yellow-painted cut-out figures reading '10' on the right hand side of the track as you approach Matlock Riverside from Darley Dale). Because of the curve in the track, the approaching train cannot be seen from the signal box until the train is on the Derwent Bridge and close to the facing points (and the new Up Home signals) so the driver whistles to announce the train's arrival.

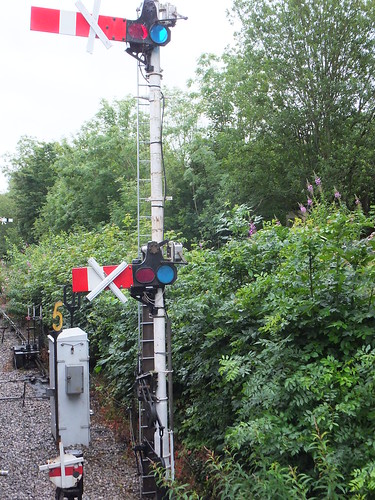
The white 'X' on the signal arms of the Matlock Riverside Up Home indicates that the signals are not yet in use.
A yellow flag given from the signal box or from the ground near the facing points authorises the driver to proceed into Matlock Riverside platform, detach from the train and move forward into the headshunt. Once the driver acknowledges the yellow handsignal (with a single or double 'pop' whistle) the yellow handsignal can be withdrawn.
Once stationary in the platform, the driver will normally 'ease-up', reversing the locomotive against the train so as to compress the buffers. A crowd often forms on the footpath adjacent to the locomotive, to watch the locomotive being uncoupled. Having come to a clear understanding with the driver that it's "safe to go under", the fireman (or cleaner under training) will first part the vacuum hose connection (so as to inhibit further movement), then the steam heating hoses are disconnected and finally the locomotive coupling ('shackle') is unscrewed to give sufficient slack for the coupling to be lifted off the drawhook on the leading coach. Usually the coupling is 'stowed' on the locomotive drawhook, unless other arrangements are provided. If a lengthened screw coupling is left dangling, it may cause damage by striking point fittings (for instance, facing point locks) or other signalling equipment (for instance, AWS on main line railways) or to level crossings. The two steam heating hoses are suspended from the chains provided to similarly prevent damage to the hose connections or track fittings. Finally, the vacuum hoses on the leading coach and locomotive are placed on the dummy coupling ('stopper'). There's further discussion of 'hooking on and off' here.
The driver will then draw the locomotive forward, not just clear of the loop points but beyond the 2-disc ground signal. During shunting, a driver must always go 'behind' a signal controlling the move. Provided a move comes to a stand 'behind' any controlling signal, the driver can be sure it will be safe for the points to be moved. In some cases, track circuits are provided to indicate to the signalman the position of vehicles and electric locking may prevent the changing of points unless the movement is correctly standing 'behind' the signal.
 Having uncoupled from the coaches, 'Lord Phil' moves into the headshunt. Click on image above for an uncropped view showing the 2-disc ground signal on the right of the locomotive.
Having come to a stand in the headshunt, the driver whistles to indicate that the points may be moved. I always give one long followed by one short (which used to be the code for 'from one line to another' when shunting). The whistle also confirms that the driver will not allow the locomotive to move again until authorised.
When the points have been set, a yellow flag will be displayed from the signal box, again acknowledged by a 'pop' whistle. The yellow flag authorises the locomotive to take the loop around the train and over the points at the Darley Dale end of the station, coming to a stand behind the Up Home signal. Again, one long and one short blast on the whistle indicates that the locomotive is clear of the points.
The points are now set towards the platform line and a yellow flag is displayed and acknowledged by the whistle. This time, the driver is authorised to move onto the train, although the final closing-up will be authorised by the guard from the platform. Once coupled-up, the brake vacuum is created and, when the guard issues the 'Right Away', the train can leave for Darley Dale and Rowsley.
After Matlock Riverside signal box is brought into full use, running round as described above will be controlled by the fixed signals rather than handsignals.
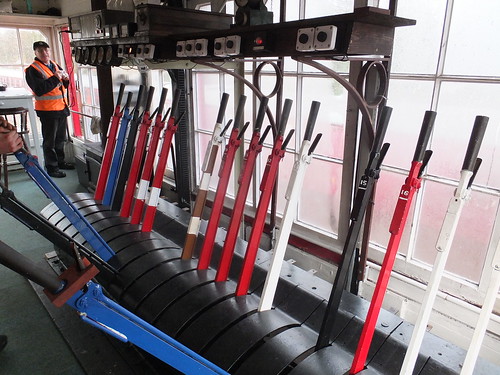
 A general view inside Matlock Riverside signal box.
My pictures
Resignalling at Matlock Riverside
In earlier posts, I've explained my involvement in a small commercial woodland in Wales. You can find them all here. It's four years since my last post describing the harvesting of around half the plantation.
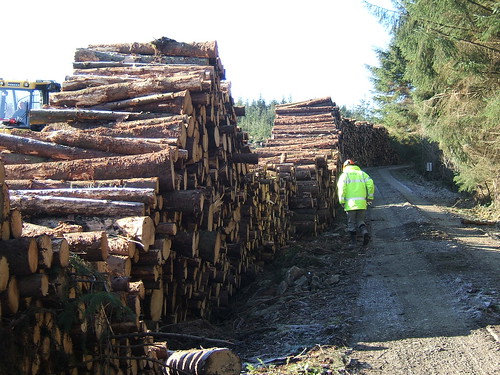
 Harvested timber awaiting road shipment to the saw mill in 2010.
 The rather stark appearance of the hillside after timber clearance in 2010.
Re-planting occurred soon after harvesting was complete and there are pictures showing the young trees here, taken on 25th July 2010 when I made a visit with Ann and Dean. The weather was splendid. The young trees were gamely trying to establish themselves. Limited use had been made of chemicals to control weevils which nibble at the tender plants and can cause untold damage.

"... young trees gamely trying to establish themselves."
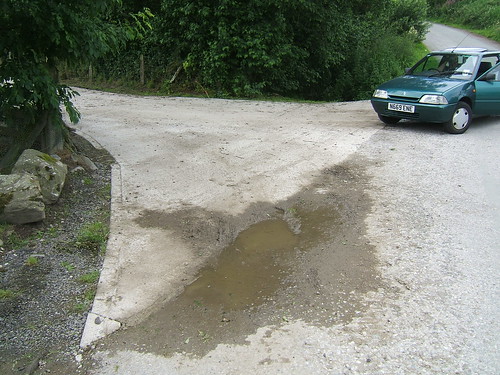
It's often necessary to carry out maintenance after harvesting and a number of tasks were tackled. This included repairs to the stock-proof fencing, clearance of the various drains and repairs to internal roads on the plantation. The junction with the public road also required re-surfacing.
 The resurfaced junction with the public road.
After replanting, Fountain Forestry (who are the professional managers of the woodland) continued to visit and they ensured that any essential actions were carried out. Heather is sometimes a problem as it can compete with young trees for water and other nutrients. This can be controlled by careful spraying.
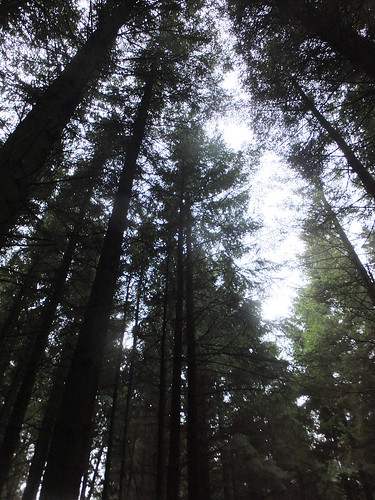
On 26th February 2014, I visited the woodland with the forester, Rob MacCurrach, to see how matters were proceeding. The United Kingdom had been having very wet weather with exceptionally high winds and we both wanted to assess the damage to the standing trees caused by 'Wind Blow'. The weather during our visit varied between wet and very wet with some dry spells but it wasn't too cold. It was gratifying to find that damage to date had been rather less than anticipated. The Ty Gwyn woodland is in an exposed upland area of Wales where it is prudent to expect some losses. Continuing growth in the mature areas had been very satisfactory.

The view of the sky from within the mature area.
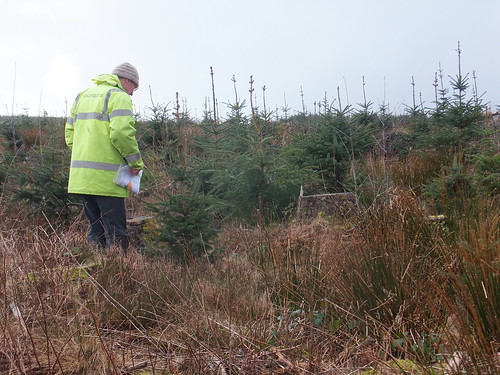
In the replanted areas, although there is some variation in growth rates, the young trees have established well, with healthy trees growing vigorously.
 The 2010 Planting is establishing well.
Pictures taken during the visit are here. All-in-all, a very satisfactory trip.
My Pictures
2003.
2006.
2008.
2009.
Harvesting (1).
Harvesting (2).
Replanting 2010.
Progress in 2014.
In three earlier posts, I describe a trip by rail on 8th February 2014 to Birkenhead and New Brighton (Part 1, Part 2, Part 3). This post lists miscellaneous information on the railways in the area.
Development of the Railways to Birkenhead
Once the Grand Junction Railway had linked the Liverpool and Manchester Railway to the London and Birmingham Railway, Crewe became the obvious starting point for a branch to Chester. The Chester and Crewe Railway Company built the 11-mile branch with Robert Stephenson as the Engineer and Thomas Brassey as the Contractor. Before the line opened in 1840, the Chester and Crewe Railway Company had been absorbed by the Grand Junction Railway. Also in 1840, a separate railway linking Chester and Birkenhead opened, initially as a single line.
The Chester - Birkenhead Route
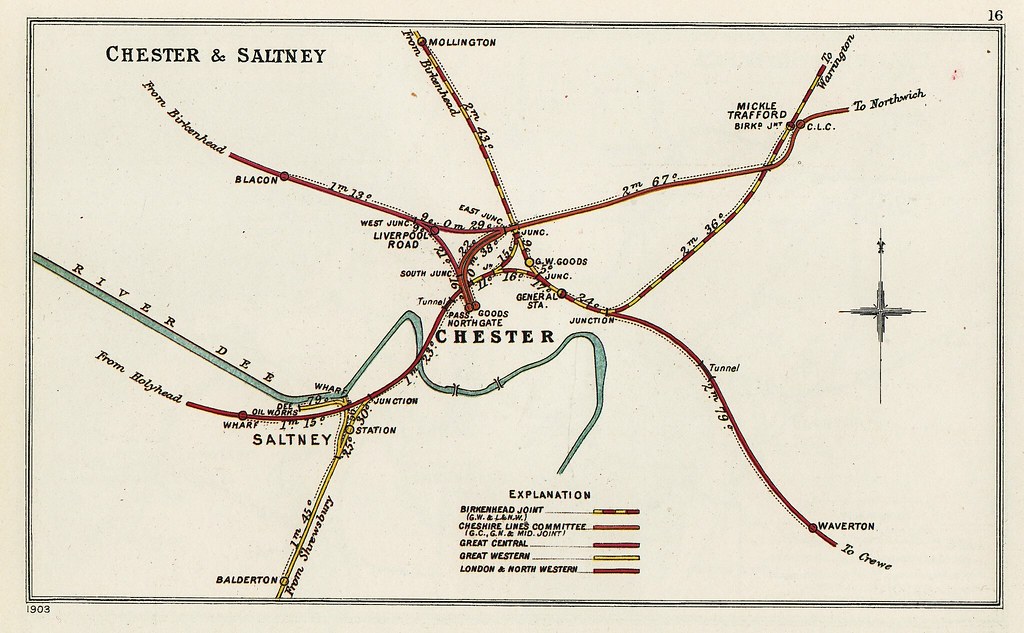
The Chester and Birkenhead Line eventually became a joint L.M.S./G.W.R. line and traffic growth resulted in most of the route being quadrupled. The junction with the North Wales line was made at Chester No. 4 signal box, just to the west of Chester station. The next signal box, Chester No. 5, was just 300 yards away, controlling the connections which completed a triangular junction with the North Wales line at Chester No. 6. This allowed trains approaching Chester from the west (and, in particular, Great Western trains from Wrexham which had joined at Saltney Junction) to join the Birkenhead Line without a reversal in Chester station. No. 4 and No. 6 boxes were L&NWR designs, as were a number of the signalboxes on the line to Birkenhead.
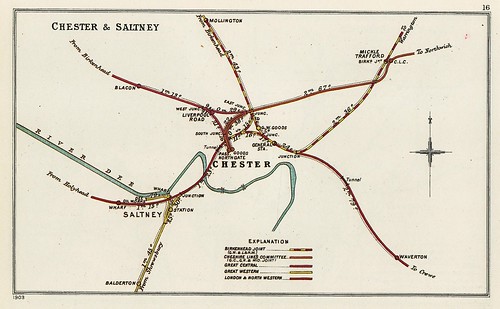 Click here for larger image
Railway Clearing House Plan of Chester area in 1903
The first four miles beyond Chester No. 5 were double track but from Ledsham Junction four running lines (paired by use) were provided - Down Slow, Up Slow, Down Fast, Up Fast. Today, Merseyrail only uses two lines, generally the former Slow lines, but where roads cross the railway, the bridges over the other two lines remain, with the tracks lifted and overgrown.
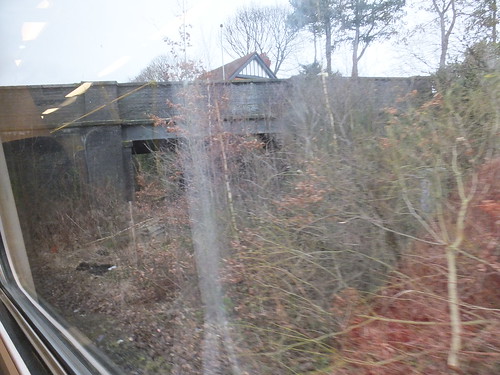 View from an Up Merseyrail train, showing the overgrown trackbed of the former Fast lines.
On the Birkenhead side of Rock Ferry (which offered interchange with Mersey Railway services), the four-track joint line continued to Green Lane Junction signal box where the Slow Lines became Goods Lines and Fast Lines became Main Lines to Blackpool Street signal box (near the side-by-side locomotive sheds for the L.M.S. and G.W.R.). Beyond Blackpool Street, the Goods Lines entered Haymarket Tunnel, emerging at Brook Street signal box and splitting into two routes serving the dock area. The Main Lines entered Woodside Tunnel at Blackpool Street, emerging at Birkenhead Woodside passenger terminus.
The Mersey Railway
The Mersey Railway opened in 1886, linking Liverpool Central with Birkenhead. Later, it was extended to two separate terminal platforms at Rock Ferry station on the Chester-Birkenhead line. A branch from Hamilton Square made an end-on junction with the Wirral Railway at Birkenhead Park. In 1903, the Mersey Railway was electrified. For a brief description, see Early Days of the Mersey Railway. After the electrification of the Wirral lines in 1938, the L.M.S. introduced through running with the Mersey Railway. In 1977, the 'Liverpool Loop' was opened by British Railways, allowing closure of a number of signal boxes.
The Wirral Railway
The Wirral Railway was incorporated in 1862 as the Hoylake Railway, becoming the Wirral Railway in 1882. At Birkenhead Park it made an end-on connection with the Mersey Railway line from Hamilton Square then continued through Birkenhead North to a triangular junction east of Bidston Station. One branch continued via Bidston Station (where a branch from Wrexham joined) to West Kirby, the second branch served New Brighton, with a second triangular junction connecting a branch to Seacombe which closed in 1964. There's a short Wikipedia article here. At the grouping, the line became part of the L.M.S., continuing to use steam locomotives until electrification at 650v d.c. third rail in 1938. From West Kirby, a single line branch originally continued to Hooton
Signal boxes in the 1950s
The lines were generally controlled by semaphore signals and manual signal boxes with partial track circuiting, although the former Mersey Railway underground lines had colour lights and extensive track circuits.
Chester-Birkenhead line
The signal boxes are listed below:-
Chester No. 5 (81-lever L&NWR Tappet Frame)
Mollington (25-lever L&NWR Tappet Frame)
Capenhurst (65-lever Frame)
Ledsham Jn. (20-lever L&NWR Tumbler Frame)
Hooton South Jn. (128-lever L&NWR Tumbler Frame)
Hooton North Jn. (90-lever L&NWR Tumbler Frame)
Bromborough (36-lever L&NWR Tumbler Frame)
Spital (36-lever L&NWR Tumbler Frame)
Port Sunlight Siding (50-lever L&NWR Tumbler Frame)
Bebington & New Ferry (36-lever L&NWR Tumbler Frame)
Rock Ferry
Mersey Jn. (60-lever L.M.S. Frame)
Green Lane Jn. (60-lever L.M.S. pre-1943 Tappet Frame)
Blackpool St. (70-lever L&NWR Tumbler Frame)
Birkenhead Woodside
Former Wirral Railway signal boxes
Birkenhead Park (Cabin 'H': 60-lever LMS tappet)
Birkenhead North No. 1: 40-lever R.S.C. 5.5" tappet
Birkenhead North No. 2: 27-lever R.S.C. frame (Goods lines only)
Bidston East Jn.: 45-lever standard tappet.
Seacombe Jn.: 45-lever standard composite
Wallasey
New Brighton: 44-lever R.S.C. tappet
Slopes Branch Jn. (closed 1964)
Seacombe Goods (closed 1964)
Seacombe (closed 1964)
Bidston Dee Jn.: 65-lever 4.5" centres
Leasowe Level Crossing: Pre-1943 standard tappet
Moreton: 30-lever standard frame
Hoylake: 21-lever R.S.Co. 5.5" centres
West Kirby: 63-lever L.M.S. frame
The Mersey Railway
Liverpool Central East ('A' Box): Closed 1977
Liverpool Central West ('B' Box): Closed 1977
James Street ('C' Box): Closed 1977
Hamilton Square ('D' Box): Closed 1977
Birkenhead Central ('E' Box)
Green Lane ('F' Box)
There are detailed diagrams for these signal boxes in the 1950s in the excellent publication from the Signalling Record Society 'British Railways Layout Plans of the 1950's' - 'Volume 10: LNW Lines in North Wales, Chester and Wirral areas' (ISBN: 1-873228-12-0).
Book References
[1] 'Railways to the Coast' by Michael H. C. Baker, published by Patrick Stephens (ISBN 1-85260-058-6).
[2] 'An Historical Survey of Selected LMS Stations' by Dr. R. Preston Hendry & R. Powell Hendry: Layouts & Illustrations, published by Oxford Publishing Co. (ISBN 0 86093 168 4).
[3] 'An Historical Survey of Selected LMS Stations: Layouts & Illustrations Volume 2' by Dr. R. Preston Hendry & R. Powell Hendry, published by Oxford Publishing Co. (ISBN 0-86093-330-X).
[4] 'A Pictorial Record of L.M.S. Architecture' by V. R. Anderson and G. K. Fox, published by Oxford Publishing Co. (SBN 86093 083 1).
[5] 'A Regional History of the Railways of Great Britain: Volume 10 The North West by Geoffrey O Holt, published by David & Charles (ISBN 0946537 34 8).
Reference [2] above has more information about Birkenhead North station.
References [3] and [4] above have more information about New Brighton Station.
Related articles on other sites
On Track in North Wirral.
Bidston Dock (Wikipedia).
Birkenhead Dock Branch (Wikipedia).
Mersey Railway (Wikipedia).
The Wirral Railway (Wikipedia).
Wirral Railway ('Railway Magazine' articles).
'Railscot' Chester and Birkenhead.
Related posts in this blog
Early Days of the Mersey Railway.
Birkenhead and New Brighton by train (Part 1)
Birkenhead and New Brighton by train (Part 2)
Birkenhead and New Brighton by train (Part 3)
My pictures
North Wales Line (Crewe - Llandudno).
Merseyrail.
Birkenhead and its Docks.
Introduction
In Part 1, I described my journey to Birkenhead's Hamilton Square station by train on the 8th February 2014.
In Part 2, I described my exploration on foot around Birkenhead's docks.
In this part, I'll describe re-visiting New Brighton.
My first visit to New Brighton
I think I was seven or eight when I made my first visit to New Brighton with my mother and father for a few days holiday. I thought it was marvellous. Despite its proximity to Liverpool with its docks, it was a 'proper seaside' with an excellent sandy beach, promenades, a lighthouse, a pier (from where it was possible to sail to Liverpool by Mersey Ferry) and an amusement park with a real steam miniature railway.
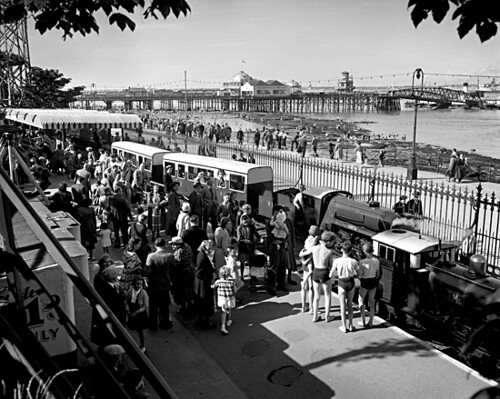 Tommy Mann's railway ran at New Brighton from 1948 to 1965. The pier and ferry landing stage can be seen in the background (Photo: 'Reflections').
We stayed in a boarding house which I think was towards Wallasey. A guest there during our visit was Billy Scott Coomber. I knew nothing of his fame as a singer and musician both in his own right and with the Jack Payne Orchestra but he was a very kindly, humorous man who made mealtimes at the hotel very jolly.
Brief railway history
The Wirral Railway was incorporated in 1862 as the Hoylake Railway, finally becoming the Wirral Railway in 1882. It comprised the line from Birkenhead Park (where it made an end-on connection with the Mersey Railway line from Hamilton Square) through Birkenhead North to a triangular junction east of Bidston Station. One branch continued via Bidston Station (where a branch from Wrexham joined) to West Kirby, the other branch went on to New Brighton, with a second triangular junction serving a branch to Seacombe, which had a ferry service to Liverpool. There's a short Wikipedia article here. At the grouping, the line became part of the L.M.S., continuing to use steam locomotives until electrification at 650v d.c. third rail in 1938. Metro-Cammell and Birmingham Railway Carriage and Wagon built the successful 3-car Electric Multiple Units (classified by British Railways as Class 503). For a time, the new trains worked alongside earlier Mersey Railway units until they were replaced. In 1985, the Class 503 were, in turn, replaced by Class 507 and Class 508 units which handle the services now.
By train to New Brighton
There are a number of stations on the line to New Brighton from the junction with the Rock Ferry line at Hamilton Square:-
Hamilton Square
Conway Park
Birkenhead Park
Birkenhead North
Wallasey Village
Wallasey Grove Road
My walking tour of the docks took me from Hamilton Square to Birkenhead North where I intended to catch the first train to either West Kirby or New Brighton. In common with other Wirral Railway stations, Birkenhead North is provided with neat, brick buildings. It's currently undergoing a major rebuilding - the original footbridge has been demolished to allow a modern replacement to be constructed and, in the meantime, a temporary affair has been erected at the Bidston end of the station.
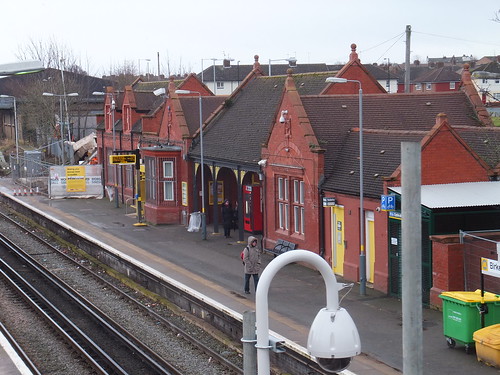 Birkenhead North Station, viewed from the temporary footbridge.
The first train was for New Brighton and we were soon curving to the right, away from the West Kirby Line, and passing the modern maintenance depot which handles all the rolling stock on the Merseyrail network.
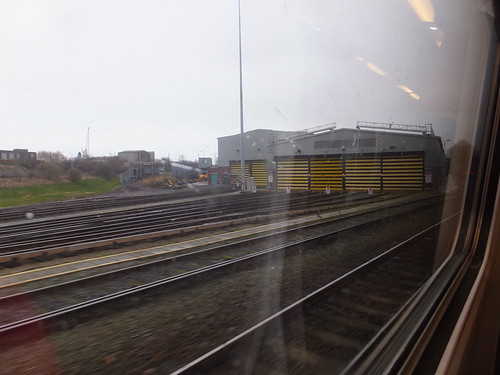 Birkenhead North Traction and Rolling Stock Maintenance Depot.
I could just make out the overgrown remains of the junction which originally led to Seacombe and the iron ore sidings (which received foreign ore by ship which was sent by rail to the steelmaking plant at Shotton). We made a brief stop first at Wallasey Village Station and then, just a quarter of a mile further on, at Wallasey Grove Road Station. The rain was sluicing down the windows as we travelled the final mile and a half to the terminus at New Brighton. It was still raining as I crossed the road to admire the station frontage.
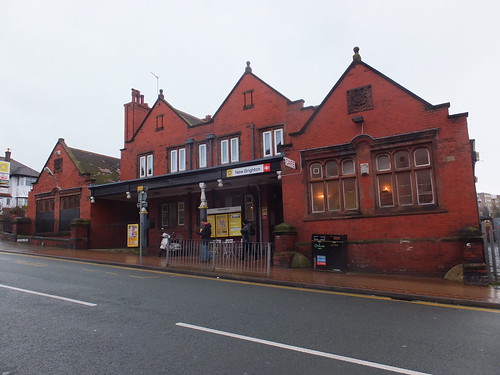 New Brighton Station Building from the road.
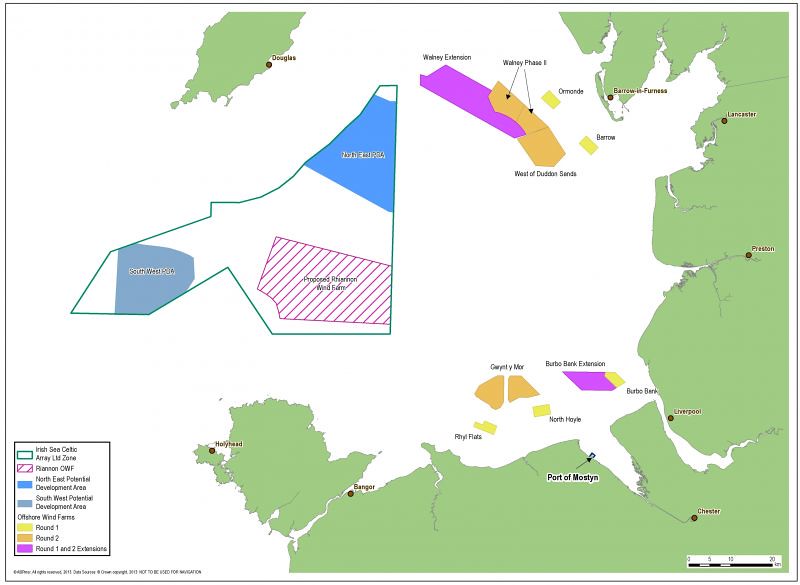
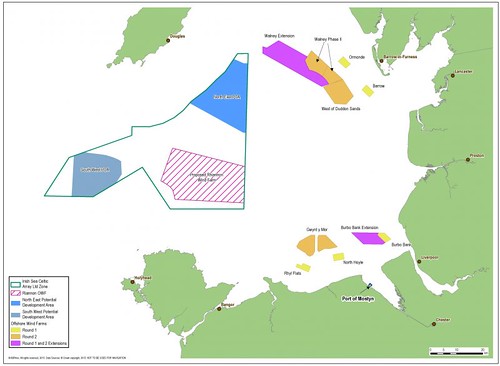
The station sits on a hill at the back of the town, in a residential area of dignified early 20th-century development. I look the steep road leading down to the promenade where there was a large, well-filled car park. As I reached the bottom of the hill, I discovered a large block of modern buildings on my right - a Morrisons Supermarket, Travelodge Hotel and various other restaurants. I don't think this retail park was there on my last visit. I suffered the same lack of recognition I experienced on my December trip to Morecambe and Heysham (described here) on discovering the modern retail park on the front at Morecambe. At New Brighton, I had a similar sense of alienation looking out to sea, as the view took in the offshore wind turbines of the Burbo Bank Array.
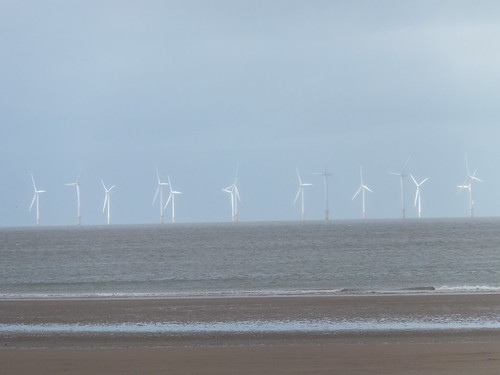 The Burbo Bank Array.
It was only a few weeks previously that I had been reminded of the extent of the wind farm industry on my trip to Holyhead (described here).
Click for larger view
Map showing the Burbo Bank Array and other offshore wind farms.
It was raining and blowing a gale but the beach still looked inviting. I took a picture from the sands showing the older part of the town.
 New Brighton: View of the town from the beach.
Looking across the Mersey estuary, you can still see Liverpool and its docks. When I was young, that was a bonus. Living inland, I rarely saw big ships and the beach at New Brighton offered unrivalled views of the almost continuous parade of ships of all kinds. The lighthouse at Fort Perch Rock was an important navigational mark but, with the advent of shipborne radar, it was taken out of use. It still stands proudly on the beach.
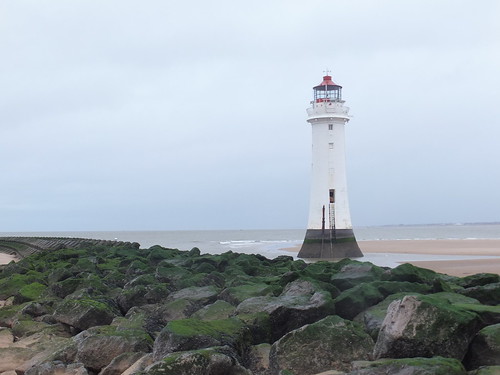 Fort Perch Rock Lighthouse.
I decided to walk back to the railway station before I became too wet, too cold or too tired to make the journey. I caught the next departure, alighting at Hamilton Square. I explored the underground passages connecting the station's three platforms for a few minutes whilst waiting for the next train towards Rock Ferry. The next service was for Ellesmere Port - I took this train to Hooton and spent a few minutes taking pictures whilst waiting for the following train which was for Chester. After a short wait at Chester, there was a 2-car diesel to Crewe out of bay platform 1. Finally, at Crewe I caught a London Midland Liverpool-Birmingham 4-car Electric Multiple Unit for the last leg by rail back to Wolverhampton.
My day was very enjoyable, despite arriving home tired and a little bedraggled.
Related articles on other sites
Reflections (features a host of historical pictures).
The New Brighton History Site.
Related posts in this blog
Birkenhead and New Brighton by train (Part 1)
Birkenhead and New Brighton by train (Part 2)
My pictures
Merseyrail.
New Brighton.
North Wales Line (Crewe - Llandudno).
 The imposing ashlar-faced facade of Shrewsbury station, viewed from the forecourt.
 The impressive, but rather anonymous, entrance to platform 3 from the forecourt.
 Window to waiting room on platform 3.
 Crewe Junction, Shrewsbury, viewed from platform 3.
 Coton Hill North Signal Box now forms part of a private house.
 The neat appearance of the station buildings at Wrexham General.
 Croes Newydd North Fork Signal Box.
 View of Wrexham Central station from the train.
 Penyffordd signal box.
 Flowers on Buckley station.
 View of Shotton Low Level (looking towards Holyhead) from a Down Bidston train.
 View from Down Bidston train approaching the Dee Crossing with the Tata Steel complex in the background.
 Hawarden Bridge before "encapsulation" (Photo: John S. Turner, Creative Commons).
 A fuzzy picture of Dee Marsh Junction signal box.
 Approaching Bidston, my train gets a 'Yellow and a White Feather' for platform 2.
 Bidston Station. The train I arrived on has already left platform 2 and a crowded electric train for Liverpool Central is arriving at platform 1.