skip to main |
skip to sidebar
On Friday, 17th February 2017 I arrived at London Euston with a few hours to spare before an invitation to Afternoon Tea. I intended to take a short trip on the Channel Tunnel Rail Link (CTRL) first and decided I'd time to travel from St. Pancras International to Ebbsfleet International and back, so I walked east along Euston Road from Euston to St. Pancras International.
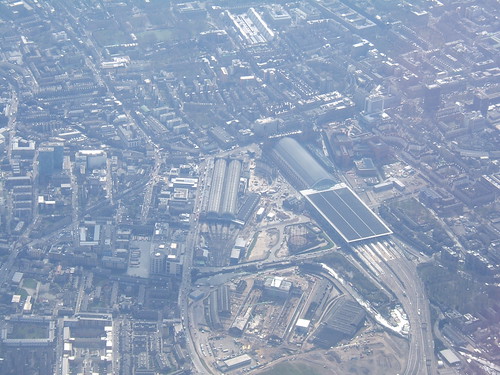
London: Aerial view looking south in 2009 showing King's Cross (left) and St. Pancras International (right).
St. Pancras International
The Grade 1 listed station hotel in Gothic Revival style fronting Euston Road was designed by George Gilbert Scott (see Wikipedia article here) and has been handsomely restored. I'm glad it's been saved but even I find its exuberant style a bit florid.

London: St. Pancras International: restored frontage to Euston Road.
I passed through the entrance onto the station concourse beneath the magnificent arched roof designed by William Henry Barlow (see Wikipedia article here). This has also been restored and I commented approvingly in a 2008 post here. The concourse area was eerily quiet on my visit, as were the international platforms, segregated behind their glass walls.
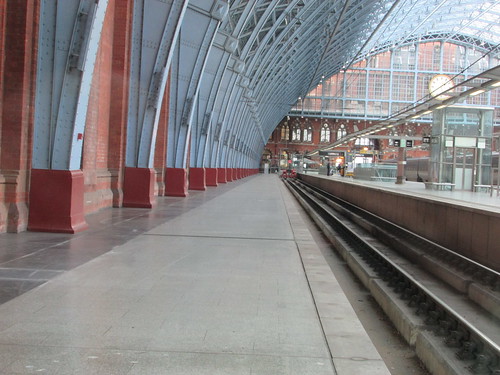
St. Pancras International: View of Barlow's trainshed looking south, with International Platform 10 on the right.
But looking down to the undercroft below, I could see plenty of activity. The need for the Midland Railway approaching St. Pancras to cross over the Regent's Canal just north of the station required the platforms to be elevated above the level of Euston Road. Barlow turned this necessity into a virtue by building the undercroft to store the major shipments of beer from Burton-on-Trent required to slake the Capital's thirst! Now, the undercroft presents shopping and eating opportunities to the traveller. The modified undercroft and the new-build concourse at ground level just north of the original train shed were much busier. This concourse has ticketing and check-in for international services on the south side, domestic ticketing on the north side and exits to the adjacent King's Cross Station of the east side.
I successfully purchased a return to Ebbsfleet International from an automatic machine and took the escalator to platform level to catch the 11:12 Southeastern High-speed domestic service, operated by a Class 395 'Javelin' Electric Multiple Unit (EMU). The Class 395 can run at up to 140 m.p.h. on High Speed 1. Back in 2007 I was involved in design and testing for some of the on-board signalling equipment for this design. There's a short post about the design here and a post about site testing here.
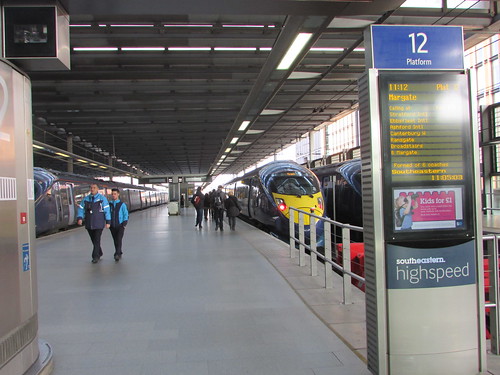
London: St. Pancras International: High-Speed Domestic Platforms.
High Speed 1
High Speed 1, linking the Channel Tunnel (opened 1993) to London, was built in two stages. The first stage, opened in 2003, allowed high speed running at up to 186 m.p.h. between the Channel Tunnel and the vicinity of Ashford International; Eurostar trains then continued to Waterloo International station in London on existing, third-rail d.c. electrified lines. In 2007 the northern section was completed to Stratford and St. Pancras, providing maximum speeds of 140 m.p.h., and a new maintenance depot at Temple Mills replaced the original one at North Pole. The Wikipedia article here briefly outlines the 'alarums and excursions' involved during the completion of this very expensive project.
My Class 395 departed on time with the train reasonably full. Leaving St. Pancras, colour light signals are provided and the KVB control system. 'KVB' stands for 'Contrôle Vitesse par Balise' ('Speed Control by Beacon') since the system is of French origin. The track layout is quite interesting. CTRL curves to the right, but throws off three connections on the left: a maintenance siding which connects with the Midland Mainline, the single line Silo Curve which joins the North London Line at Camden Road (allowing running onto the West Coast Main Line) and the single line ECML Connection. There's also a North London Line CTRL Connection from York Way South Junction to join Silo Curve at Cedar Junction. The picture below was taken from a CTRL train arriving at St. Pancras International.
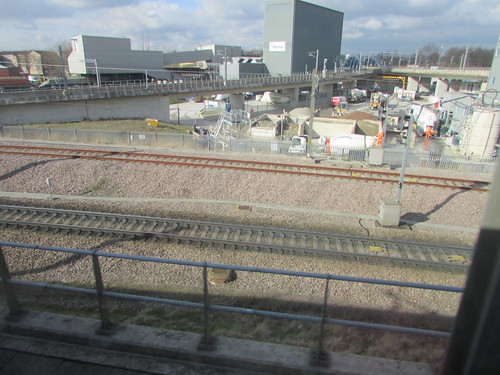
Approaching St. Pancras International on Up CTRL (on viaduct)). Down CTRL in foreground, ECML Connection behind. Silo Curve left rear and North London Line CTRL connection right rear converge at Cedar Junction in the distance.
The ECML Connection (currently not in regular use) joins the much older North London Incline at York Way North Junction, then joining the Down Slow of the East Coast Main Line just south of the Copenhagen Tunnels. Leaving St. Pancras International, I just managed to picture the East Coast Main Line and Copenhagen Tunnels before the double-track CTRL crossed the East Coast Main Line on a covered bridge.
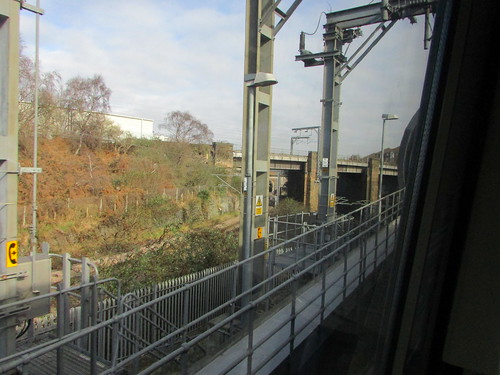
London: Leaving St. Pancras International on CTRL, North London Incline and ECML Connection on left, high level bridges of North London Lines crossing the East Coast Main Line on right with south portals of Copenhagen Tunnels in the distance. The portal of the covered bridge on HS1 is just visible on the right.
We entered the twin tunnels called London Tunnel 1, each around 7.5 km long. In-cab signalling using the TVM-430 system is in use. This system is also French and 'TVM' stands for 'Transmission Voie-Machine' ('Track to Train Transmission). There's a useful article on Wikipedia here. Left-hand running is normally adopted but the signalling is arranged to allow bi-directional running when required.
At Stratford International, the London 1 tunnels emerge into a long concrete station box, open to the sky but not very attractive. There's plenty of pointwork and a single line grade-separated connection allows empty stock to get to and from the depot at Temple Mills. From north to south, the six lines of High Speed 1 are Down International, Down CTRL, Down RDO, Up RDO, Up CTRL, Up International. My train paused at the single island platform used by Southeastern trains. The Down CTRL and Up CTRL are through lines used by Eurostar services whilst the Down International and Up International loops are flanked by platforms although these are currently unused.
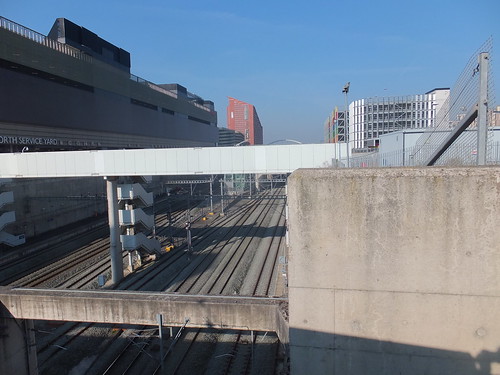
High Speed One: East end of Stratford International. Looking west towards St. Pancras from Montifichet Road with the Westfield Stratford City on left.
My train continued through the twin tunnels called London Tunnel 2, each just over 10 km long, emerging at Dagenham Docks Junctions, where connections allow freight trains from the Channel Tunnel to reach Ripple Lane Railhead. The Tibury branch of the line from Fenchurch Street ran parallel past Rainham to our north, then we crossed over that line near Purfleet, with views of the River Thames and the disused Littlebrook Power Station on the south bank. After brief views of the Queen Elizabeth II Bridge which (together with a twin-tube tunnel) carries the M25 motorway across the river, we made our own river crossing by the twin tubes of the Thames Tunnel which, including covered ways extending beyond the tunnel portals, are a little over 3 km long.

View from High Speed 1, looking across the River Thames, with the Queen Elizabeth II Bridge on the left.
Ebbsfleet International
Emerging from the Thames Tunnel, we were already slowing for Ebbsfleet International. Like Stratford International, there are six lines through the main station, but arranged in a different order. From east to west they are Down CTRL, Down International (with platform), Down Domestic LL and Up Domestic LL (both served by an island platform), Up International (with platform) and Up CTRL. The Domestic Platforms are identified as 'LL' for Low Level as there is a further island platform for Domestic High Speed trains continuing on the (conventional) North Kent Line. High speed domestic services from St. Pancras International for the North Kent Line diverge via a grade-separated junction just after the Thames Tunnel and, after stopping at the High Level platform, join the North Kent Line from Dartford at Springhead Junction, another flyover junction.
I left the train which continued to Margate and set about a brief survey. The station is surrounded by grassland with several large car parks. There were taxis and people waiting for a bus. Swanscombe lies to the West with Dartford further afield. Northfleet lies to the east with Gravesend a little more remote.
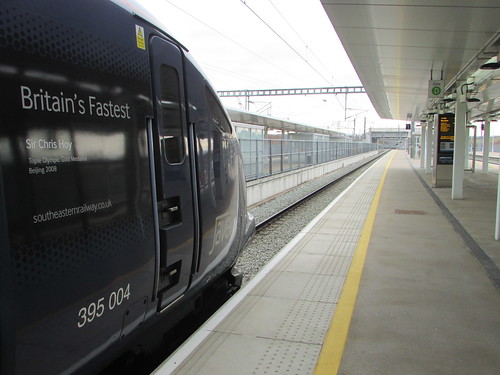
High Speed 1: Ebbsfleet International. Looking towards the coast as the train I arrived on leaves, viewed from Down Domestic Platform with the Down International Platform on the left.
The station really is 'International' (unlike Stratford) and two continental departures were on the information display near the Eurostar Check-In.

High Speed 1: Ebbsfleet International, Passenger Information Display at 'Eurostar' Check-In.
I then travelled back to St. Pancras International on another Class 395, after an informative few hours learning about CTRL and I made my way to a very enjoyable Afternoon Tea.
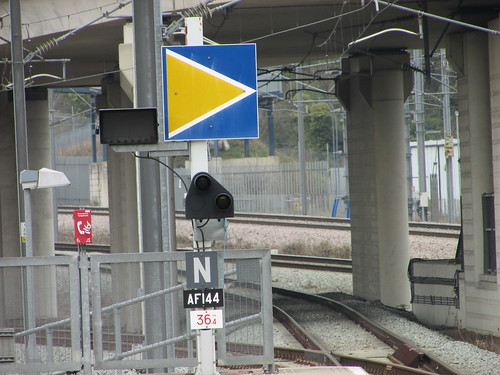
High Speed 1: Ebbsfleet International. Looking towards St. Pancras from Down Domestic Platform with the TVM Block Marker and subsidiary signal AF144.
Books
Track diagrams of the Channel Tunnel Rail Link are in the following publication (or later issue):-
‘Railway Track Diagrams Book 5: Southern and TfL’ (TRACKmaps: 3rd edition) ISBN 978-0-9549866-4-3
Related sites
St Pancras railway station (Wikipedia).
High Speed 1 (Wikipedia).
Transmission Voie-Machine (Wikipedia).
HS1 Ltd (The operating company).
St. Pancras International.
Stratford International.
Ebbsfleet International.
Ashford International.
Related posts on this site
Class 373 Test Train to Grantham.
London's Terminal Stations (discusses St. Pancras).
Crewe International Electric Maintenance Depot.
Class 395 Trainsets.
Testing Class 395 Trainsets.
My Pictures
Where necessary, clicking on an image above will display an 'uncropped' view or, alternately, pictures from may be selected, viewed or downloaded, in various sizes, from the albums listed:-
London: St. Pancras Station.
High Speed 1.
Class 395: Testing.
Channel Tunnel and High Speed One.
London, England.
Arriving in London on Friday, 27th January 2017 with a few hours before a business meeting, I decided to repeat a trip I made on on 8th September 2014 (described here) when I'd taken a short trip on the former Great Eastern Railway from Liverpool Street to Stratford (the one in East London, not the one associated with William Shakespeare).
I arrived by Virgin 'Pendolino' at Euston and walked along Euston Road to Euston Square station where I caught a train five stops on the historic Circle Line to Liverpool Street.
Liverpool Street - Stratford
I didn't pause to admire the restored parts of the Great Eastern Railway terminus around the main line concourse but made my way to the subterranean platforms to catch a Stratford train.
I was surprised to find that the service between Liverpool Street and Shenfield had, since May 2015, been operated for TfL Rail by MTR Corporation (Crossrail) Limited (who, following the previously-noted fear of capital letters which is becoming endemic, usually call themselves 'mtr crossrail'). When the massive Crossrail Project is complete, MTR will also operate the new or upgraded route from Reading and Heathrow in the west to Shenfield and Abbey Wood in the east, under the branding 'Elizabeth Line'. The line will be operated by new, 9-coach Class 345 'Aventra' trains being built by Bombardier in Derby.
At the time of my visit, Class 315 EMU were operating the service from Liverpool Street, terminating at Brentwood, presumably whilst upgrading was taking place on the rest of the line to Shenfield.
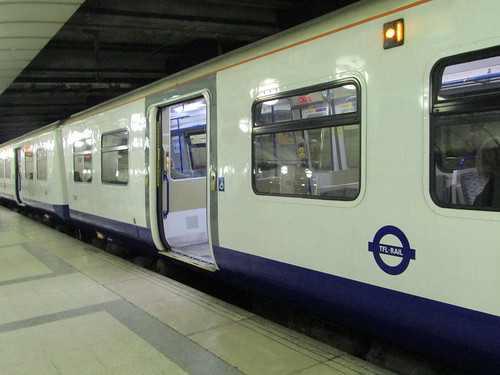
Class 315, in TfL Rail livery, in platform 17 at Liverpool Street.
We departed on time and effortlessly climbed the bank to Bethnal Green, where the branches to north London diverge, and continued to Stratford, passing the once-notorious former Bryant & May match factory, which is now apartments in the 'Bow Quarter', with a website here. I say 'once-notorious' as this was the location for the "Match Girls' Strike" of 1888 which led to the creation of the first womens' trade union.
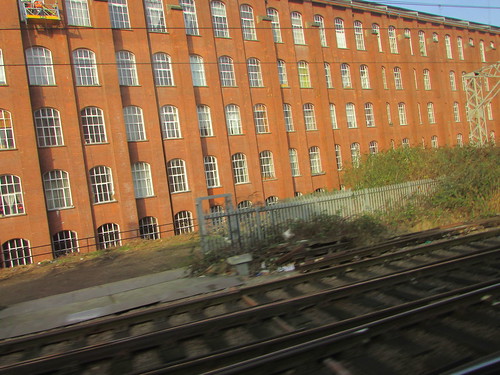
The former Bryant & May match factory, now apartments in the 'Bow Quarter'.
After passing the Queen Elizabeth Olympic Park (with its dreadful ArcelorMittal Orbit tower - more on their website here), we slowed for the station stop at Stratford, where I left the train.

Queen Elizabeth Olympic Park, home to West Ham United Football Club and the ArcelorMittal Orbit.
Docklands Light Railway
I had not kept up with the pace of developments on the Docklands Light Railway (DLR). There's an informative history of the network, including proposals for still further extension, in Wikipedia here and the present route map is here.
The system originally opened, in 1987, with a just a city terminus rather inconveniently located at Tower Gateway extending via Canary Wharf to a terminus at Island Gardens, north of the river. At Poplar, just north of Canary Wharf, a triangular junction connected to a branch to Stratford. The original Operating and Maintenance Centre (OMC) was at Poplar. In 1991, construction of the tunnel section to Bank gave much better interchange with the tube system and, since then, the system has been significantly extended and upgraded.
I decided to travel from Stratford to Greenwich, using the DLR. Originally, the interchange at Stratford was just a short bay platform 'cut into' the existing island platform serving the Up Electric and Westbound Central Line. Currently, DLR has its own 2-platform terminus on the original branch from Poplar, plus two more platforms on the former British Rail Stratford Low Level line now incorporated into the DLR route from Stratford International to Canning Town and from there to Beckton or Woolwich Arsenal.
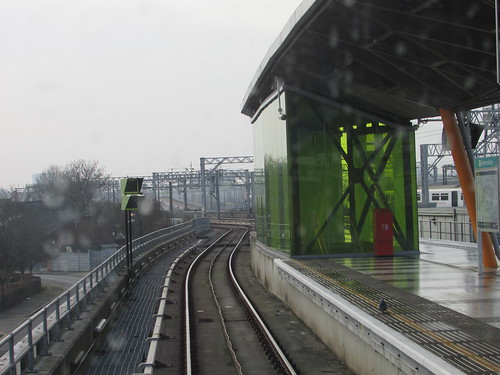
View from front of DLR train leaving Stratford platform 4A.
The line singles leaving Stratford, squeezed into a narrow margin on the south side of the former Great Eastern main lines. Next, the line doubles and slews to the left through Pudding Mill Lane station before turning right, reverting to the original alignment of a single line next to the main lines. Apparently, this (fairly recent) alteration was to accommodate Crossrail works in the vicinity of the original station - Pudding Mill Lane now has quite a grand new station.
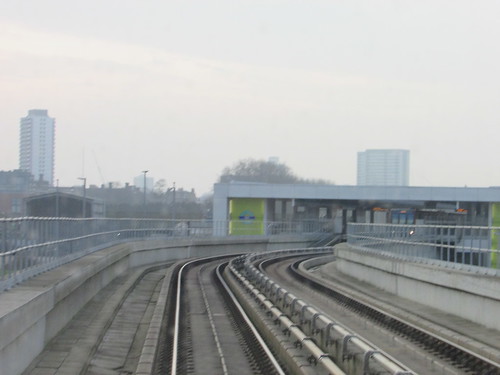
The single line doubles through the new Pudding Mill Lane station.
After continuing parallel to the Liverpool Street lines past the former Bryant & May factory, the line turns south and becomes double track before Bow Church station.
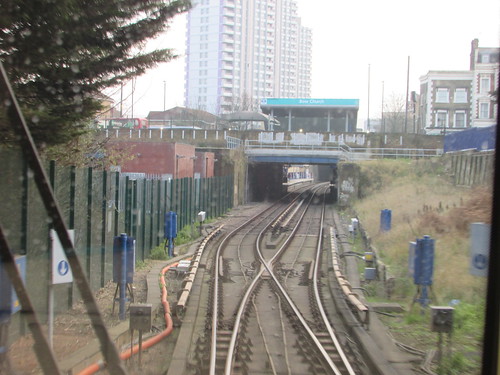
The single line doubles before Bow Church station.
Our route continued through Devons Road, Langdon Park and All Saints. Beyond All Saints stations, connections diverge to the right to serve the sidings at the depot at Poplar. Approaching Poplar station, the route from Canning Town converges.

Docklands Light Railway: Turnouts approaching Poplar station.(L-R): WB Canning Town, SB Stratford, NB Stratford, EB Canning Town (on flyover).
Leaving Poplar station, my train swung sharply left as it climbed the steep East Curve to West India Quay. Just 200 metres further on, we stopped under the elliptical, glazed roof of Canary Wharf Station, where I changed trains. The three roads through the station are provided with two island platforms and two flanking platforms so each road has a platform on both sides to improve passenger flow. I alighted on the correct side and, within a minute or two, my connecting train arrived on the opposite face of the same platform.
 Docklands Light Railway: Changing trains at Canary Wharf.
The train I'd joined was heavily loaded for our journey through Heron Quays, South Quay, Crossharbour (with its turnback siding) and Mudchute (now with a third, terminal platform). Originally, the double track beyond Mudchute ran on the surface to a simple terminal at Island Gardens. Now the line is extended to Lewisham, the line dives underground to a new underground station at Island Gardens after which it crosses the Thames to a second underground station called Cutty Sark, where I disembarked, along with a crowd of other passengers. The train I'd left would continue to stations at Greenwich, Deptford Bridge, Elverson Road and Lewisham. I reached the surface quite near the river and the impressive bulk of Cutty Sark, now transformed into a major tourist attraction.
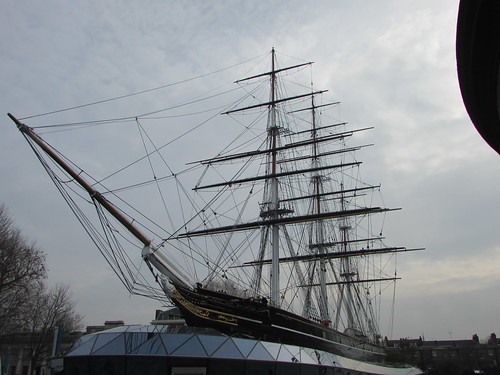
London, Greenwich: Cutty Sark.
I was tempted to go back to Island Gardens through the Greenwich foot tunnel which, since the last time I used it, now has user-operated lifts. However, unsure of the time this detour would take, instead I took a few photographs around what is now Maritime Greenwich World Heritage Site.
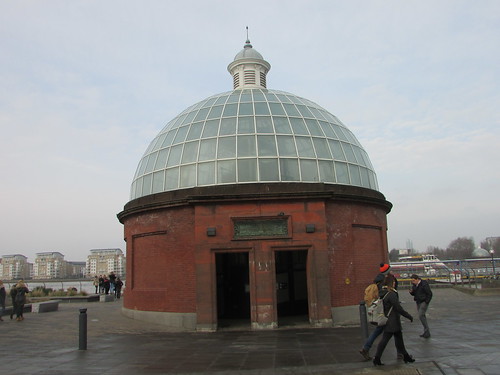
London: Entrance to Greenwich Foot Tunnel
Near the river, there were splendid views of the incomparable 17th-century buildings designed by Sir Christopher Wren (on the site of the earlier Royal palace) built as the Royal Hospital for Seamen, housing retired veterans of Britain's navy, later seeing service as the Royal Naval College. The Old Royal Naval College has a website here.
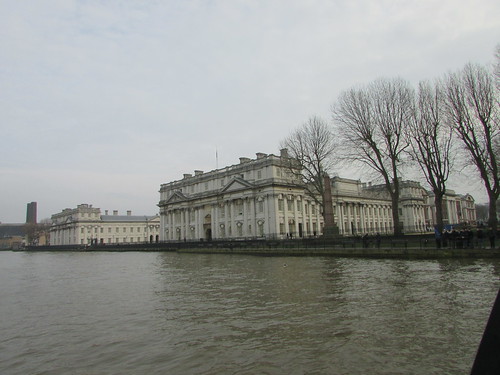
London: The Old Royal Naval College, Greenwich:
After admiring Wren's creation, my eye was also drawn downstream to the rather grim outline of Greenwich Power Station, with its four 8-sided chimneys and, thrust into the Thames, its disused coal unloading jetty standing on sixteen massive cast-iron Doric columns.
Greenwich Power Station
In the post London Underground - Traction Power Distribution, I mentioned the importance of London Underground's Greenwich Power Station. Since Lots Road Power Station was shut in 1998, London Underground has derived its power from the National Grid, but Greenwich was retained as the Central Emergency Power Supply.
Greenwich Power Station was built in two stages between 1902 and 1910 for the London County Council to power trams and underground trains. There are articles on the origins of Greenwich Power Station in Grace's Guide here and in Port Cities here. There's also a brief account in Wikipedia here.
I was surprised to discover that tables showing the generated output from the power station for the ten years to 2014 are available online (following a Freedom of Information Request) here. This is available through the mySociety project of the charity UK Citizens Online Democracy (UKCOD).
A plan to improve efficiency and lower the carbon footprint of the station using a new Combined Heat and Power (CHP) gas installation is under consultation.

London: Greenwich Power Station.
Ferry to London Bridge
I'd decided to take a ferry from Greenwich to London Bridge City pier, near the location of my meeting. MBNA Thames Clippers operate a scheduled service of fast ferries on the river. Their web site is here and details of their fleet of modern, large catamarans powered by waterjet or propellor are here. The huge 220-seat 'Hurricane Clipper' arrived on time and, within moments, was loaded and heading upstream again.
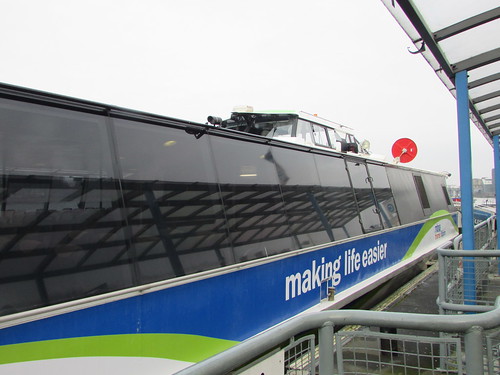
London: 'Hurricane Clipper' at Greenwich landing stage.
After a brief pause at Canary Wharf we continued upstream, passed through the north fixed span of Tower Bridge and then set off again, passing the moored light cruiser 'H.M.S. Belfast' (there's a post describing a visit I made here) and stopping at London Bridge City Pier after a total journey time of just over 20 minutes. I disembarked with a few other passengers and 'Hurricane Clipper' roared away upstream.
After an informative and enjoyable few hours, I made my way to my meeting.
My Pictures
Where necessary, clicking on an image above will display an 'uncropped' view or, alternately, pictures from may be selected, viewed or downloaded, in various sizes, from the albums listed:-
London: Former Great Eastern Line.
Docklands Light Railway.
London, England.
In the post Return to Merseyside (Part 3), I described my first, brief exploration around the modern Brunswick Station.
On Saturday, 4th February 2017, I returned to Brunswick Station intending to walk from there along the Riverside Walk to Pierhead.
I had an uneventful journey from Wolverhampton using the London Midland service to Liverpool South Parkway where I changed to a Merseyrail train for the short journey to Brunswick. It had been cold and overcast when I started from home but at Brunwick, there was bright sun and the day remained very pleasant, except for a brief shower in the early afternoon. On my first visit, I'd been able to walk directly from the station to the river by crossing through the Brunswick Business Park but, on Saturday, I was rather surprised to find the Harrison Way gates securely locked. A small sign, which I almost failed to spot, directed me south along Sefton street to reach the Riverside Walk.
This led me past a series of modern, smaller business premises on the left (many car-related) and huge modern warehouses on to my right, the second of which was occupied by TeamSport Go Karting (see their site here).
My detour offered me a view of the unusual entrance to the C.L.C. Dingle tunnel, now used by Merseyrail services to Hunts Cross. The tunnel is approached by a short, deep rock cutting carrying an iron bridge which provides support for the area around Grafton Street.
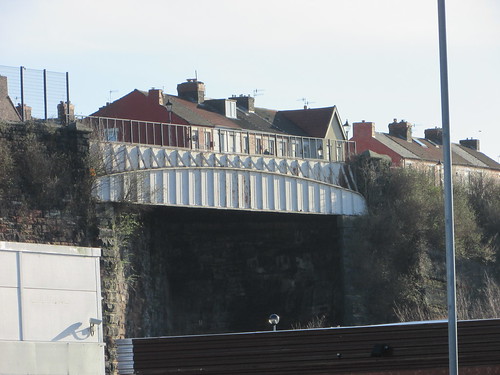
The unusual north portal to Dingle Tunnel on the C.L.C. (now Merseyrail), with the houses on Grafton Street in the background.
Just beyond this tunnel, there is the partially bricked-up entrance to the abandoned Liverpool Overhead tunnel. The sandstone portal remained in excellent condition, with the inscriptions clearly legible - 'L. O. Ry. SOUTHERN EXTENSION | 1896 | ENGINEERS SIR DOUGLAS FOX, J.H. GREATHEAD, S. B. COTTRELL | CHAIRMAN SIR WILLIAM BOWER FORWARD | CONTRACTORS H. M. NOWELL, C. BRADDOCK'.
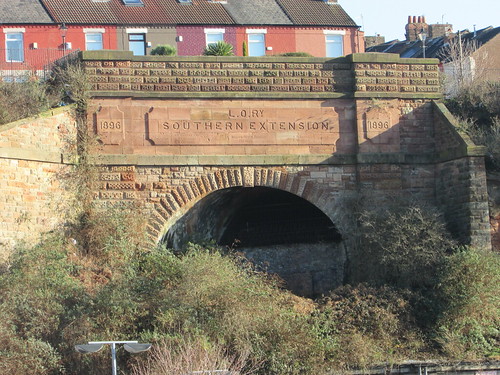
Liverpool area rail: Entrance to abandoned Liverpool Overhead Railway Extension tunnel built 1896.
On my right,I passed the brick-built transit shed which had served the east side of the now-filled-in Harrington Dock. This has been retained and modernised as the South Harrington Building, partly occupied by Royal Mail.
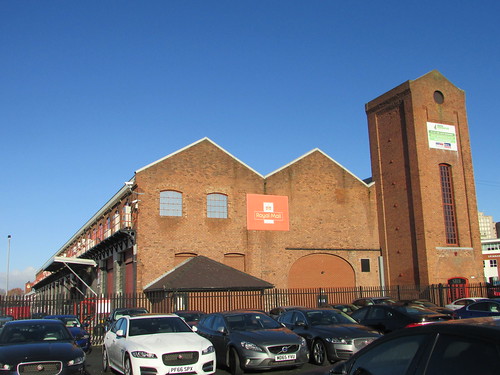
South Harrington Building, showing, on the left, the long elevation which faced the dock.
I turned into the service road and almost missed the small gate giving access to the Riverside Walk next to the filled-in 80-foot wide entrance to Herculaneum Dock. On the other side of the dock entrance I could see Chung Ku Chinese Restaurant. There had been a second 60-foot wide entrance to the south of the restaurant.
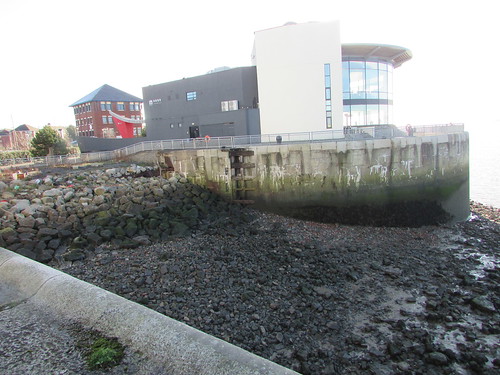
Views around former south docks: Chung Ku Chinese Restaurant and the filled-in entrance to former Herculaneum Dock.
The 1909 plan below shows where I started of my walk, near point 'L' on the plan.
Plan of Toxteth to Herculaneum Docks

Liverpool Docks Admiralty Maps, 1909, Plate 30 (Source: Wikimedia Commons).
Click here for a larger view.
I continued northwards along Riverside Walk, towards Pierhead (heading left on the plan above). There were occasional bicycles, joggers and walkers whose numbers increased as I came nearer to Pierhead. After passing the filled-in Harrington Dock, I had good views of the Tranmere oil handling installations on the Wirral side of the river.
There are two berths for oil tankers. The upstream berth was occupied by the chemical/oil products tanker 'Cenito', owned by LGR di Navigazione Spa and built in China in 2009. The ship's 'vital statistics' are here. The 'SUPER ICE' painted in the hull initially puzzled me - it's because she is classified 'Ice Class 1A Super' which is the highest of the Finnish-Swedish Ice Class ratings, allowing her to operate in difficult ice conditions without icebreaker assistance. Brief research on the internet subsequently showed that her recent ports-of-call included Antwerp and Aruba (in the Caribbean).

'Cenito' berthed at Tranmere.
The other berth at Tranmere was unoccupied (except by a tug), allowing a better view of the loading/unloading facilities.

Loading/unloading berth at Tranmere. The tug 'Switzer Stanlow' (with firefighting equipment) is moored at the berth.
I walked past more modernised transit sheds on my right, flanking the filled-in Toxteth Dock and saw parents with young children going into Yellow Sub, which describes itself as "Liverpool's Premier Play Centre". The only reminder of the lock which once connected Toxteth Dock directly to the river was a capstan, set within modern paving.
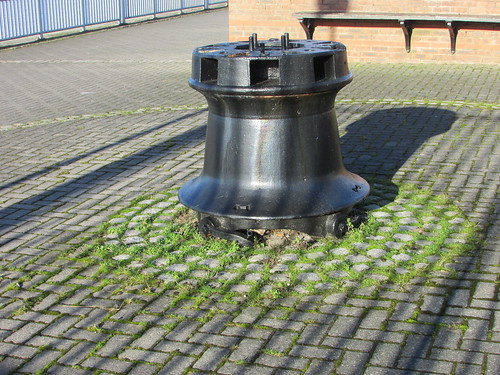
Liverpool - Capstan at former Toxteth Dock.
The 1909 plan below shows the continuation of my walk.
Plan of Queens to Toxteth Docks
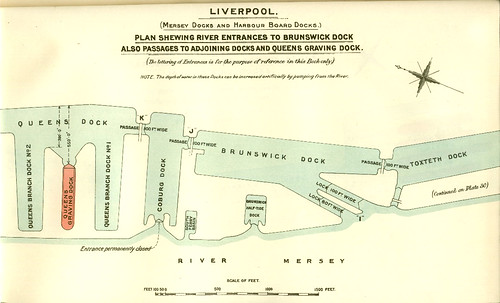
Liverpool Docks Admiralty Maps, 1909, Plate 29 (Source: Wikimedia Commons).
Click here for a larger view.
I then had views of the Cammell Laird shipyard on the Birkenhead side. At a landing stage near the massive shipbuilding hall, two small craft were moored. They were 'Njord Forset' and 'Njord Odin', both 21m multi-purpose crew transfer vessels for the offshore windfarm industry, operated by Njord Offshore Ltd. There is more information on these vessels here.
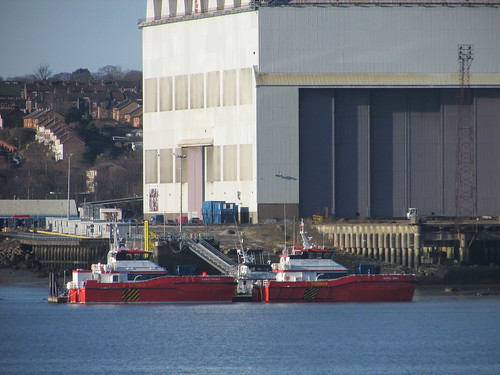
Liverpool: 'Njord Forseti' and 'Njord Odin' moored near the Cammell Laird Shipbuilding Hall.
The locks for Brunswick Dock were the next feature on my walk.
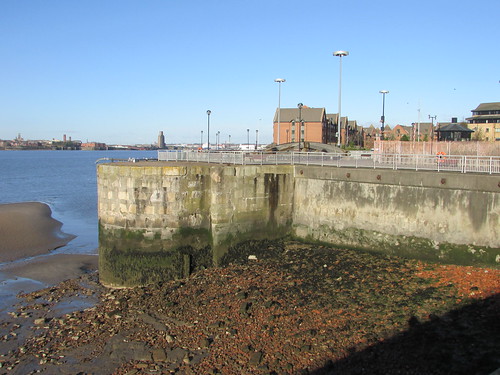
Liverpool: Entrance to Brunswick Dock looking towards housing at Clippers Quay with Birkenhead in the left background.
There were two parallel locks which entered the river diagonally. The larger lock to my right was 100 feet wide but has been filled-in. The second lock, originally 80 feet wide, has been retained and modernised allowing Brunswick Dock and the adjacent Coburg Dock to be used as marinas for pleasure craft.
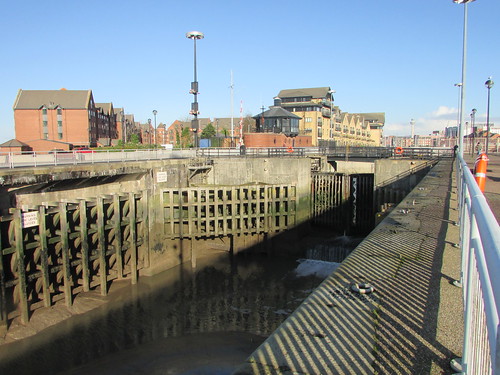
Liverpool: The 80-foot lock chamber at Brunswick Dock, adapted to provide a smaller, working lock for modern pleasure craft.
Whilst most Docks were connected to the river via locks with two sets of lock gates allowing vessels to enter and leave at any state of the tide, the small Brunswick Half-Tide Dock (as hinted by the name) had only one set of wooden lock gates, still in place but not in use.
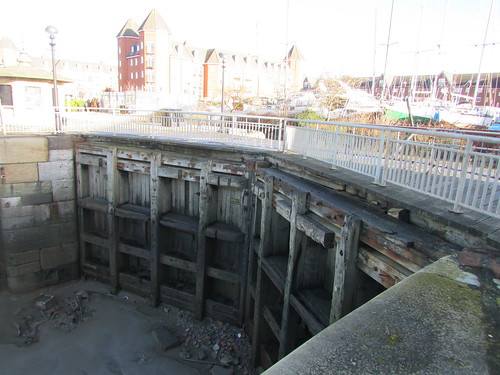
Liverpool: Wooden Lock Gates at Brunswick Half Tide Dock.
The dock itself has been filled and surfaced and now serves as an out-of-the-water storage area for pleasure craft. The remaining walls facing the river, the two Lock-Keeper's Offices and the windlasses to work the gates and sluices give an impression of the meticulous attention to detail of Jesse Hartley, who was the Dock Engineer from 1824 to 1860. There's a little more about this remarkable man in the post Notes on Liverpool and its Docks.
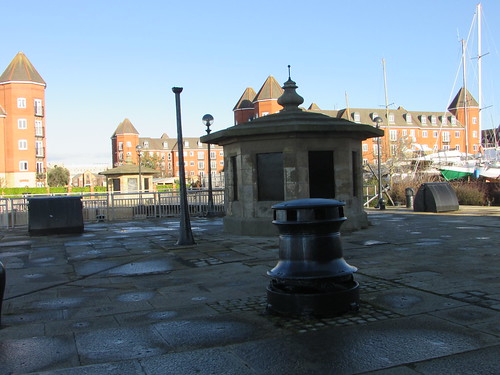
Liverpool: Two Lock-Keeper's Offices at Brunswick Half Tide Dock.
Beyond Brunswick Half Tide Dock, the curved river wall with a set of stone steps gave testimony to the quality and endurance of the works carried out by Jesse Hartley.

Liverpool: Jesse Hartley's stonework near Brunswick Half Tide Dock.
I then came to a small tidal dock - South Ferry Basin. Once the river teemed with ferries linking both sides of the River Mersey, now a single Mersey Ferry operates a triangular route Pierhead - Seacombe - Birkenhead Woodside and the South Ferry Basin is long out of use and silted-up.
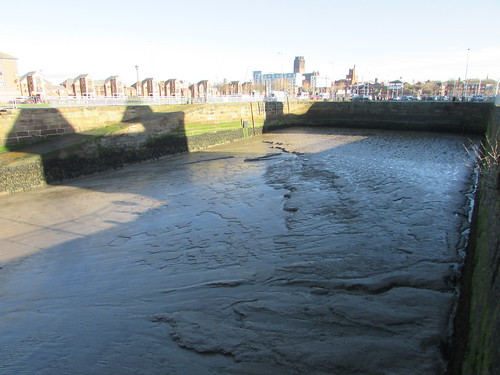
Liverpool: South Ferry Basin.
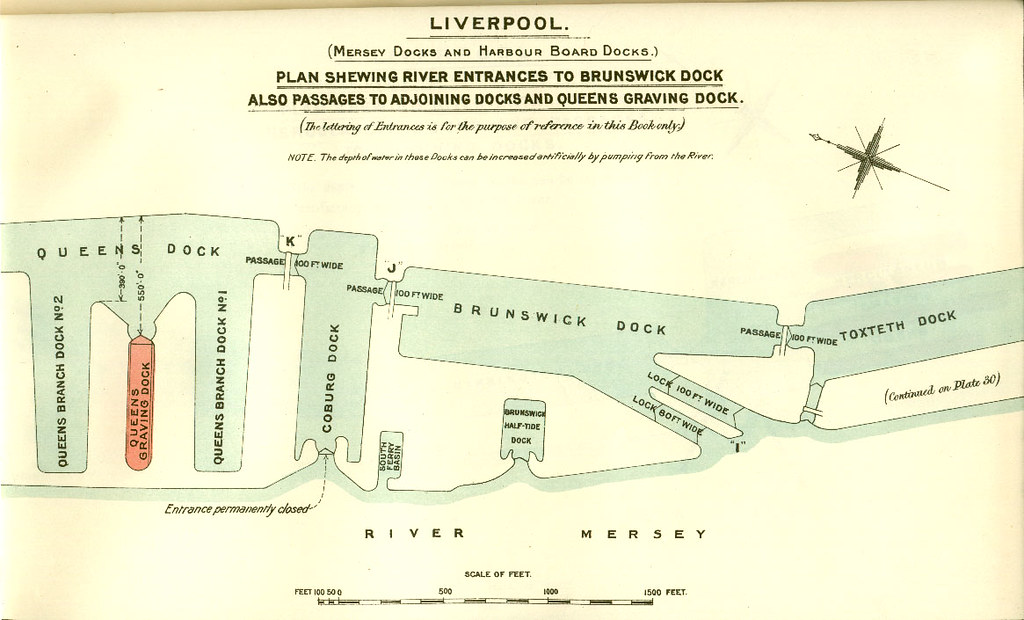
Coburg Dock came next. Originally, this dock had a single set of gates leading to the river, like Brunswick Half Tide Dock. But the 1909 plan shows this entrance permanently closed because a 100-foot wide passage linked Coburg Dock to Brunswick Dock from where 80-foot wide and 100-foot wide locks offered non-tidal connection to the river. Coburg Dock, still linked to Brunswick Dock, now forms part of Liverpool Marina. A launch area and slipway has been constructed at the river end of the dock.
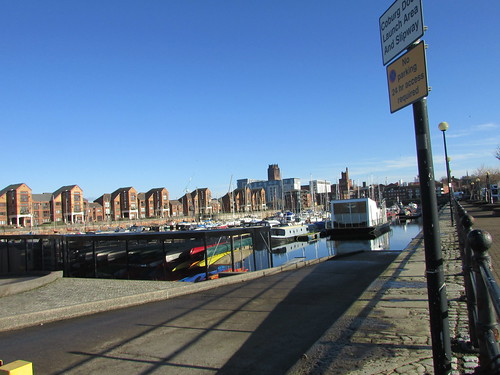
Liverpool: Coburg Dock, showing launch area and slipway.
The footpath was now joined by a road called Kings Parade which has a bus service. I passed the end of Queens Branch Dock No. 1 which has received a new role as the home of Liverpool Watersport Centre (LWC). The Centre is one of the initiatives run by a local charity called Local Solutions, with support from the European Social Fund.

Liverpool: 'wakeboarding' at the Liverpool Watersport Centre in Queens Dock.
Never having heard of 'wakeboarding', I was puzzled by a series of what looked like waterski jumps and two overhead cable systems installed in the end of dock nearest me and. Two young people started performing which clarified the activity. The wakeboard is a short, modified single waterski. The cable system replaces a speedboat. The user attaches to the cable system which drags the performer in one direction before reversing and dragging them back. The user performs a '180 degree' turn at each end of the course and attempts waterski jumps along the course. The System 2.0 Wake Park site here lists 27 'Wake Parks' in the U.K. - the Liverpool Wake Park has a site here and British Water Ski & Wakeboard is the sport's governing body and membership organisation.
The expedition was becoming a little surreal, not helped by the fate of the next dock - Queens Graving Dock. Fashionable apartments called The Keel comprised one block on either side of the flooded dock and two shorter blocks bridge-like across the dock, forming a rectangle. I was now in a thoroughly modern environment passing, in turn, the three modern venues along Kings Parade, Exhibition Centre Liverpool, BT Convention Centre, ECHO Arena. All three are run as an integrated events centre by ACC Liverpool, who have an introductory video with 'drone footage' here. The Exhibition Centre is the most recent addition with a website here. The Pullman Hotel is integrated into this building.
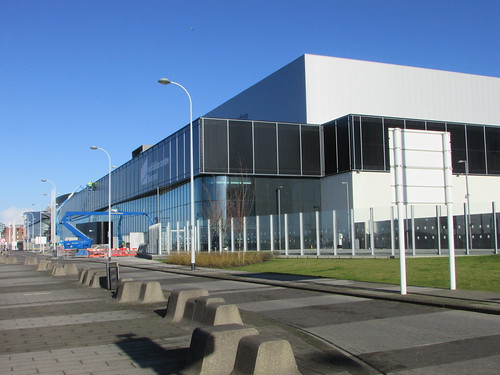
Exhibition Centre Liverpool, Kings Parade.
Then I hurried past the Convention Centre and ECHO Arena towards the Albert Dock and the Waterfront area, concluding my first exploration to Liverpool's former South Docks.
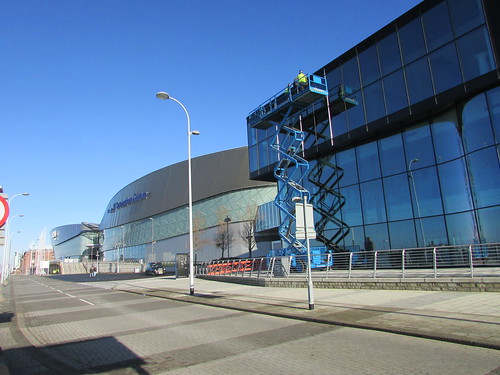
Kings Parade, Liverpool: (L-R) ECHO Arena, BT Convention Centre, Exhibition Centre Liverpool.
Related posts on other sites
Ship AIS (live map showing ships in Liverpool).
Related posts on this site
I've written about Liverpool many times. Most are referenced in the post Liverpool (again).
My Pictures
Where necessary, clicking on an image above will display an 'uncropped' view or, alternately, all the pictures from this and earlier trips may be selected, viewed or downloaded, in various sizes, from the albums listed:-
Liverpool South Docks
Liverpool area rail
Liverpool.
A correspondent enquired about the correct positions for lamps on model locomotives. The answer is "It all depends", particularly on the railway owning the locomotive and the period. I'm mainly familiar with the London Midland region after Nationalisation so I've made reference to a number of articles on other websites which describe different periods and different railways. There's a brief introduction to lamps displayed on trains in the steam era in the post MIC - Lamps.
Tail lamps
The post The Railway at Night mentions the use of a red tail lamp as a 'last line of defence' in preventing collisions and that technique remains in use on today's railways.
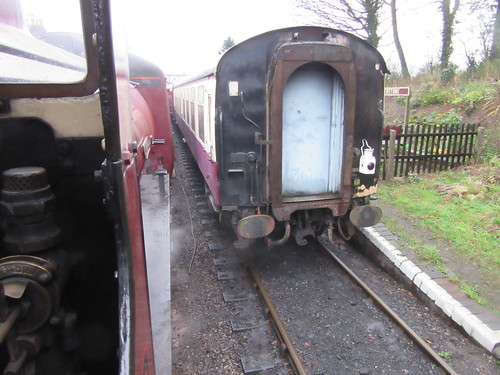 British Railways coach with two tail lamp brackets mounted on the corridor connection (either could be used), high up on the left, lower on the right, with a lamp. On other designs, the brackets may be mounted on the end wall of the coach.
Goods trains presented an increased hazard. They tended to be slower and could readily become stalled on gradients or stop at stations to attach or detach wagons. They generally were 'loose coupled', without continuous brakes so the only brake effort was on the locomotive, supplemented by a handbrake in the Guard's Brake Van which was the last vehicle in the train. To mitigate these risks, in addition to a tail lamp, side lights were carried (as described in MIC - Lamps).

LMS 20-ton brake van No. 747 at Peak Rail. This vehicle has two tail lamp brackets on the end wall (either could be used) and side lamp brackets mounted high up on each corner post.
When locomotives carried a tail lamp (running light engine or 'banking') it was commonly carried above either rear buffer.
Sometimes additional tail lamps were carried which usually indicated that an additional train was following or that the train included one or more 'Slip Coach' to be detached on the journey without stopping the main train.
Head lamps
As the railway system became more complex, the need for signalmen and others to correctly identify an approaching train, so that it could be dealt with appropriately, became important.
Headcode indicating class of train
Different headcodes indicated the type of train, for instance express, stopping passenger, through freight, pick-up freight. On many British Railways, the use of four lamp positions on the front of locomotives was adopted: one adjacent to the chimney, one above each front buffer and one in the centre of the buffer beam. These positions were usually replicated at the rear for when the locomotive was working tender- or bunker-first. In most cases, different combinations of up to three lamps would give sufficient indication of the type of train. The appropriate code was carried by day and by night and at night or in conditions of poor visibility (fog or falling snow) the lamps were to be lit.
Different railways used locomotive lamps of various patterns. For instance, the London & North Western Railway (LNWR) originally used lamps which 'plugged' into a substantial cast socket. That design gave way to the simpler flat bar type of 'lamp iron' (although lamps for other purposes on the LNWR, like Gate Lamps, continued to use the cast socket approach which gave accurate alignment). Most railways used lamp irons with the broad flat facing forward but the Great Western fitted them with the broad flat facing sideways, requiring a different pattern of lamp (see MIC - Lamps). I remember in the late 1950s, when ex-LMS '8F' locomotives were transferred to ex-GWR Stourbridge shed, the lamp irons had to be changed to match the lamps in use at the shed! [this is mentioned in note (13) of article Traffic Movements at Sedgeley Junction 1962-1963 (Part 16)]].
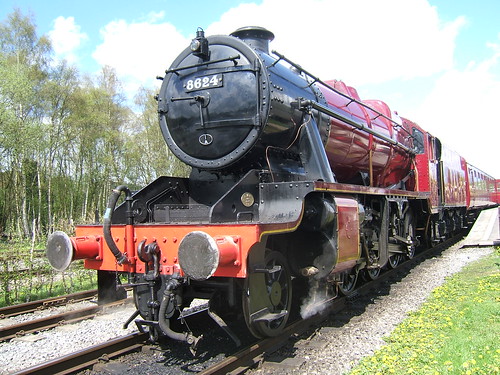
8624, a preserved Stanier '8F' (in the wrong livery) at Rowsley, with four LMS-pattern lamp irons, carrying one LMS-pattern oil lamp (painted black) in front of the chimney ('Ordinary Passenger Train').
Although there were (until Nationalisation) many independent railways, the need to apportion passenger and freight receipts fairly on journeys between different railways gave rise to the creation of the Railway Clearing House (RCH) in 1842 which was modelled on the existing Bankers' Clearing House system. This led to a limited amount of co-operation on non-commercial matters and one result was that a number of railways used the same headcodes. Exceptions abounded, particularly on lines jointly owned by two or more companies. Some lines used discs, rather than lamps, by day.
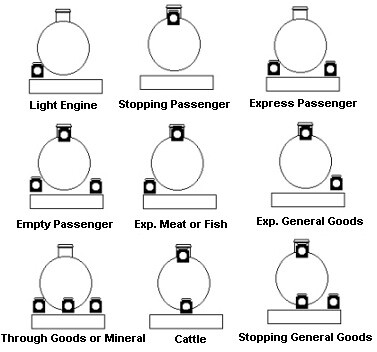
Early RCH Headcodes (from the useful Goods & Not So Goods site).
Some of the above RCH headcodes required three lamps so, following the Railways Act of 1921 which combined the railways into four Groups, a simplified set of headcodes was agreed. Each class of train was associated with a letter so an express became a 'Class A'.
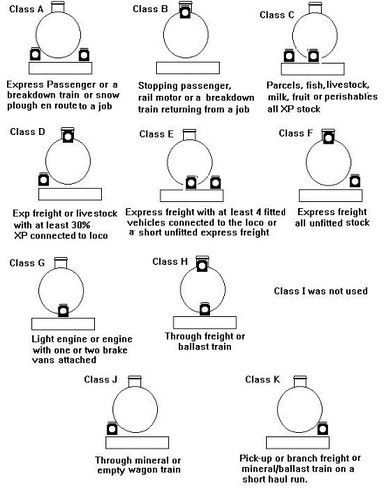
Later RCH Headcodes (from the useful Goods & Not So Goods site).
Headcode indicating route of train
On complex (particularly suburban) networks, the indication of 'Class' of a train gave insufficient guidance to signalmen and so headcodes were used to indicate the 'Route' of the train. This could involve additional positions for lamps - the Great Eastern Railway (GER) and London Brighton & South Coast Railway (LBSCR) used six positions. The Caledonian Railway supplemented the lamp indications with a small Semaphore route indicator carried in front of the chimney [see O.S. Nock's 'The Caledonian Railway' (Ian Allan 1961) pp 184-185]. Forms of route indication by disc or lamp survived until the end of steam on British Rail. By this time, the use of '4-character headcodes' had been introduced which I hope to cover in another article.
Use of Electricity
All the lamps discussed so far have been oil lamps but Britain made some use of electricity. British Railways introduced the battery-operated flashing red tail lamp ('flasher') still in use. Some steam locomotives were provided with electric head- and tail-lamps, as described in the post Electrical Systems on Steam Locomotives.

'Mayflower' being prepared for service at Shackerstone, showing the electric headlamps fitted to this locomotive, plus an LNER-pattern oil lamp (painted white) in the 'Light Engine' position.
A Historical Curiosity
In Richard Blythe's 1951 book ‘Danger Ahead’, I found a copy of an 'announcement', in 1845, by Thomas Forsyth regarding his patented system of white lights to be carried on locomotives to identify the type of train, together with a system of light (rather than semaphore) fixed signals. I don't believe his ideas met with great commercial success, but he was clearly thinking in the right direction. The 'light signal' in the picture looks remarkably modern but I don't know how Forsyth intended to achieve the 'searchlight effect' depicted by the artist with the available technology.
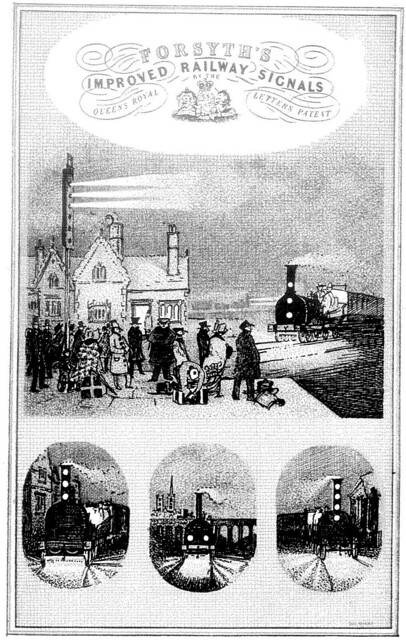
1845 advertisement for Thomas Forsyth's patented system.
Related articles on this web site
The Railway at Night.
MIC - Lamps.
Electrical Systems on Steam Locomotives
Recommended articles on other web sites
Train reporting number (Wikipedia).
Bell Codes & Locomotive Head Codes (The 'goods and no so goods' site).
TRAIN HEADCODES AND BELL SIGNALS (Western Region & GWR).
GWR headcodes (The extensive 'WarwickshireRailways.com site).
GER headcodes part 1 (The large Great Eastern Railway Society site).
GER headcodes part 2 (The large Great Eastern Railway Society site).
Steam Era Headcodes (The amazing Southern E-Group site).
Following a meeting in London on 27th January 2017, I stayed with my friend Rita in Croydon. On Saturday, 28th January 2017, we decided to visit 'The View From The Shard'.
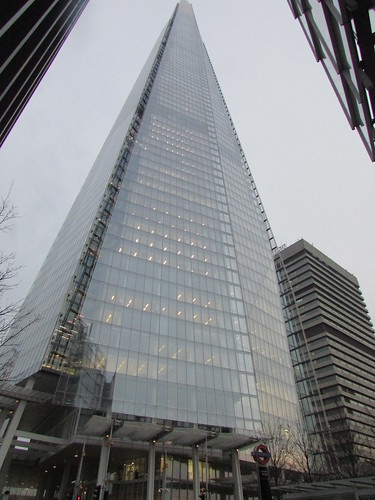
The Shard.
The Shard, situated in the London Bridge area of London is the tallest building in the United Kingdom at 1,016 feet. It was designed by Italian architect Renzo Piano and opened in 2012. The building has its own website at The Shard.
There's a Wikipedia article on the building here. I discovered that there's another version of Wikipedia called The Simple English Wikipedia with versions of the main articles better suited to students or people coming to grips with the complexities of the English Language. The Simple English article on The Shard is here. I found both versions very informative.
'The View From the Shard' is a tourist attraction offering "London's highest viewing platform". This attraction has its own official website here.
The Southern railway franchise was running a reasonable service from Croydon to London Bridge that day and a few minutes walk took Rita and I to 'The View From The Shard' and the ticket counter. There were plenty of visitors around but we only had a few minutes wait before we passed through the airport-style security installation and joined a short queue for the first of two lifts.

About to enter the first lift. The wall graphic shows how two lifts (elevators) are used to take visitors to the main viewing gallery.
A high-speed lift takes visitors to level 33, then a second lift ascends to level 68 where stairs lead to the main viewing gallery on level 69 (a lift is available when required).
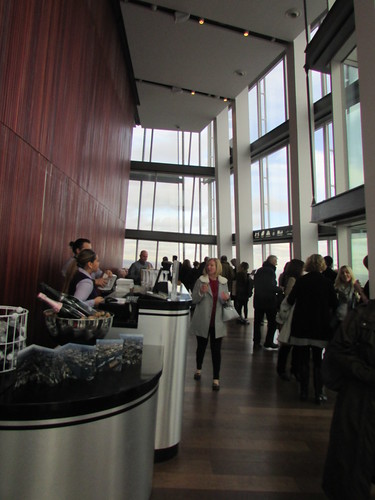
The View From The Shard: Main Viewing Deck.
Further stairs lead to the Open-Air Deck, level 72. Like the main viewing gallery, the area is surrounded by fully-glazed walls but it was distinctly cooler so I presume the tall space rising to the top of the building was vented to the outside.
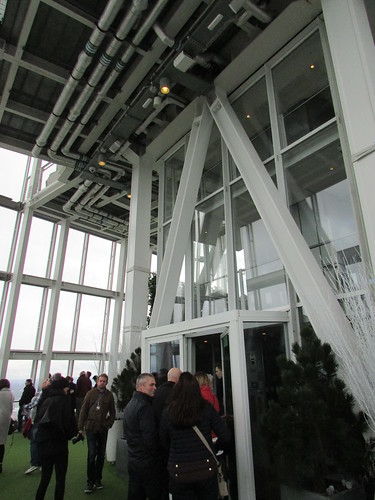
The View From The Shard: Open-Air Viewing Deck.
Both viewing levels had simple refreshment facilities and there was a souvenir shop before descending to the entrance where there's another, larger shop. We were able to stay aloft as long as we wished and all the staff were unfailingly courteous. Visitors were free to take their own photographs but photographic souvenirs could also be purchased. The attraction certainly offered a unique view of London.
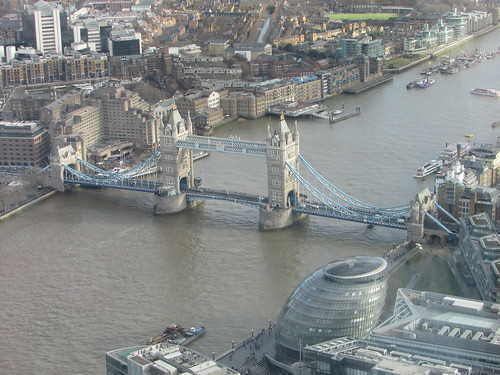
Tower Bridge.
It was only after my visit I remembered my visit to the Skybridge on floor 41 of the Petronas Twin Towers in Kuala Lumpur back in 2010. There's a very brief description here with links to my photograph albums. Both visits were very enjoyable.
Videos by Pink Banana Studios.
The Shard Occupier Film - 2016 (building tenants describe their experiences).
Renzo Piano explains the concept.
My pictures
Where necessary, clicking on an image above will display an 'uncropped' view or, alternately, my pictures may be selected, viewed or downloaded, in various sizes, from the album listed:-
London: The View From The Shard.