Monday, 24 October 2016

Return to Manchester

I was a regular visitor to Manchester for many years after I became a working volunteer at the Museum of Science and Industry in 1988. However, after my volunteering stopped around 2014, my visits to the city became infrequent. An invitation to the unveiling of a commemorative plaque in honour of the Friends of the Museum on 19th October 2016 offered a good reason to return to the city, and look at a little of the railway system. Of course, I chose to travel by train.

My journey on Wednesday, 19th October 2016

The direct service from Wolverhampton to Manchester is currently operated by Cross Country, using 'Voyagers'. The whole of my journey would be 'under the wires' but using diesel traction. The 09:15 from Wolverhampton was a 4-car set and we made good time to Stafford, where we stood for 5 minutes. The new Norton Bridge Flyover came into use on 29-Mar-2016, so we were routed via the Slow Line (now upgraded for 100 m.p.h. running) to Norton Bridge where we diverged to the left onto the new Down Manchester, rising at 1 in 125, before crossing over the four lines of the West Coast Main Line and rejoining the 'old' line to Stone.
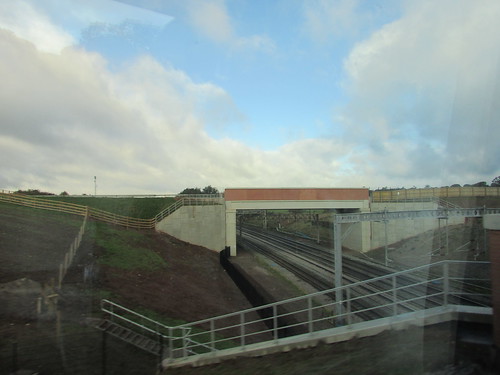

View of WMCL from Down Manchester train.


Revised layout at Norton Bridge (Rail Engineer).
[Click on image for larger view]


We made a very slow approach to Stone, finally coming to a stand at signal SOT 411, part way along the curving platform, watched by passengers waiting for a following stopping train. After a few minutes, a Virgin 'Pendolino' scurried past on the Down Line from Colwich and our signal cleared. By the time we had reached the next signal, it was already 'green' and we had a succession of 'green' aspects until we approached Stoke and passed the former Marcroft Engineering, now Axiom Rail and a DB Schenker company. We came to a dead stand just outside the station before being admitted to the platform and, by the time we'd completed station duties and set off, we were about five minutes 'down'. Our next station stop was Macclesfield, where a crowd of passengers joined the train. We'd not recovered any of our lost time when we approached Bramhall and we were once again stopped by an adverse signal.

I always think the design of the signal heads on the Manchester South scheme rather odd. They are the usual modern 4-aspect types using Light Emitting Diodes projected through two 'lenses' but provided with a shaped hood which includes a rectangular tab hanging down inside. I assume the tab is to prevent low sun reflecting off the lens. I believe the signals were supplied by Ansaldo.


Bramhall: Signal MS 385 (sorry about the reflections from the brightly-lit coach interior).

In a while, the signal cleared and we continued at a modest pace to Cheadle Hulme, where we were once again stopped by signal MS 391 sited towards the end of the sharply-curved platform. Presently, we continued to our stop at Stockport, arriving over ten minutes late. We had no further delays on the short journey to Piccadilly. I can't recall an earlier trip from Wolverhampton to Manchester which suffered four signal stops, but on our arrival the Guard only made the usual non-committal comment over the public address regretting our late running and no explanation was offered.

Around Manchester

With a little under three hours before I needed to be at the Museum, I'd decided to make a quick trip to Rochdale to see how the railways had changed. This involved a train from Manchester Victoria so I descended to the Undercroft at Piccadilly which houses the Metrolink tram station. In 2013, I'd seen some of the non-public areas of the Undercroft during a fascinating visit to the Piccadilly Signalling Control Centre, described here (with links to pictures).

I purchased a 'Train and Tram Daysaver' ticket from one of the Ticket Machines on the platform to cover my explorations. Since I first travelled on Metrolink, the network has expanded remarkably - there's a System Map here. My tram was the third to arrive and I sat near the front as we rumbled through the streets, pausing briefly at Piccadilly Gardens, Market Street and Shudehill before arriving at Manchester Victoria.

Victoria tram and train station had changed out of recognition since my earlier visit on 12th March 2013. The station was remodelled in the 1990s when Metrolink took over the former electrified railway line to Bury, and a two-platform tram station huddled under the old train sheds, adjacent to the remaining British Rail terminal platforms. The tram station now has three, improved platforms and, just outside the station, there's a junction leading to a temporary new terminus at Exchange Square. This is part of the Second City Crossing project (inevitably abbreviated to '2CC') which, in the future, will continue to a junction with the existing route at St. Peter's Square.
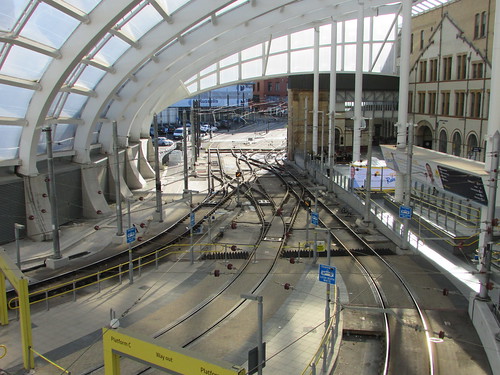

Manchester Victoria Tram Station looking towards Piccadilly Gardens. The new '2CC' route can be seen diverging to the right.

The enlarged tram station formed part of a 44 million pound station upgrade, completed in October 2015, of which 20 million pounds was spent on a modern, airy overall roof, clad in some sort of semi-transparent fabric, covering the Tram Station, the Terminal Platforms and the Concourse area. The old train sheds have been removed (although the outline of the gables can still be seen on the wall of the main station building facing the platforms) to make way for the modern roof. I noticed a worker (in hard hat and orange High Visibility overalls) walking across the outside of the new roof but the significance of this wasn't apparent until I later discovered that, following a rainstorm on the afternoon prior to my visit, several roof panels above platforms 1 and 2 had fallen to the ground, soaking numerous people with rainwater and injuring two. That discovery rather limited my admiration for the improvements but I suppose all this investment in roofs which cannot withstand normal English weather is to be expected in a country which so mismanages its capital projects.

The following two pictures show the stone facade of the road elevation of the 1909 station building and the rear elevation of the same building with the new roof.
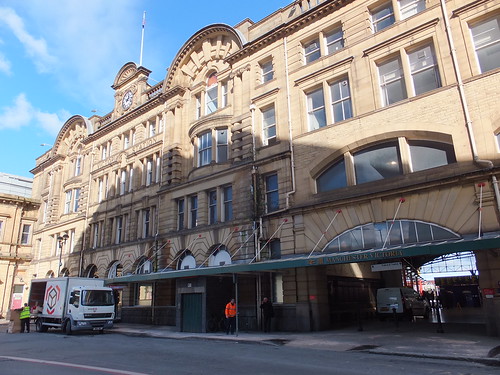

Manchester Victoria's elegant facade by William Dawes, provided for the station extension of 1909, viewed in 2013.
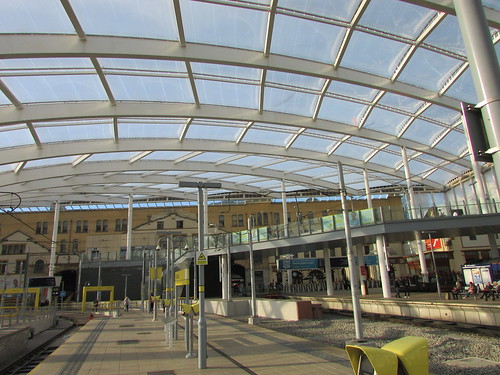

Manchester Victoria: Platform elevation of the 1909 station building, showing the new roof viewed from the Metrolink platforms in 2016. The elevated walkway leads to the Manchester Arena.

The following two pictures show part of the concourse area before and after the traditional glazed roof was replaced by the new roof.
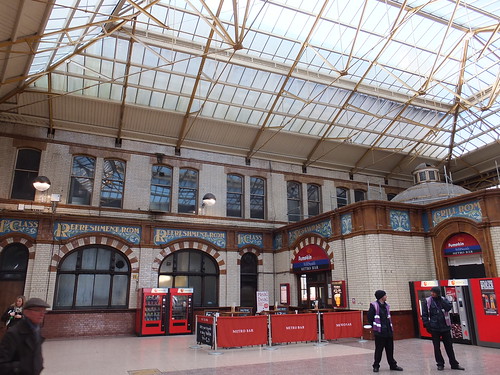

Manchester Victoria concourse area in 2013, showing the traditional glazed roof.


A similar view (taken from the elevated walkway to the Manchester Arena) after construction of the new roof.

Politicians are now fond of calling Lancashire and Yorkshire "The Northern Powerhouse", so I went to platform 1, eager to see what type of train was deemed suitable for the Leeds service, running non-stop to Rochdale - it was a 2-car Class 142 'Pacer'. I'm not a fan of diesel railcars built of bus parts but we lolloped along (as 4-wheel long-wheelbase vehicles do) gamely enough, making noisy progress at full throttle with the folding power doors (and everything else) rattling and the wind howling under the doors, arriving at Rochdale right time.

I knew that the station had been completely rebuilt and that Rochdale can also be reached by Metrolink tram, but, after a quick look at the modernised streetscene outside the station, I decided to defer exploration of the town centre until a later visit and return to Manchester Victoria. However, I was struck by the foreign appearance of the Church of St John the Baptist built in 1927 in Byzantine Revival style and listed Grade II*.


View outside Rochdale railway station. The domed building is St John the Baptist Roman Catholic church.

Waiting for the return service, I could just make out evidence of the platforms of the earlier, larger station. The new station is a simple island with a bay which I presume once serviced the Oldham branch, now part of the 'Metrolink' network. However, there's a new bay at the Manchester end which hasn't yet been brought into service. As recently as 2013, there was a signalbox called 'Rochdale West' (code 'TH') but the modern 4-aspect colour light signal I could see was numbered 'TH 7300', suggesting that control has been transferred to the Rail Operating Centre at Ashburys.


Rochdale. View from end of Up platform looking towards Manchester, with the new bay platform on the right.

The train back was a well-patronised Class 158 but the return journey took a little longer as we made stops at Castleton, Mills Hill and Moston. I look a few more pictures at Victoria, as 66 708 hustled a freight westbound through platform 4. In addition to the terminal platforms 1 and 2, there remain four bi-directional through platforms. Platforms 3 and 4 have some daylight above, but platforms 5 and 6 are buried beneath the massive bulk of the Manchester Arena. To look at the 'western approaches' to Victoria, I headed towards a diesel multiple unit forming the 12:10 to Wigan Wallgate standing in platform 3, which took off before I reached it.
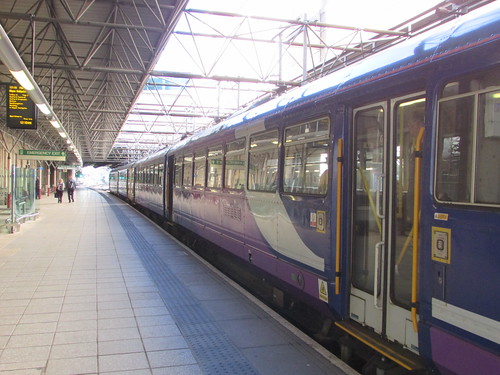

Manchester Victoria: The 12:10 for Wigan Wallgate leaving platform 3.

However, I caught the 12:14 off platform 4 for Kirkby, via Wigan Wallgate. The four lines to Deal Street Junction now have Overhead Line Equipment and the junctions appeared to have been further simplified.
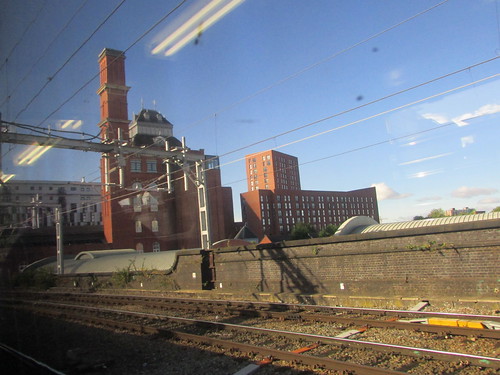

Manchester area rail: Approaching Deal Street Junction, with the former Threlfall's Cook Street Brewery (now Deva City Office Park) in the background.

We made a quick stop at Salford Central, overdue to be electrified as part of the electrification to Blackpool, then continued past the Hope Street Cement Discharge Sidings on our left to Salford Crescent where the line from Ordsall Lane Junction trailed in, also on our left. We made our second stop at Salford Crescent, where I got off on the single island platform to watch my train disappear on the Atherton Line, heading for Kirkby. I was reminded of the trip I made along the Kirkby Line on 9-Aug-2014, described here.
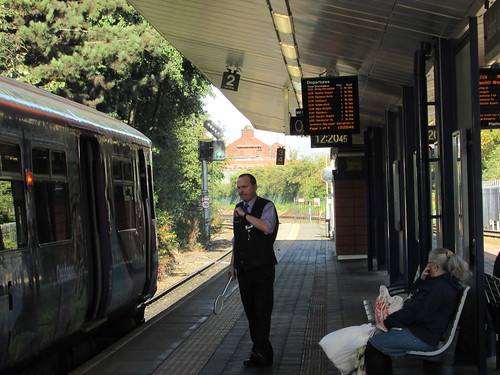

Salford Crescent, with 12:21 to Kirkby about to leave platform 2. Signal MP 405 is showing 'green' with a 'white feather' for the Atherton line diverging to the left, to which a 30 m.p.h. limit applies, as shown by the reflective sign and arrow on the signal post.

I'd originally intended to re-trace my route back to Manchester Victoria but I discovered that in 5 minutes there was a Manchester Airport service stopping at Deansgate which was a simpler option. Leaving Salford Crescent, we took the right-hand route, leading to Ordsall Lane Junction where we crossed the original Liverpool and Manchester line (now called the Chat Moss line). As we continued to Castlefield Junction, on the left I could see the elaborate civil engineering works involved in the construction of the new Ordsall Chord with the Museum of Science and Industry in the background.
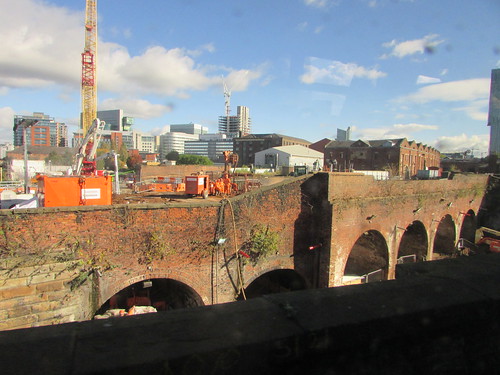

Approaching Deansgate from Salford Crescent. The 1830 Warehouse at the Museum of Science and Industry is visible in the background.

From Deansgate station, I walked to the Museum.

The Journey Home

After the 'unveiling' at the Museum, I walked back to Deansgate station but, with no train to Piccadilly for over half an hour, I took the pedestrian walkway across Whitworth Street to reach Deansgate-Castlefield Metrolink station, which I remembered with two staggered platforms. This station had also been rebuilt since my last visit, now having three platforms and pointwork allowing arrivals from either direction to 'turnback'. In fact, one tram from Cornbook direction did just that in the few minutes I waited for a Piccadilly service.
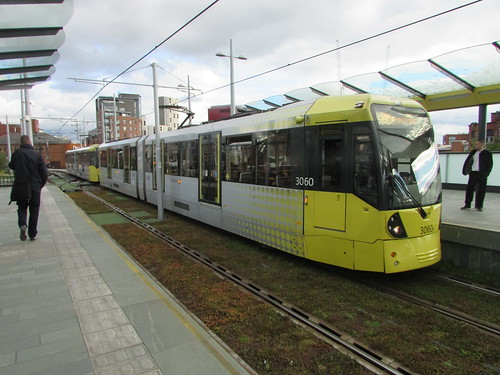

Deansgate-Castlefield with a 'double' unit arriving from St. Peter's Square direction.

On arrival at Piccadilly, I discovered I just had time to jump on the 15:27 Cross Country 'Voyager' to Bournemouth via Wolverhampton. We made our first station stop at Stockport and then were stopped by signals at Edgeley Junction No. 1. The signal cleared after a diesel multiple unit growled past on the down, so I suspect they'd crossed the diesel in front of us from the Buxton Line. But I've no idea why we were stopped again before the junction at Cheadle Hulme. Once under way again we had no further signal delays and, after our booked stops at Macclesfield, Stoke-on-Trent and Stafford, we arrived at Wolverhampton about 'right time', allowing me to catch the last bus home. After recent timetable changes, this is now at the ridiculously early time of 17:10!

Origins of the railways around Manchester

The tangle of railways which developed around Manchester, many of which are still in use, is perhaps better understood by looking at the pre-grouping map below.

I'd arrived that morning at Piccadilly (originally London Road) on what was the London & North Western Railway. The Metrolink network is, of course, modern. My trip to Rochdale and Salford Crescent were on the Lancashire & Yorkshire Railway, which merged with the London & North Western Railway shortly before the grouping. My journey from Salford Crescent to Ordsall Lane Junction and on to Deansgate (originally Knott Mill & Deansgate) only became possible in 1991 with the opening of the Windsor Link and a new interchange station at Salford Crescent.
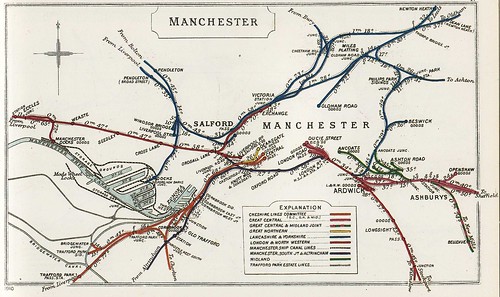

Railway Clearing House Map of Pre-Grouping Railways around Manchester dated 1910, showing London & North Western lines in red, Lancashire & Yorkshire lines in blue.
Click for other sizes or to download


Related posts on other websites

Improvingements Stafford - Crewe (Network Rail).
Norton Bridge rail flyover opens.
Easing the Flow (Rail Engineer).
Manchester Victoria station (Wikipedia).
Manchester Victoria (MCV) (National Rail).


Related posts in this blog

By Rail to Manchester.
Manchester Piccadilly Station - Behind the Scenes.

My pictures

Stafford Area rail.
Stoke Area Rail.
Manchester Area Rail.
Manchester Metrolink.

Sunday, 16 October 2016

L. & N.W.R. Signal box architecture and features

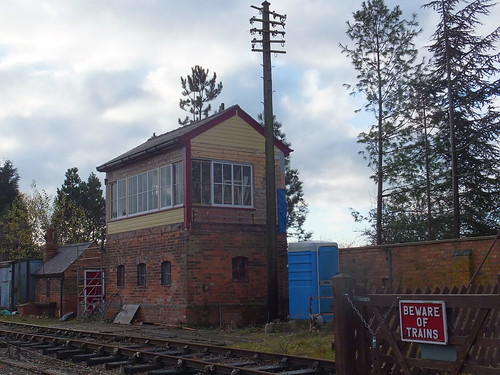
LNWR 'composite' signal box at Market Bosworth, under restoration in 2013.

In the post Visiting Signalboxes I described the start of my interest in railway signalling.

In my post The London and North Western Railway, I mentioned the signals and signal boxes introduced by the prolific designer Francis William Webb for the LNWR. There's a little about signals in the post L&NWR Signalling and the 'Bedstead'.

The Building

In the early days of railway signalling, safety was largely dependent upon what the signalman could see, so signal boxes normally had an elevated operating floor to improve the signalman's view of the lines he controlled. The operating floor was usually generously provided with windows, producing a 'greenhouse' appearance. Some of these windows were arranged to open so that the signalman had an unimpaired view. Some railways used one of the railway signalling contractors to supply signal boxes and signalling equipment, others carried out the work 'in-house'.

The LNWR originally used outside contractors but Webb believed that manufacturing in-house led to highest quality and lowest cost to the railway so distinctive LNWR signal box designs were produced, assembled from common parts. The upper operating floor and roof were timber-framed, the lower section (usually termed the 'locking room') could be either wooden or brick, depending upon the site. Where a brick lower section was provided, the height could vary according to the site. For more details, refer to Richard Foster's excellent book [reference 1].

The LNWR was uncharacteristically generous in the provision of opening casements on the operating floor. These were arranged to slide on a rather crude metal rail and, when closed, a thumbscrew with a square thread form was provided to secure the casement closed. But usually, even when closed, windows were a source of draught, as were the slots to allow the levers to be moved. In my post Life in the Signal Box, there's a section titled Heating Signalboxes which deals with this. Needless to say, the LNWR also produced its own cast iron stoves for use in signalboxes in-house.

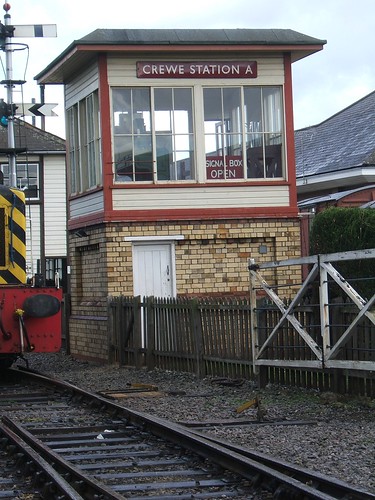
Crewe Heritage Centre is home to the preserved Crewe Station 'A' Box. There's more about the LNWR signal boxes at Crewe in the post Crewe Station Signal Boxes. Although this example is a little unusual (having a flat-roof because it was situated beneath the All-over roofing of the station, had an electric rather than mechanical frame of the 'Crewe' All Electric pattern and with a non-standard brick base to match the brickwork of the station itself), it still uses elements common to most LNWR boxes.


Crewe Station 'A' Signal Box, as preserved at Crewe Heritage Centre.

Security of Signalboxes

Signal box security remained very simple back at least up to the 1960s. LNWR boxes had a very simple door handle and latch made from a few standard castings which incorporated a screw-down 'lock' requiring only a simple forked key which was common to all boxes. It was so crude, I made my own key out of an old poker. And yet, vandalism didn't seem a major problem then unless the box had remained 'switched out' and unattended for a length of time.

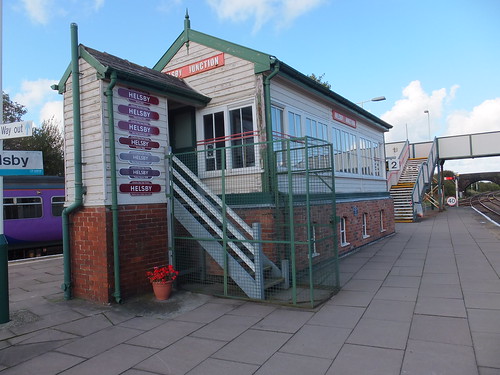
When boxes were staffed, you could just walk in but nowadays lockable 'cages' are being provided around the access steps. Helsby was the first box I'd seen with this feature but it is being introduced more widely. In my post Ellesmere Port - Helsby line, I mused that "this might be to protect the public from a particularly violent breed of signalmen but I'm sure it's actually to protect signalmen from enraged passengers ('customers'?) when they despair of getting to their destination".

Helsby modernised LNWR signal box with 'cage'.

In my post The Holyhead to Crewe Railway Line, there are (not very good) pictures I took of the signal boxes which survive between Holyhead and Crewe. Many of these are LNWR-built boxes, with varying degrees of modernisation (dual glazed UPVC windows are the most common change). The post By Rail to Manchester has a few 'snatched' pictures of LNWR boxes and there are other pictures scattered around my railway posts - I must try to collect then into an album.

Other websites

The Signal Box site has many signal box pictures, plus links to similar resources.
Signalling Record Society is an indispensible source of information.

Book references

[1] 'A Pictorial Record of L.N.W.R. Signalling' by Richard D. Foster (Oxford Publishing Company 1982) SBN: 86093 147 1.
[2] ‘A Pictorial Record of L.M.S. Signals’ by L. G. Warburton with V. R. Anderson (Oxford Publishing Company 1972) SBN 902888 09 9.
[3] ‘The Signal Box – A Pictorial History and Guide to Designs’ by the Signalling Study Group (Oxford Publishing Company 1986) ISBN 0-86093-224-9.

Saturday, 15 October 2016

Return to Blackpool and Fleetwood (part 2)

On 13th February 2016, I made a day trip to Blackpool and Fleetwood. The train journey to Blackpool didn't go quite to plan so it was about five hours between leaving home and arriving at Blackpool North station. This is described in Return to Blackpool and Fleetwood (part 1). This part continues the story.

Click on any image below for 'uncropped' view, or search 'My pictures' to view or download in various sizes.


Blackpool

The weather in Blackpool, famous for its amusement park and seasonal 'Illuminations' (sometimes called 'The Lights') was dry and sunny but there was a fairly cool wind coming off the sea. I knew I'd want to take a trip to Fleetwood on the modernised tram system so I'd taken the precaution of printing out the tram timetable. I judged that by the time I'd walked down Talbot Road to the North Pier tram stop, I'd just miss the next tram going north. However, by hustling along a little, I reached the tram stop before the tram arrived and I gratefully took a seat at the front with a view down the line ahead for the 8-mile journey.


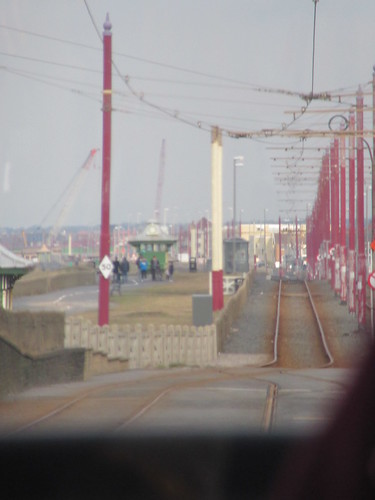
Blackpool Trams: View ahead en route to Fleetwood. The tram rumbled along Lord Street, the 'main street' but a little shabby in places. There's a large market nearby but I stayed on the tram until the last stop at 'The Ferry'.

Fleetwood's History

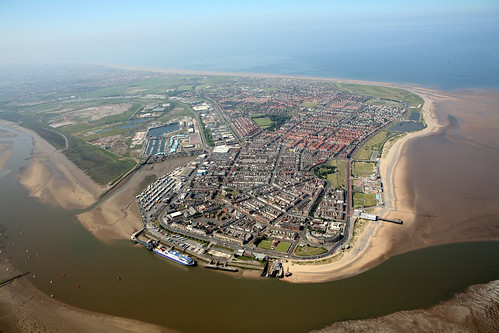
Until the 19th century, the area was fairly barren sand dunes. In 1835 the then-owner of the land, Peter Hesketh (1801-1866), later Sir Peter Hesketh-Fleetwood, decided the location could serve as both a resort and a seaport for ferries taking passengers to Scotland before the developing railway system was able to compete. The layout of the new town was arranged with a part-cartwheel plan (clearly visible in the picture below) by the architect and garden-designer Decimus Burton (1800-1881). The 'spokes' of the part-cartwheel radiated from the largest dune in the area, which was landscaped, turned into gardens and became 'The Mount'. There's a short history of 'The Mount' here and information on both the modern restoration and history of the site on the Wyre Council site here.

There's a Wikipedia article on Fleetwoodhere.


An aerial view of Fleetwood taken a few years ago (Photo:urbed.coop)
Click here for a larger view.


Fleetwood on Foot

I alighted at 'The Ferry' and walked past the futuristic-looking Radar Station operated by the Fleetwood Nautical Campus, part of Blackpool and the Fylde College. Looking seawards, the remains of the Wyre Light were visible, two miles out and, further away, the massive buildings of Heysham Nuclear Power Stations, mentioned in the post Railways around Morecambe.


Radar Station operated by Fleetwood Nautical Campus.

I walked to the Fleetwood Marine Hall and then across 'The Mount' to emerge in the town's main street, continuing to Dock Street in order to admire more of the buildings designed by Decimus Burton before relaxing with a splendid fish and chip meal at 'The Fish House'.


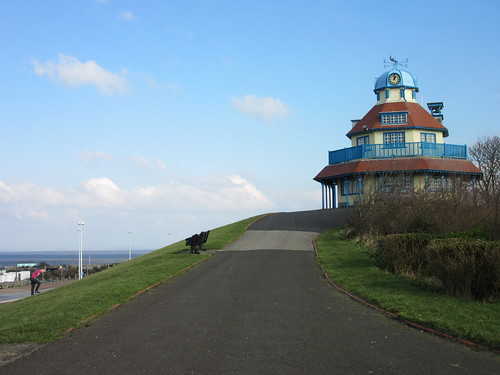
Fleetwood: Mount Pavilion.

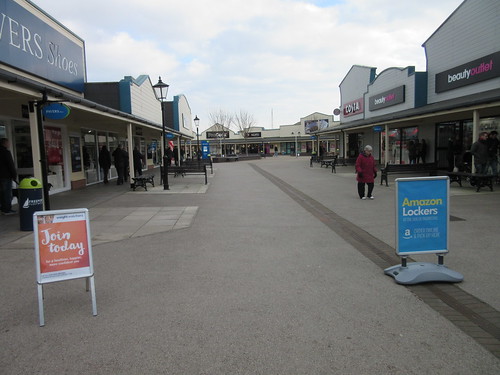
Suitably fortified by the food, I decided to carry on walking to the 'Freeport', a retail mall where the outside shopping areas are curiously reminiscent of a Wild West Town.


Freeport Fleetwood: The wooden-clad shops with canopies reminded me of a 'Wild West' town.

The 'Freeport' is adjacent to the dock area now almost wholly converted into a yacht marina. I saw one preserved ocean-going trawler which is open to the public at certain times.


Fleetwood: Former Dock now a Marina.

Saddened at the sight of the loss of a vital fishing port, I walked towards Lord Street, at an area called Fisherman's Wharf, suitably 'prettified' for tourists with displays of ship's anchors and a buoy next to the 1994 Frances Mary Lofthouse Clock. This lady was the late mother of Tony Lofthouse, the husband of Mrs. Doreen Lofthouse who is the present CEO of Fisherman's Friend. I gather there's another public clock further along Lord Street usually called the "Four-faced Liar" because of a reputation of showing different times on each of the four clock faces.


Fleetwood: 1994 clock in memory of Frances Mary Lofthouse.

The Former Railway at Fleetwood

The Preston & Wyre Railway opened in 1840, with a terminal station next to the ferry landing stage served by the nearby North Euston Hotel. Back in 1965, I visited the area when the station was still open, but threatened with closure. I made a very rough sketch of the arrangements which can be found here. Today, no trace of the railway remains.

Returning home

I caught a tram back to Blackpool and had a quick stroll in the vicinity of the North Pier, before walking to Blackpool North station and returning to Wolverhampton by train.


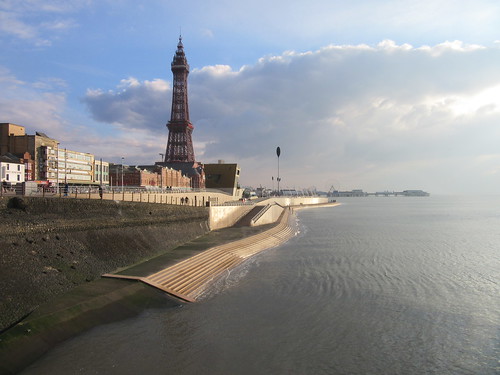
Blackpool Tower viewed from the North Pier, showing improvements to the sea wall.

Related articles in this blog

Return to Blackpool and Fleetwood (part 1).
A Trip to the Seaside (a trip to Blackpool & Fleetwood in January 2014).

My pictures

Blackpool Trams.
Blackpool and Fleetwood (the towns).

Origins of the Southern Railway: Part 4 - Pre-Grouping Approaches to London

The pattern of Pre-Grouping lines which were to form the Southern Railway was initially determined by the complex parliamentary approvals given to the early railways. The success of the railways resulted in that pattern being overlaid by a complex of suburban lines as London developed.

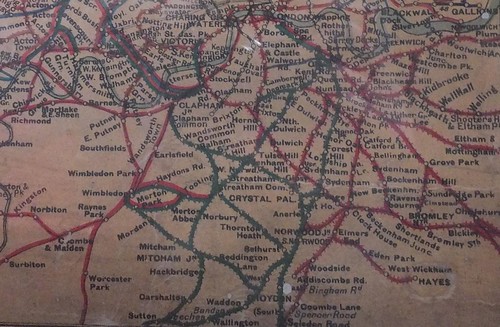
Since 1899, the London Chatham and Dover Railway and the South Eastern Railway, still retaining their separate legal identities, had operated jointly as the South Eastern and Chatham Railway (SECR) so, at the Grouping, that railway merged with the London and South Western Railway (LSWR) and the London Brighton & South Coast Railway (LBSCR). The complexity of these routes is shown on the map below.

The River Thames makes its serpentine progress across the top of the map, with the various termini close to the River on both banks - Victoria, Waterloo, Charing Cross, Cannon Street, Blackfriars and London Bridge (the last two having both terminal and through platforms).

The earliest route, the former London and Greenwich, runs initially south east from London Bridge operated by the SECR, serving their routes in north Kent. The LBSCR line branches south from the SECR within 2 miles of London Bridge to Norwood Junction. Further south, the LBSCR divides into the main 'Brighton' line through East Croydon and the line through West Croydon to Dorking and Guildford.

The LSWR runs from Waterloo south west to Clapham Junction where it divides, one fork forming the main line to Southampton, Portsmouth and the West, the other leading the Richmond and the suburbs.

The SECR line from Victoria heads south east to connect with its original route from London Bridge serving north Kent. The LBSCR line from Victoria provides interchange facilities with the LSWR at Clapham Junction before joining with the earlier 'Brighton' route just north of East Croydon. At Clapham Junction, the map also shows a short, multi-coloured branch heading north west. This is the important West London Extension Railway, jointly owned by the Great Western, London and North Western, LSWR and LBSCR.

The South Eastern Railway developed the through platforms at London Bridge, leading to the additional stations on the north bank of the Thames at Charing Cross and Cannon Street, ultimately becoming part of the SECR.

The SECR also operated Blackfriars, originally built by the London and Chatham Railway, with an onward extension through Snow Hill Tunnel to the Metropolitan Railway. Although British Railways closed Snow Hill Tunnel for a number of years, re-opened, it now forms part of the essential 'Thameslink' route.

Click here for larger image
Southern approaches to London.


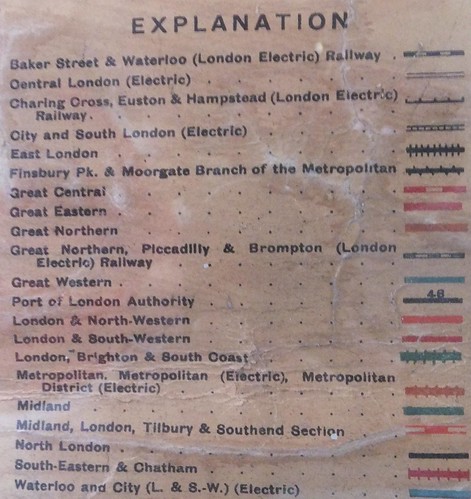
Line key for London map.


Maps
The map above is from the 'Railway Map of England & Wales', 11th Edition, published W. & A. K. Johnston.

Details of these railways today are shown in the 'Quail Track Diagrams':-
'Railway Track Diagrams Book 5: Southern and TfL' Third Edition, published by TRACKmaps (ISBN 978-0-9549866-4-3).

Related articles on this web site

Origins of the Southern Railway: Part 1 - L.S.W.R..
Origins of the Southern Railway: Part 2: L.B.S.C.R.
Origins of the Southern Railway: Part 3 - S.E.C.R..
Victoria Station, London.
Clapham Junction Station, London.
Waterloo Station, London.
Waterloo Station, London (Part 2).
The West London Line.

[Links to Clapham Jn., Waterloo and WLE added 25-Mar-2020]

Wednesday, 12 October 2016

Southern Railway (Index)

As a child growing up in the Midlands in the early days of the post-war Nationalised railway, I became familiar with both the former L.M.S. and G.W.R. lines but the former Southern Railway was very much a 'foreign railway' to me. Once I travelled on it, I was fascinated by the complexity of the network, the frequency of trains and the electric services - the 'juicers' - unknown at that time in my part of the country.

The Southern Railway had been created in 1923 by the government-directed grouping of railways into the 'Big Four' (L.M.S., G.W.R., L.N.E.R. and S.R.). The Southern Railway brought together the London Brighton and South Coast Railway, the South Eastern and Chatham Railway and the London and South Western Railway.

Upon Nationalisation in 1948, the Southern Region of British Railways absorbed the assets of the Southern Railway.

There are now a number of articles in this blog on the Southern Railway, its predecessors and successors, which are listed below.

Where a topic is split into two or more parts, links are normally provided between these parts, but note that unconnected posts may deal with a similar theme. I'm sorry if it appears confusing, but the Search Box (with the magnifying glass symbol) in the header can always be used to find posts including any particular word or phrase. From time-to-time, other topics may appear.

My Articles

Origins of the Southern Railway: Part 1 - L.S.W.R. 17-Nov-2015
Origins of the Southern Railway: Part 2: L.B.S.C.R. 11-Oct-2016
Origins of the Southern Railway: Part 3 - S.E.C.R. 11-Oct-2016
Origins of the Southern Railway: Part 4 - Pre-Grouping Approaches to London

Waterloo Station, London 8-May-2013
Waterloo Station, London (Part 2) 17-Sep-2015
London Underground: The Waterloo & City Line 7-Oct-2015
Victoria Station, London 15-May-2013
Clapham Junction Station, London 20-May-2013
By Rail to Guildford 14-Aug-2015
Visiting former 'Southern' stations in London 26-Aug-2015
By Train to Surrey 31-Jan-2016


My Pictures

These are albums which include pictures taken in recent times showing former Southern Railway infrastructure:-

Clapham Junction.
London: former 'Southern' lines.
London's Railways.
Waterloo Station.
London: Victoria Station.
London Cannon Street Station.
London Charing Cross Station.
London Bridge Station.

[Amended 16-Oct-2016]

Tuesday, 11 October 2016

Origins of the Southern Railway: Part 2: L.B.S.C.R.

The Southern Railway was created in 1923 by the government-directed grouping of railways into the 'Big Four' (L.M.S., G.W.R., L.N.E.R. and S.R.). The Southern Railway brought together the London and South Western Railway, the London Brighton and South Coast Railway and the South Eastern and Chatham Railway.

Upon Nationalisation in 1948, the Southern Region of British Railways absorbed the assets of the Southern Railway.

There's a brief history of the London and South Western Railway here.
There's a brief history of the South East and Chatham Railway here.

Brief early history of the London, Brighton and South Coast Railway

The Royal Pavilion, also known as the 'Brighton Pavilion' was completed by the architect John Nash in 1822. The popularity of Brighton with Royalty made the town a fashionable location, attracting the attention of railway builders keen to improve communications with London.

Engineer John Rennie brought forward a series of plans for the London and Brighton Railway in the early 1830s. These plans were reviewed unfavourably by Robert Stephenson who had his own scheme for the line rejected by the Lords in 1836. In 1837, a revised scheme by Rennie passed in the Lords, subject to review by a Military Engineer, resulting in approval of the main line from Croydon to Brighton, with branches to Newhaven and Shoreham.

A proposal to construct a line from London to Dover by the South Eastern Railway had already obtained parliamentary approval in 1836.

Meanwhile, the first passenger railway to actually operate in London was the London and Greenwich Railway which opened in stages between 1836 and 1838. It was elevated on brick arches throughout its length with the London terminus in Tooley Street.

In 1839 the London and Croydon Railway opened, running from a terminus near the present West Croydon station to join the London and Greenwich railway at a point about halfway to Greenwich which became Corbett's Lane Junction. The London and Greenwich Railway levied a toll on the London and Croydon for use of the shared line. The London and Greenwich Railway land in Tooley Street was sufficient for a station which could be used by a number of companies. In 1844 the joint terminal opened, part paid for by the London and Croydon Railway and the station acquired the name 'London Bridge'.

The approvals for the South Eastern Railway line to Dover and London & Brighton Railway to Brighton required both railways to use the existing route of the London & Croydon Railway from Croydon and then the route of the London & Greenwich Railway for the last 1.75 miles to reach a joint terminus at London Bridge. The South Eastern Railway was to share the lines of the London & Brighton Railway as far as Purley. In addition, the London & Brighton Railway was then to build, at cost, the line on behalf of the South Eastern Railway from its junction with the London & Brighton Railway near Purley to Redhill. This line stayed quite close to the London and Brighton line and crossed under it to reach Redhill. Subsequently, the South Eastern Railway re-imbursed the London & Brighton Railway for the construction costs.


1905 Railway Clearing House Map showing the L.B.S.C.R. line (coloured green) and the S.E.R. line (coloured pink) south of Purley.
Click on the map for a larger view.


The first section of the London and Brighton line to open was the branch from Brighton to Shoreham in 1840. The scale of the engineering works on the main line, involving tunnels, cuttings and the Ouse Viaduct delayed the opening of the main line to London until 1841.

In 1846, in response to shareholder pressure following disappointing results, the London and Croydon Railway and the London and Brighton Railway amalgamated, together with the Brighton and Chichester Railway and the Brighton Lewes and Hastings Railway, to form the London, Brighton and South Coast Railway. This amalgamation provided excellent connections to the south coast around Brighton and Eastbourne. The LBSCR was flanked to the east by the South Eastern Railway which later became the South Eastern and Chatham Railway(see article Origins of the Southern Railway: Part 3 - S.E.C.R.) who were not well-liked and constantly feuded with the LBSCR) and to the west by the London and South Western Railway (see article Origins of the Southern Railway: Part 1 - L.S.W.R.).


Click for larger image
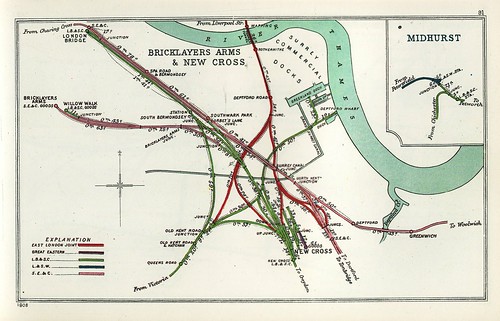
1908 Railway Clearing House Map showing lines in the vicinity of London Bridge. London Bridge Station is top left.

In a joint venture with the Great Western Railway, the London & North Western Railway and the London Chatham and Dover Railway called the 'Victoria Station and Pimlico Railway' (VS&PR) the LBSCR provided significant backing for the construction of a new bridge over the Thames leading to a new terminus called Victoria, first opened in 1860 as a joint station. The station was very successful so, by 1862, the bridge over the Thames was extended to carry more tracks and a second, separate terminus had been built to the east, purely for the LCDR, after which the LBSCR solely used the western station. The two stations at Victoria were well-situated on the north bank of the Thames for West End passengers, although departing trains were immediately faced with a climb leading to Grosvenor Bridge over the River Thames.

Under an agreement between the London Chatham and Dover and the South Eastern Railway in 1899, the two railways traded together as the 'South Eastern and Chatham Railway' (SECR). The former South Eastern Railway was now 'next door' to the LBSCR at Victoria but this didn't reduce its agressive behaviour. When the two stations were rebuilt (the Chatham in 1906, the Brighton in 1908) it was in notably contrasting styles.

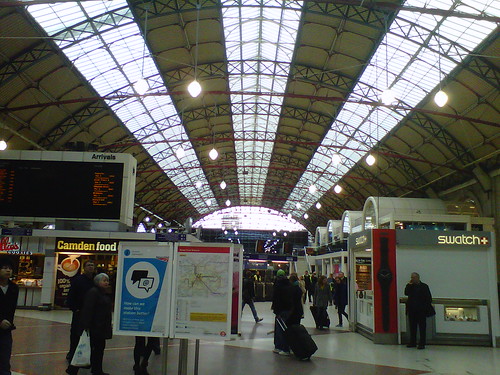
London Victoria: Approaching Victoria on the Up Brighton Fast. Today the 'Brighton' platforms (on the left) are buried and gloomy beneath a modern shopping centre, but the arched roof over the Chatham platforms (on the right) is still in place.

Click for larger image.
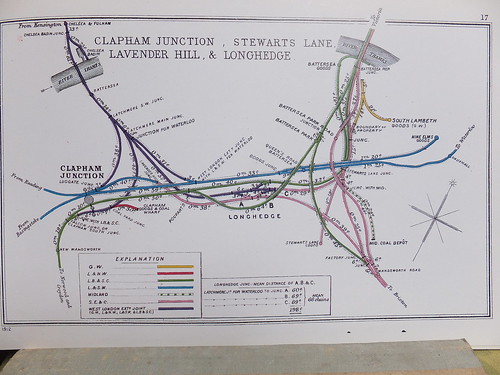
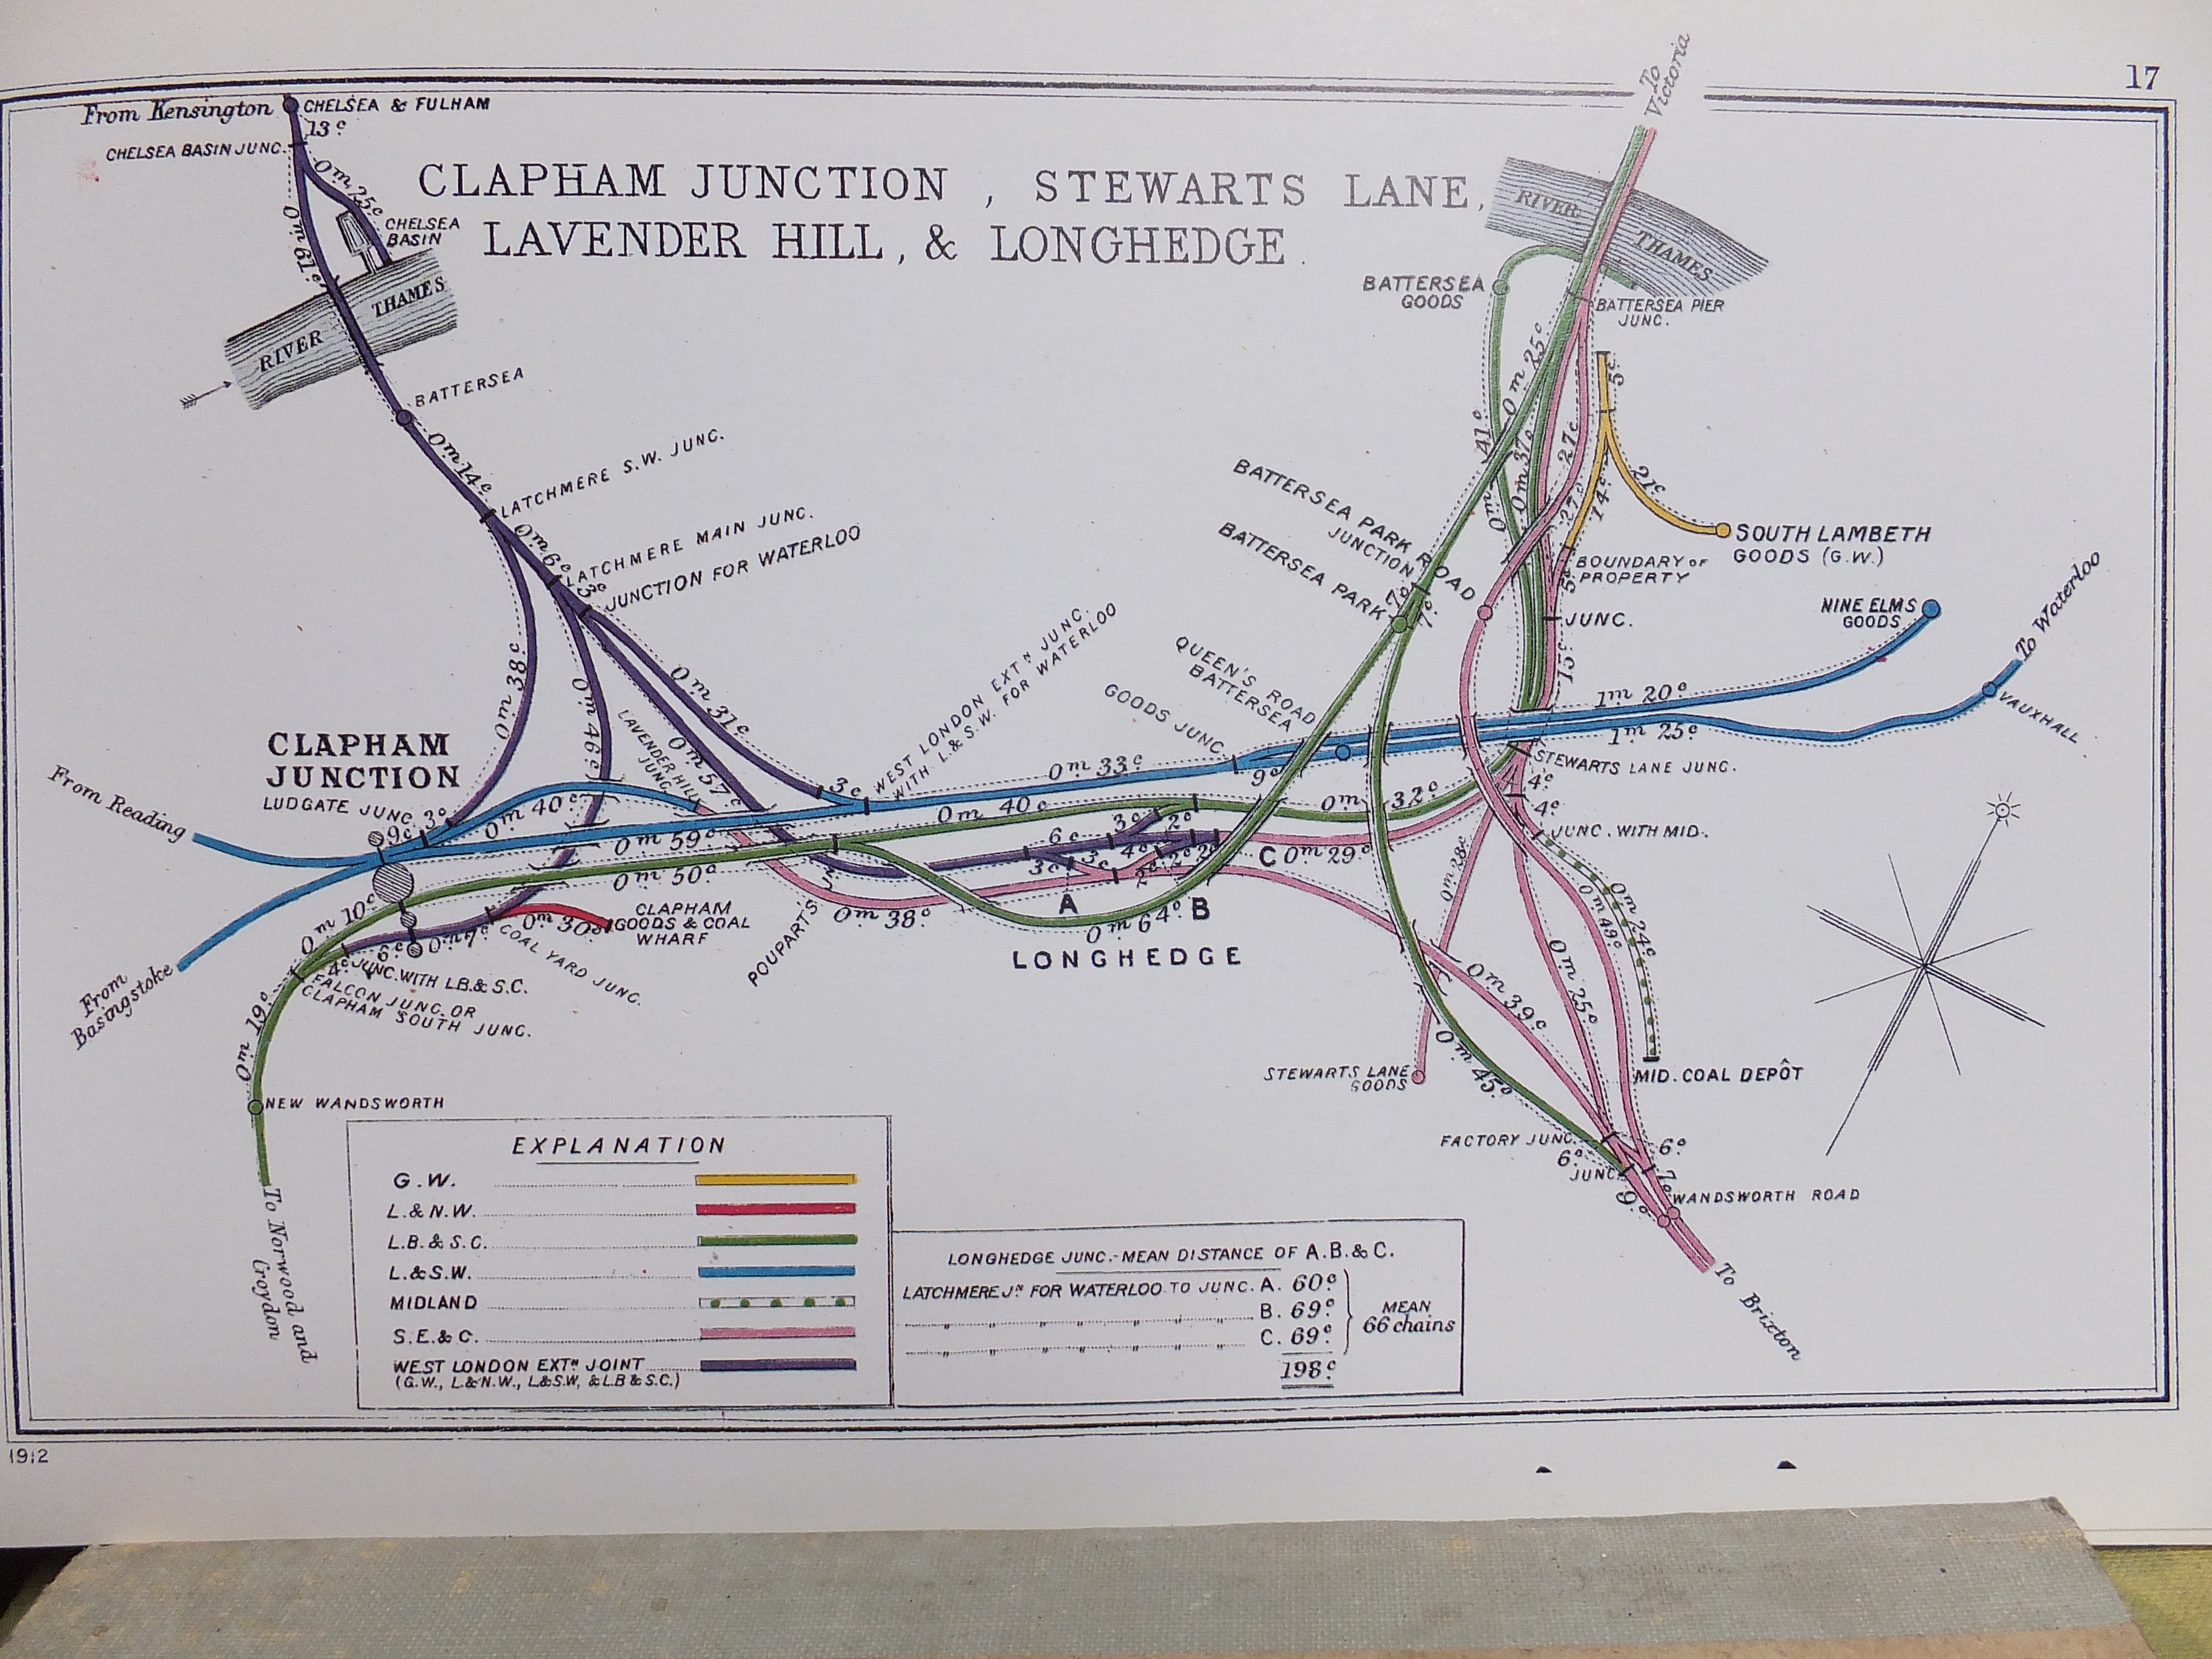
Details of the junctions between the L.B.S.C.R. (green) and other railways in the vicinity of Clapham Junction. Victoria Station is just off the map, top right. This map (and the two above) are from a series prepared by the Railway Clearing House in 1914 which appear in the reprint 'Pre-Grouping Railway Junction Diagrams 1914', published by Ian Allen (ISBN 0 7110 1256 3).

Book references

[1] 'The London Brighton and South Coast Railway' by C. Hamilton Ellis, 1971 edition by Ian Allen (SBN 7110 0269 X).
[2] 'The London to Brighton Line 1841 - 1977' by Adrian Gray, The Oakwood Press.
[3] 'Stroudley Locomotives' by Brian Haresnape, Ian Allen (0 7110 1391 8).
[4] 'History of the Southern Railway' by C. F. Dendy Marshall, revised by R. W. Kidner reprinted 1982 by Ian Allen (ISBN 0 7110 0059 X).
[5] 'Great Locomotives of the Southern Railway' by O. S. Nock, Guild Publishing, 1987 edition by Book Club Associates.
[6] 'Southern Steam' by O. S. Nock, published by David & Charles (ISBN 0 7153 5235 0).
[7] 'London's Termini' by Alan A. Jackson, published by David & Charles (0 330 02746 6).
[8] 'London Brighton & South Coast Railway: Signal Boxes in 1920-1922: Part 1 - London to Brighton', from the J. M. Wagstaff Collection, Signalling Record Society (1 873228 08 2).
[9] ‘A Regional History of the Railways of Great Britain: Volume 2 Southern England’ by H. P. White, 4th edition published by David & Charles (ISBN: 0-7153-8365-5).

Maps
Details of what remains of the L.B.S.C.R. today are shown in the 'Quail Track Diagrams':-
'Railway Track Diagrams Book 5: Southern and TfL' Third Edition, published by TRACKmaps (ISBN 978-0-9549866-4-3).

Related articles on other web sites

London, Brighton and South Coast Railway (Wikipedia).

Related articles on this web site

Origins of the Southern Railway: Part 1 - L.S.W.R..
Origins of the Southern Railway: Part 3 - S.E.C.R..
Victoria Station, London.

My Pictures

There are sets which include pictures taken in recent times showing former L.B.S.C.R. infrastructure:-

Clapham Junction.
London: former 'Southern' lines.
London's Railways.
London: Victoria Station.

Origins of the Southern Railway: Part 3 - S.E.C.R.

The Southern Railway had been created in 1923 by the government-directed grouping of railways into the 'Big Four' (L.M.S., G.W.R., L.N.E.R. and S.R.). The Southern Railway brought together the London and South Western Railway (LSWR), the London Brighton and South Coast Railway (LBSCR) and the South Eastern and Chatham Railway (SECR).

Upon Nationalisation in 1948, the Southern Region of British Railways absorbed the assets of the Southern Railway.

There's a brief history of the London and South Western Railway here.

Brief early history of the South Eastern and Chatham Railway

Originally called the South Eastern Railway, parliamentary approval for a line from London to Dover was obtained in 1836, based on sharing the lines of other companies near London. The London & Greenwich Railway opened throughout in 1838 with its London terminus at Tooley Street (now London Bridge). The following year, the London & Croydon Railway opened from West Croydon to a junction with the London & Greenwich Railway, sharing the Tooley Street terminus. In turn, the London & Brighton Railway opened throughout in 1841 from Brighton to a junction with the London and Croydon Railway, then sharing their lines to Tooley Street.

The South Eastern Railway was to share the lines of the London & Greenwich Railway, the London and Croydon Railway and the London & Brighton Railway as far as Purley. In addition, the London & Brighton Railway was then to build, at cost, the line on behalf of the South Eastern Railway from its junction with the London & Brighton Railway near Purley to Redhill. This line stayed quite close to the London and Brighton line and crossed under it to reach Redhill. Subsequently, the South Eastern Railway re-imbursed the London & Brighton Railway for the construction costs.

After this rather tedious route out of London, William Cubitt then provided the South Eastern Railway with an almost dead straight main line from Redhill to Folkestone and Dover, with major intermediate stations provided with through lines for fast trains and platform loops for stopping trains. Construction started in 1838 and the line to Dover was completed in 1844.


1905 Railway Clearing House Map showing S.E.C.R. line (coloured pink) in between Purley and Redhill.
Click on the map for a larger view.


The railway was not well-liked and constantly feuded with neighbouring railways. Dissatisfaction with the services provided by the South Eastern Railway in North Kent led to the bill for the East Kent Railway being introduced into parliament in 1853. This line would provide much shorter journeys to the coast and, for the first time, bring important towns like Chatham and Rochester onto the railway system. In 1859, the East Kent Railway was renamed the London Chatham and Dover Railway (LCDR). Although funding was a perpetual problem, the railway managed to provide a service to Blackfriars and link up with the Metropolitan Railway (on the north bank of the Thames) before collapsing into bankruptcy. The LCDR somehow managed to carry on.

In a joint venture with the London Brighton & South Coast Railway, the Great Western Railway and London & North Western Railway called the 'Victoria Station and Pimlico Railway' (VS&PR) the London Chatham and Dover Railway participated in the construction of a new bridge over the Thames leading to a new terminus called Victoria, first opened in 1860 as a joint station. The station was very successful so, by 1862, the bridge over the Thames carried more tracks and a second, separate terminus had been built to the east, purely for the LCDR, after which the LBSCR solely used the western station. The two stations at Victoria were well-situated on the north bank of the Thames for West End passengers, although departing trains were immediately faced with a climb leading to Grosvenor Bridge over the River Thames.

The London Chatham and Dover continued to face financial difficulties and finally, in 1899, came to an agreement with its erstwhile enemy the South Eastern Railway. Under this agreement, the railways would operate jointly, trading as the 'South Eastern and Chatham Railway' (SECR). However, the two railways remained legally distinct (until 1923 when both, and the VS&PR, were absorbed into the Southern Railway by the Grouping).

The 1899 changes didn't stop the feuding between the former South Eastern Railway and the London Brighton and South Coast Railway, even after the railways occupied two termini side-by-side at Victoria. The eastern station now served the South Eastern and Chatham Railway and was called 'The Chatham' whilst the western station served the London Brighton and South Coast Railway and was thus called 'The Brighton'. Even when the both side-by-side stations were rebuilt (the Chatham in 1906, the Brighton in 1908) it was in notably contrasting styles.

The 'Chatham' platforms at Victoria remain light and airy, thanks to the simple, arched roof. Unfortunately, all the clutter at platform level largely destroys the sense of space.

Click for larger image.
Details of the junctions between the S.E.C.R. (coloured pink) and other railways in the vicinity of Clapham Junction. Victoria Station is just off the map, top right. This map (and the one above) are from a series prepared by the Railway Clearing House in 1914 which appear in the reprint 'Pre-Grouping Railway Junction Diagrams 1914', published by Ian Allen (ISBN 0 7110 1256 3).

Book References

[1] 'The South Eastern and Chatham Railway' by O. S. Nock, 1971 edition Ian Allen (SBN 7110 0268 1).
[2] 'The Locomotives of the South Eastern Railway' by D. L. Bradley, 1963 The Railway Correspondence and Travel Society.
[3] ‘A Regional History of the Railways of Great Britain: Volume 2 Southern England’ by H. P. White, 4th edition published by David & Charles (ISBN: 0-7153-8365-5).
[4] 'History of the Southern Railway' by C. F. Dendy Marshall, revised by R. W. Kidner reprinted 1982 by Ian Allen (ISBN 0 7110 0059 X).
[5] 'Great Locomotives of the Southern Railway' by O. S. Nock, Guild Publishing, 1987 edition by Book Club Associates.
[6] 'Southern Steam' by O. S. Nock, published by David & Charles (ISBN 0 7153 5235 0).
[7] 'London's Termini' by Alan A. Jackson, published by David & Charles (0 330 02746 6).

Maps

Details of what remains of the S.E.C.R. today are shown in the 'Quail Track Diagrams':-
'Railway Track Diagrams Book 5: Southern and TfL' Third Edition, published by TRACKmaps (ISBN 978-0-9549866-4-3).

Related articles on other web sites

South Eastern Railway (Wikipedia).
London, Chatham and Dover Railway (Wikipedia).
South Eastern and Chatham Railway (Wikipedia).

Related articles on this web site

Origins of the Southern Railway: Part 1 - L.S.W.R..
Origins of the Southern Railway: Part 2: L.B.S.C.R..
Victoria Station, London.

My Pictures

Various albums which include pictures taken in recent times showing former S.E.C.R. infrastructure:-

London: former 'Southern' lines.
London's Railways.
London: Victoria Station.

Notes on Some Early Railways in England

The Surrey Iron Railway

The Surrey Iron Railway, extending from the Thames to Croydon, was the first public railway in England, authorised by an Act of Parliament in 1801. Horses provided the motive power to haul trains of wagons. A further act of 1803 authorised the Croydon, Martsham and Godstone Railway. The line to Martsham opened in 1805, similarly using horses, but the extension to Godstone was never constructed.

There's a more detailed account of this pioneer railway by Peter Mcgow here, on the Wandle Industrial Museum site.


A contemporary watercolour of the Surrey Iron Railway.

The Stockton and Darlington Railway

The Stockton and Darlington Railway opened in 1825 but, although steam locomotives were used for the goods trains, passenger trains remained horsedrawn until around 1834. There's a Wikipedia article here.

The Canterbury and Whitstable Railway

The Canterbury and Whitstable Railway was authorised by an Act in 1825 and started using its steam locomotive 'Invicta' for hauling goods trains in 1830, a few months before the Liverpool and Manchester Railway inaugurated its steam-hauled passenger services. There's a 'Wikipedia' article on 'Invicta' here.

The Liverpool and Manchester Railway

The Liverpool and Manchester Railway opened in 1830. The first Parliamentary Bill to authorise the railway was rejected in 1825 but a revised Bill passed the following year. There's a Wikipedia article here.

The London and Southampton Railway

The London and Southampton Railway was promoted in 1831 and by 1838 ran from Nine Elms to Woking, reaching Southampton in 1840. As the system expanded, the name was changed to the London and South Western Railway. See the article Origins of the Southern Railway: Part 1 - L.S.W.R.

The Bodmin and Wadebridge Railway

The Bodmin and Wadebridge Railway was authorised by an Act in 1832 and opened in September 1834 with a single locomotive 'Camel', a single passenger coach and not many goods wagons. The railway struggled for funds and 'Camel' was not joined by the second locomotive, 'Elephant', until 1836. See the Wikipedia article Bodmin and Wadebridge Railway.

The London and Greenwich Railway

The London and Greenwich Railway was sanctioned in 1833 and starting running part of the line in 1836. By 1838, it was carrying passengers between its London terminus at Tooley Street (now London Bridge) and a temporary terminus at Greenwich. The final terminus in Greenwich opened the following year. The London & Croydon Railway (below) opened sharing the first 1.75 miles of the London and Greenwich on the approach to Tooley Street, as did the London & Brighton Railway (below). The South Eastern Railway approval also mandated sharing of the 1.75 miles from London Bridge.

The Grand Junction Railway

The Grand Junction Railway was authorised in 1833 and opened to passengers in 1837. It ran from a junction with the Liverpool and Manchester Railway at Earlstown to a terminus at Curzon Street, Birmingham, adjacent to the terminus of the London and Birmingham Railway. See the Wikipedia article here.

The London and Birmingham Railway

The London and Birmingham Railway encountered significant opposition from landowners along the route. The first Parliamentary Bill seeking to authorise the railway's construction was thrown-out in 1832, but a revised Bill in 1833 was passed. The railway was opened to passengers in 1838. There's a short article here.

The London and Croydon Railway

The London and Croydon Railway received consent in 1835 and by 1839 was running between its own station at London Bridge and West Croydon. To do this, it shared the first 1.75 miles of the route from London Bridge with the London and Greenwich. For a time, the railway used the Atmospheric System of propulsion.

The South Eastern Railway

The South Eastern Railway was initially sanctioned in 1836. Its final approval resulted in sharing the 1.75 miles of the London & Greenwich from London Bridge, then following the route of the London & Croydon and finally the route of the London and Brighton Railway as far as Purley. In 1864, it extended to Cannon Street and Charing Cross.

The London and Brighton Railway

The London and Brighton Railway, later renamed the London Brighton & South Coast Railway (LBSCR) was authorised by an Act in 1837 and started running in 1841, sharing the first 1.75 miles of the route from London Bridge with the London and Greenwich and then using the route of the London and Croydon Railway.

Later Railways

The trickle of new railways rapidly turned into a flood in the 1840s. Shareholders in some of the earliest railways earned large dividends, turning all railway shares into "hot stocks" encouraging investors and leading to the period of 'Railway Mania' when the most improbable routes were promoted and dubious operators like George Hudson (the so-called 'Railway King') made fortunes for themselves, if not their shareholders. Wikipedia discusses Railway Mania here and the notorious George Hudson here.

One of these 'Later Railways' was East Kent Railway, which I outline below because of its interactions with earlier lines. Dissatisfaction with the services provided by the South Eastern Railway in North Kent led to the bill for the East Kent Railway being introduced into parliament in 1853. In 1859, the railway was renamed the London Chatham and Dover Railway (LCDR). Although funding was a perpetual problem, the railway managed reach to Blackfriars and link up with the Metropolitan Railway before collapsing into bankruptcy. The LCDR somehow managed to carry on and, in a joint venture with the London Brighton & South Coast Railway, Great Western Railway and London & North Western Railway called the 'Victoria Station and Pimlico Railway' (VS&PR) participated in the construction of Victoria Station, first opened in 1860. A parallel station to the east, purely for the LCDR, opened in 1862. Faced with continuing financial difficulties, in 1899 The LCDR made an agreement with the South Eastern Railway to operate and market jointly, trading as the 'South Eastern and Chatham Railway'. However, the two railways remained legally distinct until 1923 when both, and the VS&PR, were absorbed into the Southern Railway by the Grouping.

Book References

[1] 'Views on the Liverpool and Manchester Railway Taken on the Spot by Mr. A. B. Clayton', reprinted by Frank Graham 1970 (SBN 900409 29 0).
[2] 'Views of the Most Interesting Scenery on the Line of the Liverpool and Manchester Railway', I. Shaw 1831, facsimile published by Hugh Broadbent 1980 (ISBN 0-904848-05-1).
[3] 'British Railway History 1877 - 1947', Hamilton Ellis, published 1959 by George Allen and Unwin.
[4] 'The Stockton and Darlington Railway 1825 - 1975', P. J. Holmes, published by First Avenue Publishing Company.
[5] 'The Liverpool & Manchester Railway', R. H. G. Thomas, published 1980 by B. T. Batsford (ISBN 0 7134 0537 6.
[6] 'The Railway Mania and Its Aftermath 1845 - 1852', Henry Grote Lewin 1936, reprinted 1968 by David and Charles (7153 4262 2).
[7] 'Drake's Road Book of the Grand Junction Railway', 2nd edition 1838, reprinted 1974 by Moorland Publishing (ISBN 0 903485 25 7).
[8] 'Britain's First Trunk Line - The Grand Junction Railway', Norman W. Webster, published 1972 by Adams & Dart (SBN 239 00105 2). [9] 'Oldest in the World - The Story of Liverpool Road Station, Manchester 1830 - 1980', edited by C. E. Makepeace, published by Liverpool Road Station Society/Manchester Region Industrial Archaeological Society (ISBN 0 907172 01 6).
[10] 'History of the Southern Railway' by C. F. Dendy Marshall, revised by R. W. Kidner reprinted 1982 by Ian Allen (ISBN 0 7110 0059 X).
[11] 'The London & South Western Railway' O.S. Nock, published by Ian Allen.
[12] 'The South Western Railway' by Hamilton Ellis, published 1956 by George Allen and Unwin.
[13] 'The London Brighton and South Coast Railway' by C. Hamilton Ellis, 1971 edition by Ian Allen (SBN 7110 0269 X).
[14] 'The London to Brighton Line 1841 - 1977' by Adrian Gray, The Oakwood Press.
[15] 'The South Eastern and Chatham Railway' by O. S. Nock, 1971 edition Ian Allen (SBN 7110 0268 1).
[16] 'London's First Railway - The London & Greenwich' by R.H.G. Thomas, published by Batsford Paperbacks (ISBN 0 7134 5414 8).
[17] 'The Railway Companion, Describing an Excursion along the Liverpool Line' by A Tourist, published 1833, reprinted by Deanprint Ltd. in 1980 and published on their behalf by Liverpool Road Station Society (ISBN 0 907172 00 8).
[18] ‘A Regional History of the Railways of Great Britain: Volume 2 Southern England’ by H. P. White, 4th edition published by David & Charles (ISBN: 0-7153-8365-5).
[19] ‘A Regional History of the Railways of Great Britain: Volume 10 The North West’ by G. O. Holt, revised Gordon Biddle published by David & Charles (ISBN: 0946537 34 8).
[20] ‘A Regional History of the Railways of Great Britain: Volume 11 North and Mid Wales’ by Peter E Baughan, published by David & Charles (ISBN 0-9153-7850-3).
[21] ‘A Regional History of the Railways of Great Britain: Volume 12 South Wales by D. S. M. Barrie, published by David & Charles (ISBN 0-7153-7970-4).
[22] ‘Atmospheric Railways – A Victorian Venture in Silent Speed’ by Charles Hadfield (David and Charles, 1967).

Sunday, 9 October 2016

Mutual Improvement Classes (2)

In the post Mutual Improvement Classes, I outlined the aims of the MIC of steam days. This index has links to posts labelled 'MIC' in my blog. Titles starting 'MIC' have been used as talks before appearing here, other posts are included because of the amount of technical content which I hope may be of some help to volunteers studying locomotive work.

Where a topic is split into more than one post, links are normally provided forwards and backwards, but note that unconnected posts may deal with a similar theme. I'm sorry if it appears confusing, but the Search Box (with the magnifying glass symbol) in the header can always be used to find posts including any particular word or phrase.

Other topics are in preparation but, unfortunately in an unstructured manner.

Caledonian Railway preserved 0-4-4 tank engine No. 419 at the Battlefield Line 21-Jan-2023
Battlefield Line Mince Pie Specials 2022 3-Mar-2022
Battlefield Line 'Santa' Trains 2021 29-Jan-2022
Class 20 Diesel Electric Locomotive 08-Jan-2022
A Day on the DMU13-Nov-2021
Getting Back on Track 6-Nov-2021
Origins of the Great Western Vacuum Brake 8-Nov-2020
Battlefield Line Bonfire and Firework display at Market Bosworth Station 19-Nov-2019
Shackerstone Railway Society 50th Anniversary Steam Gala 16-Nov-2019
Operation of Steam/Diesel Multiple Unit Services at the Battlefield Line 10 Nov-2019
Fish and Chip Special 11-Oct-2019
Preparing 5542 (part 2) 6 Aug 2019 5542 at the Battlefield Line in 2019 30 Jul 2019
'Pannier' 6430 at the Battlefield Line 4-Apr-2019
Battlefield Line Steam Gala 2018 (Part 2) 4-Jan-2019
Battlefield Line Steam Gala 2018 (Part 1) 16-Oct-2018
Preparing 5542 (part 1) 14-Sep-2018
Battlefield Line 'Family Fun Weekend' 3 Sep 2018
5542 at the Battlefield Line 28 Aug 2018
Talking about Engines 19 Apr 2018
Class 08 User Manual 24 Mar 2018
Passed Fireman 24 Mar 2018
Santa Specials at the Battlefield Line 2017 19 Dec 2017
On the Footplate 5 Dec 2017
On the Footplate: the Drummond 'T9' 17 Sep 2017
Two Failures 16 Sep 2017
The Role of the Shunter (2) 26 Aug 2017
The Role of the Shunter 29 Aug 2017
Bank Holiday with Steam and Diesel 7 Jun 2017
British Locomotive Headcodes 1-Feb-2017
Shackerstone Santa Specials 28-Dec-2016
Peak Rail Santa Specials 23-Dec-2016
'Operation: Market Bosworth' - On the Footplate 8-Oct-2016
Electrical Systems on Steam Locomotives 14-Sep-2016
The Railway at Night 11 Sep 2016
Locomotive Regulators (part 2) 11 Sep 2016
Peak Rail Winter Service 2013 22 August 2016
Sunday at Shackerstone 4 April 2016
Driving the 'Planet' replica 11 September 2015
Water, water, everywhere 19 July 2015
HST Charter to Peak Rail 12 March 2014
Peak Rail in early 2014 11 March 2014
Battlefield Line 1940s Weekend (June 2013) 18 June 2013
Preparation of Locomotive 'Sapper' 8 January 2013
The Clack Valve 19 November 2012
A Day on the Footplate (2) 25 June 2012
A Day on the Footplate (1) 9-Jun-12
Driving 'Lion' 13 January 2012
Battlefield Line Santa Specials 2011 18 December 2011
Summer Saturday with a '2884' 4 September 2011
On the Footplate (Part 2) 7 January 2011
On the Footplate (Part 1) 22 July 2010
The Best Laid Schemes ... 9 July 2010
Stanier '8F' inauguration at Peak Rail 28 May 2009
Diesel Multiple Units 23 May 2010
MIC - Brakes 11 January 2009
MIC - Disposal 10 January 2009
MIC - Firing Steam Locomotives (1) 10 January 2009
MIC - The Working of Trains 2 January 2009
Driving Turn at Peak Rail - Part Two: Driving Experience 31 December 2008
MIC - Lamps 31 December 2008
Firing a 'B1' 11 October 2008
Driving Turn at Peak Rail - Part One: Preparation 6 May 2008
Mutual Improvement Classes 24 February 2008
Locomotive Regulators (part 1) 17 July 2007
Sunday at Peak Rail: 15 January 2007
Early Locomotive Design 12 January 2007
'Henry' 12 January 2007

You can select all the posts in this blog labelled 'MIC' by clicking here.

[List updated: 30-May-2017, 29-Aug-2017, 23-Mar-2018, 8-Apr-2018, 4-Sep-2018, 14-Sep-2018, 8-Aug-2019: List updated and sequence reversed 28-Jan-2023]

Birmingham Railway Museum, Tyseley

I was a 'late starter' in railway preservation, but in 1988 I joined the 'Lion' supporters group, the Old Locomotive Committee (OLCO), following a series of coincidences I've described in the post Lion. It appears that my life is guided by this sort of 'Happy Accident' as I commented in another post here.


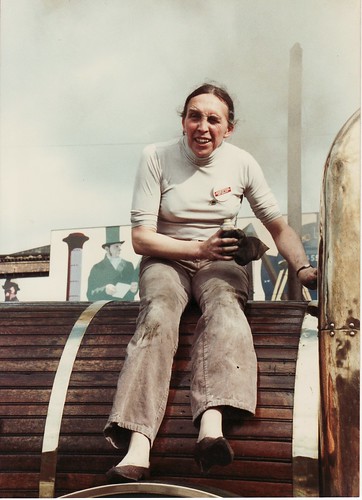
'Lion' at Manchester Museum of Science and Industry In 1988, with a much-younger Jan.

'Lion' had been returned to steam to celebrate her 150th Birthday (or, as The Old Locomotive Committee preferred to call it "The Sesquicentenary"), visiting various sites around the country. From Crewe, where I first became involved, she went to the Manchester Museum of Science and Industry, The Science Museum at Wroughton and made two visits to Birmingham Railway Museum, Tyseley. Having become a member of OLCO, I accompanied the venerable locomotive on these public appearances. During the visit to Tyseley, one of the OLCO members let on about my interest in railway signalling. Since the Museum's plans for a new demonstration line incorporating a Great Western signalbox (relocated from Holesmouth Junction) were well advanced, new volunteer members were being actively recruited for the Museum and I was invited - no, instructed - to join. Having had no previous involvement with railway preservation, I thus found suddenly found myself a member of three organisations - OLCO, the Manchester Museum of Science and Industry and Birmingham Railway Museum.

The two visits by 'Lion' to Birmingham Railway Museum after I joined OLCO produced some record crowds at Tyseley. Otherwise, things were much quieter apart from occasional 'Gala' days when two or three large engines would be steamed. Although the site was open to the public regularly at that time, the main activity during the week was restoration and repair of steam locomotives in the workshops. On Sundays, a 2-coach passenger train gave rides on the Demonstration Line using a small steam locomotive. For a time, a 'Terrier' carried out this duty. I'm afraid passenger numbers weren't impressive. The main excitement for operating volunteers was the regular, complicated shunts which were required to position vehicles for the workshops. Initially, I trained as a Passenger Guard and Shunter at the Museum and helped out a bit on the signalling side. Once the signal box was commissioned, I also passed out as a Signalman. The weekend passenger trains, which had previously loaded and unloaded at a wooden platform behind the signal box, moved to one of two new brick platforms, giving a somewhat longer ride.


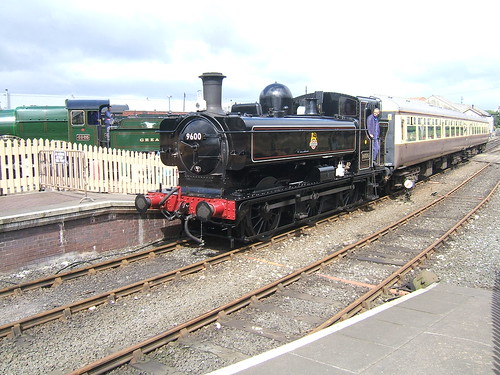
9600 giving rides on the Demonstration Line during the 'Tyseley 100' event.

In an attempt to boost income, Driving Experience Courses were introduced. The original format proved very popular - a safety briefing, sessions about shunting, signalling and, with the benefit of a number of a number of locomotives under restoration to study, the principles of locomotive engineering. Most important, of course, was hands-on firing and driving on both a small tank locomotive and a tender engine, like 'Defiant' or 'Clun Castle'. There was a need for volunteers who could do the presentations on shunting, signalling and locomotive engineering and I happily served in this capacity for a while, before gravitating to Instructor Driver on the 'Little Engines' used on the Driving Experience Courses - engines like 'Henry', 'Cadbury No. 1' or one of the three Tyseley 'Panniers' (there's a description of 'Panniers' illustrating the Tyseley 'Panniers' here). The line used by the small engine was short but that gave trainees plenty of practice in starting, stopping and reversing. Each group of three trainees spent 75 minutes on the footplate, taking it in turns to drive and (if they wished) fire. The Instructor Driver 'single manned' and had to fire, manage the boiler and instruct and supervise the trainees.

But, of course, the highlight of the course was driving a large engine on the 400 yard demonstration line. Initially 'Defiant' or 'Clun Castle' were used and, again, the Instructor Driver 'single manned', looking after three trainees in each 75 minute session.


7029 'Clun Castle' running with a 'Churchward' tender.

The initiative met with such an enthusiastic reponse from enthusiasts that, later, a variety of engines offered the driving experience at Tyseley. By that time, I'd been 'passed out' to drive all visiting engines which included 'King Edward I', 'Taw Valley', 'Canadian Pacific' and 'Sir Nigel Gresley'. We thought we were busy with these locomotives on offer (which my friend Tony described as 'tasty engines') until driving courses on 'Flying Scotsman' were introduced.

To deal with the numbers of trainees who wanted a chance to drive this iconic locomotive, the course structure was simplified, omitting the presentations and the small locomotive experience and reducing the time each group of three trainees spent on the locomotive from 75 minutes to 60 minutes. Courses started earlier in the day and continued late into the evening. 12-hour shifts became common and I can remember disposing 'Flying Scotsman' at the end of a late-running shift at midnight, in a snowstorm! There's a short description of 'Flying Scotsman' at Tyseley here. As I write this, 'Flying Scotsman' has recently been returned to steam at a cost (this time) of £4.5 million. Commenting on the excitement this has caused in a post here I said "I think the opportunity for members of the public to actually drive 'Flying Scotsman' is unlikely to recur in the future".

I'll tell you more when I can, including the creation by Birmingham Railway Museum of 'satellite' courses at The Battlefield Line (resulting in my becoming a member of yet another preservation organisation). There's a short history of the Birmingham Railway Museum on Wikipedia here.

I remained a working volunteer at Birmingham Railway Museum for around ten years until Driving Experience courses were discontinued in favour of a regular steam service on the main line between Birmingham and Stratford, the 'Shakespeare Express', which commenced in 1999. Losing the opportunities for footplate work I'd come to enjoy, I decided to concentrate my activities at other sites - The Museum of Science and Industry (as the Manchester museum had become), The Battlefield Line and Peak Rail. However, I had an enjoyable day meeting old friends at Tyseley during the Tyseley 100 event in 2008.

Saturday, 8 October 2016

'Operation: Market Bosworth' - On the Footplate

In the post 'Operation: Market Bosworth' - The Battlefield Line 1940s Weekend 2016, I described the first day of the two-day event, the 17th October 2016, when I drove the steam locomotive 'Cumbria' with Jamie firing and Richie as a trainee. This report has more information about actually working on the locomotive.

The locomotive

'Cumbria' is a six-coupled 'Austerity' saddle tank locomotive. The 'Austerity' tank locomotive class is described here. In the section 'Related Posts on this site' below there are links to other posts about 'Cumbria'.

The timetable

The normal weekend 'Green Timetable' of five return workings between Shackerstone-Market Bosworth-Shenton had been strengthened by an earlier round trip (operated by the diesel railcar) and two evening 'Special' trains.

Shackerstone Dep 09:45 11:15 12:30 13:45 15:00
Market Bosworth Arr 09:53 11:23 12:38 13:53 15:08
Market Bosworth Dep 09:57 11:27 12:42 13:57 15:12
Shenton Arr 10:05 11:35 12:50 14:05 15:20
Shenton Dep 10:20 11:50 13:05 14:20 15:35
Market Bosworth Arr 10:28 11:58 13:13 14:28 15:43
Market Bosworth Dep 10:32 12:02 13:17 14:32 15:47
Shackerstone Arr 10:40 12:10 13:25 14:40 15:55


Shackerstone Dep 16:15 17:30 18:55
Market Bosworth Arr 16:23 17:38 19:03
Market Bosworth Dep 16:27 17:48 19:12
Shenton Arr 16:35 17:56 19:20
Shenton Dep 16:50 18:15 19:35
Market Bosworth Arr 16:58 18:23 19:43
Market Bosworth Dep 17:02 18:27 19:47
Shackerstone Arr 17:10 18:35 19:55

Speed Restrictions

The Line Speed Limit is 25 m.p.h. but parts of the line have lower limits, as shown below.

Location Speed m.p.h.
Shackerstone Station (Signal Box - Stop Board on Plat 1 and 2) 5
Barton Lane overbridge 32 - Signal Box (Relaid section) Dead slow
Adjacent Headley's Crossing (Relaid section) 10
Market Bosworth Station (Signal Box - Bridge 27) 5
Through Market Bosworth platform Dead slow
Underbridge 26 (approach to Market Bosworth) 15
South of Bridge 21 - Shenton 5
Shenton Station Ground Frame - Buffer stop 5


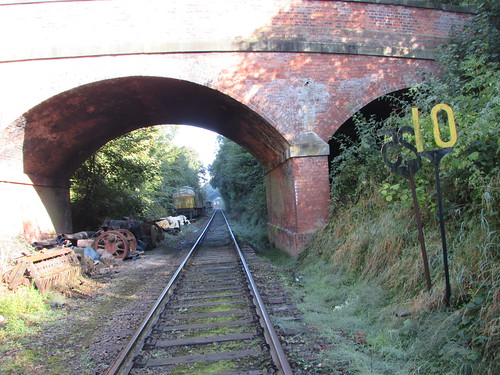
The frequent changes in permitted speed make the working of the train more challenging for the locomotive crew. Permanent speed restrictions are usually marked with a sign of the old 'British Railways' pattern - a steel post carrying steel cut-out figures painted yellow on the front showing the limit (in miles per hour) which is positioned at the Commencement of the Restriction. The Driver must start braking in advance of the sign since the locomotive must not exceed the speed limit when passing the sign and that limit must then be observed until the whole of the train has left the restricted area. On single lines, there is no sign marking the end of the restriction so the driver has to look out for the 'Commencement of Restriction' sign for trains running in the opposite direction and ensure that the whole of the train has passed that sign before adjusting speed. This pattern of sign is no longer used on the modern railway - coloured, reflective signage is now in use.

Temporary speed restrictions may be unmarked on preserved lines, hence the importance of the Driver being thoroughly familiar with the line and reading the notices on display at the Motive Power Depot (or Signing-on Point) at the start of each shift as well as checking the 'Late Notice Case' (where provided) for recent changes.


Battlefield Line, 2014: A 'Midweek Shunt' outside Shackerstone Signal Box (on an earlier date). The yellow-painted front of a '5' restriction sign and the black-painted rear of a '10' restriction sign can be seen.

Preparation

The term 'Preparation' covers both Driver's and Fireman's duties. In general, the Driver is responsible for the daily examination of the locomotive and 'oiling round' whilst the Fireman concentrates on raising steam but they should work as a team to ensure that all the tasks are carried out efficiently. On preserved lines, a Trainee may also be rostered both to learn about firing and boiler management and also assist in all other tasks. Proper attention to Preparation can help to prevent failures 'on the road' later.

By the time I 'signed on', Jamie had matters well in hand and had done some of the oiling (four eccentrics and two big ends in between the frames), then I carried on. Once I was in the pit and had completed my examination and oiling, I decided I might as well 'ash out' the ashpan, assisted by Richie. Since Jamie had done the initial boiler safety checks the previous evening, leaving a 'warming fire' in overnight, there was already a fair bit of ash to remove but it's important to enter traffic with a clear ashpan, to prevent possible steaming difficulties later once the inevitable build-up of ash starts to obstruct the flow of 'primary air' which reaches the burning fuel through the ashpan. Other design considerations tend to make the layout of the ashpan something of a compromise.

In the 'Austerity', the trailing coupled axle is positioned underneath the firebox, so the ashpan is designed with a 'hump' to clear the axle, effectively dividing the ashpan into two. Two damper doors are provided to control the flow of 'primary air', one at the front of the ashpan, one at the rear. The damper doors are controlled by a simple linkage from levers in the cab which lift up and down. Fully opening the rear damper door allowed the back ashpan to be cleared, then opening the front damper door allowed the (larger) front ashpan to be cleared. Once we'd filled the saddle tank from the hose in the shed and steam pressure in the boiler had risen to allow us to move, we shunted the engine just outside the shed to complete as much cleaning as time permitted.

There are other posts in my blog about Preparation, covering different engines and different sites. Here are two about other 'Austerity' tank locomotives:-
Driving Turn at Peak Rail - Part One: Preparation.
Preparation of Locomotive 'Sapper'.


View from the Inspection Pit in the Loco Shed, underneath 'Cumbria', looking towards Shackerstone station.

In Traffic

In good time, we came off shed 'Light Engine' and coupled onto our waiting 5-coach train (the maximum that can be accommodated at the platforms on the line) in platform 2. We created vacuum, the Guard did a 'brake continuity' test and the signals cleared for us to depart. Then we waited. As often happens, departures are often late away, waiting for tardy passengers or for other reasons. Bearing in mind the speed restrictions along the line, it is very difficult to make up time once late. When we finally received the 'Right Away' from the Guard, we crept out of Shackerstone, bunker first.


'Cumbria' ready to leave Shackerstone on an earlier date.

The signalman passed the Single Line Token to me as we passed his 'landing'. This was our authority to occupy the single line to Shenton. I also checked that the Starting Signal (these days called the 'Section Signal') was still 'off' and observed the 'Dead Slow' over the relaid section. The gradient profile of the Battlefield Line is a bit like a capital 'M' - uphill leaving Shackerstone then downhill to Market Bosworth, after which the line rises again before a downhill section to Shenton. Once the whole train was clear of Barton Lane overbridge, I was able to open the regulator to 'Full First Valve' but the locomotive was fairly sluggish - the fire was still 'green' and it would take some time for firebox to rise to a proper working temperature. In addition, until an engine has been doing real work for a time, the temperature in the cylinders remains low enough to rapidly chill steam and these 'condensation losses' reduce the effective work done. During the course of a shift, the situation noticeably improves and it's often commented that "it's a different engine in the afternoon". To reduce condensation losses on starting, it was once common practice, after backing onto a train, to leave the engine in 'back gear' and slightly open the regulator with the drain cocks open to 'warm through' one end of the cylinders. Shortly before leaving, the reverser would then be placed in forward gear with steam applied, to warm the other end of the cylinders. Needless to say, the locomotive handbrake would be firmly applied during this process.

'On the road', it's essential that the driver and, when not otherwise engaged, the fireman keep a good look-out. As we approached our next 'slack' (the speed restriction around Headley's Crossing), I banged the regulator shut and dropped the reverser into 'full gear' since most engines with Link Motion 'drift' best in full gear. Next, watching the vacuum gauge, I carefully dropped the vacuum to around 15 (inches of mercury) to start lowering our speed. As our speed fell, I pushed the application valve back to 'Release' so that the Vacuum Ejector re-created 21 (inches of mercury) to release the train brakes. It may take some seconds for the train brakes to release, particularly with industrial locomotives like 'Cumbria' which were not originally vacuum fitted, so it's important not to 'overdo' the brake application. There's an introduction to the vacuum brake in the post here.

I whistled for the farm crossing at Headley's and we rumbled across slowly, then I whistled for the next crossing and we continued at our rather funereal pace until our last coach had passed the speed restriction sign for trains in the opposite direction, when I was able to apply steam again. First, I 'pulled up' the reverser to the second notch (easier to do with steam off), then I opened the regulator to 'full first valve'. I allowed the train to accelerate to line speed then partially closed the regulator so as to maintain the desired speed with minimum use of steam.

On this downhill section, as we passed the golf course on our left, the train was moving fairly well. As we approached what's usually called 'Airfield Bridge' (near a private house with a hangar and a grass landing strip), I shut off steam and drifted in full gear before commencing braking as we approached the 5 m.p.h. restriction entering Market Bosworth Station which reduces to 'Dead Slow' in the platform. I complied with the 'SW' ('Sound Whistle') board and rumbled along the platform, trying to judge the right point to stop so that all the doors of the 5-coach train were on the platform. Just before the train finally stopped, the vacuum brake application valve was put back to 'release' so as to avoid a jerk (the old locomen's adage is "stop on a rising vacuum") and I 'held' the train on the locomotive steam brake to prevent any movement as passengers boarded and alighted. Jamie made sure his fire was ready for departure and then we all had a few moments to watch the activity of the platform. There were certainly plenty of people about!


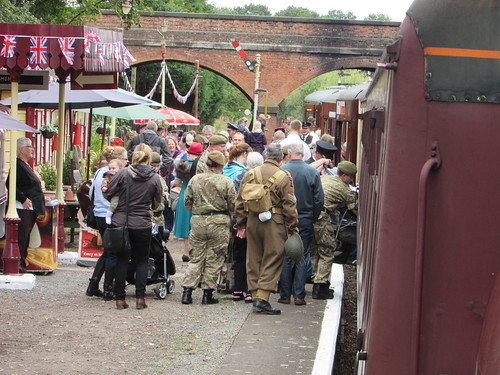
Battlefield Line 1940s Weekend 2016: Passengers at Market Bosworth.

Eventually, the doors were closed, the station staff gave the 'tip' to the guard who whistled and gave us the 'Right Away' with a green flag. As I moved back across to my side, I sounded the whistle and scanned the line ahead, particularly the foot crossing with wicket gates which gives access to the platform. Then I released the steam brake and pushed open the regulator, 'linking up' the reverser after a few 'chuffs'. Both Jamie and I carefully observed the foot crossing, with the public both sides watching our departure, to make sure nobody suddenly decided to cross. I gave another whistle in warning and we slowly trundled over the crossing, waving to the people. When the whole train was past the signalbox (currently not in use), I eased the regulator open a little more, so as to cross underbridge 26 (the 'Cattle Creep') at 15 m.p.h.

Once clear of the 15 m.p.h. restriction, I could open up again as the line entered the uphill section, a curving cutting crossed by three overbridges. As speed rose, I first eased the regulator and finally shut-off to drift in full gear, although we'd still not reached the summit. The cutting ended near the summit so, judged correctly, our momentum would take us to Shenton without further use of steam. Well before the fixed distant signal for Shenton, I'd started to slow the train because, just short of Shenton with its 5 m.p.h. restriction, there's a temporary 'slack' over a 'dip' in the track which has appeared near underbridge 21.


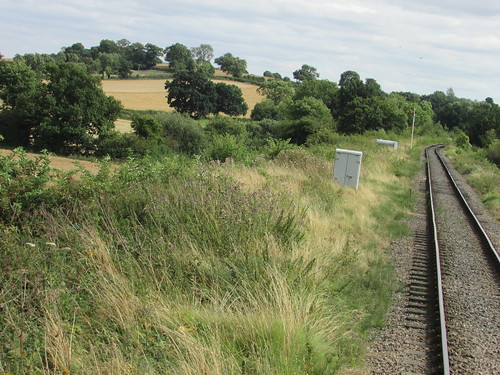
View from the footplate of 'Cumbria' approaching Shenton. Note the Fixed Distant signal.

I whistled as we approached the platform and rolled the train well along with the leading coach door right at the end of the platform when we stopped, hoping that the double doors of the Guard's Brake at the rear would also be on the platform. The double doors served the luggage section, used to transport bicycles, pushchairs and wheelchairs, so it's quite important to get them on the level platform (and not on the platform ramp). Once we stopped, I applied the locomotive steam brake, destroyed the vacuum in the train pipe and shut off the steam supply to the vacuum ejector.


'Cumbria' on arrival at Shenton (on an earlier date).

I haven't described Jamie's firing in detail but the frequent changes of speed meant that the demand for steam varied throughout the journey and the firing rate had to be adjusted for this. The gradient changes necessitated frequent attention to the boiler water level and a sometimes-problematic fireman's side injector meant that the driver's side injector periodically had to be used, sometimes with the driver's help, if not otherwise pre-occupied. Of course, the fireman is also expected to help the driver in keeping a look-out, particularly approaching signals, in the vicinity of the various crossings and entering or leaving platforms.

Although, even on a simple railway like the Battlefield Line, the driver has plenty to concentrate on when on the road, it's important that the driver periodically scans the pressure gauge, the water gauges and the apparent condition of the fire (judged by the smoke from the exhaust and the colour of the fire). I knew that there was no necessity for this with Jamie on 'the other side' but force of habit meant I still carried out these checks. The work always goes best, and is more enjoyable, if the driver and fireman work as a team. In the old days, many fireman reported problems with drivers who didn't see footplate work as a partnership - one such tale is recounted in my post here.

Our arrival at Shenton signalled a period of furious activity for the footplate crew as the timetable allows only 15 minutes to uncouple, run round, couple up and prepare for the return journey. Fortunately, these tasks were shared with Richie. The Guard is responsible for putting the handbrake on in the Brake Van so that the driver can 'ease up' against the train, compressing buffers, to make uncoupling easier. 'Cumbria' has an unfortunate tendency to 'steam lock' during this process. The Guard works the Ground Frame at the northern end of Shenton for the locomotive crew. This Frame is released by a key forming part of the Single Line Token so I placed the Token, in its pouch, on the fence for the Guard to collect and moved one of the lamps to the front bufferbeam whilst we ran round. The locomotive was stopped just by the busy foot crossing with wicket gates which links the car park to the station and to the Bosworth Battlefield Experience so it was vital to ensure that the public were clear of the track before whistling and moving off into the headshunt. With the handpoints reversed, we moved towards the crossing, stopping to pick up the 'third man' once the points had been reset towards the platform line. Handpoints are designed to be 'trailable' without damage and, back in steam days, enginemen would happily 'trail' but most preserved railways encourage positively setting points to be 'trailed' to avoid both wear and possible mishap. We passed our 5-coach train, looking out for the ground shunting signal, which would be 'cleared' by our Guard from the Ground Frame once the points had been set from the run round loop to the single line.


Shenton Ground frame. The frame is released by inserting the Single Line Token into the release near the bottom of the rightmost lever (on an earlier date).

We ran onto the single line and stopped until the guard had restored the ground frame and extracted the Single Line Token which we would carry back to Shackerstone. I moved the locomotive onto the waiting train, we coupled on and I 'set' the lamps to one above each front buffer (Express - called class 'A' when I was young, becoming class '1' when the 4-character headcodes were introduced by British Rail). I created vacuum and watched for the Guard's 'Brake Continuity Test'. By checking that operation of the Guard's Brake Valve (the 'Setter') destroys the vacuum in the train pipe, the Guard is reassured that he can bring the train to a stand in an emergency. The Guard checked that all the carriage doors were properly closed, made sure that there were no 'late passengers' hurrying to board the train and, with a whistle and a flourish of his green flag, gave us the 'Right Away'.

On our return journey, the engine was the 'right way round' - chimney leading. Actually, the driver's forward view is impaired compared with bunker leading because the boiler and saddle tank restrict the view ahead. Unless it's very cold or wet, I tend to lean out of the cab when driving as that gives somewhat improved visibility but good teamwork between the driver and fireman in keeping a lookout is the best method. Approaching the various speed restrictions in the opposite direction, with the gradient profile reversed, I had to use a different set of 'markers' to initiate braking.

We were still running late as we approached Shackerstone. I slowed before Barton Lane overbridge to comply with the 10 m.p.h. 'slack' and also in readiness for having to halt at the tall outer home signal. Particularly in the growing season, when the vegetation in the cutting goes wild, the signal is quite hard to 'sight'. A team of three volunteers are kept busy in the season trying to keep the line clear of overhanging branches which can give the unwary engineman a nasty 'swipe'.


Barton Lane overbridge No. 32 on the approach to Shackerstone originally spanned a double track route, like all the overbridges on the line. Note the speed restriction sign (10) on the right. The lattice post outer home signal (beyond the derelict 'Peak') is quite hard to sight. Shackerstone signal box is visible in the distance.

As we emerged from the bridge, the signal was still 'on', so I gave the signalman a blast on the whistle as a reminder. The signal immediately came 'off', so I politely gave a short 'pop' on the whistle in thanks and continued down the cutting, braking again for the 'dead slow' restriction on the relaid section. The inner home signal is a two-disc L.M.S. pattern ground signal. Where signals are placed one above another, the topmost arm or disc relates to the leftmost route.


Shackerstone: Driver's view of the inner home. The upper disc reads
to platform 1; the lower disc to platform 2.


This is where it went a bit awry. With a 5-coach train in platform 2, it's difficult to run round and still access the water crane at the end of platform 2 so the special timetable called for arrivals during the day to be into platform 1. But the disc came off for platform 2 and I 'took it', thinking I knew the stopping 'mark' for 'Cumbria' with 5-coaches in platform 2. Unfortunately, I got it slightly wrong, so when we ran round, we buffered up to the coaches still a few feet short of the water crane. We checked the level of water in the tank but thought it imprudent to depart without taking water so we coupled onto our train, had the Guard close the doors and ensure that the barrow crossing at the rear of the train was clear and set back back a short distance so that we could take water.

We had to take water each time we ran round our train at Shackerstone but the signalman routed us into platform 1 after the first train, so we had no further trouble accessing the water crane, although taking water is always a fairly heavy and unpleasant business for whoever is 'on top'. When I was young, I used to watch locomotives taking water at Wolverhampton High Level Station and the LNWR pattern water column is described in the section 'Water Column' in post Wolverhampton High Level Remembered


Water Crane, Shackerstone. Note the brazier.

We made four more round trips to Shenton on the regular timetable, doing good business each time. On most trips, we'd make up a few minutes, only to lose them again waiting for passengers. After the fifth round trip, we'd arranged for Adrian to meet us at the ground level coal storage bunker in the North End Sidings at Shackerstone. Here, with Adrian driving the 'Wetherill' bucket loader, we re-coaled, ready for our two Evening Specials, inevitably increasing our lateness. Movements from the North End Sidings back into either platform line are controlled by a ground disc signal which, because of the distance from the signal box, is electrically-operated. Unusually, the signal is not provided with coloured spectacles to allow the signal to give red or green indications at night. The signal is similar to types which were used extensively on both the Southern Railway and London Underground, where an electric spotlight was provided to illuminate the face of the disc at night.


Westinghouse electrically-operated semaphore ground signal,
Shackerstone No. 7.


The 'Specials'

We watered, completed the run-round and prepared to take the first of the Evening Specials. A relief signalman had taken over in Shackerstone signal box and Garth took over as Guard but the locomotive crew carried on. We were due out at half past five, but it must have been nearer six before we left.


'Cumbria', coaled, watered and with the engine lamps lit, ready to depart with the late-running 17:30 'Special'.

We set off at dusk in that strange twilight where motorists often mistake what they can see so we made sure we kept a sharp lookout. The train was well-patronised with lots of people getting off and on at our intermediate stop at Market Bosworth. In the gathering gloom, we made our sixth journey of the day to Shenton. When leaving the engine at Shenton, extra care was taken during uncoupling, coupling, setting lamps and working points because of the increased risk of slips, trips or falls in the reduced visibility.

As we waited for the "Right Away" from Shenton, the station lighting threw a few small pools of yellow light onto the platform, insufficient to see how advanced station duties were. Eventually, we set off, slowly until we'd passed over the temporary speed restriction at Bridge 21, where the bridge parapet was just visible as we passed, then accelerating up the bank. It had become properly dark and much cooler. The ground was completely black and the line ahead invisible. The sky had dimmed to a deep purple so that the outlines of lineside features like trees, overbridges or telegraph poles were eerily silhouetted against the sky. In the post The Railway at Night, there's a brief description of the problems of running trains in the dark. As visual cues are reduced, hearing becomes more important and drivers had to orient themselves largely by listening to the differing sounds made by various lineside features. At Market Bosworth, there was the usual bustle of activity on the platform then we set off for Shackerstone.
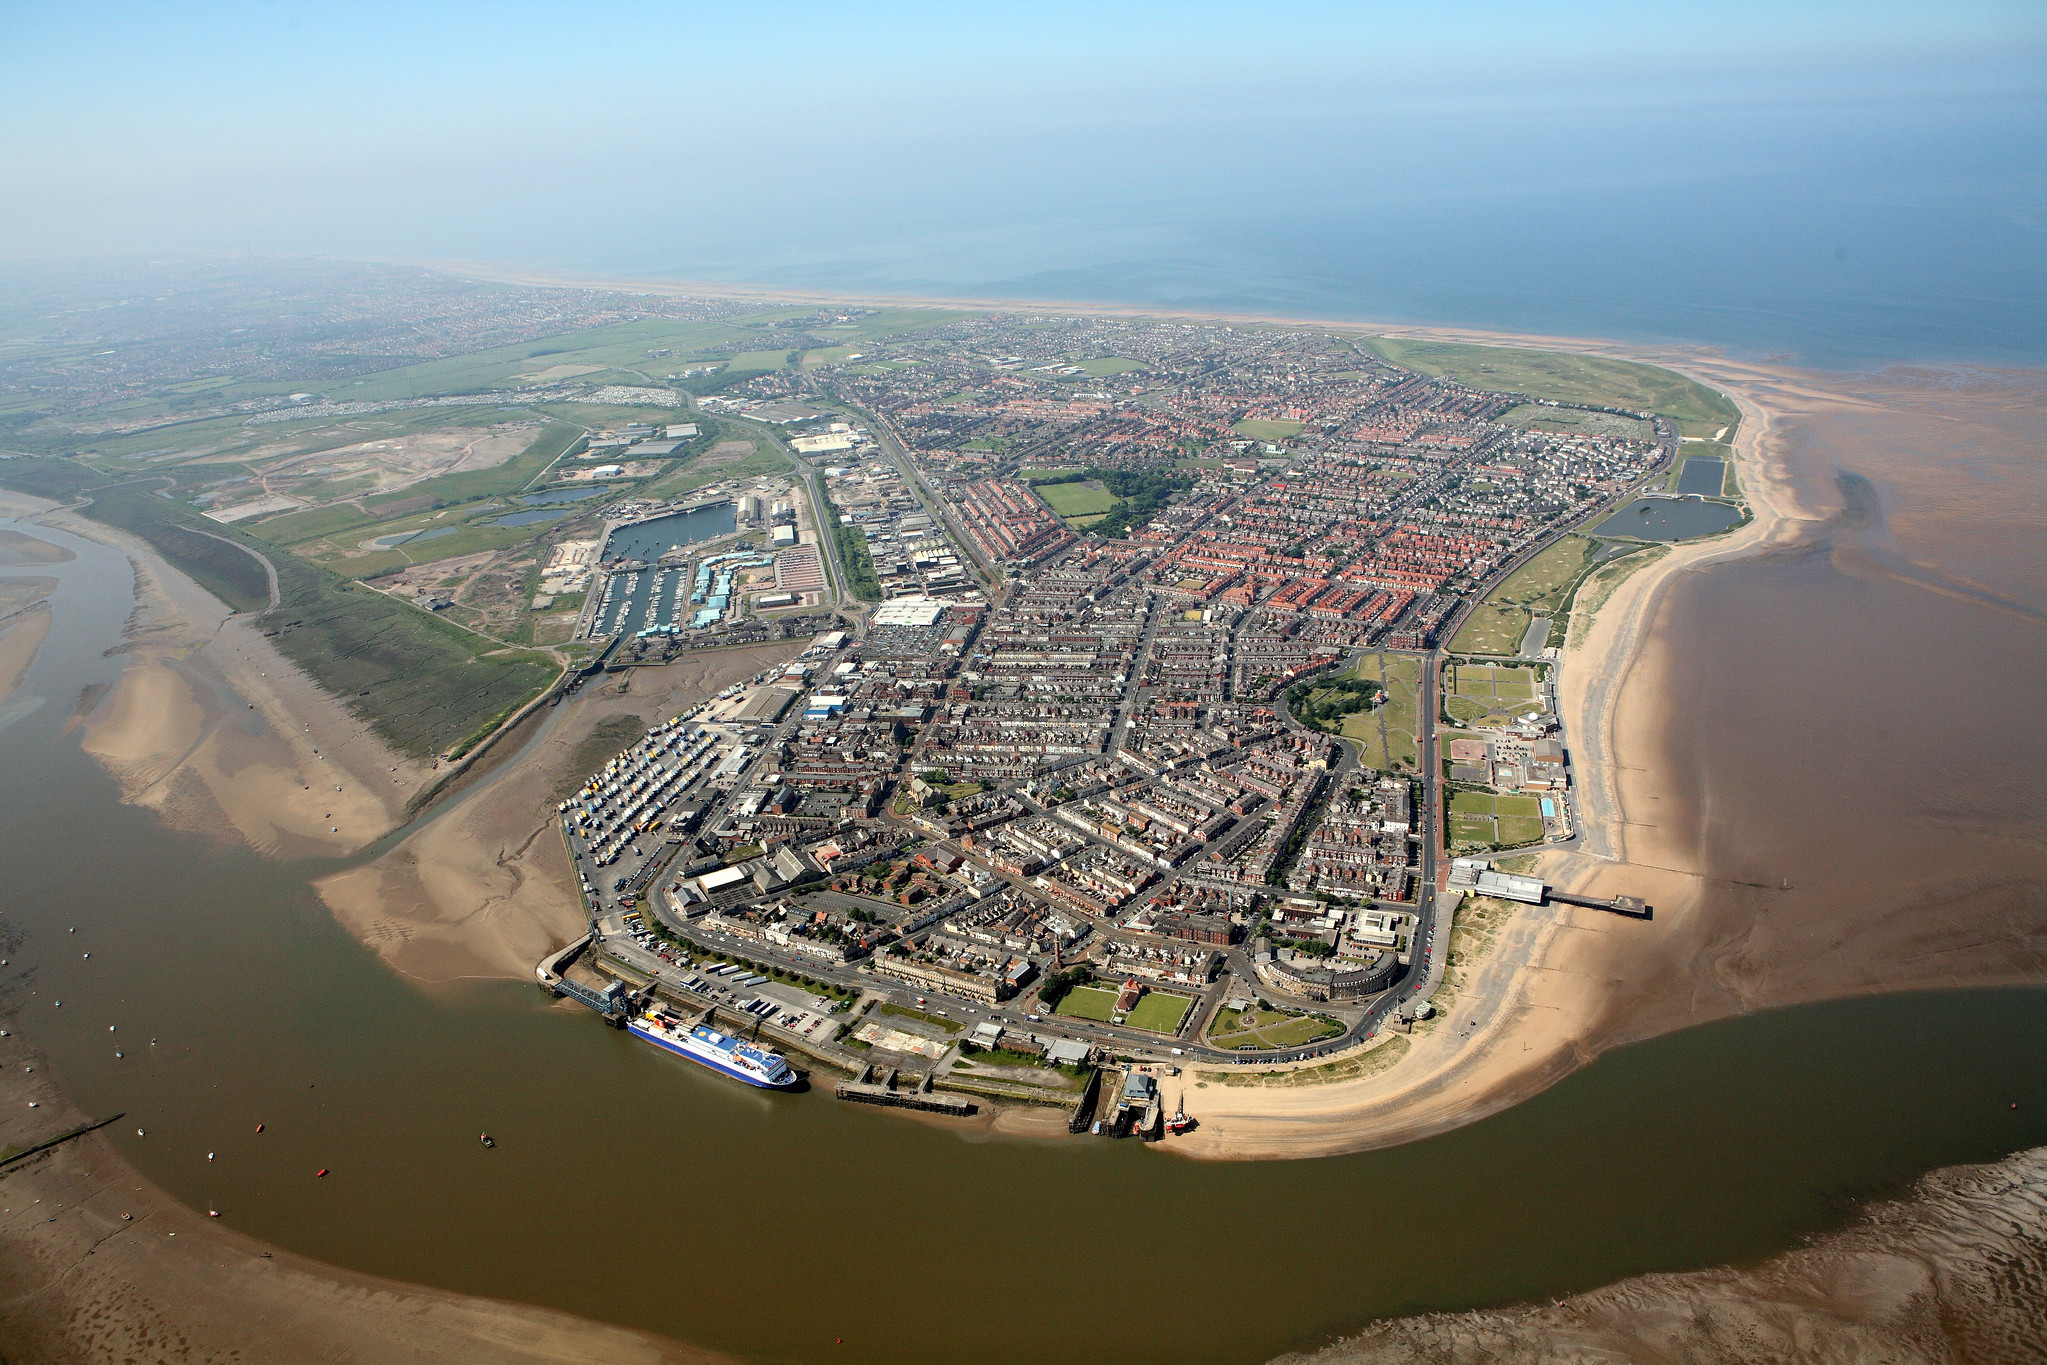
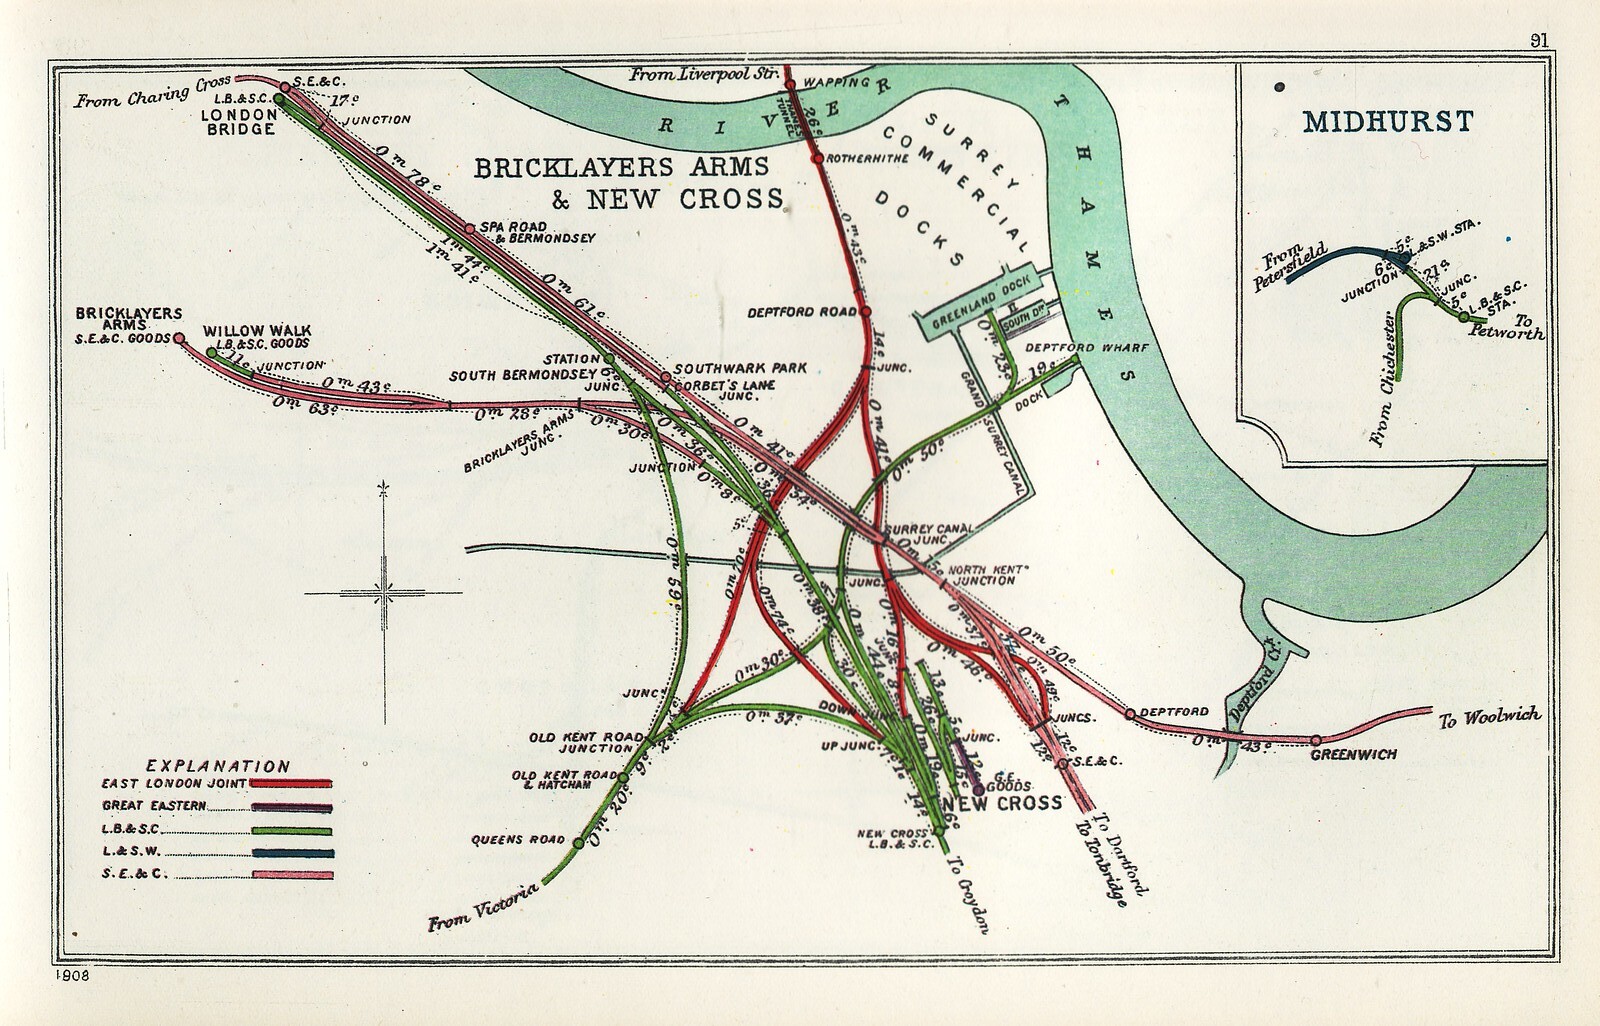
Approaching Barton Lane overbridge, I slowed to 10 m.p.h. and looked out for the outer home signal. The post and signal arm would be invisible - I was looking for a red or green signal lamp. Traditionally, semaphore signals were lit with paraffin lamps, as described in the post here, but the main signals at Shackerstone have been electrified, with filamentary lamps replacing the original oil lamps. The signal was 'off' so we continued our approach, looking out for 'green above red' at the inner home, which would mean we were cleared to platform 1. Having confirmed the signal aspect, I prepared to surrender the Single Line Token to the Signalman, who had to leave his cosy-looking box to wait on the outside landing. As I passed, he gave me permission to pass the Stop Board at the north end of Platform 1 to run round. On arrival, we ignored the activity on the platform to concentrate on uncoupling, drawing forward, setting the hand points towards platform 2 and, once the signalman had 'cleared' the ground signal, reversing to the water crane.

Taking water is not much fun in the day but, at night, the man on top of the saddle tank manhandling the water 'bag' has to be especially cautious. Having taken water for the last time, we moved across to the front of our train for our final round trip to Shenton. Before we left Shenton for the last time, I recorded the scene but, even with flash, there's not much to see.


'Cumbria' ready to leave Shenton with the last service of the day to Shackerstone.

Once again, we went through the complex pattern of changing speed to comply with the various slacks, in the dark. This is where a good Fireman shows his colours. We needed enough fire to work the train back to Shackerstone, move light engine to shed, clean the fire and fill the boiler, leaving ideally not more than 50 p.s.i. on the 'clock'. Underdo it and it may be difficult to complete one or more of those tasks; overdo it and the crew may be faced with 'paddling out' excessive fire, wasting fuel (and effort). Jamie had judged matters nicely and everything was in order as the approached the inner home at Shackerstone where, this time, we got 'red above green' - cleared to platform 2, as shown in the special timetable. On arrival, we lost no time in uncoupling, drawing forward, changing the points for platform 1 and backing through the platform to the Ground Frame which gave access to the Loco Shed.

Disposal

We stopped outside the Shed with reasonable pressure to move into the shed (the problem isn't being able to move, it's having sufficient steam for an effective steam brake - without that, you're reliant on screwing on the handbrake to stop), decent water level and a nice 'low' fire. We co-operated on 'cleaning' the fire. The coal we'd been using was pretty good, but tended to produce some 'clinker' where impurities in the coal fuse with the incombustible ash to produce a metallic 'slag'. If left undisturbed to cool down, 'clinker' tends to 'glue' itself to the firebars and can be very hard to remove. The standard approach is to scrape the clinker off the bars whilst hot and break it up, removing it with a 'clinker shovel' or 'paddle' ('paddling it out'), if necessary. I prefer to slide the flat end of a 'long pricker' up and down the bars to detach clinker but other tools, like a 'long dart' or a 'bent dart' may also be needed. There's a general post on Disposal here.

I moved 'Cumbria into the shed for the night and we used the remaining steam to fill the boiler. I had a quick look round the locomotive for anything untoward, checked each wheel centre with the back of my hand for running 'hot' then (because "The job's not done 'till the paperwork's done") set about completing the three-page 'Fitness To Run' ('FTR') report completed for each day's steaming. Meanwhile, Jamie and Richie isolated the various cocks and tidied things away. My shift had been 11 hours - Jamie's and Richie's even longer but we all agreed that we'd had a good, if tiring, day.

On the footplate

The description above is specific to working the trains for 'Operation: Market Bosworth'. Footplate work is very varied according to the locomotive in use and the 'diagram' (the details of the movements to be carried out). More posts on this topic are listed below:-

On the Footplate (Part 1).
Stanier '8F' inauguration at Peak Rail.
MIC - The Working of Trains.
Driving Turn at Peak Rail - Part Two: Driving Experience.
A Day on the Footplate (2).
Peak Rail Winter Service 2013.

Other posts on this site featuring 'Cumbria'

The Battlefield Line Steam Gala.
The 'Austerity' 0-6-0ST locomotive.
'Santa Specials' at The Battlefield Line - Christmas 2015.
Sunday at Shackerstone.
Teddy Bears' Picnic (by another author).
'Operation: Market Bosworth' - The Battlefield Line 1940s Weekend 2016

My Pictures

Battlefield Line 1940s Weekend 2016.
All my Battlefield Line pictures.

[Update 13-Aug-2017]