Wednesday, 5 November 2014

On foot around Liverpool Docks

Introduction

The walk I'm about to describe has its origins in a visit I made to Liverpool on 6th July 2011. In the morning, my friend John Hawley and I were involved in a filming session in connection with the locomotive 'Lion' (brief report here) and in the afternoon we took a circular tour on the Mersey Ferry. I spotted a Scherzer rolling lift bridge in the Liverpool Docks and took the picture below thinking "I must have a closer look at that".
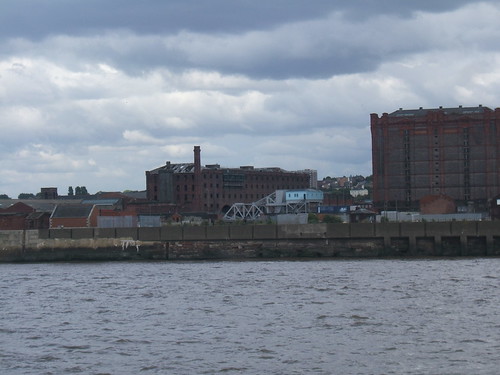
Regent Road Scherzer Rolling Lift Bridge from the river in 2011.

The Scherzer rolling lift bridge is a particular type of Bascule Bridge. You can study the manufacturer's 1906 catalogue extolling the design's virtues here. There are also three Scherzer rolling lift bridges in Birkenhead's docks and I tracked them down on 8th February 2014, as described here.

On 9th August 2014, I explored some of the former Lancashire and Yorkshire Railways in Lancashire and managed to fit in another trip on the Mersey Ferry, which I wrote about here. I took another picture (below) of the Scherzer rolling lift bridge in the Liverpool Docks and thought "I REALLY must have a closer look at that".
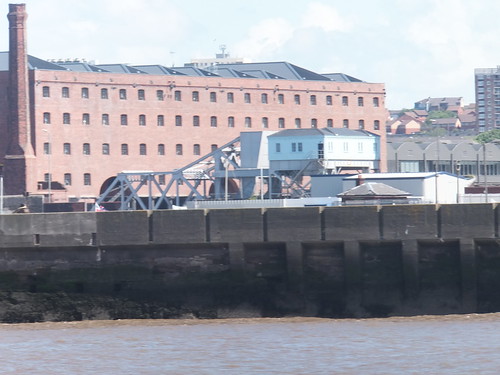
Regent Road Scherzer Rolling Lift Bridge from the river in 2014.

On 4th October 2014, I decided to travel on the railways of the former Cheshire Lines Committee (CLC) which still have a passenger service and those trips are described here. To travel the last few miles of CLC from Hunts Cross to Liverpool Central (the new, underground station - the original surface station has gone), I had to take a Merseyrail Northern Line train and I decided to continue on that train to Sandhills. This part of the day is described in the post More Merseyrail. From Sandhills, I decided to walk back to Pierhead along the dock road (Regent Road) which would take me, at last, across the Regent Road Scherzer Rolling Lift Bridge.

This aerial phograph gives an impression of the Sandhills area in 1937.


Sandhills in 1937: The former Lancashire & Yorkshire Railway line to Southport and Aintree runs horizontally across the middle of the photograph. Nearer the camera (at a lower level) is Huskisson Goods Depot. The road running almost vertically towards the docks is Sandhills Lane. L-R the docks are Sandon (now filled in) and Huskisson Branch Docks 1,2,3 (Click on the image for a slightly larger version).

It's all rather different now, of course.

Sketch Map of part of Liverpool Docks in 2014
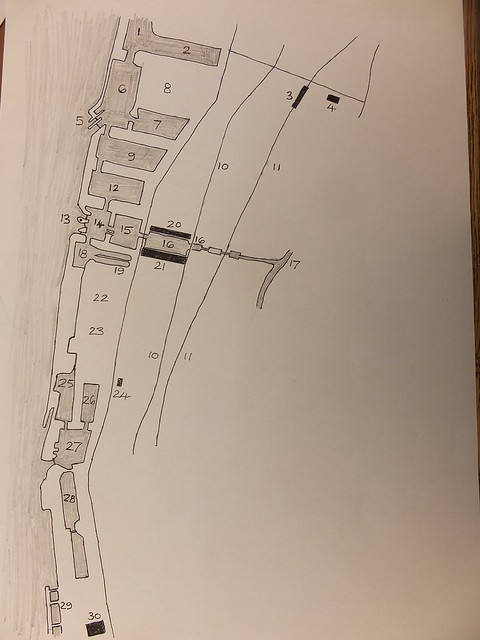
Sketch Map of part of Liverpool Docks in 2014. For explanation of reference numbers, see the table below.

Ref Description
1 Huskisson Dock.
2 Huskisson Branch Dock No. 1.
3 Sandhills Station (Merseyrail).
4 Sandhills Signalling Control Centre (Merseyrail).
5 Entrance Locks to Sandon Half-Tide Dock.
6 Sandon Half-Tide Dock.
7 Wellington Dock.
8 Former Sandon Dock (now filled-in and United Utilities Liverpool Wastewater Treatment Works).
9 Bramley-Moore Dock (hydraulic tower on NE quay).
10 Public Roads.
11 Merseyrail Northern Line.
12 Nelson Dock.
13 Entrance Locks to Salisbury Dock and Victoria Tower.
14 Salisbury Dock.
15 Collingwood Dock.
16 Stanley Dock.
17 Leeds and Liverpool Canal.
18 Trafalgar Dock (part filled in).
19 Clarence Graving Docks.
20 Former Warehouse now 'Titanic' Hotel.
21 Tobacco Warehouse.
22 Former Clarence Dock (now filled-in).
23 Former Trafalgar and Victoria Docks (now filled-in).
24 Kingsway Tunnel Ventilation Station.
25 Waterloo West Dock.
26 Waterloo East Dock (Grain Dock).
27 Princes Half-Tide Dock.
28 Princes Dock.
29 Liverpool Landing Stage.
30 Liver Building.


A walk along Regent Road in 2014

I walked along Sandhills Lane towards the docks until I reached Regent Road and then turned left heading towards Pierhead. Regent Road is divided from the dock estate by a tall boundary wall. In this area, the wall is in Jesse Hartley's 'Cyclopean' masonry. However, at the first set of gates, the gatekeeper's lodge is in brick.
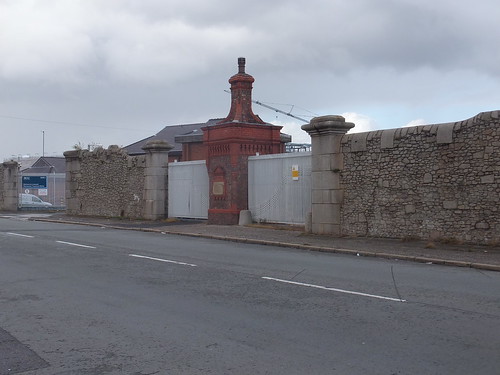
Liverpool Docks, Regent Road: Jesse Hartley's Dock Wall in 'Cyclopean' masonry with In-Out gates flanked by rectangular stone pillars and a brick Gatekeeper's Office in between the two gates provided with a rather fancy roof and central chimney.

Sandon Dock has been filled-in and is now home to the huge Liverpool Wastewater Treatment Works, operated by United Utilities. Bramley-Moore Dock and Nelson Dock are still 'wet'. The most notable feature I could see was a derelict brick-built hydraulic tower which appeared to have an integral pump house and chimney, built on the quay at Bramley-Moore Dock. Afterwards, I confirmed that it's a Grade II Listed Engine house, accumulator tower with a pyramidal roof and truncated octagonal chimney (the chimney cap is missing). It's in common brick with red brick dressings, slate roof and round-headed windows/entrances. It was built in 1883 by George Fosbery Lyster (1821 – 1899) who, in 1861, followed Jesse Hartley's son John as Engineer-in-Chief to Mersey Docks and Harbour Board.
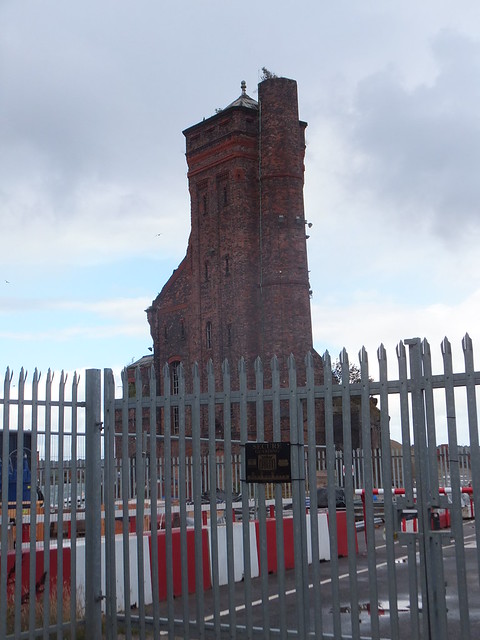

Lyster's Hydraulic Tower in Bramley-Moore Dock.

Every so often, the dock wall was pierced by other IN-OUT gateways. A number of them were in the form the form of two gates flanked by round turret-like stone pillars (slotted for sliding gates) with a matching stone Gatekeeper's Office with chimney (or at least the remains of a chimney) in the centre.
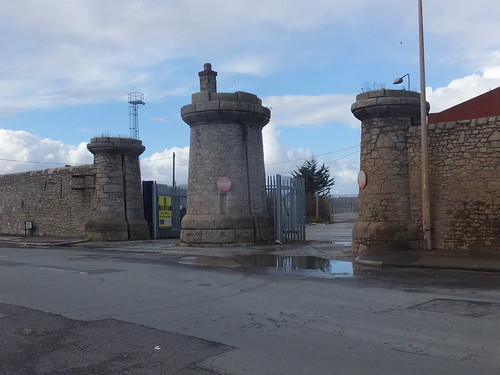
Liverpool Docks, Regent Road: Jesse Hartley Dock Wall with In-Out gates flanked by round turret-like stone pillars (slotted for sliding gates) with matching stone Gatekeeper's Office with chimney in centre.

In a couple of places, I found a cast iron drinking fountain set in the dock wall. The first was clearly unrestored but the second had been repainted black.


I passed more gates with more variations in design before I approached the Regent Road Scherzer Rolling Lift Bridge. This divides Collingwood Dock from Stanley Dock but neither dock remains in commercial use so the bridge is no longer required to open. The landward end of Stanley Dock connects to the Leeds and Liverpool Canal via locks but canal leisure craft can pass under the bridge when closed.

The northern quay of Stanley Dock has a massive warehouse which re-opened in June 2014 as the Titanic Hotel Liverpool. Reports say 36 million pounds has been spent converting the building into a 4-star 153-room venue. A dispute with contractors held up completion for some weeks until a 5 million pound grant from the City Council was released. Work is continuing on making an Events and Exhibition space as part of the 'Stanley Dock Village Development'. However, the name of the hotel has ruffled feathers at another Liverpool hotel 30 James Street - Home of the Titanic which had its official opening in October 2014.

Next to the bridge is the Stanley Dock Hydraulic Tower - another Jesse Hartley confection looking like a medieval castle next to the associated pumphouse and chimney.

Liverpool Docks: Regent Road with Jesse Hartley turret style gateposts on left leading to 'Titanic' Hotel, Stanley Dock Hydraulic Tower, pump house and chimney, Rolling Lift Bridge and, in background, Tobacco Warehouse.

Stanley Dock Hydraulic Tower, Pumphouse and Chimney with the 'Titanic' Hotel in background.
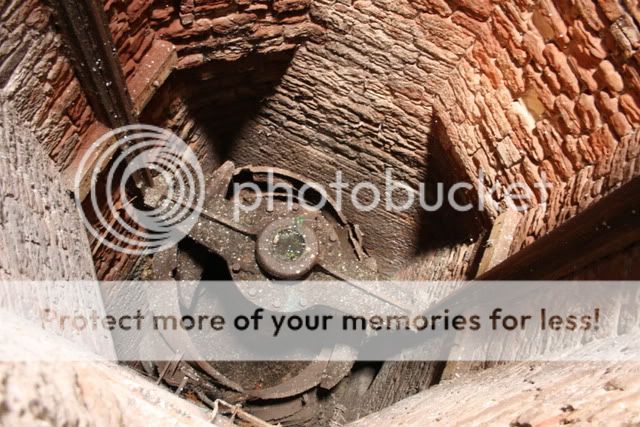
View inside the hydraulic tower (Photo: www.urbexforums.com).

The Rolling Lift Bridge has been cosmetically restored. To see what it looked like before restoration, have a look at Urbex Forums here. The bridge was electrically operated and it appears that the gates either side of the bridge which close off the road and the pavements are also power worked. I noticed that a cast electrical terminal box was marked 'IGRANIC'. Igranic originated in 1906 and is now part of Automated Technology Group.
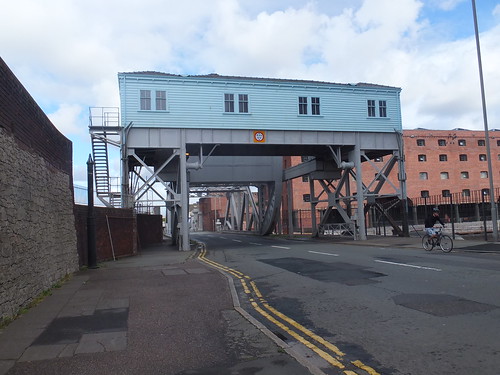
Regent Road Scherzer Rolling Lift Bridge after cosmetic restoration with the 'Titanic' hotel in the background.
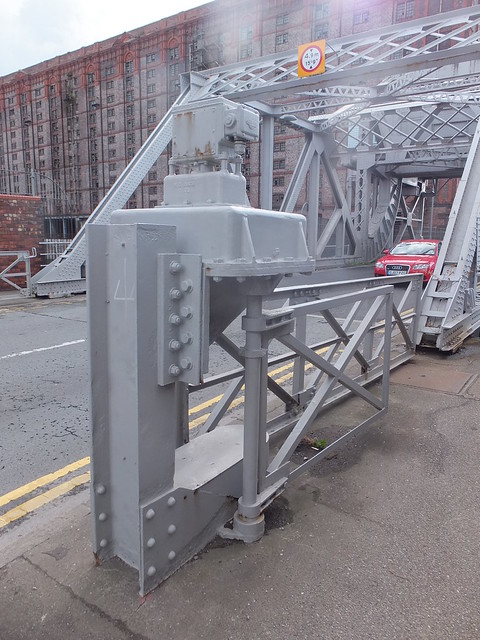


Regent Road Scherzer Rolling Lift Bridge after cosmetic restoration with the Tobacco Warehouse in the background.

The 14-storey Stanley Dock Tobacco Warehouse on the south side of Stanley Dock is thought to be the largest brick building in the world (27 million bricks) and was completed in 1901 to a design by A. G. Lyster (mentioned above in connection with the Hydraulic Tower at Bramley-Moore Dock). This huge building awaits restoration.

The Tobacco Warehouse, Stanley Dock.

I passed the Clarence Graving Docks, out of use and surrounded by a rather bleak area of quayside. Clarence Dock itself was filled-in in 1929 and Clarence Dock Power Station (with its three tall chimneys called affectionately the "three sisters") was built there. In turn, the power station has now gone.

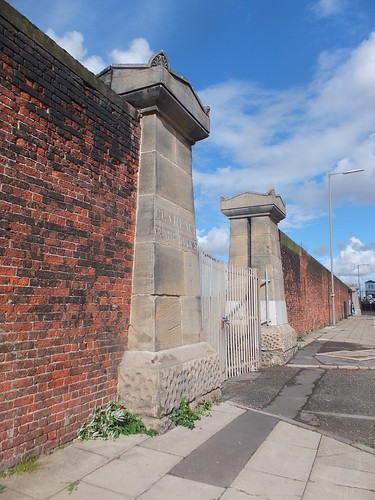
Continuing along Regent Road the tall dock wall is brick with stone cappings and the gateposts are massive rectangular stone pillars, still carrying the names of the docks originally served, like Clarence Dock and Trafalgar Dock. An octagonal modern plaque attached to the wall commemorates the 1.3 million Irish migrants who passed this way during the Great Famine between 1845 and 1852.
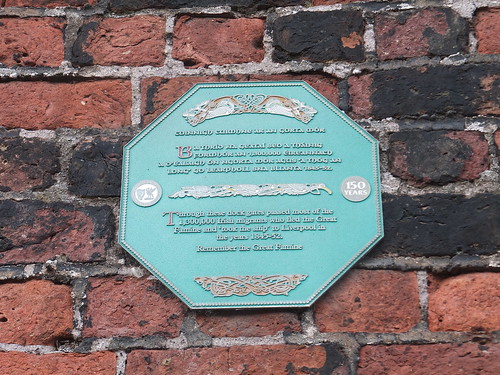
"Through these dock gates passed most of the 1,300,000 Irish migrants who fled the Great Famine and 'took the ship' to Liverpool in the years 1845-52. Remember the Great Famine."

On the left, I passed the ventilating station for the Kingsway Road Tunnel, opened in 1971. The appearance suggests a pair of giant, stereo loudspeakers. Not to my taste, I'm afraid.
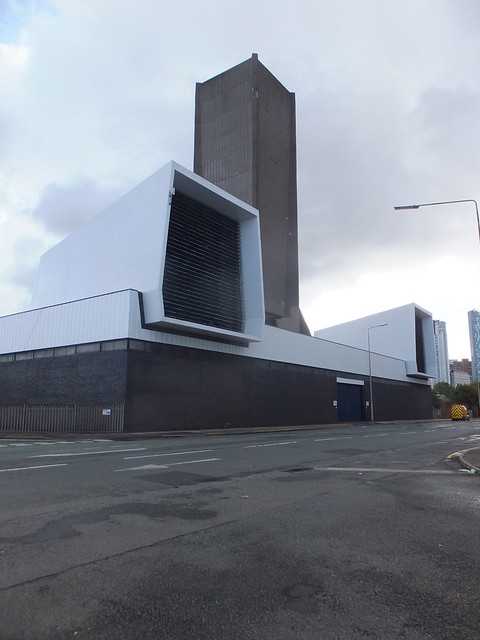
Kingsway Tunnel Ventilating Station.

Princes Half-Tide Dock, Waterloo West Dock and Waterloo East Dock are still 'wet' but now accessible only to canal craft. The huge warehouse on the east side of Waterloo East Dock has been given a new lease of life as apartments.
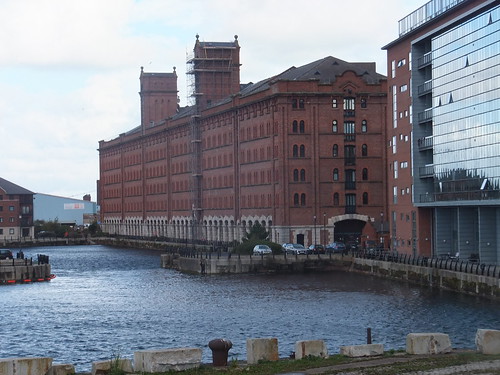
Warehouse on Waterloo East Dock, now apartments.

The last dock on my walk was Princes Dock, immediately north of the Royal Liver Building. When I was young, Princes Dock had its own railway station, Riverside, served by Boat Trains from London Euston operated in conjunction with Trans-Atlantic liner sailings. Today, you search in vain for signs of this past. Modern buildings line the quays and the dock is only suitable for canal leisure craft.
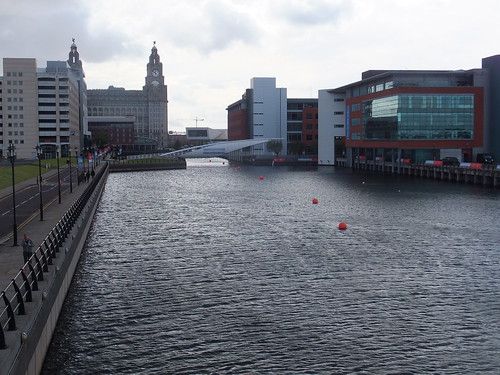
View of Princes Dock looking south, showing the Royal Liver Building and, in the distance, the Museum of Liverpool.

I carried on to Pierhead and, after the usual brief visit to the locomotive 'Lion' in the Museum of Liverpool, walked to James Street Merseyrail station. The next part of my travels is described here.

Related posts on this website

More Merseyrail.
Notes on Liverpool and its Docks..

Books

[1] 'Jesse Hartley - Dock Engineer to the Port of Liverpool 1824-60' by Nancy Ritchie-Noakes, published by National Museums and Galleries on Merseyside (ISBN 0 906367 05 0).
[2] 'L.N.W.R. and the M.D.& H.B. - The History of the Dock Lines from the Records' by J. C. James, Limited Edition published c1981.
[3] 'Prince's Dock - A Magnificent Monument of Mural Art' by Adrian Jarvis published 1991 by Merseyside Port Folios (ISBN 0 9516129 0 5).
[4] 'Liverpool and its Canal' by Mike Clarke and Allison Hewitt published 1992 by Merseyside Port Folios (ISBN 0 9516129 3 X).
[5] 'An Illustrated History of Liverpool's Railways' by Paul Anderson, published Irwell Press (ISBN 1-871608-68-6).

My Pictures

Liverpool Docks.
Liverpool.

Wednesday, 29 October 2014

Notes on Liverpool and its Docks

Introduction

I've always found Liverpool a special place. In 2009, I wrote my first post about the City called simply Liverpool. Since then, I've added a number of posts with a Liverpool theme. I summarised my posts up to June 2014 in the post Liverpool (again). Liverpool's location on the west coast of England, facing Ireland and the New World, encouraged its growth as a major seaport. By 1927 the dock system extended for over 6 miles along the east side of the estuary of the River Mersey. The panorama of the docks below in the 1950s was included in the post The Liverpool Overhead Railway (where there is a larger version).


Notes on the History of Liverpool Docks

In the 18th century, the Old Dock (subsequently filled in), Canning Dock, Salthouse Dock, Georges Dock Dukes Dock, Kings Dock and Queens Dock were built, all upstream (south) of the present Pierhead. In 1810 John Foster Senior added Princes Dock. In 1824 the remarkable Jesse Hartley (1780 - 1860) became Dock Engineer and, by 1860, had increased the size of Liverpool's docks from 46 acres to 212 acres. All the old docks were modernised and he was responsible for the design and execution of numerous new docks both to the north (Clarence Dock, Waterloo Dock, Trafalgar Dock, Stanley Dock, Collingwood Dock, Nelson Dock, Bramley-Moore Dock, Salisbury Dock, Wellington Dock, Sandon Dock, Huskisson Dock, Canada Dock) and to the south (Brunswick Dock, Coburg Dock, Albert Dock, Toxteth Dock, Wapping Dock)

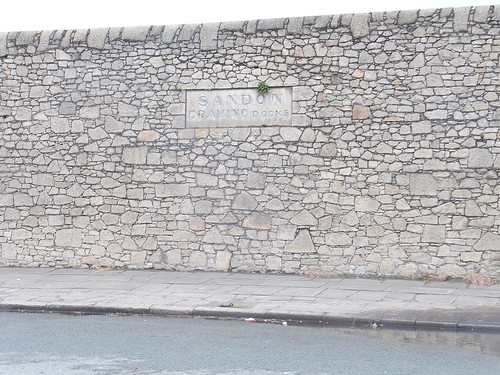
Hartley's background was as a stonemason and the quality of the work he supervised was so good that it can be admired even today. He had a fondness for so-called 'Cyclopean' masonry using irregularly-shaped stones carefully fitted together. In constructing quay walls, huge stones might be used but a similar style with smaller stones was also used extensively.

Enclosing wall for Sandon Graving Docks, built 1848, featuring Jesse Hartley's 'Cyclopean' masonry.

When Hartley used 'worked' stone, the accuracy he demanded was amazing. His architectural style is sometimes called 'eclectic' but I'm tempted to call it 'eccentric'. He mixed styles and materials in a flamboyant manner, but work was always carried out to the highest quality.

Hartley was an innovator in dock design. He constructed huge locks to separate the river from groups of docks, allowing the water level to be kept constant in the docks to facilitate loading and unloading of ships. But the locks allowed ships to enter or leave the docks at any state of the tide.

A Lock Keeper's Office by Jesse Hartley, illustrating his attention to detail and build quality.

Jesse Hartley also pioneered the concept of Enclosed Docks. By providing substantial, tall dock walls with access to the docks only through manned gates, theft was significantly reduced.

Jesse Hartley Dock Wall in stone with In-Out gates flanked by round turret-like stone pillars (slotted for sliding gates) with matching stone Gatekeeper's Office (incorporating a chimney).


Jesse Hartley Dock Wall in brick with gateway flanked by stone pillars (Clarence Graving Docks).

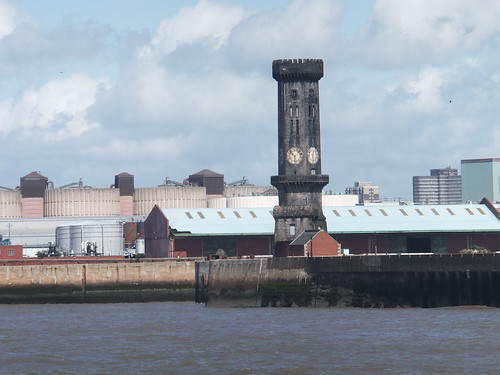
An example of Jesse Hartley's architectural range is the 6-sided clock tower at the entrance to Salisbury Dock, completed in 1848. It's called officially Victoria Tower and is described on Wikipedia here. Listed Grade II it awaits the refurbishment promised by Peel Ports. There's further information on the Tower here.

Victoria Tower from the river.

The prolific Jesse Hartley was also the Dock Engineer for Birkenhead's docks. There's a brief post on a walk around Birkenhead's docks here.

Jesse Hartley died in 1860 and his immediate successor was his son, John Hartley. Over the next 40 years, Liverpool Docks continued to expand both to the north (Brocklebank Dock, Langton Dock, Alexandra Dock, Hornby Dock) and the south (Herculaneum Dock, Harrington Dock). In 1913, Gladstone Graving Dock (a Dry Dock) was opened, followed by Gladstone Dock in 1927.

This represented the zenith of dock development in Liverpool. In the 1950s, the now-familiar Shipping Container was introduced. Containerisation reduced the need for traditional docks like Liverpool. In 1972, a new container dock was built to the north of Gladstone Dock, Seaforth Dock (sometimes called 'Royal Seaforth Dock'). Some of the old docks have been filled-in to permit new developments but most of the quays and enclosed areas of water remain but, for the most part, much less used.

Liverpool Docks were operated by the Mersey Docks and Harbour Board for a long period and there's a brief post here. Today, a reduced set of docks is operated by the Mersey Docks and Harbour Company, part of Peel Ports.

The Peel Ports website on Liverpool is here. The emphasis now is on the container post at Seaforth, which rendered many of the earlier docks redundant. Peel Ports are also completing a new deepwater container port called 'Liverpool2', due to open in 2015, which they say will handle "two 380m mega post-panamax vessels simultaneously". There's more information here and an excellent explanation of the terms 'Panamax' and 'Post-Panamax' in Wikipedia here.

I consider myself fortunate that I saw Liverpool Docks before the Containerisation Revolution brought major changes to its role.

Related articles on other sites

Jesse Hartley (Wikipedia).
Port of Liverpool (Wikipedia).
List of Liverpool Docks (Wikipedia).
Liverpool Docks (Victoria County History).
Mersey Docks 1949.
Seaforth Dock (Wikipedia).
Peel Ports, Liverpool.
Peel Ports, Liverpool2

Related posts on this site

Liverpool.
Liverpool (again).
The Liverpool Overhead Railway.
Birkenhead and New Brighton by train (Part 2) (On foot around Birkenhead's Docks).
The Mersey Docks and Harbour Board.
On foot around Liverpool Docks.

Books

[1] 'Jesse Hartley - Dock Engineer to the Port of Liverpool 1824-60' by Nancy Ritchie-Noakes, published by National Museums and Galleries on Merseyside (ISBN 0 906367 05 0).
[2] 'L.N.W.R. and the M.D.& H.B. - The History of the Dock Lines from the Records' by J. C. James, Limited Edition published c1981.
[3] 'Prince's Dock - A Magnificent Monument of Mural Art' by Adrian Jarvis published 1991 by Merseyside Port Folios (ISBN 0 9516129 0 5).
[4] 'Liverpool and its Canal' by Mike Clarke and Allison Hewitt published 1992 by Merseyside Port Folios (ISBN 0 9516129 3 X).
[5] 'An Illustrated History of Liverpool's Railways' by Paul Anderson, published Irwell Press (ISBN 1-871608-68-6).

My Pictures

Liverpool Docks.
Liverpool.

Monday, 27 October 2014

Ellesmere Port - Helsby line

On Saturday 4th October 2014, having earlier travelled on most of the former Cheshire Lines Committee (CLC) routes which still have a passenger service (as described in the post here), I transferred to the Northern Line of Merseyrail to explore the short section of the former CLC line from Hunts Cross to Liverpool. Later, I used the Wirral Line from James Street to West Kirby and back before finally travelling to Ellesmere Port (as described in the post More Merseyrail).
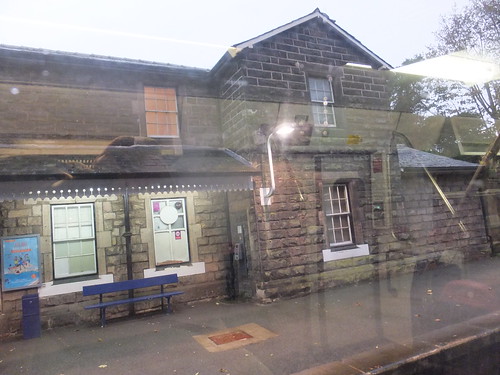
The line from Ellesmere Port to Helsby still has a passenger service, operated by Northern Rail, but it's confined to a couple of trains each way early morning and two more round trips in the afternoon. Otherwise, you can catch a Merseyrail electric to Hooton, change for Chester then change again for Helsby. Instead of a ten minute direct journey, it can take the best part of an hour or longer, depending upon connections.

Ellesmere Port station

I was intrigued that what was a double track wayside station now operates as two back-to-back terminals.

Ellesmere Port station. Merseyrail electrics use the far platform (platform 1); Northern Rail trains use the near platform.

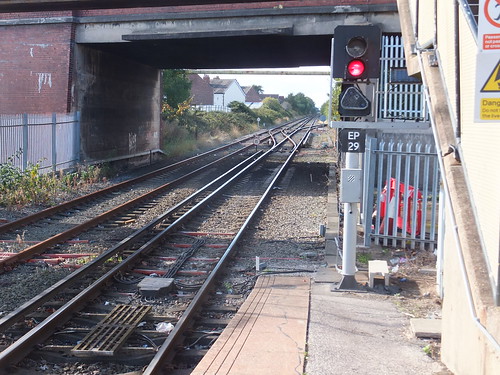
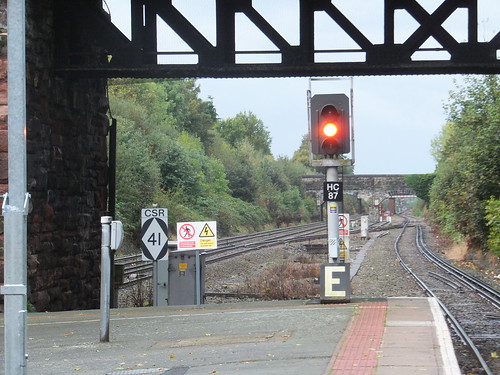
Merseyrail trains arrive in platform 1 on the down line and, when unloading and loading has taken place and the Driver and Guard have changed ends, the train departs via a trailing crossover at the Hooton end of the station (shown in the photograph below) to reach the Up line for the journey back to Liverpool. There's also a trailing connection in the Down line to the dock branch. This was originally closed over 20 years ago but was re-opened as a railhead in 2011 by Peel Ports and Quality Freight. A 2-aspect colour light signal controls departures onto the Up line; the subsidiary aspect is presumably for movements onto the dock branch. In the 'four foot' note the traction impedance bond and (foreground) the Train Stop Loops forming part of the Train Protection and Warning System (TPWS) installation.
Ellesmere Port: View from platform 1 looking towards Hooton, showing the crossover used by electric trains. The single line diverging to the right serves the much-altered dock branch.

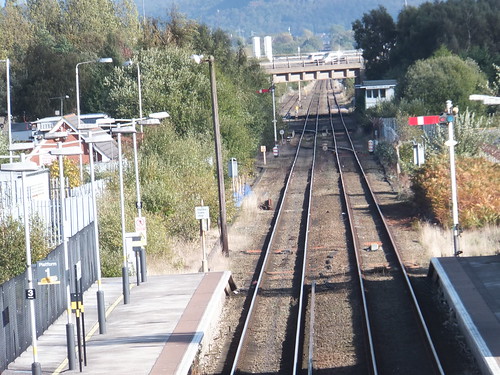
Looking towards Helsby, we're suddenly in the world of semaphore signalling (with a huddle of ground disc signals) operated from a manual signal box (a composite design with a brick base and a British Railways Standard top. The picture below is the view from the station footbridge looking towards Helsby. The third rail on platform 1 (left of picture) ends abruptly at the platform ramp. In the 'four foot' on the Up line, there appears to be an AWS Magnet to serve as a warning to trains approaching platform 2.

Ellesmere Port: View from station footbridge looking towards Helsby.

Ellesmere Port to Helsby

I wasn't too confident that my train for Helsby would materialise but, right on time, I saw the headlights of a Diesel Multiple Unit (DMU) approaching. On arrival, a few passengers alighted whilst two passengers and I joined the 2-car Class 156. The Driver and Guard changed ends and, with clear signals, we set off through the crossover onto the Down line, crossing over the Shropshire Union Canal near the signal box which proudly claimed to be 'Ellesmere Port No. 4'. I'm afraid it's now the sole survivor of five boxes which once controlled the major complex of sidings serving the docks and oil refineries. After a few minutes, we stopped at Ince and Elton station but I saw no-one get off or on. A few minutes later we made an equally unproductive stop at Stanlow and Thornton. A few more minutes and we stopped at our destination, Helsby.

Helsby Station

With two afternoon departures from Ellesmere Port only 30 minutes apart, I'd already correctly guessed that my train would go back to Ellesmere Port to form the final service. This time, a small cluster of people boarded and the DMU set of back to Ellesmere Port, regaining the Up line through a crossover.

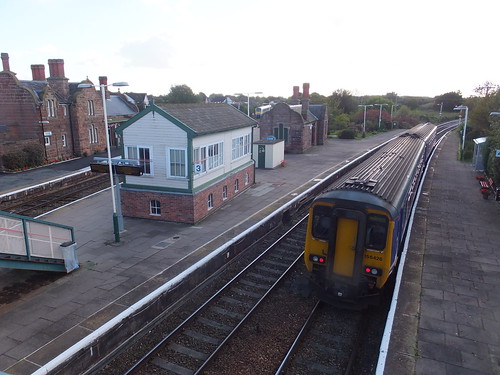
Helsby Station, with the train I'd arrived on from Ellesmere Port standing in platform 4, ready to return to Ellesmere Port.

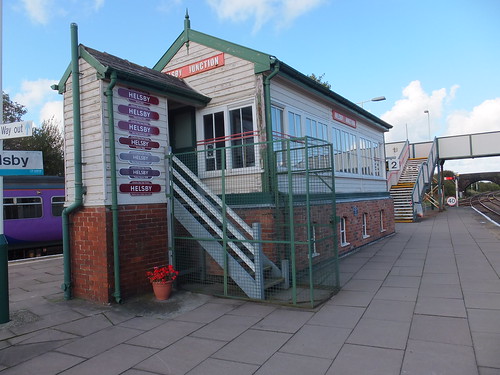
But I'd arranged a few minutes on Helsby station for photography. Of course, I was particularly taken by the LNWR mechanical signal box mounted between platforms 2 and 3. It's the first box I've seen with a locked 'cage' around the access steps (although I think this feature is being introduced more widely). I imagined that this might be to protect the public from a particularly violent breed of signalmen but I'm sure it's actually to protect signalmen from enraged passengers ('customers'?) when they despair of getting to their destination.

Helsby Junction Signal Box, showing the cage around the access steps.

The wooden wall of the toilet displays a number of awards in the form of British Railways 'totem' signs recording Helby's success in the Cheshire Best Kept Station competition:-
Winner 2010
Tidiest Station 2011
Best Kept Gardens 2012
Winner 2006
Best Kept Gardens 2007
Tidiest Station 2008
Cheshire West & Chester Award 2009
Helsby is an attractive station and the semaphore signalling appealed to me (around the station area all upper quadrant tubular post signals). I could have waited for the train I'd arrived on to return from Ellesmere Port since it was then booked to go forward to Warrington. However, when an earlier Arriva Trains Wales service arrived from Chester direction bound for Manchester, I decided to take this train to Warrington Bank Quay.

Helsby to Warrington and home

Our first stop was at Frodsham which has a handsome former station building of brick with stone quoins, window surrounds and detailing. Today's travellers are served by an ugly green 'bus shelter'.

The handsome former station building at Frodsham.

In just over a mile, we came to Frodsham Junction which initially had a double-line junction to Halton Junction on the Weaver Junction - Liverpool main line. A unidirectional single line remains, called the 'Down Chester-Liverpool'. There were once Up and Down Goods Lines extending towards Halton station on the Warrington line. The Up Goods Line survives but Halton station and its signalbox have gone.

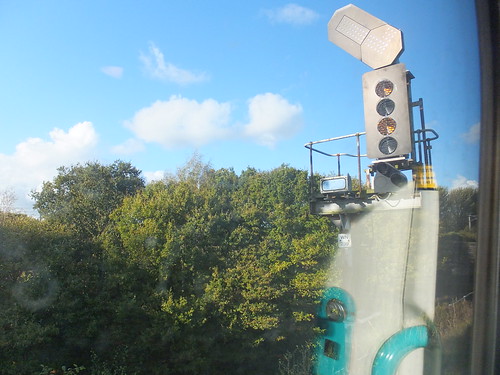
We dashed through Sutton Tunnel (over a mile long) and made a brief stop at Runcorn East - another 'bus shelter'. We passed over the West Coast Main Line (WCML), where I spotted a Virgin 'Pedolino' heading quite slowly towards Warrington. Then we slowed on the approach to Acton Grange Junction where our line converged with the WCML and we came to a stand at the colour light protecting the junctions, WN239. After a short wait, we started to move and I found that the signal head and route indicator had been replaced by yet another variation of modern, Light Emitting Diode (LED) signal. The flat panel forming the route indicator looked very odd to my eyes - I'm old enough to remember the Air Raid Precaution (A.R.P.) design signal box at Acton Grange junction and semaphore signals. I always have a vision of a wheezing 'Super D' freight engine dragging a long loose-coupled freight up the gradient on the 'Old Line' towards the signal box. Well, the four tracks with double junctions remain, as does the massive lattice girder bridge carrying the four lines over the Manchester Ship Canal but otherwise the scene has totally changed.

Acton Grange Junction - signal WN239.

We were routed onto the Down Main (presumably following the 'Pendolino' which was nowhere in sight) and soon stopped at Warrington where I left the train. I had a few minutes to wait for the London via Birmingham New Street 'Pendolino' which would take me home. Whilst waiting, the Class 156 I'd left a Helsby arrived, discharged a few passengers and set off again, presumably now Empty Stock, on the Down Slow.

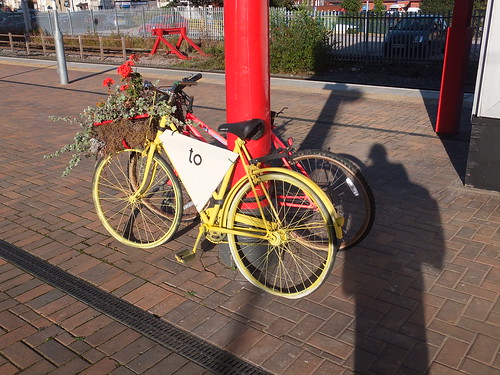
I found at least eight old bicycles, repainted, tied to pillars along the platform. Three successive bicycles of the up platform offered a message to passengers on arriving trains - 'Welcome' - 'to' - 'WBQ'. Coming across the last sign first, it took me a few seconds to realise that 'WBQ' was simply 'Warrington Bank Quay'. One of the bicycles carried a sign reading 'Have you reserved your bicycle?' so I'm not sure whether it was a Art Installation, an advert for Virgin's Bicycle Carrying Facilities, or both. It may be only a coincidence that the Warrington Contemporary Arts Festival was being held at the same time.

A pair of bicycles at Warrington Bank Quay, incorporating a floral arrangement.

My pictures

Merseyrail.
Ellesmere Port - Helsby line.
Warrington Area rail.

Wednesday, 22 October 2014

Signalling on the former Cheshire Lines Committee in the 1950s

Introduction

The Railway Signal Company, located in Fazakerley, Liverpool supplied the signal boxes and signalling equipment when the Cheshire Lines Committee (CLC) was opened. The Railway Signal Company became part of Westinghouse in 1920 and finally closed in 1974. Some of the company records are preserved in the National Archives as detailed here.

However, the CLC always had a distinctive approach and this was no less true of its signalling installations. The CLC set up signalling workshops in Warrington and became self-sufficient.

The CLC lower quadrant semaphore signals featured large spectacle glasses and the CLC even contrived some odd-looking upper quadrant signals using parts for the lower quadrant signals! In a post about signalling in Burma here I was rather unkind about their use of lower quadrant arms on upper quadrant signals - perhaps I now know where the idea originated.


Glazebrook East Junction in 1962 showing a CLC upper quadrant bracket signal. The left doll is for Manchester, the right for Skelton Junction and Stockport. The two miniature arms read to sidings. Today, the signal has gone, the sidings have gone, the branch to Skelton Junction has gone. The main line and the British Railways Standard signal box remain. (From a photo by G. H. Platt)

Not much of this interesting legacy survives today and my recent dash around the system in the rain described here no doubt missed any signalling 'jewels' which remain. I'm afraid it's mainly British Railways Standard signal boxes and colour light signals now and, of course, the lines that remain are much simplified and many signalboxes have been abolished.

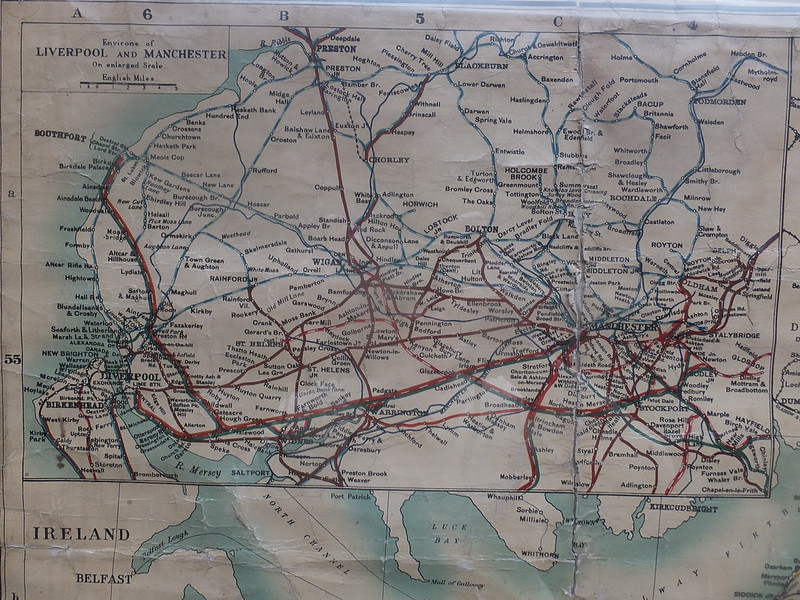
Pre-grouping railway map showing Cheshire Lines Committee routes

The principal CLC routes were:-
1. Liverpool Central to Manchester Central via Warrington Central.
2. Chester to Manchester Central.
3. Halewood/Hunts Cross to Southport Central via Aintree.
4. Glazebrook to Hyde Jn./Godley Jn. via Stockport Tiviot Dale.


Click for larger view. On the above map, CLC routes carry the colours of all three partners:-
Great Northern Railway - Brown
Great Central Railway - White/Red
Midland Railway - Green


Signalling on the CLC in the 1950s

In the 1950s, the CLC routes were mainly controlled by semaphore signals, manual signal boxes and Absolute Block Signalling (although Brunswick had a 45-lever frame plus a small 'NX' control panel and Manchester Central was a Power Box). Nowadays, with many of the lines abandoned and the remaining routes simplified, it's hard to imagine the complexity of the British Railway system even as late as the 1950s. The signal boxes operating on the CLC network in the 1950s are detailed in the John Swift collection (see the section 'Track Diagrams' below) and are listed below.

1. Liverpool Central - Manchester Central
Liverpool Central
Brunswick
Otterspool
Cressington
Garston Central
Hunts Cross West Jn.
Hunts Cross East Jn. (controls a triangular junction with Southport Line - see 3 below)
Halewood West Jn. (Goods Lines only)
Halewood East Jn. (controls a triangular junction with Southport Line - see 3 below)
Hough Green Jn.
Widnes Moor Lane (on Loop Line)
Widnes Central (on Loop Line)
Tanhouse Lane (on Loop Line)
Widnes North
Widnes East Jn.
Sankey
Sankey Jn.
Bewsey (on Loop Line)
Warrington Central (on Loop Line)
Workshops (on Loop Line)
Padgate Jn.
Padgate
Risley West
Risley East
Risley Moss
Dam Lane Jn. (Note A)
Glazebrook West Jn. (Note A)
Glazebrook East Jn. (Junction for Stockport Line)
Irlam
Flixton
Urmston
Trafford Park
Trafford Park Sidings (Goods Lines only)
Trafford Park Jn. (Note B)
Throstle Nest East Junction (Note B)
Cornbrook Sidings (Chester Lines)
Old Trafford Jn. (Chester Lines)
Cornbrook West Junction
Cornbrook Jn. East (LNW Tappet Frame controlling Oxford Road Lines)
Manchester Central (Power Box with Colour Light Signals)
Note A: Dam Lane Jn. and Glazebrook West Jn. control a triangular connection with the GCR Branch to Wigan:-
Glazebrook Moss Jn.
Newchurch Halt (Box Closed)
Culcheth
Lowton St. Marys Jn. (Note C)
Bickershaw Jn.
Bickershaw & Abram
Hindley South (Junction for LNWR Bickershaw Jn, Amberswood West Jn. & Amberswood East Jn.)
Lower Ince
Wigan Central Goods Yard
Note B: Trafford Park Jn. and Throstle Nest East Jn. control a triangular junction with a branch serving both GCR and MR lines:-
Throstle Nest South Jn.
Chorlton
Chorlton Jn. (Junction for MR Withington & West Didsbury)
Wilbraham Road
Fallowfield
Levenshulme
Hyde Road Jn. (controls a triangular junction with Gorton Jn. and Fairfield Jn. on the GCR Manchester - Sheffield line)
Note C: Junction for St. Helens
Edge Green and Golborne Colliery Sdgs. Haydock Park Racecourse
Ashton in Makerfield
St. Helens Central
2. Chester Northgate to Manchester Central

Chester South Jn. (controls a triangular junction with the GCR lines on the Wirral)
Chester East Jn. (controls a triangular junction with the GCR lines on the Wirral)
Mickle Trafford (Junction with the LNWR/GWR line from Chester to Warrington)
Barrow for Tarvin
Mouldsworth Jn. (Junction for Helsby-Hooton line)
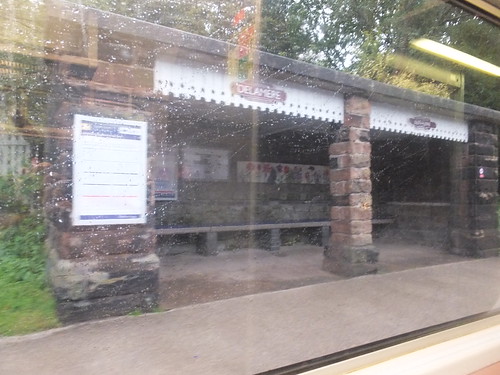
Delamere
Winsford Jn. (Junction for Winsford & Over
Cuddington
Hartford Jn. (Junction for Hartford Jn. LMS
Hartford & Greenbank (controls a triangular junction at Hartford North Jn. with Oakleigh Sidings
Hartford East Jn. (controls a triangular junction at Hartford North Jn. with Oakleigh Sidings
Sandbach Jn. (controls a triangular junction with the line to Sandbach).
Northwich Central
Northwich East
Lostock Gralam
Halford Hall (Closed)
Plumley West
Plumley
Knutsford West
Knutsford East
Shaw Heath
Mobberley
Ashley
Hale
Altrincham South
Altrincham North
Navigation Road
Deansgate Jn. (Junction for Skelton Jn.)
Timperley Jn. (Junction for Deansgate Crossing)
Brooklands
Sale
Mersey Bridge
Stretford
Warwick Road
Old Trafford
Old Trafford Jn. (Next box Cornbrook Jn. West. Junction for Castlefield Jn.)

3. Halewood/Hunts Cross to Southport Central via Aintree

Hunts Cross East Jn. & Halewood East Jn. made a triangular connection with the CLC Southport Line. Southport Lord Street and the northern part of the line was closed to traffic in 1952.
Halewood North Jn.
Gateacre
Knotty Ash
West Derby
Clubmoor
Fazakerley South Jn. (Note D)
Fazakerley North Jn. (Note D, also junction for MR branch to Langton Dock)
Aintree Central
Southport Jn. Closed
Sefton and Maghull
Lydiate
Altcar & Hillhouse
Hillhouse Jn. (Junction for Downholland)
Woodvale
Ainsdale Beach
Birkdale South
Southport Lord Street
Note D: Fazakerley South Jn. and Fazakerley North Jn. made a triangular connection with the branch to Huskisson:-
Fazakerley West Junction
Huskission
'Jutland' comments on the signal box controlling Southport Lord Street as follows:-
The signal box opened on the 1st September 1884 and was of Railway Signal Company design. It had a brick base and wooden upper portion and contained a 42 lever Railway Signal Company lever frame. The Railway Signal Company, located in Fazakerley, supplied all the signal boxes and signalling equipment for the opening of the line only, all subsequent signalling equipment was supplied by the Cheshire Lines Railway, from their Warrington workshops, until 1937. At some stage Lord Street Station Signal Box received a replacement 42 lever Cheshire Lines lever frame. The signal box closed on the 25th September 1949 and was replaced by a short-lived LMS type 11c signal box.
4. Glazebrook to Hyde Jn./Godley Jn. via Stockport Tiviot Dale
Cadishead
Partington
Partington Jn. (Junction for Manchester Ship Canal Lines)
Carrington Sidings
West Timperley
Skelton Jn. (Junction for Warrington LNWR and Altrincham MSJ&A)
Baguley
Northenden Jn. (Junction for Cheadle Goods Yard)
Cheadle
Cheadle West
Cheadle Jn. (Junction for Cheadle Heath North Jn.)
Heaton Mersey West Jn.
Heaton Mersey East Jn. (Junction for Heaton Mersey Station Jn. GCR/MR)
Georges Road Jn.
Stockport Tiviot Dale
Brinnington Jn. (Junction for Reddish Jn.)
Bredbury Jn. (Junction for Romiley Jn.)
Woodley Jn. (Junction for Romiley Jn.)
Apethorne Jn. (Note E)
Hyde Central (then Hyde Jn. GCR)
Note E: Branch from Apethorne Jn. to Godley Jn. GCR
Brookfold Lane
Related posts on this site

The Cheshire Lines Committee.
The Cheshire Lines Committee Routes Today.

Related articles on other sites

Signal boxes of the Cheshire Lines Committee (The Signal Box).
Cheshire Lines Committee Signals (The Signal Box).
CLC Block Instruments (The Signal Box).
CLC Signalboxes (The 8D Association).

Railway Books

[1] 'Railway Stations in the North West' by Gordon Biddle, published by Dalesman Publishing Co. Ltd. (ISBN: 0 85206 644 9).
[2] 'Lost Railways of Lancashire' by Gordon Suggitt, published by Countryside Books (ISBN: 9 781853 068010).
[3] 'An Illustrated History of Liverpool's Railways' by Paul Anderson published by Irwell Press (ISBN 1-871608-68-6).
[4] 'A Regional History of the Railways of Great Britain: Volume 10 The North West' by G. O. Holt, revised Gordon Biddle published by David & Charles (ISBN: 0946537 34 8).
[5] 'The Heyday of Steam around Manchester' by Tom Heaviside published by Ian Allen Ltd. (ISBN 0 7110 2329 8).
[6] 'An Illustrated History of the Cheshire Lines Committee' by Paul Bolger published by Heyday Publishing Company (ISBN 0 947562 00 1).
[7] 'The Cheshire Lines Committee: Then and Now' by Nigel Dyckhoff published 1984 by Ian Allen Ltd. (ISBN 0 71101410 8).

Track diagrams

The CLC in the 1950s:-
'British Railways Layout Plans of the 1950s: The John Swift Collection' Vol 13: Cheshire Lines Committee and associated Great Central Lines', published by the Signalling Record Society (ISBN 1 873228 17 1).

The lines remaining today:-
'Railway Track Diagrams: Book 4 Midlands & North West', published by TRACKmaps (ISBN 978-0-9549866-7-4).

Tuesday, 21 October 2014

More Merseyrail

Introduction

When I was young, my parents took me on the 'Liverpool Electrics'. The rolling stock was the L.M.S. built electric trains introduced in 1938 which looked very modern to my eyes. Eventually, British Railways classed these electrics as Class 502 and Class 503. Although vehicles survive in preservation, all the trains in service are now Class 507 and Class 508.

After many changes, the extended system now operates as Merseyrail and their website is here. There's also a Wikipedia article here.

Merseyrail's Wirral Line incorporates the Mersey Railway which built the first Mersey Tunnel and opened using steam traction in 1886. In 1903, the Mersey Railway was electrified. There's a little more in the post Early Days of the Mersey Railway.

Exploring the Merseyrail Network

A number of earlier posts have chronicled my recent travels on the third rail electrified Merseyrail network.

The first post was Day Trip to Liverpool in 2010.

More journeys were described in By rail to Liverpool (Part 2)
- (Part 1 described the first part of my journey that day on Network Rail).

More travel followed, described in Birkenhead and New Brighton by train (Part 1) and Birkenhead and New Brighton by train (Part 3).
- (Part 2 describes a walk around Birkenhead Docks.

The post Railways around Birkenhead has further information on Birkenhead's railways.

On Saturday 4th October 2014, having earlier travelled on most of the former Cheshire Lines Committee (CLC) routes which still have a passenger service (as described in the post here), I transferred to the Northern Line of Merseyrail to explore the short section of the former CLC line from Hunts Cross to Liverpool. Later, I used the Wirral Line from James Street to West Kirby and back and finally travelled to Ellesmere Port.

Hunts Cross - Sandhills

I joined the Merseyrail system at Liverpool South Parkway and decided to first travel to Hunts Cross, the limit of Merseyrail operations, and take a few pictures. The picture below is a general view of Hunts Cross station from island platform 2/3, looking towards Liverpool. The CLC provided an impressive brick station building on the Down side which is now licensed premises called 'The waiting room' (with the definite article alone capitalised).
Hunts Cross, looking towards Liverpool, showing the former CLC main lines.

Looking towards Liverpool from platform 3 at Hunts Cross. Platform 3 is third-rail electrified for terminating Merseyrail trains.

After a very hasty survey, I re-boarded the train I'd arrived on, now heading for Southport, and travelled on the 'last bit' of the CLC to Liverpool. The area around the modern Brunswick station appeared to be a retail park - I'll have to go back to see if any parts of the early railway infrastructure remain. Now the CLC Liverpool terminus has gone, the line descends in a tunnel to the modern sub-surface Liverpool Central before continuing to Moorfields, near the original Lancashire and Yorkshire Railway terminus at Liverpool Exchange. The train then climbs the Great Howard Street Incline to reach the 22 spans of the Great Howard Street Viaduct and the 68 spans of the Liverpool Exchange Viaduct which formerly carried the approach tracks to Liverpool Exchange.
I alighted at Sandhills station and, on the landward side of the station, immediately came to a modern industrial estate built on the site of the former CLC Huskisson Goods Depot. The aerial view of Sandhills below, taken in 1937, suggests how completely the area has changed. The Lancashire and Yorkshire lines from Liverpool Exchange appear centre left and divide near the top of the picture, curving left to Bank Hall for Southport and carrying straight on to Kirkdale for Aintree and beyond.


Sandhills in 1937: The sidings bottom left form the 'throat' of the CLC Huskisson Goods Depot. The road running horizontally near the bottom left is Sandhills Lane (Click on the image for a slightly larger version).

One of the 'units' on the industrial estate which occupies the site of the CLC Huskisson Goods Depot houses the Sandhills Area Signalling Control (ASC) which manages most of the Merseyrail network. This is an Integrated Electronic Control Centre (IECC).

Sandhills Area Signalling Control: The road at high level in the background is Sandhills Lane and the now white painted buildings can also be seen on the 1937 photograph above.

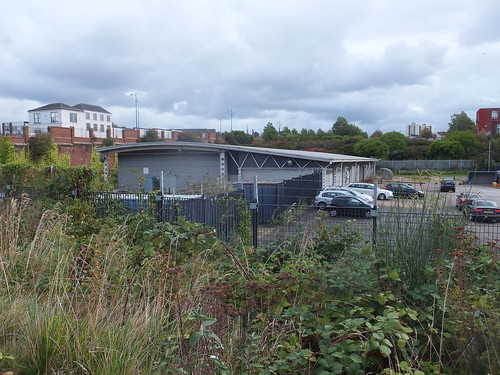
I then set off towards the river along Sandhills Lane so as to join Regent Road (the main dock road) and walk back towards the city, in order to see the Regent Road Scherzer Rolling Lift Bridge. This walk in described in the post On foot around Liverpool Docks. My walk ended at James Street Merseyrail Station, on the Wirral Line, where I caught a train towards West Kirby.

James Street - West Kirby

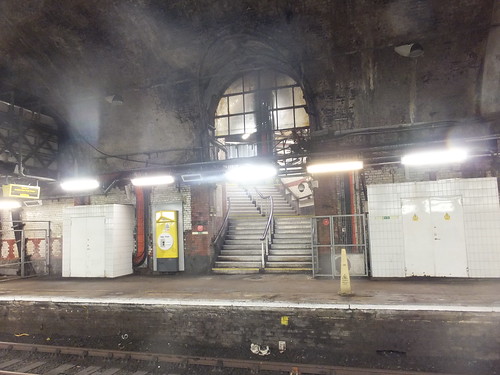
James Street station was built on the double-track Mersey railway between the railway tunnel under the Mersey and the terminus at Liverpool Central (Low Level). With the building of the balloon-shaped Liverpool Loop by British Railways, a new platform was built on the new alignment for trains approaching Liverpool. Having traversed the Loop, trains now heading for the Wirral still call at the original Mersey Railway platform, which has been modernised to match the other underground stations. The original Liverpool-bound platform still exists, in a largely un-modernised form, and now serves as a link-line between the Wirral Line and the Northern Line for rolling stock transfer. So passengers waiting for Wirral Line trains face the now-unused platform which conjures up a good idea of the station before the construction of the Liverpool Loop, indeed, it's evocative of the steam days. There's a brief description of the early days of the Mersey Railway here. The steps of the overbridge linking the two original platforms (not now in use) still proudly carries the cast builder's plate marked 'Manufactured by the Butterley Company 1885'.

The largely un-modernised now-unused platform at James Street.

I discovered that Hamilton Square Station (at the Birkenhead end of the river tunnel) had closed a few days earlier for a period of around six months for re-furbishment. During the closure, a Rail Replacement bus service loops between Hamilton Square Station, Birkenhead Central Station, Conway Park Station then back to Hamilton Square Station. I didn't want to catch a Chester or Ellesmere Port train as that would have involved a bus transfer from Birkenhead Central to Conway Park but the first train to arrive was for New Brighton, allowing me to travel on it and change anywhere up to Bidston.

I decided to change at Birkenhead Park. This is now just a simple island platform with access from a road overbridge carrying Duke Street (further north, Duke Street is carried over the Great Float of the docks on a Scherzer Rolling Lift Bridge as I described in the post here). Originally, the Mersey Railway terminated at Birkenhead Park making an end-on connection with the Wirral Railway. There were four platforms and it must have been busy with every train terminating and reversing. The Mersey railway was electrified in 1903 but the Wirral Railway remained steam hauled until 1938 when, at last, the whole network was electrified by the LMS. There are clues to the station's former importance - extra arches on the road bridge and a too-wide formation where there were once additional tracks. As elsewhere where redundant tracks are 'lifted', a small forest is appearing.


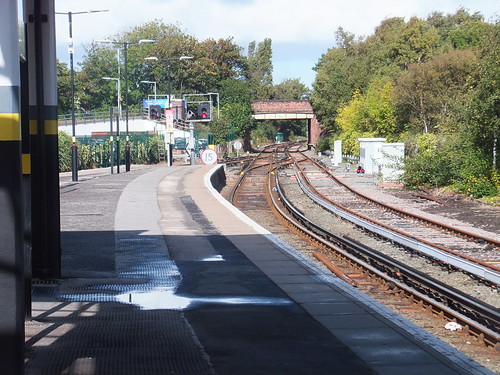
Birkenhead Park, looking towards Hamilton Square with a Liverpool-bound train in the distance, showing its ugly station building on Duke Street.

After a few minutes, a West Kirby train arrived and I hopped aboard to complete my journey to the terminus.

View from the island platform at West Kirby, looking towards Bidston and Birkenhead.

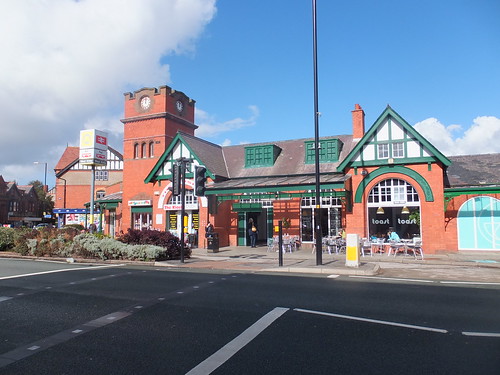
The small town of West Kirby (the population was less than 8,000 around the year 2001) looked quite attractive in the morning sun. I walked towards the promenade which looks out across the Dee Estuary. There's a Marine Lake which was being used by windsurfers. At low tide, it is possible to walk to the Hilbre Islands - a walk of about two miles each way. There were quite of few groups of walkers making their way to the islands but I had other plans and returned to the railway station, pausing to take tea and a toasted tea-cake in the cafe 'Toast' which forms part of the attractive station buildings.

West Kirby Station from the road.

My plan was then to travel to Ellesmere Port, so I boarded the next departure - quite busy with Liverpool-bound shoppers. Normally, I would have changed for an Ellesmere Port train at Hamilton Square but, because of the refurbishment, I crossed under the river again and changed at James Street.

James Street - Ellesmere Port

The first train was for Chester but I decided to board this as far as Birkenhead Central, giving me an opportunity to look around the station, and then take an Ellesmere Port train. The station is above ground and, despite various additions and alterations (invariably unhelpful), still has a 'flavour' of the original.

General view of Birkenhead Central, looking towards Hamilton Square and Liverpool.
I caught the Ellesmere Port train which took the route I'm now familiar with to Hooton, where it turned left onto the double track to Ellesmere Port. There were some fairly major earthworks, where cuttings had been hewn through the sandstone, bringing us to Little Sutton, with an attractive stone-built station building on the Down side.

Little Sutton Station: Stone building on Down Platform.

We had one more stop at Overpool and arrived at our destination, Ellesmere Port. However, the double track line continues beyond the station, though operated by Northern Rail, not Merseyrail (and not electrified). I left the station and walked towards the National Waterways Museum but found the roundabout leading to the M53 very unfriendly to pedestrians so, intending to go forward by a Northern Rail train, I returned to the station.

Ellesmere Port station. Merseyrail electrics use the far platform (platform 1); Northern Rail trains use the near platform.

Merseyrail trains arrive in platform 1 on the down line and, when unloading and loading has taken place and the Driver and Guard have changed ends, the train departs via a trailing crossover to reach the Up line for the journey back to Hooton.

Ellesmere Port: View from platform 1 looking towards Hooton.

My journey onward from Ellesmere Port is described in the post Ellesmere Port - Helsby line.

My pictures

Merseyrail.
Ellesmere Port - Helsby line

Tuesday, 7 October 2014

The Cheshire Lines Committee Routes Today

In the post The Cheshire Lines Committee, I wrote about the history of that joint railway and, in the section 'THE CLC ROUTES TODAY', I outlined what remains of these lines.

Well, I decided I should make a trip over these remaining CLC lines again and, this time, take some pictures. I planned a series of journeys using the National Rail Enquiries site which I find fairly reliable and, in fact, all my connections during the day worked well.

The Saturday I chose, 4th October 2014, was rather wet in the morning but improved later with occasional light showers. I'd intended to start with the 06:37 Virgin 'Pendolino' from Wolverhampton but I arrived at the station in time to catch the earlier 'London Midland' service to Liverpool so I boarded that as far as Crewe. Crewe was rather rainswept but, arriving earlier than planned, there was an 'Arriva Trains Wales' train for Llandudno about to leave number 10 bay platform which took me to Chester prior to the train I'd planned. It was still pretty dark so I couldn't see much on the journey. The original CLC station in Chester - Chester Northgate - is long gone so my journey started at the remaining Chester station, formerly Chester General.

Chester Station

At Chester, we arrived at the long platform 3 which can hold an 18-coach train. I had a quick look outside the station but the morning was slow to get light and the rain continued so I soon ducked inside again and crossed to the island platform. I watched a 'Merseyrail' electric arrive and depart from platform 7b. I don't think I'll ever get used to third-rail electrics at Chester, as I commented in the post on an earlier trip via Chester Birkenhead and New Brighton by train (Part 1).

Various other trains arrived and departed but I was waiting for the 07:59 to Manchester via the CLC line. This was scheduled to depart from bay platform 6. The overall roof covering bays 5 and 6 at the east end of the station is now completely separate from the main overall roof so I had to 'run the gauntlet' of a section of rainswept platform to get from the main part of the station to the roofed section over the bays. The roof kept the rain off but a fairly strong wind made conditions fairly unpleasant. A Class 142 'Pacer', shut down, stood in bay 6 so that did little to lift the spirits of the small group of waiting passengers (did I mention I'm not a fan of 4-wheel railcars built of bus parts?).

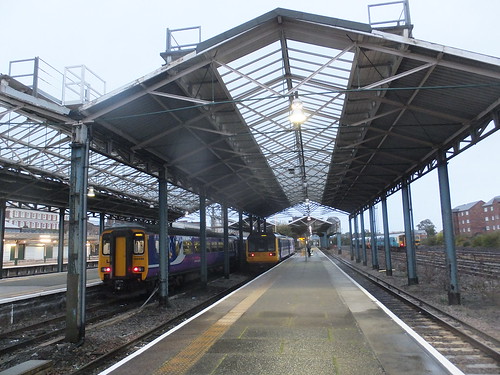
Chester Station (in the rain): Class 156 in bay 5, Class 142 in bay 6. View looking west shows that the overall roof over the bays is separate from the main station roofing.

However, about ten minutes before departure, a class 156 appeared and stopped in bay 6, a few yards short of the 'Pacer', disgorging quite a few passengers. The driver and guard from this train transferred to the 'Pacer' and, after starting-up, the driver coupled the two sets together and the guard completed his checks and let the passengers board. I assume the 'Pacer' was available to passengers, but I didn't spot anybody use it.

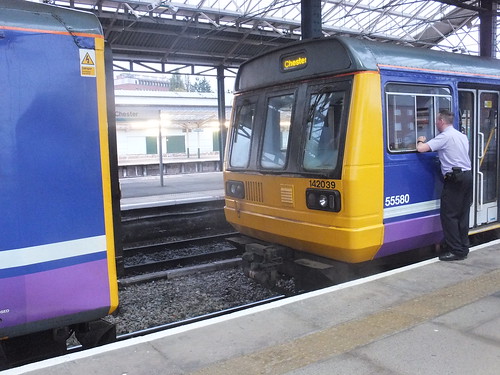
Chester Station: The driver is about to couple the Class 142 to the Class 156 as the guard looks on.

Chester - Manchester via the CLC

The colour light signal for bay 6, CR72, turned 'green' with a 'D' in the theatre-type route indicator. I presumed 'D' is for 'Down' (it's Down on the Warrington line), as opposed to 'U' (it's 'Up' heading for Crewe). We set off on the Warrington line, not more than a minute of two late, stopping all stations.

After about two and a half miles we came to Mickle Trafford Junction, with its British Railways Standard signal box, where we turned right at the single line junction to reach the CLC route which originally came from Chester Northgate (and we become an 'Up' train again). The single line now continues about four miles to Mouldsworth, where it becomes double until Altrincham. Originally, the CLC route was double throughout. The last time I was at Mouldsworth, it retained its signal box (I said it was a 'few years' since I last used the routes). Now, Mickle Trafford Junction controls the line almost to Delamere, then Greenbank signal box takes over. Mouldsworth still has its attractive stone-built station building on the Up line, apparently now a private house.

Mouldsworth stone-built station building on Up side.

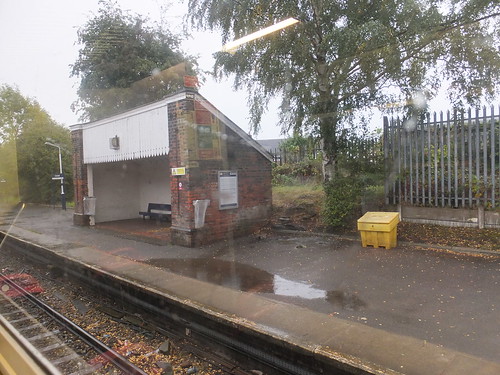
The next station is Delamere, set in the ancient and important Delamere Forest. The stone building on the Up side is similar to Mouldsworth, whilst on the Down side there's a simple stone shelter.

Delamere Station: Shelter on Down side.

The Forestry Commission, in lyrical vein, describe the Forest as a "shady oasis in the midst of the agricultural landscape of the Cheshire Plain. Delamere is a place for families to let off steam, escape the crowds and find peace in the heart of the forest". The Wikipedia article here is more restrained but informative.

Another three miles took us to Cuddington station. Although the general layout of the main station building is similar to the previous stations, in this case it is brick built, as is the shelter on the Down side.

A little under two miles further on, the CLC crosses over the double track West Coast Main Line (WCML), just south of the site of Hartford Junction signal box on the LNWR where a double-track branch used to connect with the CLC at (another) Hartford Junction Signal Box. North of Hartford Junction (LNWR) the double track WCML widened to four-tracks paired by direction for a couple of miles to Acton Bridge. Hartford Junction (CLC) box closed in 1976 and this stretch of the CLC is controlled from the British Railways Standard pattern signal box at Greenbank. Hartford Junction (LNWR) is now remotely controlled from Winsford signal box, four miles south. The double track branch still links the West Coast Main Line to the CLC but, as is the modern fashion, at each end of the branch, single-line junctions are provided, eliminating the need for diamond crossings.

Another mile took us to Greenbank Station (which used to be called Hartford and Greenbank). The station building on the Up side is similar to Cuddington, also in brick. The building appears to be in private hands and I was intrigued by a Christian cross mounted on the end wall.

Brick station building on Up side at Greenbank.

The brick shelter on the Down side has a steeply-inclined roof which I think was originally typical of this line.

Brick platform shelter on Down platform at Greenbank.

The first of the chemical works around Northwich was the Brunner-Mond chemical works at Winnington, opened 1874 and still in use as part of Tata Chemicals Europe. A triangular junction to the north of the CLC line just east of Greenbank connects to a single line branch which, after one mile, reaches the works now called Northwich West. The products are soda ash, sodium bicarbonate, calcium chloride and associated alkaline chemicals.

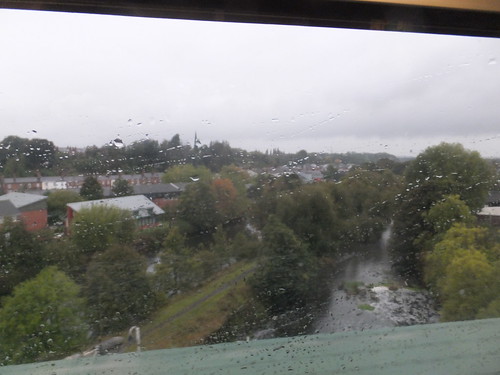
We then passed over Northwich Viaduct, around 700 yards long dating from the 1860s. Various sources have rather different details but it's certainly Grade II listed, generally of red sandstone with a total of 47 round arches and a couple of iron spans. It crosses the Weaver Navigation, the River Weaver and the River Dane.

View from Northwich Viaduct in the rain.

East of the viaduct, there's another triangular junction, this time on the south of the CLC. This leads to a single line via Middlewich to Sandbach, on the Crewe to Manchester line. I travelled once on this line, 'some years ago' when diversions were in force. I know the motive power was a Class 47, when locomotive-hauled passenger trains were still commonplace and the destination was either Manchester or Liverpool.
Back in the present, my train stopped at the impressive Northwich Station, elaborate brick station buildings provided with a glass canopy on the Up side and a platform clock made by Joyce, showing the correct time. The Down platform was originally an island platform with a glazed canopy but now the 'third line' is available for freight trains only and a 'bus shelter' has been provided for passengers awaiting trains towards Chester.

Northwich Up side platform (sorry about the rain on the coach window).

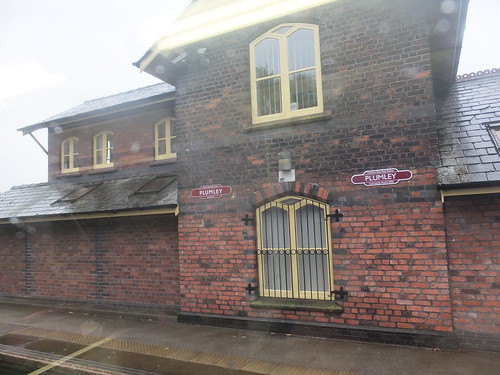
Leaving Northwich, we passed the Lostock Chemical Works, now part of Tata Chemicals and called Northwich East, then stopped at Lostock Gralam, at the limit of the control area for Greenbank signal box. Two miles further on, we paused on the approach to Plumley station. When we restarted, I caught a glimpse of a fairly old 2-aspect colour light with a subsidiary aspect underneath. There's a crossover here and a siding on the Down side, together with an elderly wooden signal box. The station building on the Up line at Plumley is the 'standard brick design', similar to Cuddington and Greenbank. Reproduction British Rail 'totems' commemorated 'Cheshire Best Kept Station' awards - a Community Award in 2006 and Winner in 2013.

Brick former station building on Up platform at Plumley.

Our next stop was at Knutsford station. Like Northwich, this had rather 'posh' buildings with a glass canopy over the Up platform. Then on to Mobberley, where I failed to spot the signal box on the Down side. The following station, Ashley, had the 'standard brick design' station building on the Up side. Just under two miles took us to Hale, the last of the CLC stations on this route. There's a level crossing just at the Chester end of the station. Barriers are now provided but the former signal box, a small wooden affair which once controlled mechanical crossing gates, survives. I believe barriers were installed in 1974, controlled from Hale signal box but, subsequently, the crossing became supervised by Closed Circuit Television (CCTV) from Deansgate Junction. Hale station also boasts a rather nice glazed canopy supported on cast columns.

Altrincham

Less than a mile took us to Altrincham station. This was the last station on the Manchester, South Junction and Altrincham Railway (MSJ&AR), jointly owned by the London & North Western Railway (LNWR) and the Manchester, Sheffield and Lincolnshire Railway (MS&L). Since the MS&L were one of the partners in the CLC, an end-on junction with the MSJ&AR offered trains from Chester a direct route into Manchester. Altrincham station had two through platforms used by CLC-route trains and two bays for local services. The MSJ&AR including the two bays at Altrincham was electrified in 1931.

In 1992 it was decided to transfer the southern part of the MSJ&AR, together with parts of the abandoned CLC route into Manchester Central, to the Manchester Metrolink Light Rail Project, using the bays at Altrincham to terminate the Metrolink trams. Although CLC-route trains would be denied the MSJ&AR route to Manchester, Deansgate Junction, less than a mile north of Altrincham, already had a branch to another CLC line - the Glazebrook Jn. to Hyde Jn./Godley Jn. Although part of this route had been abandoned,a remaining section from Skelton Junction to Northenden Junction would allow CLC-route trains to take a roundabout route to Stockport, reaching Manchester via the former LNWR line.

A difficulty with this plan was that from Deansgate Junction towards Altrincham as far as the level crossing at Navigation Road, there was not space for additional running lines beyond the existing two. The solution adopted was to convert the double track between Deansgate Junction and Navigation Road into two parallel single lines, with Metrolink using the former Up line for both Inbound and Outbound trams and Network Rail using the former Down line for CLC-route trains in both directions.

Altrincham station in November 2013. The two platforms in the foreground are used by Metrolink trains, the two in the background by CLC route trains.

By former MSJ&AR, CLC and LNWR lines to Manchester

My journey continued from Altrincham with the CLC-route double track converging into a single line through Natigation Road and past Deansgate Jn. signal box, then swinging right and becoming double track again. At Skelton Jn., the line to Glazebrook is merely a stub of single track, and that is now shown as 'out of use'. Northenden Junction signal box survives, controlling the junction with the now-singled route which still extends to Chinley. For two and a half miles our route to Stockport became singled, resuming double track 1300 yards before we joined the Crewe-Manchester main line at Edgeley Junction No. 2 signal box. After our stop in platform 4 at Stockport, we took the Down Slow Line allowing us to call at Heaton Chapel and Levenshulme before finally arriving in platform 10 in Manchester Piccadilly, just 90 minutes after leaving Chester. It was still raining so I abandoned thoughts of spending time in Manchester and made my way across Piccadilly station to platform 14 to catch a Liverpool train via the CLC route.

Manchester - Liverpool via the CLC

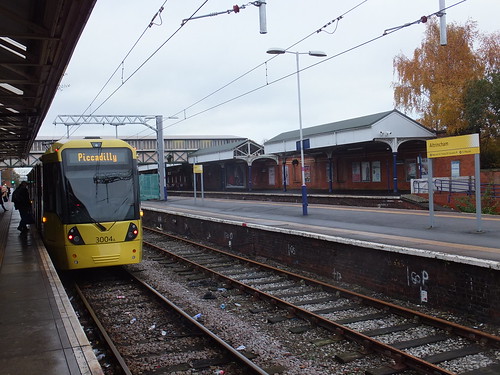
East Midland trains provide the fast service along the CLC route to Liverpool. I think Northern Rail provide an all-stations service but I'll try that on another trip. There was a large crowd of people at Manchester Piccadilly to board the 09:37 3-car Diesel Multiple Unit, so I quickly found tip-up seat in a vestibule at the rear of the train and stayed there. At Oxford Road, many people left the train but it was still pretty crowded. We didn't stop at Deansgate, then the brick viaduct built to carry the approach tracks to Manchester Central appeared on the right. This viaduct now just carries the double track of the Manchester Metrolink Altrincham Line. At Castlefield Junction a double track diverged to our right, under a skew truss bridge which originally carried the Manchester Central lines.
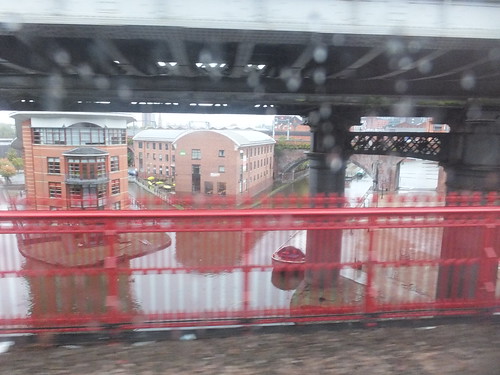
This diverging route leads to Ordsall Lane Junction. Here a siding from MOSI (the Museum Of Science and Industry) converges since the museum is the site of the first main line railway terminus in the world at Liverpool Road - the original Manchester terminus of the Liverpool and Manchester Railway (L&M), opened in 1830. There's quite a bit about the museum and my actvities there as a volunteer which you can find here.

Beyond Castlefield Junction, the route from Manchester Central was carried on a lengthy lattice bridge (usually referred to as the 'Birdcage') which is now used by Metrolink trams. The picture below taken from my Liverpool-bound train shows the rather fancy red fencing on the MSJ&AR bridge, part of the canal system, the modern apartments which now occupy the quayside and the massive supports for the lattice bridge on the Manchester Central-route. The brick bridge over the canal in the background carries the diverging line from Castlefield Junction to Ordsall Lane Junction. This line has recently been electrified (electrification of the whole of the L&M route to Liverpool is currently being completed) and a number of portal structures for the Overhead Line Equipment can be seen. Finally, the sawtooth roofline just visible above the apartment building is the 1830 Warehouse of the L&M which is now part of MOSI.

View from my DMU on the MSJ&AR.

At Cornbrook, there was a complex series of junctions between the CLC-route to Liverpool and the MSJ&AR to allow trains to change routes as necessary. Ceding the southern part of the MSJ&AR route to Metrolink has required significant alterations. Metrolink have built a station here, visible as my train moved from the former MSJ&AR route we'd used from Piccadilly to the former CLC route to Liverpool.
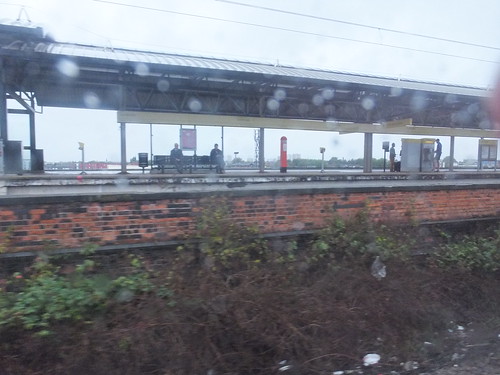
Cornbrook Station on the Manchester Metrolink.

The massive concrete bulk of Manchester United Football Stadium passed on the right, followed by the sidings and Freightliner Terminal at Trafford Park. Electrification at 25 kV a.c. extends only as far as these yards. Travelling at a good clip, we passed through the stations at Trafford Park, Humphrey Park and Urmston, which represents the limit of the control area of Manchester Piccadilly Signalling Control Centre (there's a post describing a visit to this Signal Control Centre here). We were then in Glazebrook East Junction's control area.

We sped through Chassen Road and Flixton before passing over the Manchester Ship Canal at high level near Irlam Locks. about a mile further on, we passed Irlam station, once a destination for steam-hauled suburban trains from Manchester Central. Another mile took us to Glazebrook East Junction signal box - a British Railways Standard pattern. Glazebrook station followed and, three miles beyond, the modern station at Birchwood, visible from the nearby M6 Motorway. After Padgate, the line curved onto what was the loop line to reach Warrington town and we made our first stop at Warrington Central. The massive CLC Goods Warehouse adjacent to the station is now (what else?) apartments. Modern apartment blocks have been built over the rest of the goods yard.

The Goods Warehouse at Warrington Central is now apartments.

Warrington Central signal box takes over from Glazebrook East Junction and hands on to Hunts Cross. It's another British Railways Standard design, situated on the Down platform.

Warrington Central signal box.

Warrington Central station buildings, with their glazed canopies, are quite impressive - I must try to return with time to appreciate them better.

Station buildings on Up platform at Warrington Central.

My train departed from Warrington across the 350 yard Warrington Viaduct, then crossed the West Coast Main Line (4-track, paired by direction between Warrington Bank Quay and Winwick Junction). We accelerated rapidly, flew through Sankey station and were soon braking for our stop at Widnes. Whereas the CLC provided a direct line for fast trains and a loop into the town at both Warrington and Widnes, at Warrington the direct line was abandoned but at Widnes, the loop into the town was abolished and the present Widnes station is actually Farnworth station renamed. I spotted a wooden 'Farnworth' nameboard dumped beside the station building but I couldn't determine if it was historic or a modern copy. The large brick station building on the Down side is quite attractive, but boarded-up and separated from the platform by a fence.

Farnworth station building, now serving as 'Widnes'.

The next five miles took us through stations at Hough Green, Halewood and Hunts Cross. The line straight ahead was the CLC to Liverpool Central but, from Hunts Cross, only Merseyrail trains operate the line so my train turned right onto the Down Hunts Cross Chord, joined the Crewe - Liverpool line at Allerton Junction signal box (another British Railways Standard Pattern signal box, this time with an 'oversize' brick-built ground floor) and came to a stand in platform 2 at the modern station of Liverpool South Parkway. This steel-and-glass transport interchange opened in 2006 and I first used it myself in 2010 when attending an OLCO Annual General Meeting (described here).

The train had only a five and a half mile dash to reach Liverpool Lime Street but I decided to 'bail out' and continue to Liverpool on the former CLC route, now operated by Merseyrail. My brief description of of the journey from Hunts Cross to Liverpool is in the post More Merseyrail.

Allerton Junction Signal Box seen from Liverpool South Parkway Station. The Crewe lines are in front of the signal box - Up Fast, Down Fast, Up Slow, Down Slow. The diverging lines behind the signal box are Up Hunts Cross Chord and Down Hunts Cross Chord. The lines diverging further to the left serve Northern Rail's Allerton Traction Maintenance Depot (TMD).

My pictures

North Wales Line (Crewe - Llandudno) (Pictures of Chester station).
CLC Chester - Manchester.
Manchester Metrolink.
Manchester Area Rail.
CLC Manchester - Liverpool.
Liverpool area rail.