skip to main |
skip to sidebar
On foot around Birkenhead's Docks
Introduction
In Part 1, I described my journey to Birkenhead's Hamilton Square station by train.
Over the years, I'd seen Birkenhead Docks from various viewpoints, but I'd never really studied them. I'm afraid I rather saw them as a 'poor relation' to Liverpool Docks (see my posts Liverpool and The Mersey Docks and Harbour Board). Clearly, I'd left it years too late (and the weather on the day of my visit was deteriorating) but I was determined to see what was left.
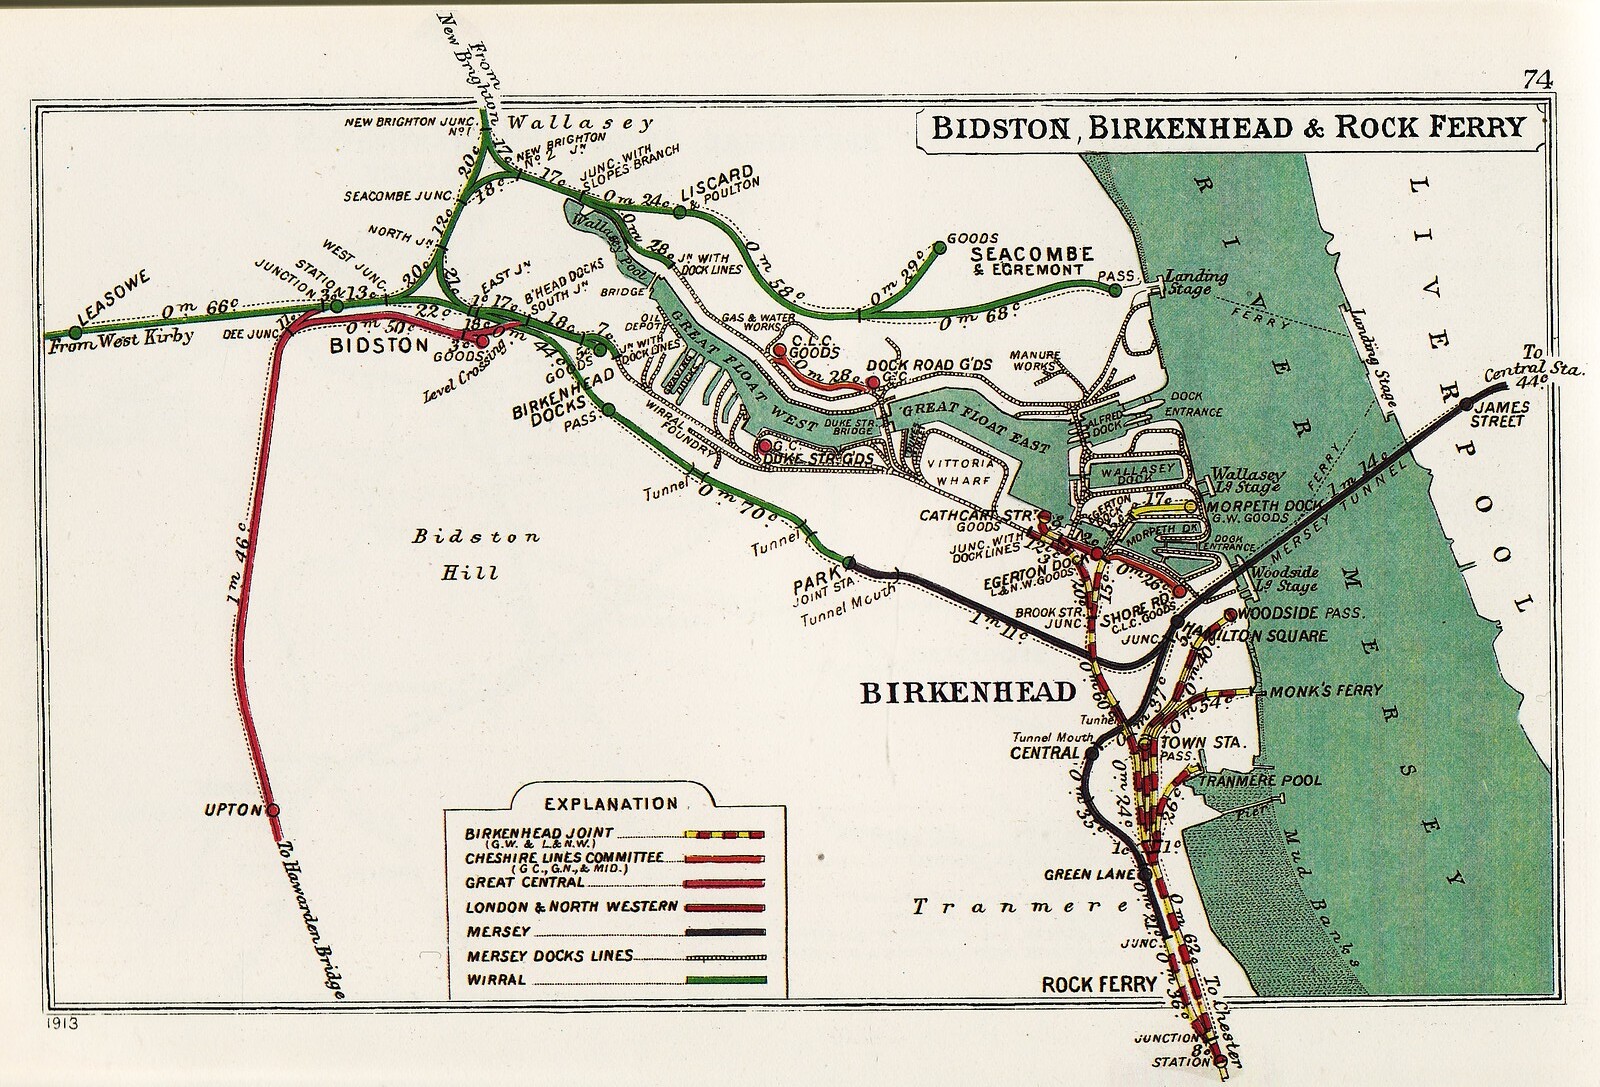
The design of Birkenhead's Docks is quite different from Liverpool's Docks. Wallasey Pool was a natural Tidal Inlet which was enclosed to create the docks. After the creation of the earlier, smaller docks, the Great Float was constructed between 1851 and 1860 producing over four miles of quays. The massive construction project overwhelmed the Birkenhead Dock Company and in 1858 the business was taken over by the Mersey Docks and Harbour Board (just across the water). The Great Float was divided into two by a road and rail bridge over the passage for ships. The two parts were named Great West Float and Great East Float. Today, these two bodies of water are simply called West Float and East Float but they still total 110 acres of water. See the Wikipedia article here. The usual tangle of dock railways was developed to serve this complex, as shown on the 1913 Railway Clearing House Plan of Birkenhead Docks below.
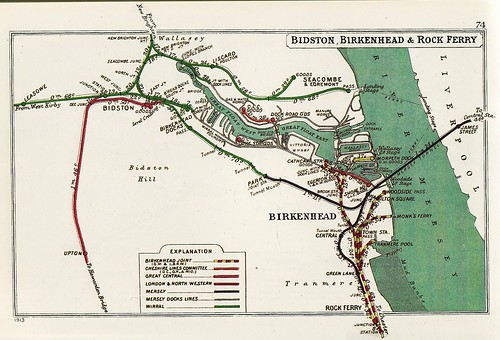 Click here for larger image.
Railway Clearing House Plan of Birkenhead Docks 1913.
Before my trip I (correctly) concluded that very little of the dock railway would have survived but I also had another target in view. Ever since I first spotted Scherzer Rolling Lift Bridges in Liverpool's Docks, they've had a fascination for me. The functional design seemed elegant compared with the traditional Bascule Bridge (London's Tower Bridge is probably the best known example). I hoped to look at three Scherzer Rolling Lift Bridges in my perambulation around the docks and, despite the weather, that's what I did.
Hamilton Square Station
I emerged from Hamilton Square Station into a cold, grey morning with rain spitting. I crossed the road to take a picture of the station building with its distinctive tower. It was over 60 years ago when I first saw it, from a Mersey Ferry approaching Woodside Landing stage. Then, as now, the side of the tower facing the river carried the simple slogan: 'HAMILTON SQUARE STATION - FREQUENT ELECTRIC TRAINS'. I'm still impressed.
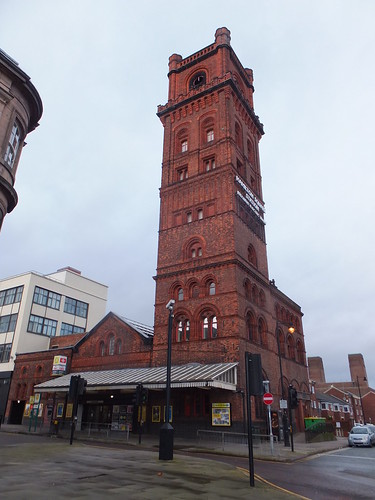
Hamilton Square Station.
I set off along Canning Street, passing the rather handsome Cheshire Lines Committee building which I presume was originally Shore Road Goods Depot, now converted into business units.
Egerton Bridge
Eventually, I came to Egerton Bridge,the first of the Scherzer Rolling Lift Bridges on my list. This bridges the passage between Egerton Dock and Morpeth Dock. Wikipedia describe Egerton Dock here and dates the present bridge to 1928-1931, replacing an earlier swing bridge. Although the bridge was reputedly restored in 1995, it doesn't appear capable of use, nor is it needed as the other exits from both Edgerton Dock and Morpeth Dock have been filled in, leaving an isolated body of water.
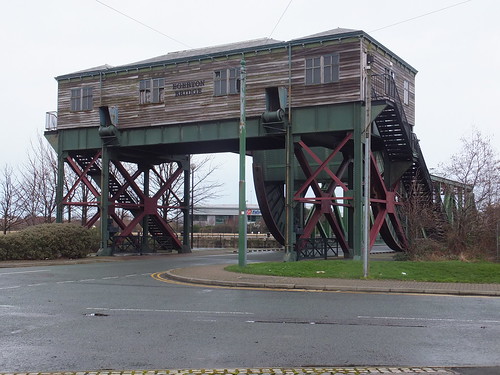 Egerton Bridge, a Scherzer Rolling Lift type.
Set in the quay, I did find an interesting winch. I can only guess that this may have been part of the mechanism for turning the original swing bridge. The cast side plates are dated and named, but I can't make out the short word after 'DAGLISH'. There were two Robert Daglish, father and son. The son was perhaps the better known - see the Wikipedia article here, but I rather think the hard-to-read word is an abbreviation of 'SENIOR'. Needless to say, the ugly mesh covers are a modern addition.
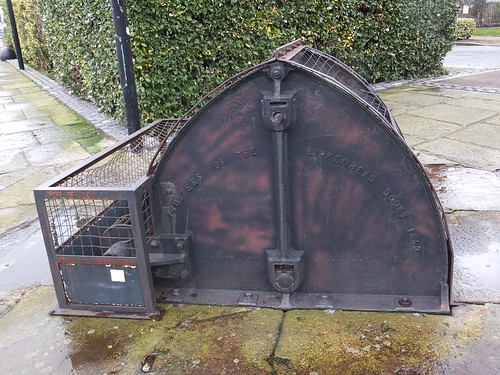 Egerton Bridge: Winch marked 'TRUSTEES OF BIRKENHEAD DOCKS 1850' and 'DAGLISH ... ST HELENS FOUNDRY'
The Central Hydraulic Tower
I retraced my route to the junction where Canning Street becomes Tower Road and followed Tower Road as it turned north to cross the filled-in entrance to Edgerton Dock, pass over what appears to be a fixed bridge and arrived at the building (on the left) which gave the road its name. This is the Central Hydraulic Tower and Engine House completed 1863 which provided power for the lock gates and bridges. It was designed by the remarkable Jesse Hartley (1780 - 1860) who, as Dock Engineer, was responsible for the design and execution of most of Liverpool's docks. Certainly the architectural style is pure Hartley, giving the appearance of an Italian palace (the Palazzo Vecchio in Florence is credited as inspiration). The building was badly damaged by bombing in the Second World War, giving rise to large expanses of modern, undecorated brickwork. The building is now disused and in poor condition.
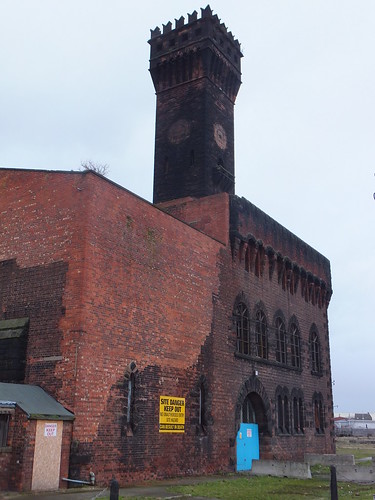
A Palazzo in Birkenhead: The Central Hydraulic Tower.
Stena Line 12 Quays Terminal
The road access to Stena Line's 12 Quays Terminal is opposite the Central Hydraulic Tower. The old Wallesey Dock has been filled in and is now a huge lorry and car park for vehicles using the Liverpool - Belfast ferry service. The ferries berth in the River Mersey. Ferries MS 'Stena Lagan' and MS 'Stena Mersey' make the crossing in eight hours.
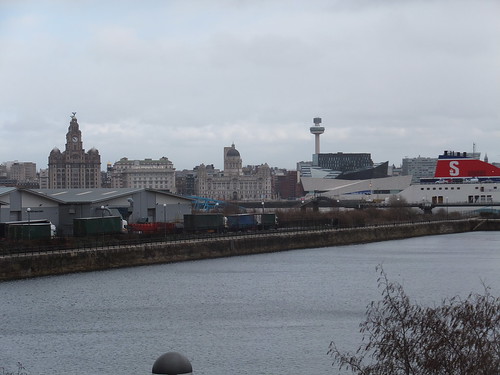 View of Stena Line's Belfast Ferry Port from Edgerton Bridge with the 'Three Graces' and Liverpool Museum in the background.
Tower Road Bridge
This large rolling lift bridge retains flashing lights and lifting barriers on the approach road either side and must be in occasional use. It bridges the 100 foot wide channel which is now the only route between the River Mersey and the Float.
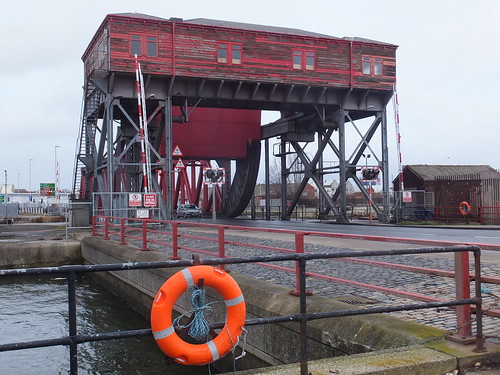 Tower Road Lifting Bridge.
Canning Street Signal Box
Again, I retraced my route to the junction with Rendel Street, which I knew was crossed by the double-track main dock line at a level crossing. In steam days, freight from the L.M.S. - G.W.R. joint line for the docks passed through Haymarket Tunnel and was split between Canning Street North and Canning Street South at Brook Street signal box. I found the remains of Canning Street North signal box, with serious fire damage, next to the former level crossing which had been covered with tarmac. As befits a dock line, the gates were hand worked, made of metal. It must have once been a busy place, because the skeleton of a pedestrian overbridge still crossed the double track.
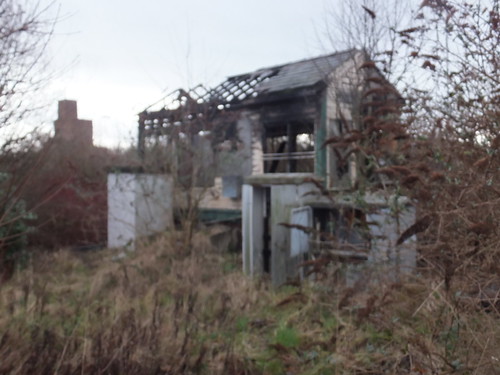 A fuzzy view of the rear of Canning Street North signal box.
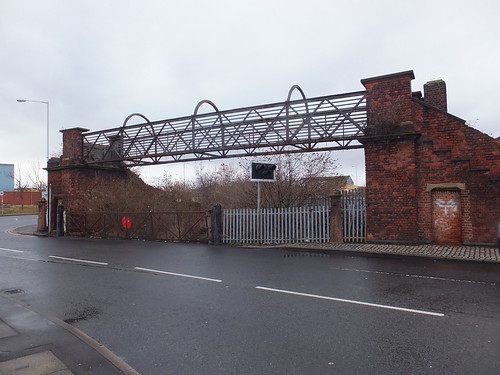 The former level crossing at Canning Street North and pedestrian overbridge,
Duke Street Bridge
I turned west onto Corporation Road, separated from the dock estate by a tall, old dock wall. All the old dock buildings had been removed, replaced by large modern factory and warehouse buildings still in use. Having walked the length of the Eat Float, I turned north onto Duke Street with its large rolling lift bridge across the 100 foot wide channel which divides the West and East Floats. Again, this bridge sees occasional use. Despite the poor weather, I managed a few photographs.
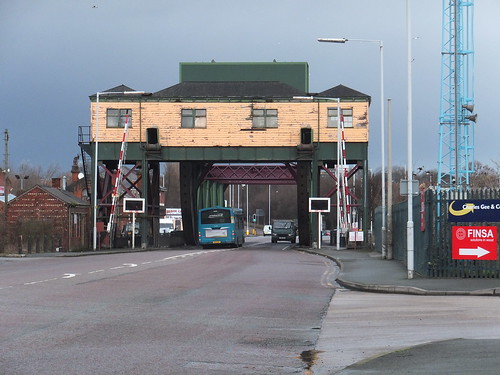 Duke Street Bridge towers over a single deck bus.
I found Mersey Ferries 'Royal Iris' and 'Royal Daffodil' laid-up, presumably during 'low season', in the East Float adjacent to Duke Street Bridge.
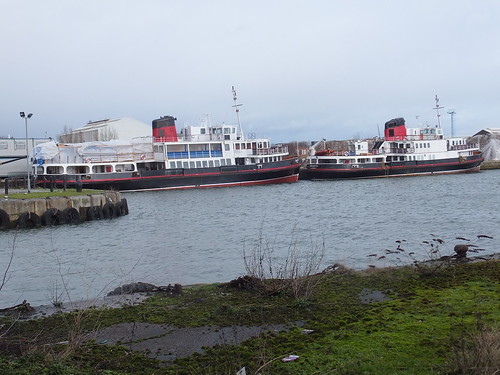 Mersey Ferries 'Royal Iris' and 'Royal Daffodil' adjacent to Duke Street Bridge.
At the north end of the bridge, I was surprised and pleased to find a cafe. There was just time for a snack before they closed (half past twelve on a Saturday, apparently).
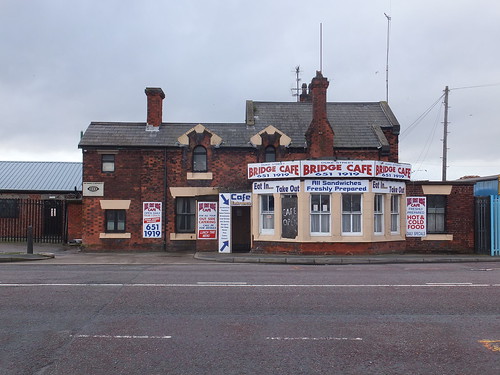 The appropriately-named 'Bridge Cafe'.
Just at the south end of the bridge, there were a pair of Canada geese resting on the quay. Then didn't object when I went to photograph a wagon turntable in surprisingly good condition.
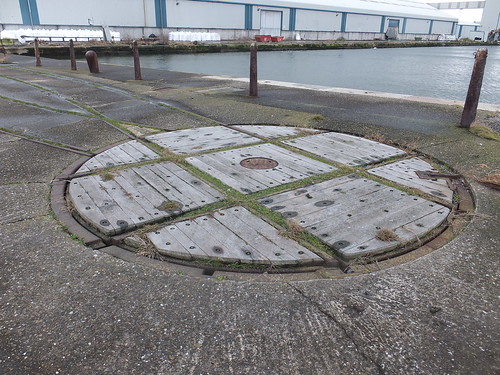 Wagon Turntable adjacent to Duke Street Bridge.
Bidston Graving Docks
I made my way back to Corporation Road and continued walking west. The dock wall had finished and the double track dock line no ran along the verge of the road, very overgrown. I turned into Beaufort Road where the dock area on the right has been cleared, probably as part of the West Float Remediation Project. This is part of very ambitious schemes by Wirral Waters and the Peel Group but there wasn't much sign of recent progress. I was surprised to find that the dock railway lines here were flat bottom but they'd been torn up in places, as if some giant had tired of his toy trains and ripped up the tracks. All a bit puzzling. There were once three graving docks here but I think only number 3 survives. This is part of the Cammell Laird ship repair site. Three ships could be seen:-
'Gold Rover': Small fleet tanker of the Royal Fleet Auxiliary Service. Information on Wikipedia here or on the Royal Navy site here.
'Fort Rosalie': Fleet replenishment ship of the Royal Fleet Auxiliary Service. Information on Wikipedia here or on the Royal Navy site here.
'Key Fighter': Oil/Chemical tanker, probably loading/discharging at the tank farm on the North Quay. Some information here.
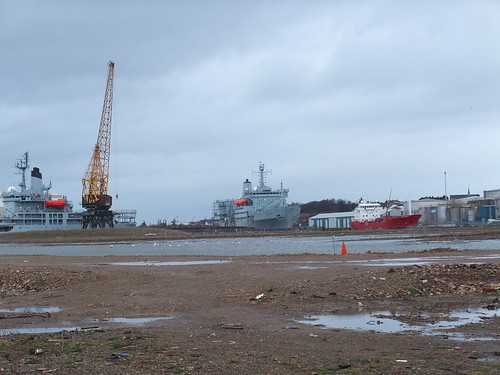 Cammell Laird's yard in the West Float showing (l to r) 'Gold Rover, 'Fort Rosalie' and 'Key Fighter'.
There is a modern swing bridge in Wallesey Bridge Road but I didn't inspect it. It divided the West Float from Wallesey Pool but Wallesey Pool has been filled in so the bridge is no longer operational.
It was still raining intermittently, so I was happy to make my way across to Birkenhead North Station for a trip to New Brighton, described here.
Related articles on other sites
Scherzer Rolling Lift Bridges (1906 catalogue).
Cammell Laird
Robert Daglish
Jesse Hartley
The Great Float.
Related posts in this blog
Birkenhead and New Brighton by train (Part 1)
Birkenhead and New Brighton by train (Part 3)
My pictures
Merseyrail.
Birkenhead and its Docks.
Introduction
Over the last few weeks, I've made a number of day trips by train, re-visiting locations I first went to half a century ago:-
Heysham and Morecambe (a seaport & a seaside resort - report here).
Fleetwood and Blackpool (former seaport & a resort - report here).
Holyhead (a seaport and sort of seaside resort - report starts here).
Where next? Birkenhead and New Brighton (seaport and seaside resort).
Passing through Chester on the recent Holyhead trip, I was reminded that (as far as I remember) I'd never actually travelled on the Chester to Birkenhead line - a surprising omission. Until Nationalisation, it was a joint L.M.S. - G.W.R. line, mainly 4-track so it should have appealed to me, with a passenger service through to Birkenhead (Woodside) and significant freight traffic. In the 1980s, I'd travelled between Birkenhead and Rock Ferry by third rail electric trains, when Rock Ferry was the limit of electrification in the Liverpool area, but I hadn't travelled the line from Rock Ferry through Hooton to Chester.
In the past, I've reached Birkenhead by travelling to Liverpool and then crossing the Mersey by train or ferry but, for this trip, I decided to go to Chester and (finally) see what remained of the former L.M.S. - G.W.R. line to Birkenhead.
By train to Birkenhead
On the 8th February 2014 I caught the 08:37 Virgin service to Edinburgh, travelling as far as Crewe. At Crewe, I changed to a 2-car diesel service to Chester. Chester is now part of the Merseyrail network, so I was able to purchase a 'Saveaway' 1-day ticket for my onward journey.
I can still remember my shock, some years ago, to find third rail electrics now working right through to Chester (the line to Chester was electrified in 1993). To me, Chester will always be remembered as the last refuge of marvellous L&NWR signal gantries and signal boxes (see the post L&NWR Signalling and the 'Bedstead'. Even after the Chester Power Box scheme had swept away the semaphore signals and mechanical signal boxes, running electric trains into Chester just seemed wrong to me. However, from a passenger point of view, integrating the line to Chester into the Merseyrail network has been a good development.
I made my way to platform 7b at Chester (the only electrified platform) to catch the next Liverpool train.
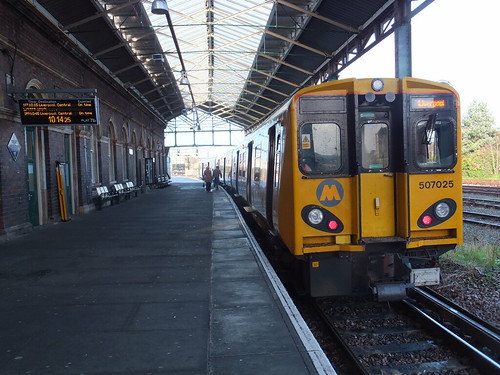 Chester: Liverpool electric service about to depart on 25-Jan-2014.
The Class 507 and 508 3-car electrics on the line are around 35 years old, but they bound along in a game fashion between stations and I was surprised at how good the ride was. There are a number of stations on the way to Birkenhead:-
Bache
Capenhurst
Hooton
Eastham Rake
Bromborough
Bromborough Rake
Spital
Port Sunlight
Bebington
Rock Ferry
Green Lane
Birkenhead Central
Hamilton Square
I've only commented on some of these stations below.
Capenhurst
We are soon passing Capenhurst - the location of the Uranium Enrichment Facility for the U.K. There's a very clear article on enrichment processes in Wikipedia here. The Capenhurst site was originally constructed as a Royal Ordnance Factory in 1940. In 1952 Uranium Enrichment for military purposes commenced here, followed by enrichment for use in power generation in 1962. Urenco UK currently use part of the site for uranium enrichment using centrifuges and this is expected to continue until at least 2050. Reported enrichment throughput in 2011 was 5,000 tSW/a (five thousand metric tons of separative work per annum). The remainder of the site was used for uranium enrichment using diffusion until 1982 and the Nuclear Decommissioning Authority are now responsible for decommissioning and cleaning up this part of the site - one of 17 sites in the U.K. for which the Nuclear Decommissioning Authority are responsible. A slightly less rosy picture is given on the website of Greater Manchester & District Campaign for Nuclear Disarmament.
Hooton
In its heyday, Hooton had six through platforms, one bay, a double-track branch to Ellesmere Port and a single-line branch to West Kirby. Hooton is still the junction for Ellesmere Port and it has two through platforms and a bay. Towards Chester, the present double track is on the formation of the old Fast Lines but, just south of the station, these tracks are slewed onto the formation of the old Slow Lines and they remain like that until Rock Ferry. Chester Power Signal Box has not long taken over control of the line to Hooton. Thereafter, the line is controlled from the Merseyrail Control Centre at Sandhills.
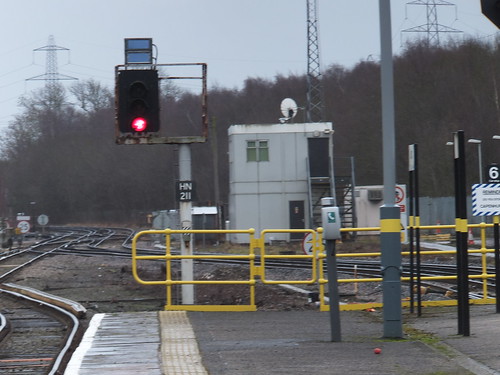 Hooton: Looking towards Chester from bay platform 1, showing platform 2 & 3 lines slewed onto the formation of the old Fast Lines
in front of the recently-closed Hooton signal box.
Hooton: Looking towards Chester from bay platform 1, showing platform 2 & 3 lines slewed onto the formation of the old Fast Lines
in front of the recently-closed Hooton signal box.
Port Sunlight
William Lever (1851 - 1925) founded the Lever Brothers soap-making empire with his brother. Needing a site for expansion of their operation in Warrington, they acquired land on the Wirral in between the railway from Chester to Birkenhead and the River Mersey. In 1888 work commenced on a new factory and also a Model Village to house the workers. The development became Port Sunlight. Each block of houses had a separate architect, all heavily influenced by the Arts and Crafts Movement. There are 900 buildings now listed Grade II in Port Sunlight, which is also a Conservation Area. The adjacent railway station of Bebington is close to the Lady Lever Art Gallery.
Rock Ferry
In the past, Rock Ferry was an important and impressive location. The four tracks of the L.M.S. - G.W.R. joint lines to Birkenhead were joined by the Mersey Railway (more in my post here) which terminated in a pair of bay platforms. There was some pointwork interconnecting the two systems. In the 1980s, I'd travelled between Birkenhead and Rock Ferry by third rail electric trains, when Rock Ferry was the limit of electrification in the Liverpool area. By that time, the Chester - Birkenhead line had been divided at Rock Ferry so that it operated as two back-to-back termini with electric trains operating to Birkenhead and Liverpool whilst Diesel Multiple Units worked to Chester.
Today, the former Fast lines are lifted and overgrown and the present double track (former Slow lines) are slewed into the Mersey Lines so that my train continued to Green Lane, Birkenhead Central and Hamilton Square on what was the Mersey Railway.
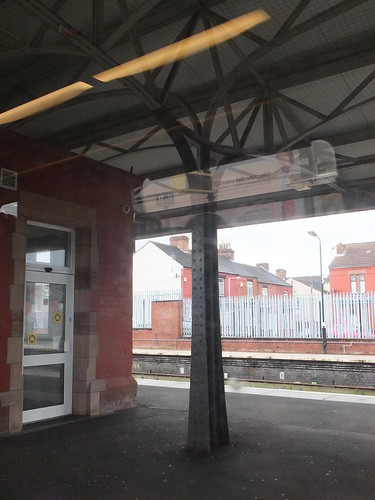
Rock Ferry, showing the construction of the platform canopy and the neat brick and stone waiting room. The bay platforms are visible in the background.
Green Lane
Green Lane station is set between two tunnels, constructed as an open 'box'. The vertical sides of the 'box' are held in place by stone-built walls, while a series of plate girders brace the stone walls apart at ground level.
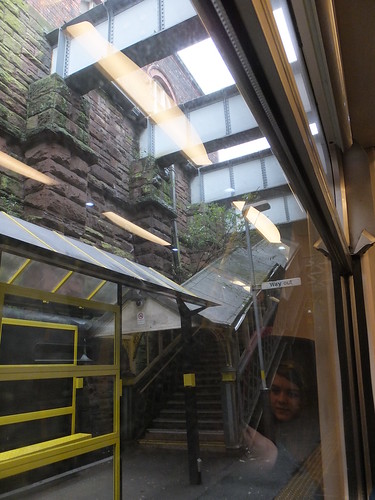
Green Lane, showing stone retaining walls and girder bracing.
Hamilton Square
The Rock Ferry line platforms at Hamilton Square are deep underground and set on a curve. Originally, there was a 'flat' double junction at the Rock Ferry end of the station, for the connection to the Wirral Railway. In the 1970s, to avoid congestion at this junction, a third platform was added for trains towards West Kirby and New Brighton. This platform is in a separate, straight bore at a slightly lower level than the original two platforms. The new line continues to fall so as to pass under the lines from Rock Ferry in a 'burrowing junction'. I got off, watched my train disappear into the tunnel leading to Liverpool and then climbed the steps to the lower concourse. From here, a series of lifts take passengers to the 'Booking Hall Level' on the surface.
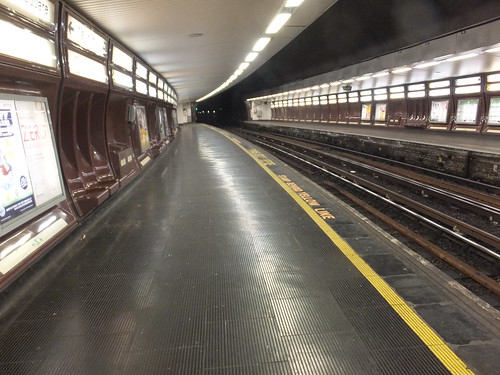 Hamilton Square: View from platform 2, looking towards Rock Ferry.
Continued in Part 2.
Related articles on other sites
'Railscot' Chester and Holyhead.
Related posts in this blog
Birkenhead and New Brighton by train (Part 2)
Birkenhead and New Brighton by train (Part 3)
My pictures
North Wales Line (Crewe - Llandudno).
Merseyrail.
I described a recent journey in posts:-
Trip to Holyhead (Part 1: Crewe to Llandudno)
Trip to Holyhead (Part 2: Llandudno to Holyhead)
Below are further notes on the railway, in the past and today.
The Importance of the Port of Holyhead
The significance of Holyhead at least partly results from the Acts of Union of 1800 (one in England, one in Ireland) which formally created the United Kingdom of Great Britain and Ireland. Following this Union, Parliamentarians with Irish constituencies regularly travelled between Dublin and London and ease of crossing of the Irish Sea and using roads to London became important. Holyhead gave the shortest sea crossing and it offered a safe harbour. But the roads to London at the time were dreadful and involved a ferrycrossing of the Menai Strait. So Thomas Telford was commissioned to build or improve the road from London to Holyhead. The ferry to Anglesey was replaced by the Menai Suspension Bridge. Here, the Admiralty insisted on 100 foot headroom above the water for their ships. Completion of this bridge allowed the whole road from London to Holyhead to open in 1826. The road also became the route for mail to and from Ireland. With the coming of railways, it was clear that Holyhead, in order to keep its role as the preferred route to Ireland, should be served by the railways.
Development of the Railways in North Wales
Once the Grand Junction Railway had linked the Liverpool and Manchester Railway to the London and Birmingham Railway, Crewe became the obvious starting point for a branch to Chester. The Chester and Crewe Railway Company built the 11-mile branch with Robert Stephenson as the Engineer and Thomas Brassey as the Contractor. Before the line opened in 1840, the Chester and Crewe Railway Company had been absorbed by the Grand Junction Railway.
In 1840, a separate railway linking Chester and Birkenhead also opened.
The political infighting between different railway companies seeking to extend the railway beyond Chester into North Wales delayed the start of work. The Chester and Holyhead Railway prevailed and, with Robert Stephenson appointed as engineer, building started at Chester in 1845. The Shrewsbury and Chester Railway, having made a junction with the Chester and Holyhead at Saltney Jn. (less than two miles from Chester) actually ran the first trains on the Chester and Holyhead Railway, using the new line between Saltney Jn. and Chester under an agreement.
An early scheme to haul railway coaches by horse over Telford's Menai Suspension Bridge to reach Anglesey was impractical, so the Chester and Holyhead Railway had to construct its own bridge across the Menai Strait. This presented a number of technical problems (the same 100 foot headroom as Telford's bridge had to be provided). Stephenson developed the idea of a tubular beam with Eaton Hodgkinson and William Fairbairn. The tubular beam was first proved on the Conwy Railway Bridge, which covered a shorter span and only had to provide 18 feet headroom above the water.
With the Up rectangular tube of the Conwy Railway Bridge completed and inspected, the service from Chester to Bangor (just under 60 miles) started in 1848. In the same year, the train service from Holyhead to Llanfair P.G. was started with road coaches over the Menai Suspension Bridge temporarily completing the 'missing link' from Llanfair P.G. to Bangor. The first named train - 'The Irish Mail' - started to run and the Chester and Holyhead Railway's fleet of paddle steamers operated the Irish Sea Crossing. The following year, the Down tube of the Conwy Railway Bridge was completed, leaving only the challenge of the bridge to Anglesey.
The railway bridge to Anglesey - the Britannia Bridge - was designed by Robert Stephenson and, like the Conwy Railway Bridge described above, also used wrought iron rectangular tubes. By October 1850, the 'missing link' was fully commissioned. The cost of the Britannia Bridge had been three times budget and 19 lives were lost during construction.
The cost overruns had made the finances of the Chester and Holyhead Railway difficult. The trains were run by the L&NWR from the start and, despite commercial initiatives by Morton Peto to increase revenue, the L&NWR acquired the whole railway in 1859.
The Route
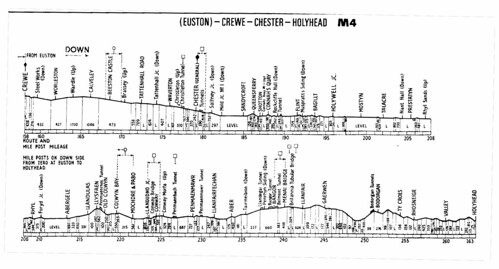
The gradients on the route from Crewe to Holyhead are not too difficult, as the diagram below shows. From Crewe, the line crosses the Cheshire Plain to Chester, generally descending. Beyond Chester, the line follows the estuary of the Dee and then takes the coastal plain along the North Wales Coast only a few feet above sea level. In places, the railway becomes squeezed towards the sea, requiring sea walls which need maintenance even today. Further west, the railway climbs and there are some tunnels. Bangor station, in particular, is set between two tunnels. At the Britannia Bridge, the railway is over 100 feet above sea level and the route onwards to Holyhead is undulating.
 Click here for a larger version
Gradient Diagram, Crewe to Holyhead.
Traffic Growth
Under the care of the L&NWR, traffic on the route grew, benefitting greatly from holiday and excursion traffic as the English discovered the joys of the seaside. Double track sufficed between Holyhead and Llandudno Junction and between Chester and Crewe but,
to cope with seasonal holiday traffic, by 1914 most of the line from Llandudno Junction to Chester had been quadrupled. Only the sections Colwyn Bay No. 1 - Llandulas and Muspratts Sidings - Connah's Quay No. 1 remained as double track. The 4-track sections are listed below:-
Llandudno Jn. No.1 - Colwyn Bay No.1: US, UF, DF, DS
Llandulas - Muspratts Sidings: US, UF, DF, DS
Connah's Quay No.1 - Mold Jn. No.1: US, UF, DF, DS
Mold Jn. No.1 - Chester No. 4: UF, DF, US, DS
In general, the 4-track sections were paired by direction but, at Mold Jn. No.1, the lines were transposed to paired by use up to Chester No. 4.
Holyhead to Crewe in the 1950s
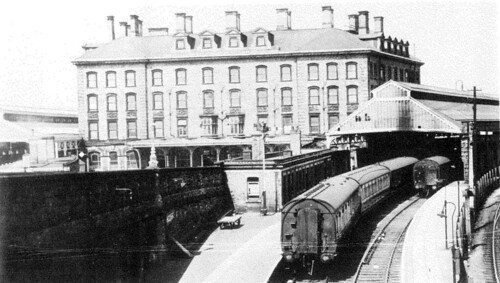
 Holyhead Station in steam days (Photo: 'A Pictorial Record of L.M.S. Architecture' by V. R. Anderson and G. K. Fox.
When I first knew the route, post-war holiday traffic was still healthy and the line was controlled by semaphore signals, manual signal boxes (generally of L&NWR pattern) and Absolute Block working. The signal boxes are listed below:-
Holyhead
Valley
Ty Croes
Bodorgan
Gaerwen No.2
Gaerwen No.1
Llanfair P.G.
Menai Bridge
Bangor No.2
Bangor No.1
Bethesda Jn.
Penrhyn Siding
Tairmeibion
Aber
Llanfairfechan
Penmaenmawr
Conway Morfa
Conway
Llandudno Jn. No.2
Llandudno Jn. No.1
Mochdre & Pabo
Colwyn Bay No.2
Colwyn Bay No.1
Old Colwyn
Llysfaen
Llandulas
Abergele
Foryd Jn.
Rhyl No.2
Rhyl No.1
Rhyl Sands
Prestatyn
Nant Hall (Down lines only)
Talacre
Mostyn
Holywell Jn.
Bagillt
Muspratts Sidings
Flint
Pentre Sidings
Rockliffe Hall
Connah's Quay No.2 (closed 1953)
Connah's Quay No.1
Queensferry
Dundas Sidings
Sandycroft
Mold Jn. No.2
Mold Jn. No.1
Saltney Jn.
Crane Street
Chester No.6
Chester No.4
Chester No.3A
Chester No.3
Chester No.2
Chester No.1
Tattenhall Jn.
Tattenhall Road
Brassey
Beeston Castle & Tarporley
Calveley
Wardle
Worleston
Crewe Steel Works
Crewe North Junction
There are detailed diagrams for these signal boxes in the 1950s in the excellent publication from the Signalling Record Society 'British Railways Layout Plans of the 1950's' - 'Volume 10: LNW Lines in North Wales, Chester and Wirral areas' (ISBN: 1-873228-12-0).
More information on Menai Bridge station can be found in 'LMS Branch Lines in North Wales Volume 1' reference [3].
Llandudno Jn. (and Llandudno) are shown in 'An Historical Survey of Selected LMS Stations' reference [4].
'Recollections of a Steam Era (1950-1966)' reference [2] gives general coverage, particularly in the Llandudno area.
'A Pictorial Record of L.M.S. Architecture' reference [5] has various photographs along the line.
'A Historical Survey of Chester to Holyhead Railway Track Layouts and Illustrations' reference [6] is a comprehensive collection of track diagrams and photographs of stations along the route.
Holyhead to Crewe in recent times
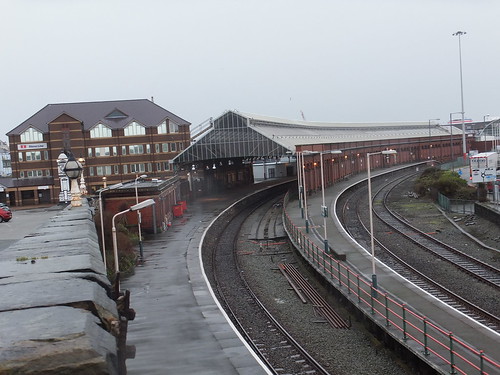
 Holyhead Station in 2014. Compare this view with the picture in steam days above.
As car and coach travel grew, the demand for trains reduced. The British also discovered that foreign holidays could provide more reliable sun. The impressive railway infrastructure which had allowed large numbers of holidaymakers to be transported was either reduced or abandoned.
Double track remains from Holyhead to Crewe (apart from about one mile over the Menai Bridge which has been singled).
The number of signal boxes in use has been slashed from 65 in the 1950s to 17 in 2014. In general, however, the 1950s methods of working with semaphore signals, mechanical operation of points and Absolute Block Signalling are still in use. The remaining signal boxes are listed below.
Holyhead
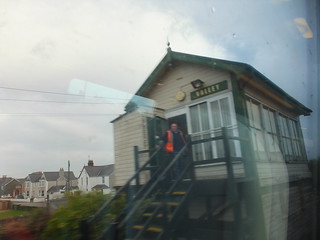
Valley
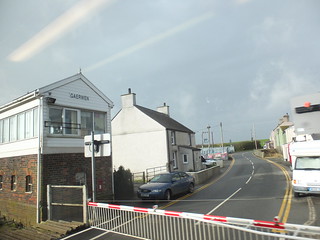
Gaerwen
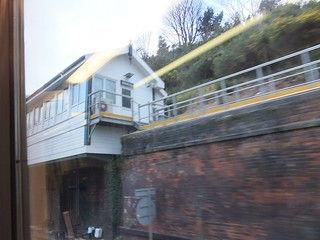
Bangor
Penmaenmawr
Llandudno Jn.
Abergele & Pensarn
Rhyl
Prestatyn
Talacre
Mostyn
Holywell Jn.
Rockliffe Hall
Chester P.S.B.
Beeston Castle & Tarpoley
Crewe Steelworks
Crewe S.C.C.
For details of the line in 2014, refer to 'Railway Track Diagrams Book 4: Midlands & North West', Third Edition, published by Trackmaps (ISBN: 978-0-9549866-7-4).
There are brief notes on the remaining signal boxes below.
Holyhead:
The basic structure of the L.M.S. Composite Signal Box with a 100-lever frame remains although the structure has been modernised with double glazing and new access stairs. All sets of points are now power operated using 'Clamplock' drives. Signals remain semaphore.
Valley:
L&NWR pattern all-wooden signal box whose origins are still recognisable despite modern attention. It has a 25-lever Tumbler Frame. The adjacent road crossing was equipped with Manually Controlled Barriers in 1970.
Gaerwen:
Orignally, there were two signal boxes at Gaerwen. This box (formerly No. 1) was presumably retained because it has an adjacent road crossing now provided with Manually Controlled Barriers. It's an L&NWR Composite design but, like Holyhead above, with more noticeable modernisation. It has a 20-lever L&NWR frame. I visited the box once in the early '90s (before modernisation) and got to signal a couple of trains.
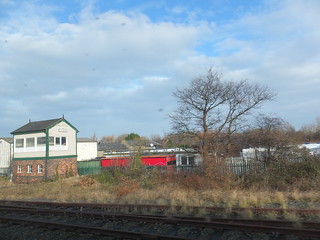
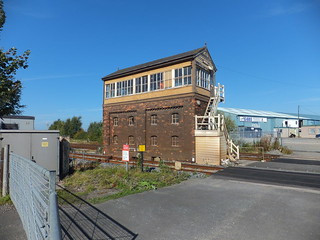
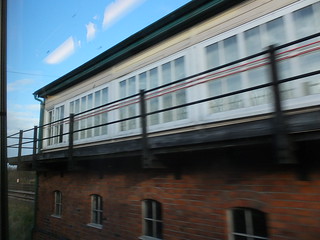
Bangor:
An L&NWR overhanging box that's received lots of structural attention. I think all the points are now power operated, the signals are now colour light and continuous Track Circuiting allows the box to remotely control the points either side and the single line across the Britannia Bridge. The signal box became simply 'Bangor' after No. 1 box at the other end of the station was closed.
Pemaenmawr:
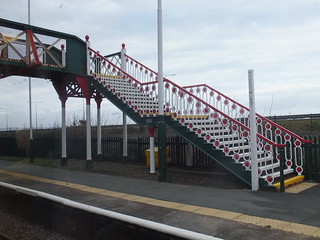
I know that's not a signal box (it's the gaily-painted footbridge at Penmaenmawr). I haven't yet taken a picture myself of the post-war brick-built signal box but there's information on 'The Signal Box' site here.
Llandudno Junction:
This is a B.R. Standard pattern which replaced three L&NWR boxes - No. 1, No. 2 and Llandudno Junction Crossing. All points are power operated, all signals colour light and the area has comprehensive track circuiting.
Abergele & Pensarn:
This is an L&NWR composite box which still looks 'right' and retains mechanical operation of points. A 60-lever frame was needed to control the four running lines and sidings but now it's double track, a Down Passenger Loop and a few semaphores.
Rhyl No. 1:
A large L&NWR composite box with modifications but still impressive. It's also listed Grade II! At the other end of the station, the non-operational Rhyl No. 2 survives, also listed Grade II, looking rather odd covered with ivy.
Prestatyn:
Not the box but the Up Starter, showing the neat arrangement of the signal and associated equipment. There's a Peter Douglas picture of the modernised box here.
Talacre:
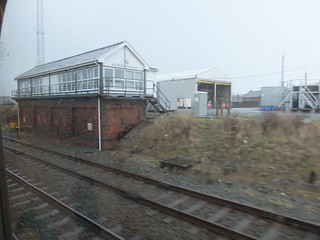
This small L&NWR composite box with a 24-lever Tumbler Frame has been modernised with very ugly modern windows.
Mostyn:
Limited clearance between the up and down main necessitated the operating floor overhanging the tall, brick locking room and the provision of complicated wooden access steps. Provided with a 40-lever L&NWR Tumbler Frame. Although a Block Post, this box is normally 'switched out'.Photo: Richard Hoare.
Holywell Junction:
An L&NWR composite construction with a 54-lever L&NWR Tumbler Frame now controls double track with Up and Down Goods Loops. Now blessed with very heavy outside landings.
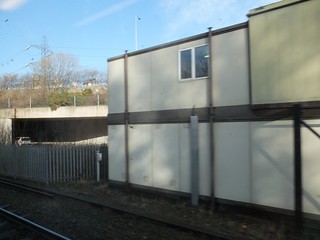
Rockliffe Hall:
This prefabricated signal box has an undistinguished appearance.
Chester Power Signal Box:
The 'brutalistic' school of design, sadly copied at a number of locations.
Beeston & Tarporley:
L&NWR composite box with a 25-lever Tappet Frame.
Crewe Steel Works:
A standard L.M.S. box, with a 30-lever L.M.S. frame.
Crewe Signalling Control Centre:
Yes, the red and white building looking like a B&Q Warehouse is the Crewe S.C.C.
Book References
[1] 'Railways to the Coast' by Michael H. C. Baker, published by Patrick Stephens (ISBN 1-85260-058-6).
[2] 'Recollections of a Steam Era (1950-1966)' by H. Rogers Jones, published by David Rogers Jones (ISBN: 0-9539720-0-03).
[3] 'LMS Branch Lines in North Wales Volume 1' by W. G. Rear, published by Wild Swan Publications (ISBN 0 906867 37 1).
[4] 'An Historical Survey of Selected LMS Stations' by Dr. R. Preston Hendry & R. Powell Hendry, published by Oxford Publishing Co. (ISBN 0-86093-330-X).
[5] 'A Pictorial Record of L.M.S. Architecture' by V. R. Anderson and G. K. Fox, published by Oxford Publishing Co. (SBN 86093 083 1).
[6] 'A Historical Survey of Chester to Holyhead Railway Track Layouts and Illustrations' by V. R. Anderson and G. K. Fox, published by Oxford Publishing Co. (ISBN 0 86093 216 8).
[7] 'A Regional History of the Railways of Great Britain: Volume 11 North and Mid Wales by Peter E Baughan, published by David & Charles (ISBN 0-9153-7850-3).
Related articles on other sites
Chester and Holyhead Railway (Wikipedia).
North Wales Coast Railway.
North Wales Coast Line (Wikipedia).
Signalling Over Wales
Signalling around the Junction Alan Roberts
'Railscot' Chester and Holyhead.
Related posts in this blog
A Trip to the Seaside.
Track Diagrams: Llanfair P.G..
Trip to Holyhead (Part 1: Crewe to Llandudno).
Trip to Holyhead (Part 2: Llandudno to Holyhead).
My pictures
North Wales Line (Crewe - Llandudno).
North Wales Line (Llandudno - Holyhead).
Holyhead railway station.
I made a visit to East Croydon by rail on Wednesday, 5th February 2014. This is a trip I make fairly frequently. Normally, I'd go to Euston with Virgin, take the Tube to Victoria then catch one of the frequent trains to East Croydon. Three trains, three different power systems (25 kV a.c., 630V d.c. fourth rail, 750V d.c. third rail).
Sadly, the unions RMT and TSSA were in dispute with Transport for London and withdrew their labour on the 5th and 6th February. RMT was formerly the National Union of Railwaymen, usually known as the 'NUR'. In 1990 this union merged with the National Union of Seamen to form the National Union of Rail, Maritime and Transport Workers, usually known as 'RMT'. TSSA is the Transport Salaried Staffs' Association. For more information, there are Wikipedia articles on RMT and TSSA.
Journey to East Croydon
The most obvious way of avoiding the Tube on this journey is to alight at Watford Junction and then catch a service to East Croydon. However, not all the fast trains into London stop at Watford and the connections onward are not always convenient.
So I decided to travel to Euston, as normal, walk to St. Pancras (oh, alright 'St. Pancras International') and catch a 'Thameslink' service to East Croydon. The Virgin train was a few minutes late into Euston. It seemed to be the usual snag involving waiting on Camden Bank for a departing service to clear the platform. After a wait, we rolled into platform 16, stopping clear of a Class 57 parked on the buffer stops.
Class 57 parked on the buffer stops of platform 16 at Euston.
I walked along Euston Road to St. Pancras, being frequently reminded of the thoughtlessness of London pedestrians who bang into you and jostle you without even appearing aware that they share the footpath with others. I knew that the 'Thameslink' platforms were underground - a quick look at the National Rail site (http://www.nationalrail.co.uk/stations/STP/details.html) allowed me to walk straight to the ticket barriers and head for platform 'A'. In the post Zen and the Art of Platform Numbering I wrote about capital letters changing to lower case in platform numbers but here, capitals reign supreme, perhaps for the good reason that each platform is quite independent of all others, without a common access point (or, perhaps not).
There were plenty of passengers and frequent trains in both directions, but they all seemed to be a few minutes late. Two pre-recorded public address systems, one with a male voice, one a female voice) were giving announcements (this seems to be increasingly common, as I noticed at Clapham Junction). A combination of poor acoustics, simultaneous messages on both systems and a terrible racket every time a train arrived or left meant that I didn't glean much from the messages. The visual displays weren't too easy to read either (white characters on a blue background and lots of reflection from incident light) and the system became completely foxed when the train I was waiting for arrived before a prior service which was late running. The displays couldn't cope with a train that had somehow 'leap-frogged' another. There was a little pantomime as people boarded, realised it was not their train and got off again.
St. Pancras Low Level Platforms, with a northbound train in platform B.
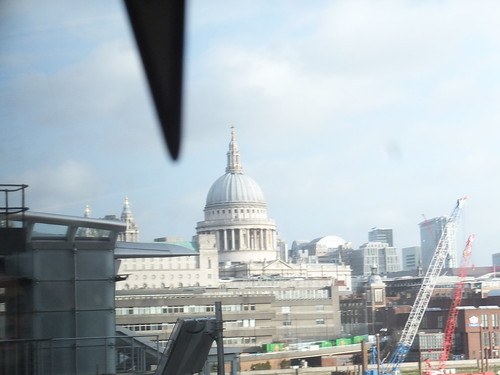
Once everybody was sorted out, we continued to Farringdon (where the train power collection was changed from 25kV a.c. overhead to 750V d.c. third rail) and then took the Snow Hill Tunnel to the underground City Thameslink. After a brief stop, we carried on to emerge at the rebuilt and remodelled Blackfriars station. People got off, people got on and then we sat there. From my seat, there was plenty of time to admire the view of St. Paul's Cathedral, glowing in the morning sun.
View of St. Paul's Cathedral from the rebuilt Blackfriars station.
Then the driver announced that we would not make our scheduled stop at London Bridge as our train was being diverted through Herne Hill. A groan went up from the passengers, many of whom were trying to get to London Bridge. The driver said there was a signalling fault at London Bridge and this was the reason for our sudden diversion. This may have been true, although later in the day it was announced that London Bridge had closed for a time because of congestion. A number of people got off (not looking too happy), the doors closed and we set off on, for me, a less-commonly travelled route.
Instead of turning left at Blackfriars Junction and taking the Blackfriars Reversible Spur, so as to join the Charing Cross to London Bridge route at the Metropolitan Junctions, we continued on the four-track section through Elephant & Castle. The lines here are paired by use (Down Holborn Fast, Up Holborm Fast, Down Holborn Slow, Up Holborn Slow). The Passenger Information Displays had not caught up with our re-routing and, for some time, insisted that our next stop would be London Bridge.
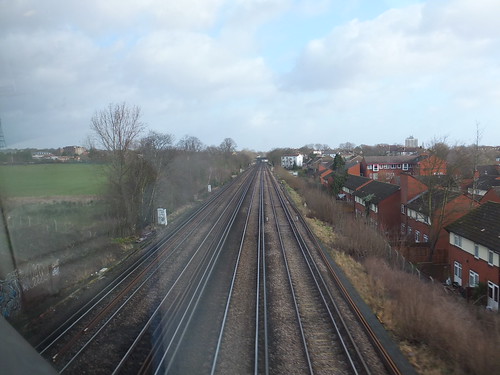
At Loughborough Junction, routes diverged both left and right and we continued, at a rather modest speed, on the double track to Herne Hill, merging with the Chatham lines through the station and then turning right on the double track Holborn Line to Tulse Hill. We merged with the Chatham Line through the station and turned left onto the West Norwood Spurs to join the double track Crystal Palace Line from Balham. This took us through West Norwood and Gipsy Hill stations and into the 746 yard long Crystal Palace Tunnel. At the end of the tunnel, there are two routes. The left leads via the Sydenham Spurs to join the four-track main line towards London Bridge. We took the right route, crossed over the London Bridge lines and, via the Down Crystal Palace Spur, joined the London Bridge Lines at Norwood Junction, back on our intended route to Brighton.
 View of the lines to London Bridge from my train on the Down Crystal Palace line.
Speed at last picked up and we soon arrived at East Croydon. You really need a pre-grouping railway map to understand the complicated interconnecting railway routes around London.
 East Croydon Station looking towards Brighton, showing the new footbridge.
Return from East Croydon
Early evening, I was back at East Croydon Station, wondering what route to attempt for the return journey. My normal approach is to catch the first fast train to London, irrespective of line. Well, I followed this rule and ended up at Victoria, so I hopefully headed towards the Tube station. There were lots of people about as I made my way down the escalator towards the Victoria Line platform. The platform was pretty crowded but I managed to move along the platform to where the crush didn't seem so bad, trying not to myself display the banging and jostling behaviour that had irritated me that morning. From the announcements being made, it was clear that all was not well and apologies were being made for delays. Eventually, a train arrived with some space and I made sure that I was close to a door, ready to board. I made it onto the train, albeit with not much space to stand, but there were plenty of people left standing on the platform as we pulled out. At busy times, this is not unusual when there isn't a strike. At Oxford Circus, I even 'bagged' a seat but I'm always careful to stay near an exit as getting off can be a problem when trains are crowded and I didn't want to get over-carried. Warren Street was closed (as were a number of stations around the system). I emerged at Euston relieved that the problems weren't worse. There was a 'Pendolino' service to Birmingham leaving in about 12 minutes so I headed for the Standard Class Quiet coach. This involves walking the length of the 11-coach train ('Pendolino' were 9-car originally, now strengthened to 11-car) but is usually worth the walk.
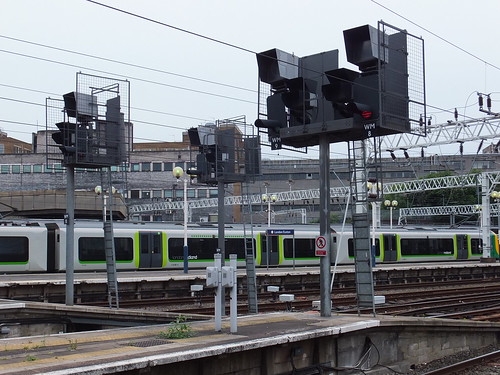
 Signals at the country end of Euston. The building in the background is the former Euston Power Signal Box. The area is now controlled from Wembley Mainline Signalling Control Centre (note the 'WM' prefixes on the signal number plates).
The journey from London was quite good (involving the fairly usual wait for a platform on the approach to New Street) but I had the usual difficulty in the half-rebuilt station trying to determine the next service onward to Wolverhampton but, all in all, I thought I'd got off lightly. That conclusion was reinforced by watching television news later. They claimed only 35% of tube trains ran and told some real horror stories of commuters stranded or taking hours extra to complete their journey.
The strike was to be repeated on 12th and 13th February but action has been "suspended" whilst negotiations continue.
In Part 1, I described some of the features along the line from Crewe as far as Llandudno Junction. In this Part, I'll continue describing the journey to Holyhead.
Conwy
Conway lies on the opposite bank of the river Conwy from Llandudno Junction. The first bridge here - the Conwy Suspension Bridge - was built by Thomas Telford in 1826 as part of his improved road route to Holyhead. By 1849, the Conwy Railway Bridge had been built by Robert Stephenson for the Chester and Holyhead Railway. This was a double track bridge, of wrought iron tubular construction. Both road and rail bridges were designed to blend with the imposing bulk of the adjacent castle. When I was young, these were the only bridges over the river but a modern road bridge and later a tunnel (opened in 1991) improve road conditions. Telford's venerable suspension bridge is now restricted to pedestrians, but the only concession to the age of the railway bridge is the effective shortening of the spans by building supporting pillars either side of the river.
 The bridges across the River Conwy, with Conwy Castle on the right, viewed from Deganwy.
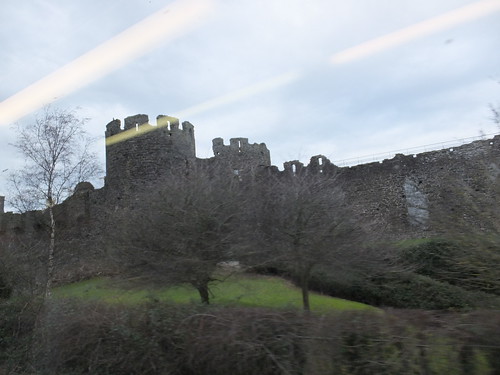
Conwy Castle was built by King Edward the First between 1283 and 1289. It's a 'proper castle' which still impresses in the way that the French fortified town of Carcassone impresses (it's only recently I've discovered that the 'rehabilitation' of Carcassone by Eugène Viollet-le-Duc
in the 19th century is not altogether authentic).
 Conwy Castle towers above the railway.
Penmaenmawr
Our next stop was at Penmaenmawr, known for quarrying and tourism. Here the railway is forced close to the sea and there are three tunnels - Penmaenbach, Moel Llys and, after our stop, Pen-y-Clip Avalanche Tunnel. The weather seemed to be deteriorating, making the area appear rather bleak. Railway sidings remain for taking away aggregates and railway ballast by rail but there was no sign of current activity. I've had a soft spot for the place ever since spending a holiday there as a child.
We carried on another ten miles to Bangor, with an intermediate stop at Llanfairfechan.
Bangor
Approaching Bangor there are two more tunnels - Llandegai Tunnel then, after a short open air section where Bethesda Junction used to be, Bangor Tunnel. The layout at Bangor is now considerably simplified. There are Up and Down 'Through' lines and Up and Down platform loops. There are a few sidings on the Down side but it's hard to recall just what a busy station this was in steam days.
However, I was cheered to find that the original 1870 station building on the Up side, designed like all the original structures for the Chester and Holyhead line by Francis Thompson, remains. Although the building has suffered various modifications during its life, its origins remain clear.
 Francis Thompson's handsome 1870 building on the Up platform at Bangor.
Leaving Bangor, we passed the remaining signalbox (formerly Bangor No. 2) which is perched on the embankment on the Up side overhanging the line. The train then plunged into the darkness of Belmont Tunnel.
Entering Anglesey
Soon after emerging from Belmont Tunnel, Telford's Menai Suspension Bridge, opened in 1826, was visible on the right. These days, the view of this famous bridge is impaired because of the numerous trees which have been allowed to grow. The railway then curves to the right, high above the waters of the Menai Strait prior to making its own leap across the water to Anglesey. The Britannia Bridge was designed by Robert Stephenson and, like the Conwy Railway Bridge described earlier, originally used wrought iron rectangular tubes. After its opening in 1850, the design carried the increasing loads of the railway until 1970 when boys playing inside the tubes set fire to the pitch-covered wooden roof of the tubes, compromising the structural integrity of the bridge.

Click on above image for a larger view.
The Britannia Railway Bridge circa 1852 (Wikimedia Commons).
Fortunately, it was decided to rebuild the bridge, retaining the original stone piers (another feature designed by Francis Thompson) but the tubes have been replaced by steel arches - a practical solution but, sadly, lacking the simple elegance of the original conception. Although the redesign accommodated the original two tracks, only one was provided. The bridge re-opened to rail traffic in 1972 but it was also decided to piggy-back a road on top of the railway (the road opened in 1980), leaving only rather claustrophobic views from passing trains (but still, I suppose, an improvement on when the trains ran through the rectangular tubes!) The bridge retains its four carved stone guardian lions but the modern steelwork supporting the road diminishes their impact. On leaving the bridge in Anglesey, the railway reverts to double track for the remaining 21 miles to Holyhead.
Llanfair P. G.
The first railway station in Anglesey, once closed but happily re-opened, benefitted from an extended name sometimes abbreviated to 'Llanfairpwll' or 'Llanfair P. G.'. The National Rail Enquiries site gives both names here. I've written briefly about Llanfair P. G. here.
Gaerwen
Gaerwen retains its signal box but has lost its station. When I was young, it was the junction for a seventeen mile long branch to Amlwch, with a second branch from Holland Arms to Red Wharf Bay. I travelled on both lines during the holiday at Penmaenmawr I mentioned above. Freight traffic survived for some years to a chemical works at Amlwch but the whole infrastructure is currently disused and the connection to the main line at Gaerwen has been severed. Various schemes have been mooted for bringing the line back into use.
After Gaerwen, there are intermediate stations at Bodorgan (with its two tunnels), Ty Croes and Rhosneigr.
Valley
This location is probably best known for its R.A.F. Station which has a very informative website here. Valley is the last railway station before Holyhead and it retains its signal box which controls a level crossing with barriers and a number of sidings.
The sidings are the nearest railhead to Wylfa Nuclear Power Station. This power station currently has one operational 'Magnox' reactor rated at 980MW (a second was shut down in 2012) and is operated by Horizon Nuclear Power, a wholly-owned subsidiary of Hitachi Limited. The Horizon Wylfa website outlines their aspirations for new nuclear generation on the site. There's also a Wikipedia article here.
The sidings at Valley have one further 'claim to fame'. The line from Crewe to Holyhead is used by a number of Steam Charter trains so, to allow locomotives to be turned at Holyhead prior to returning to Crewe, a triangle or 'wye' was constructed within the Valley sidings in 1989.
Holyhead
The Inner Harbour remained as I remember it, in the shape of a 'V' pointing south, embraced by railway platforms on both sides. But no passenger ferries berth in this area now. The Stena ferry which most railway passengers head for has a new berth (Terminal 1), on the east quay, further towards the outer harbour, supported by a modern passenger terminal leading off the concourse area at the buffer-stops end of the railway station.
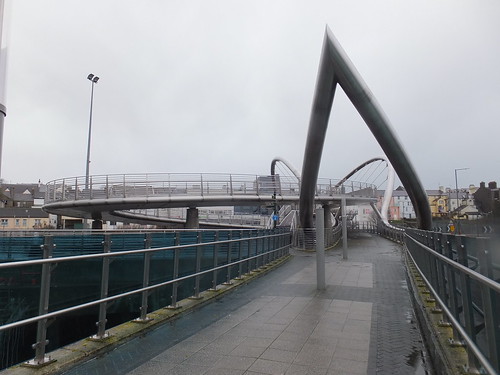
Additional terminals have been build on Salt Island, near the old Admiralty Pier. To get vehicles to these new terminals from the road entrance which is on the east side of the railway, a concrete road bridge has been constructed right across the Inner Harbour, cutting off the old quays. A second bridge for pedestrians has also been built across the Inner Harbour, leading from the concourse area at the buffer-stops end to the west quay, where a futuristic spiral ramp and bridge takes people across the railway sidings and a road, to emerge directly into the old town.
The weather had deteriorated as we approached Holyhead and the town was being lashed by driving rain and high winds. I was wearing the padded coat and thick gloves I'd used during my visit to the Antarctic (part of my Round the World trip described here so, having deployed the rain hood, I set off to explore the area.
I decided to tour the station itself first, so I made my way across the pedestrian bridge to the west quay and platform 1. The bridge had stainless steel handrails with blue tinted glass panels coming up to shoulder height, offering no protection against the wind-driven rain. I was amused to notice that the tinted glass panels gave an attractive tropical hue to the waters of the Inner Harbour, which were actually dark green. The weather conditions discouraged me from properly appreciating the artistic embellishment - a sort of cairn of slate with an inlaid message in Welsh and English. I did notice that, rather than being a boring straight bridge, it described a gentle 'S' curve (a windy, winding bridge, but not a wobbly bridge).
 View of the pedestrian bridge and spiral ramp, looking towards the town.
Platform 1 has lost its train shed and the modern awning offered scant protection to the gusting, horizontal rain. Years ago, this platform was numbered '3' (I've mentioned in the post Zen and the Art of Platform Numbering the British approach to 'modernising' platform numbers). At the landward end of the station, there's another concourse area for passengers arriving by road. This concourse was rather dark and uninviting on my visit, but at least seemed to be appreciated by a group of local skateboarders practising there. This concourse forms part of a modern building (replacing the railway hotel) principally occupied by Stena Line who are now the Holyhead Port Authority. The Stena Line website for Holyhead is here with a very good map here.
Holyhead Station in steam days showing the railway hotel (Photo: 'A Pictorial Record of L.M.S. Architecture' by V. R. Anderson and G. K. Fox).
Holyhead Station in 2014.
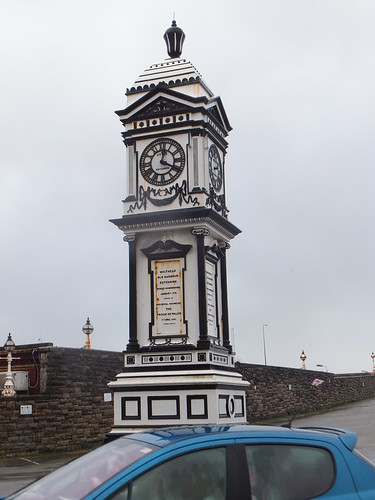
The railway hotel may have gone, but the elaborate cast-iron clock turret commemorating the opening of the 'Old Harbour Extension' in 1880 by the then Prince of Wales is now Grade II listed and remains in the turning circle outside the modern building.
 Commemorative clock turret outside Holyhead station.
I left the station by the ramped approach leading to the road bridge crossing the railway. This bridge is always busy with traffic between the A55 Expressway and the entrance to the port on the east side of the railway. Turning right, I continued along Victoria Road in between the West Dock and, at a higher level, the town. Pelham Emergency Gate was as near as I could get to Salt Island, which hosts Terminals 2, 3, 4 and 5. I'd seen pictures of the commemorative arch at the entrance to the Admiralty Pier, but I'd assumed it had been lost to the redevelopment. But no, it survives listed Grade II, together with adjacent features. Usually called the Admiralty Arch, it's also known as the George IV Arch and marks the end of Telford's road from London to Holyhead, completed in 1826 with the opening of the Menai Bridge. There's a useful history of the road we now call 'the A5' in Wikipedia here.
 Holyhead, Salt Island: Custom House (Grade II*) and Admiralty Arch.
Turning left into Prince of Wales Road, Holyhead immediately took on the appearance of a seaside resort. The rain had almost stopped, but it restarted later. I would have visited the Maritime Museum, but it was closed until Easter.
 Prince of Wales Road, Holyhead.
I turned inland, passing rows of neat houses offering bed and breakfast before coming to the town centre. With a town population of only around 12,000, this had a very relaxed feeling, even on a Saturday afternoon. I detected the aroma of fish and chips before I spotted the small shop. Even a small portion of chips to take out was very generous. Eating my chips, I passed the offices of the town council, the cinema, the magistrates court and various shops. The Cash Machine at the bank offered two languages, reminding me that I was in a different country.
 Holyhead town.
My route back to the railway station took me through the churchyard of the Church of St. Cybi which is within the walls of an earlier Roman Fort, then over the futuristic, stainless steel bridge crossing the Inner Harbour. I decided to take a Virgin train to Crewe. This comprised two 5-coach 'Voyagers' and should have given me a quicker journey than on my outward leg. However, after setting off on time, we stopped at Valley for about 10 minutes, reportedly because of a signalling fault and we then suffered various checks afterwards. However, I still thoroughly enjoyed the trip.
Maritime Matters
Throughout my visit the 'Stena Explorer' was berthed at Terminal 1. The Stena Line site for this catamaran is here and Wikipedia have an article here.
 'Stena Explorer' at Terminal 1, Holyhead.
I didn't identify the Stena Line vessel at Terminal 5 but it was probably Stena Adventurer. There's brief information on Wikipedia.
Irish Ferries also operate from Holyhead, and one of their ships (MS 'Ulysses', I think) was at Terminal 3. They operate:-
Dublin Swift (Johnathan Swift) (a catamaran).
Ulysses.
Epsilon (introduced in December 2013).
Near Terminal 4, there was a Jack-up Barge operated by Fugro Seacore.
 Jack-up Barge operated by Fulgro Seacore.
As I was returning to the railway station, the 'MTS Valiant' came into the Inner Harbour heading for the Refit Berth in the West Dock. The tug is operated by Marine & Towage Services and the specification is here.
 'MTS Valiant'.
Related posts in this blog
A Trip to the Seaside (Part 2) (Describes a 2011 trip along the North Wales Coast line to Llandudno).
Trip to Holyhead (Part 1: Crewe to Llandudno) (Describes the first part of this trip).
My pictures
North Wales Views.
Holyhead: Town and Harbour.
My railway pictures
North Wales Line (Crewe - Llandudno).
North Wales Line (Llandudno - Holyhead).
Holyhead railway station.
 Click here for larger image.
 Egerton Bridge, a Scherzer Rolling Lift type.
 Egerton Bridge: Winch marked 'TRUSTEES OF BIRKENHEAD DOCKS 1850' and 'DAGLISH ... ST HELENS FOUNDRY'
 View of Stena Line's Belfast Ferry Port from Edgerton Bridge with the 'Three Graces' and Liverpool Museum in the background.
 Tower Road Lifting Bridge.
 A fuzzy view of the rear of Canning Street North signal box.
 The former level crossing at Canning Street North and pedestrian overbridge,
 Duke Street Bridge towers over a single deck bus.
 Mersey Ferries 'Royal Iris' and 'Royal Daffodil' adjacent to Duke Street Bridge.
 The appropriately-named 'Bridge Cafe'.
 Wagon Turntable adjacent to Duke Street Bridge.
 Cammell Laird's yard in the West Float showing (l to r) 'Gold Rover, 'Fort Rosalie' and 'Key Fighter'.